How to Draw an Anime Cat: Easy 8-Step Guide for Beginners
Bring your own anime character to life with this beginner-friendly guide, perfect for artists ages 6 and up. All you need is a pencil, an eraser, and a piece of paper to get started. By following these simple shapes, you will master the expressive features and fluffy proportions that make anime cats so iconic.
🎯 Final Result
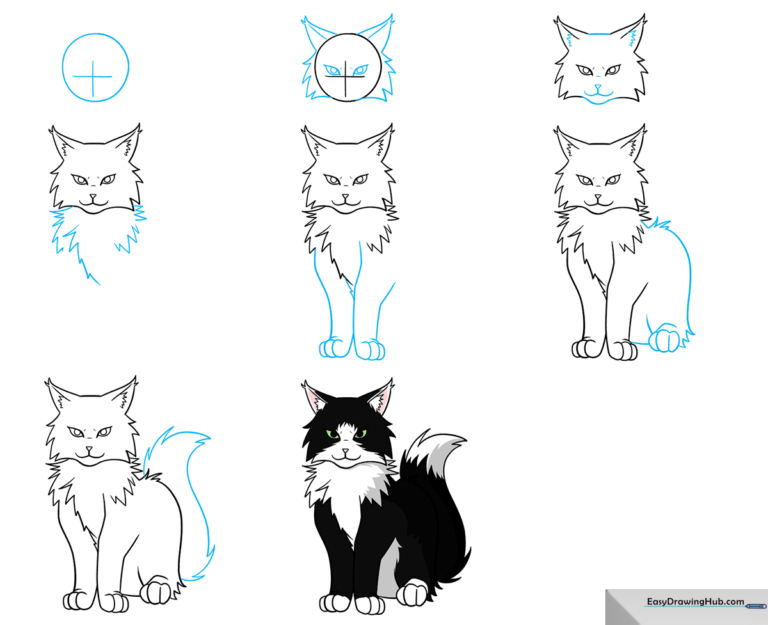
Step-by-Step Instructions
Step 1: Sketching the Head Base

Draw a light circle to serve as the head. Add a faint horizontal grid line across the lower two-thirds of the face. Teacher's Tip: Keep your pencil pressure light—this circle is just a guide and will be erased later!
Step 2: Adding Facial Features and Ears
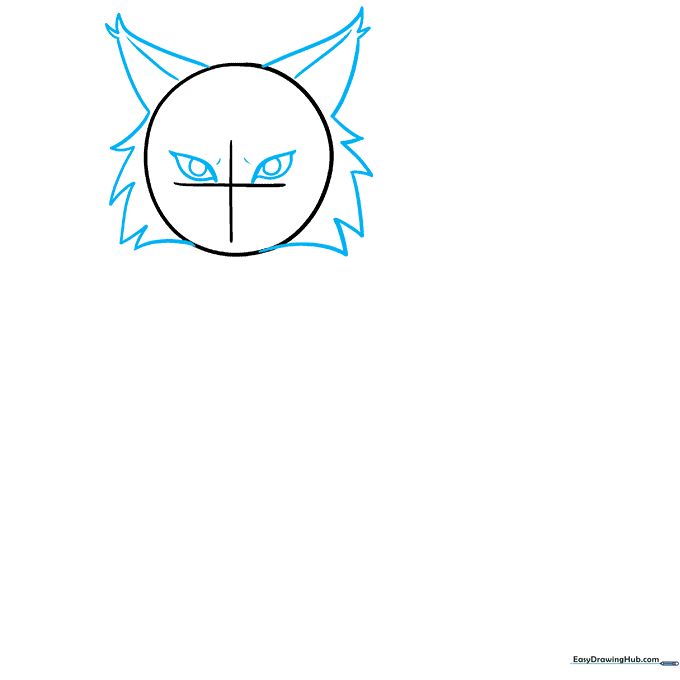
Place the slanted, pointed eyes along your horizontal guide. Sketch triangular ears on top and add jagged, zig-zag lines for cheek fur. Teacher's Tip: Use short, quick strokes for the fur to make it look soft and textured.
Step 3: Refining the Face
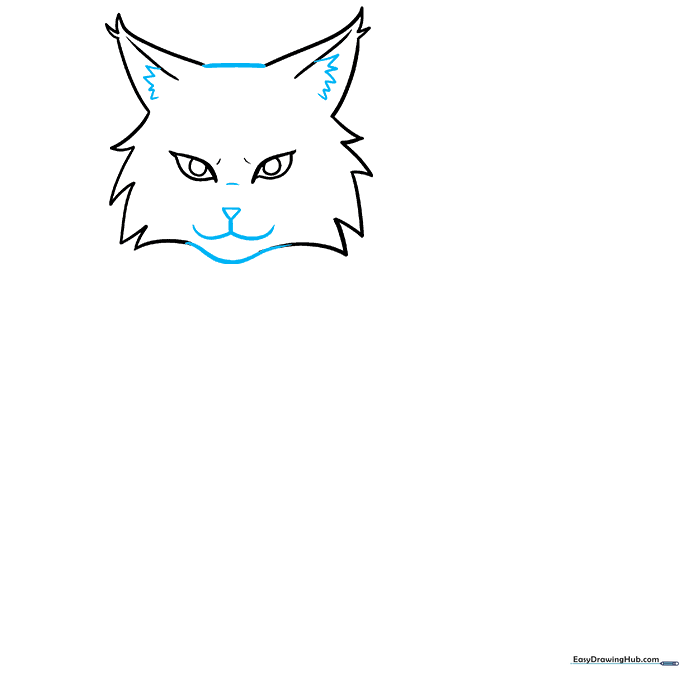
Erase your guidelines. Draw a small inverted triangle for the nose and a 'W' shape for the mouth. Connect the ears with jagged lines to show inner-ear detail. Teacher's Tip: Ensure the chin has a slight, rounded bulge to give the cat a cute, youthful look.
Step 4: Sketching the Shoulders
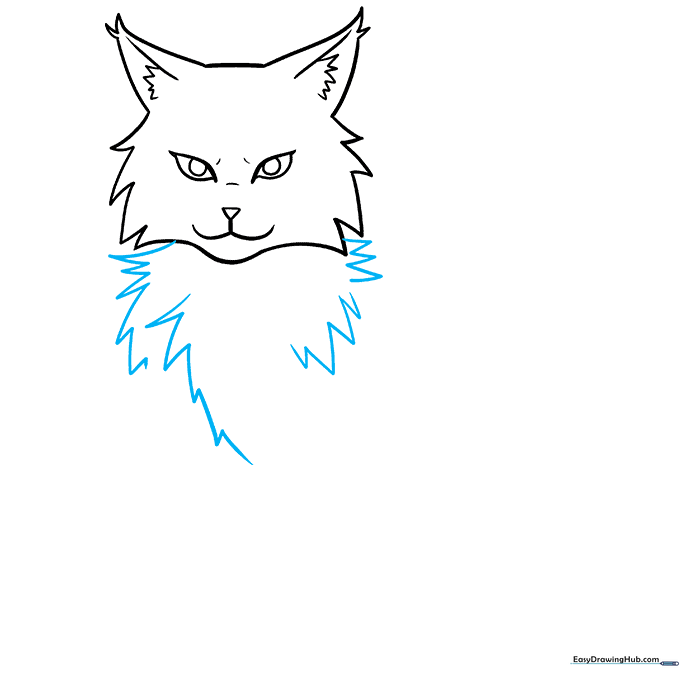
Use short, jagged lines to outline the shoulders and chest area. Teacher's Tip: Think of these lines like little 'V' shapes connected together to mimic the look of fur.
Step 5: Drawing the Front Legs
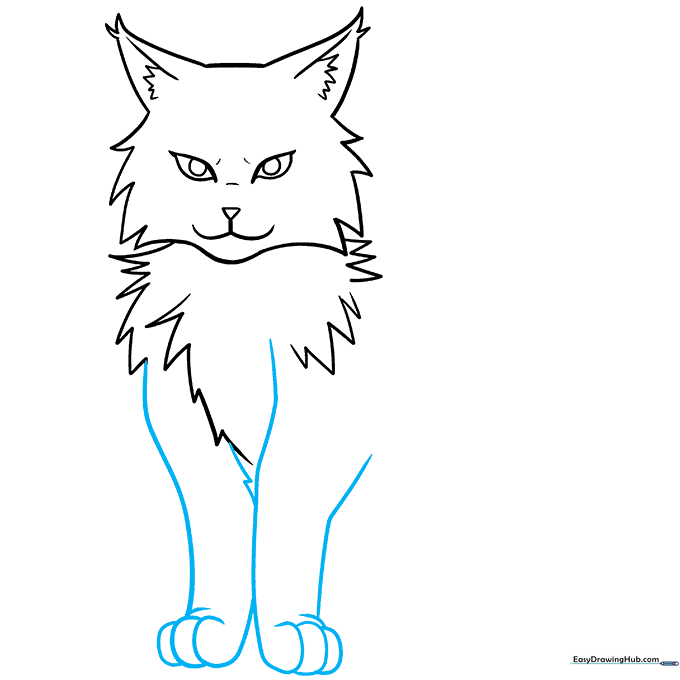
Draw two long, curved lines for each leg, ending in rounded paws. Teacher's Tip: Overlap your lines at the bottom of the paws to create the appearance of individual toes.
Step 6: Adding the Back and Belly
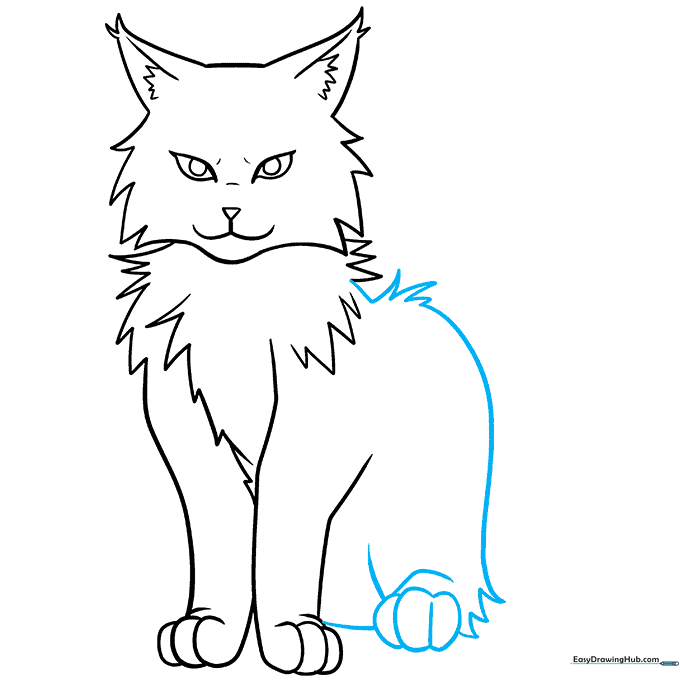
Connect the back and belly with a smooth, curved line, adding a rear leg for balance. Teacher's Tip: Add a few more jagged tufts along the belly to keep the fur texture consistent.
Step 7: The Fluffy Tail
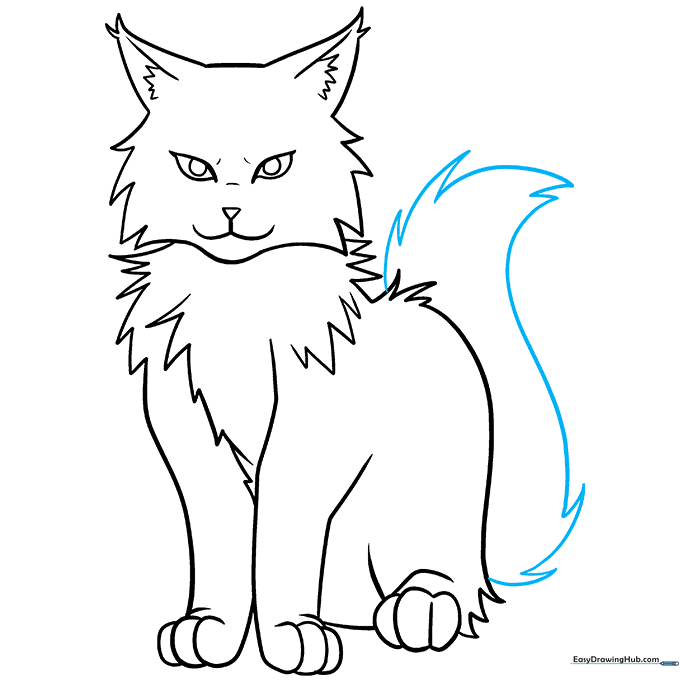
Draw a long, sweeping tail using curved lines that meet at jagged points. Teacher's Tip: Make the tail wider at the base and taper it toward the end for a more natural look.
Step 8: Coloring Your Cat
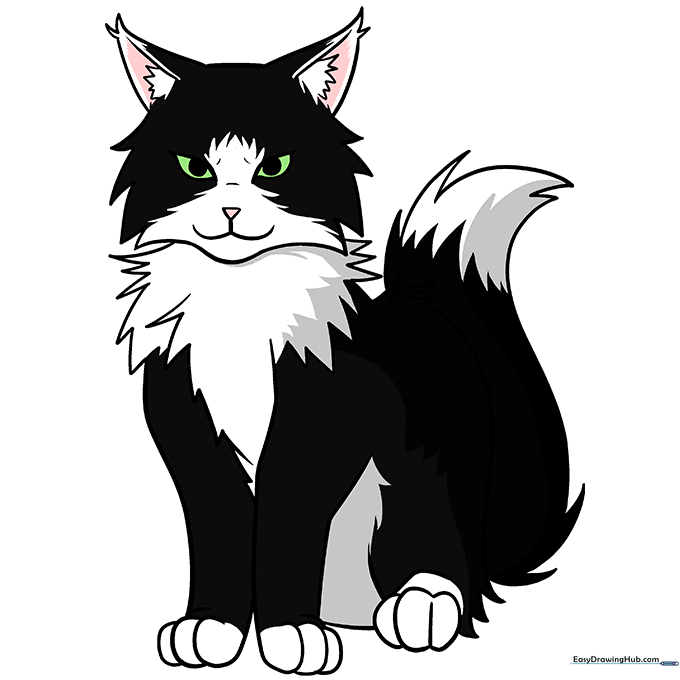
Bring your cat to life with color! Whether you choose a classic tuxedo pattern, a striped tabby, or a spotted calico, have fun with your palette. Teacher's Tip: Use light pressure with your colored pencils to layer colors for a more professional look.
More Tutorials


