How to Draw a Zombie: Easy 10-Step Guide for Beginners
Ready to bring a spooky character to life? This tutorial is perfect for young artists ages 6+ looking to practice character design. You only need a pencil, an eraser, and a piece of paper to get started. Follow these simple steps to master the basics of drawing a friendly, cartoon-style zombie.
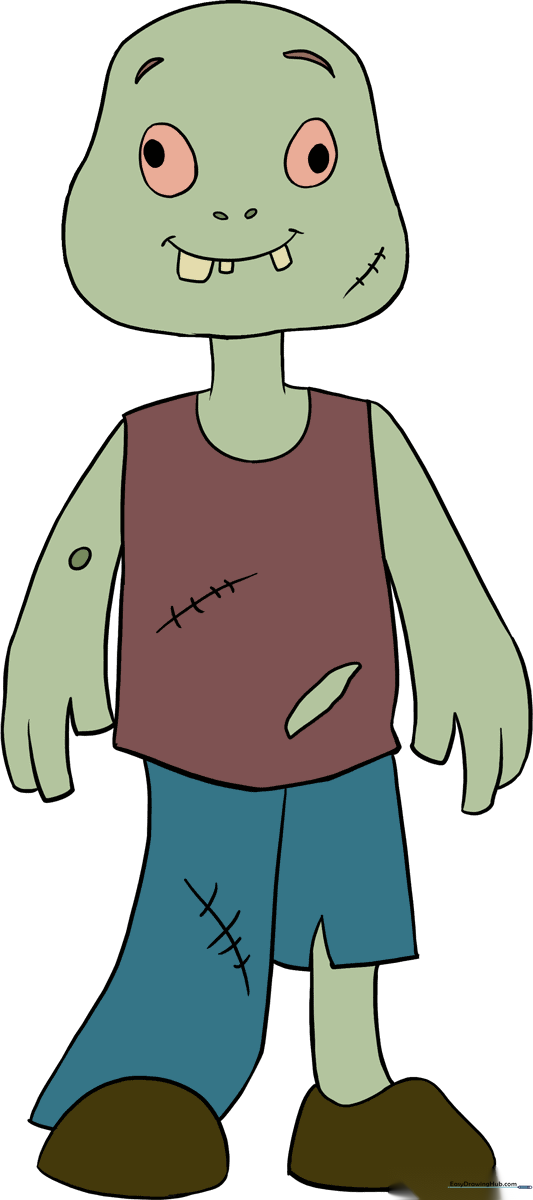
🎯 Final Result
Step-by-Step Instructions
Step 1: Sketching the Head

Draw a light circle for the base of the head. Teacher's Tip: Keep your pencil pressure very light here so you can easily erase the guidelines later; aim for a size about as wide as a soda can.
Step 2: Defining the Jawline

Draw a U-shape that hugs the bottom of your circle to create the cheeks and jaw. Teacher's Tip: Don't worry about perfect symmetry; a slightly lopsided jaw actually makes the zombie look more expressive!
Step 3: Forming the Neck

Draw two short vertical lines at the base of the head, connecting them with a small U-shape. Teacher's Tip: Keep this neck narrow to make the head look slightly oversized, which is a classic cartoon proportion.
Step 4: Sketching the Torso
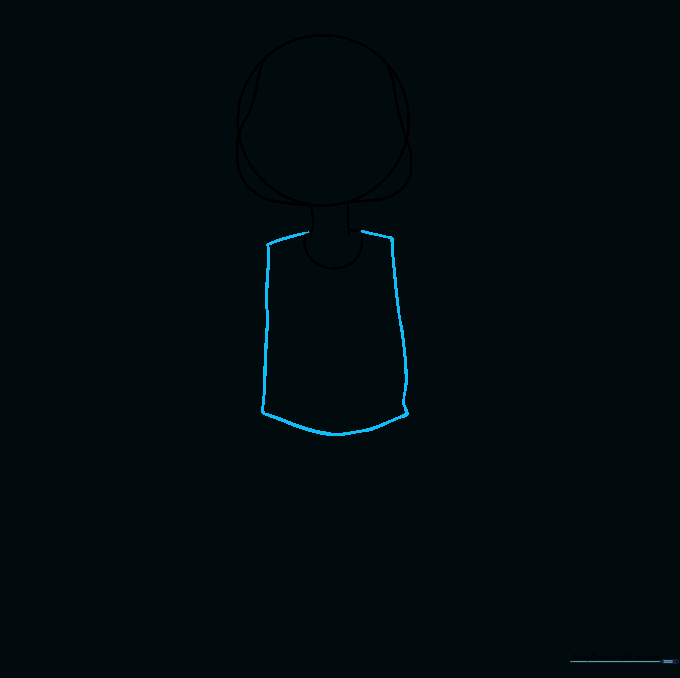
Draw a curved shape for the body, extending outward from the neck. Teacher's Tip: Use gentle, rounded curves rather than straight lines to give your zombie a more natural, 'slouchy' posture.
Step 5: Adding the Arms
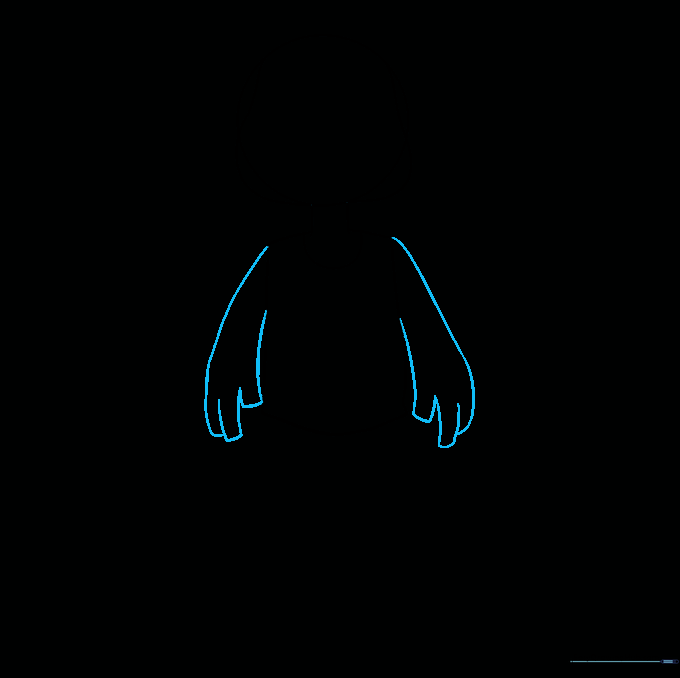
Draw two arms extending downward from the shoulders, finishing with simple finger shapes. Teacher's Tip: Try drawing one arm slightly higher than the other to make your character look like he's shuffling along.
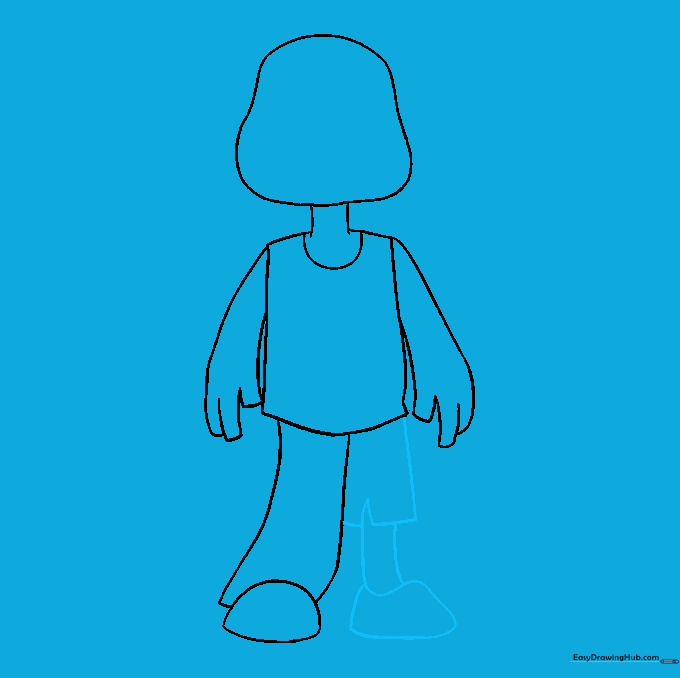
Step 6: Drawing the First Leg
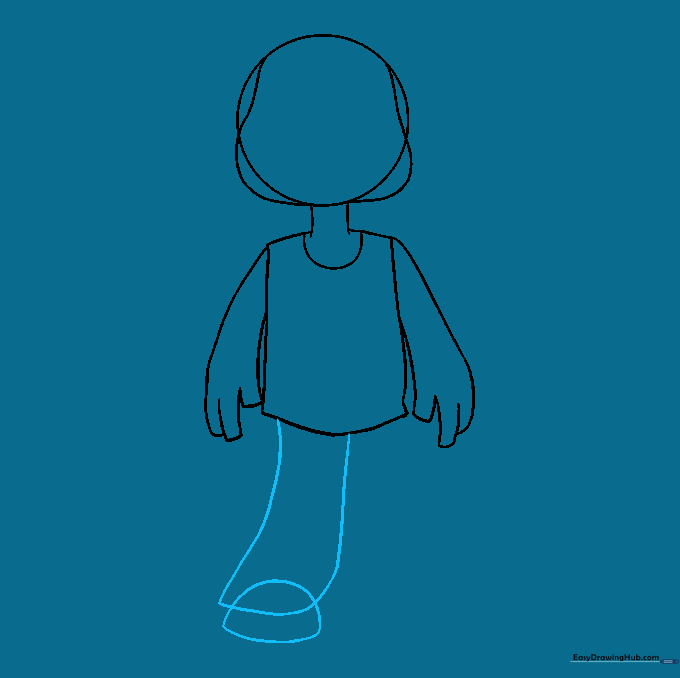
Draw one trouser leg that flares slightly at the bottom, finishing with a simple shoe shape. Teacher's Tip: A semi-circle for the shoe is all you need to keep it looking clean and simple.
Step 7: Creating the Ripped Pant Leg
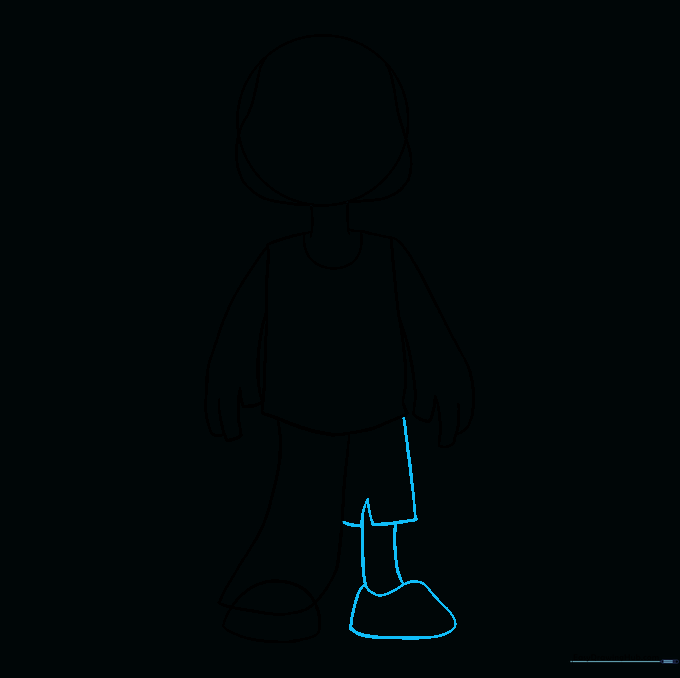
Draw the second leg, but make it look thinner and add jagged lines to represent a rip in the fabric. Teacher's Tip: Don't worry about making the rip perfect; the more uneven the lines, the better the 'torn' effect will look!
Step 8: Cleaning Up
Carefully erase the extra guidelines inside the head and body. Teacher's Tip: Use a soft eraser and hold the paper down firmly so you don't accidentally crinkle it while cleaning up your lines.
Step 9: Adding Spooky Details
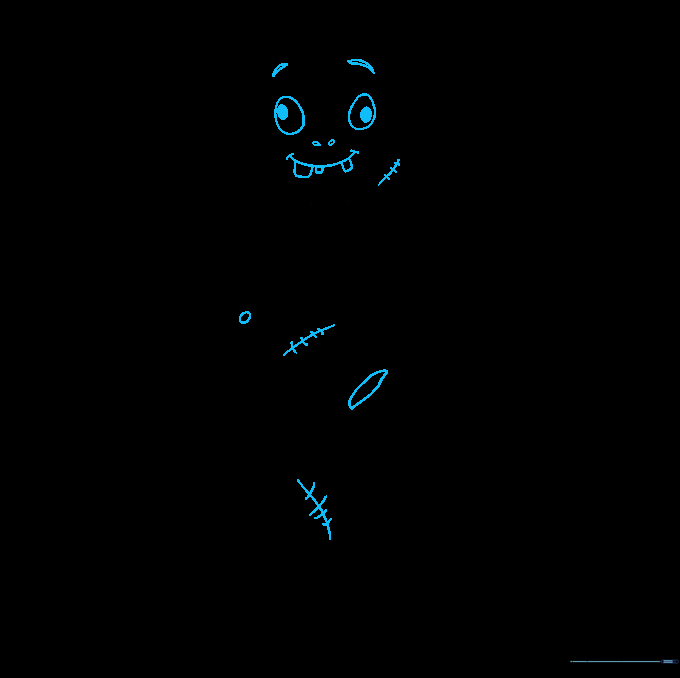
Add facial features, scars, and holes in the clothing. Teacher's Tip: Use perpendicular lines to create 'stitches' or scars. For a funny face, draw the eyes looking in different directions!
Step 10: Bringing Your Zombie to Life with Color
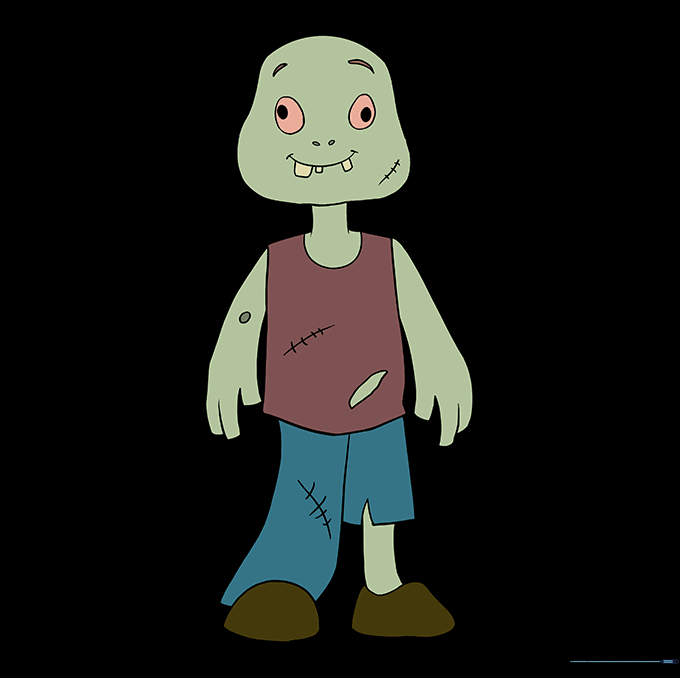
Time to color! Use shades of green for the skin and muted tones for the clothes. Teacher's Tip: Try using a darker green for the shadows under the eyes to make them look extra 'zombie-like'!
More Tutorials


