How to Draw a Zombie in a Cemetery: Easy 9-Step Guide
Ready to create some spooky art? This tutorial is perfect for young artists ages 8+ looking to master cartoon character design. You will only need a pencil, an eraser, and some markers to bring this graveyard scene to life while practicing basic facial proportions and texture techniques.
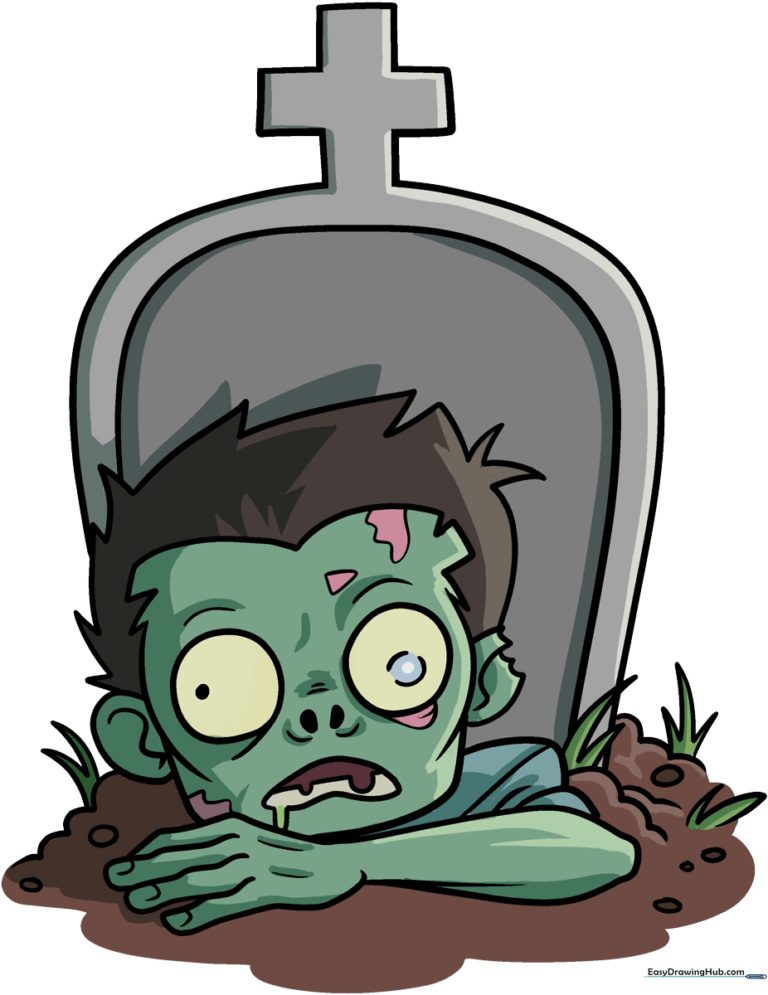
🎯 Final Result
Step-by-Step Instructions
Step 1: Sketching the Eyes

Draw two uneven circles near the bottom of your page. Add a dot for the left pupil and a circle with two small gaps for the right. Sketch a loop beneath the right eye, then surround both eyes with dashes to create a sunken, tired look. Teacher's Tip: Keep your pencil pressure light here so you can easily adjust the shapes if they look too symmetrical—zombies should look a bit messy!
Step 2: Defining the Mouth

Sketch a banana shape for the mouth with a narrow oval on the left. For the teeth, draw a straight line with two bumps. Outline the face with two curves and a semi-rectangle. Teacher's Tip: Don't worry about making the teeth perfect; slightly crooked teeth make the zombie look much more authentic.
Step 3: Adding Ears and Hairline
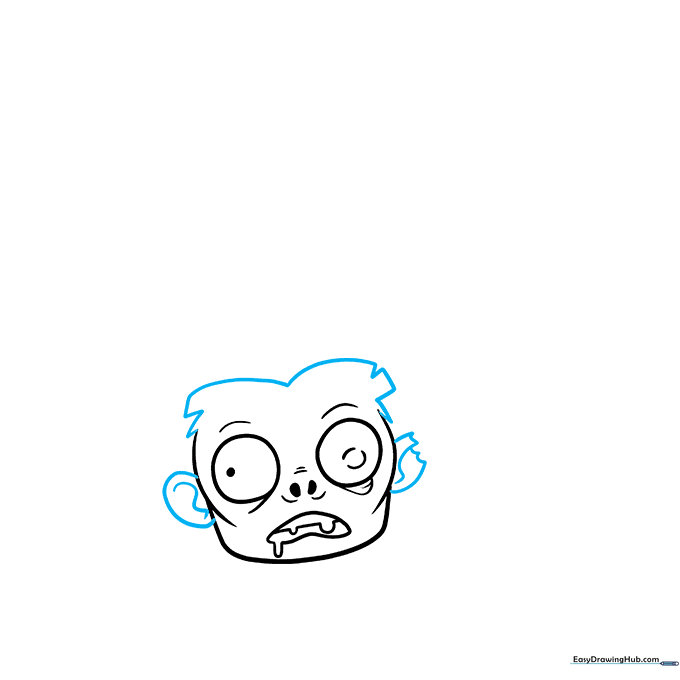
Add loops on either side of the head. Cut small hills out of the right loop for detail, and draw squiggly lines inside the ears. Draw a wide M-shape on top of the head, then surround it with squares and triangles for messy hair. Teacher's Tip: Use short, jagged strokes for the hair to give it that 'just woke up from the grave' texture.
Step 4: Creating Rotted Skin Details
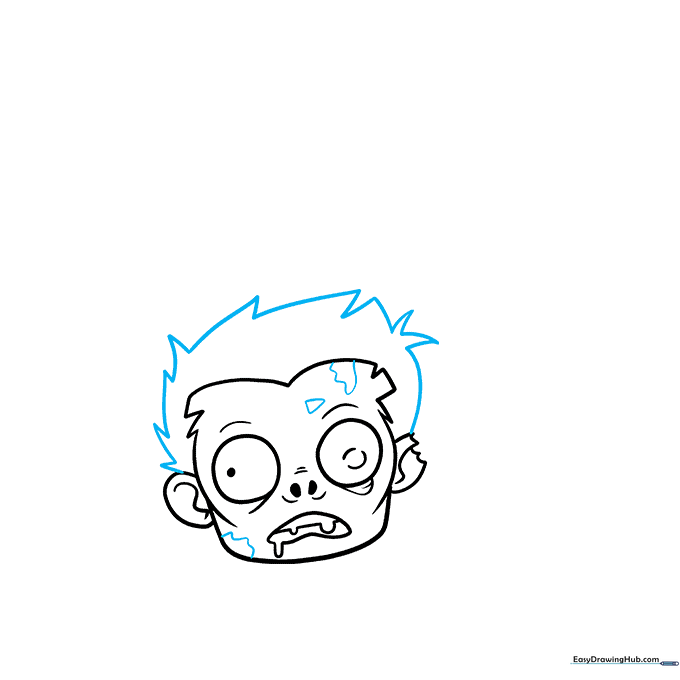
Outline the hair with loose, sketchy triangles. Draw uneven shapes inside the face to make the flesh look rotted. Teacher's Tip: Vary the size of your shapes—some large, some small—to create a more organic, decaying appearance.
Step 5: Drawing the Arm and Hand
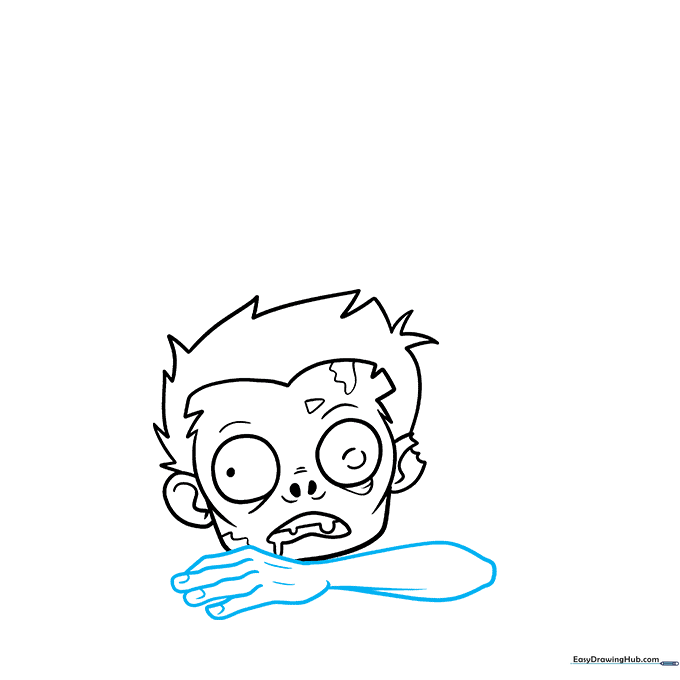
Start the arm with a long oval that becomes two straight lines like a bowling pin. Draw a rounded line for the elbow and a diagonal line inside the arm. Sketch the fingers with bumpy hot dog shapes. Add curves for the fingernails, plus two dashes inside the hand. Teacher's Tip: Keep the fingers slightly bent to make the zombie look like it's reaching out.
Step 6: Adding Background Elements
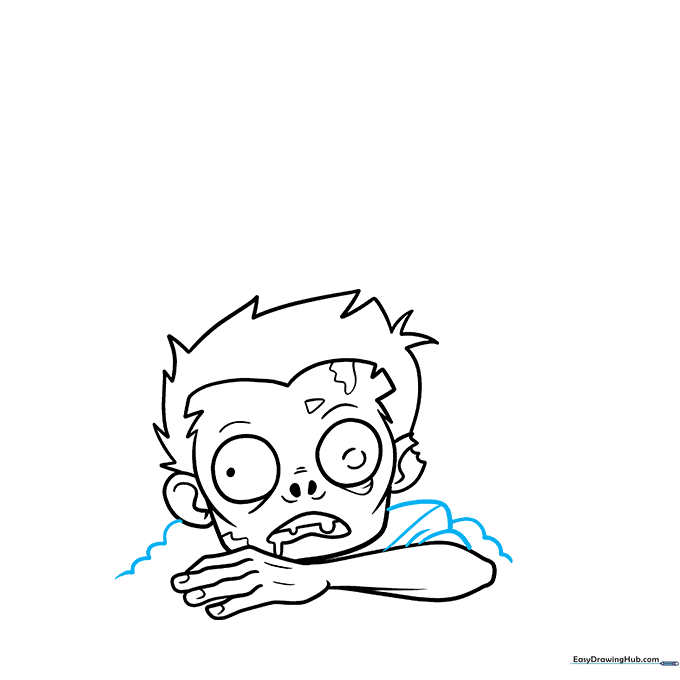
Sketch four small hills beneath the left ear and two large hills and three smaller ones behind the arm. Draw two lines inside the biggest hill. Teacher's Tip: These shapes represent the mounds of dirt in the cemetery, so make them look lumpy and uneven.
Step 7: Drawing the Headstone
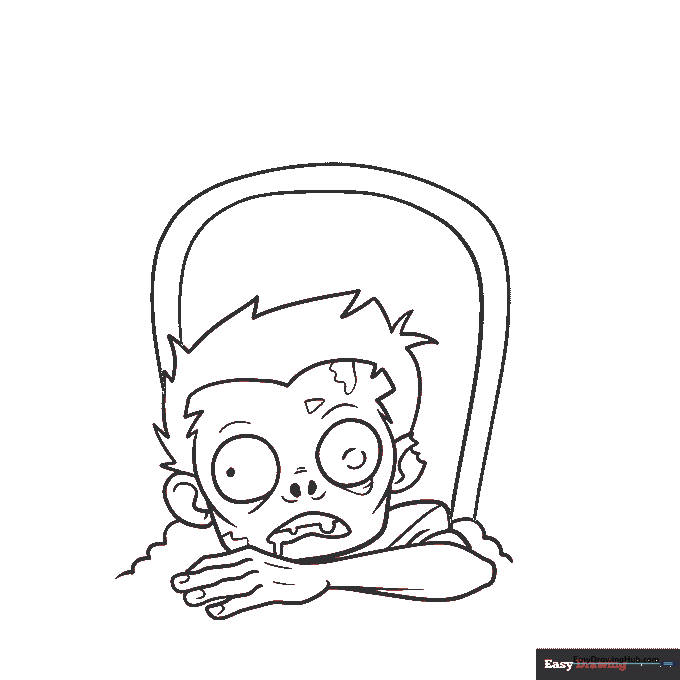
Draw an arch around your zombie, then surround it with a bigger arch. This creates the shape of a classic tombstone. Teacher's Tip: Use a ruler if you want it perfectly straight, but a slightly wobbly line adds to the 'old and spooky' vibe.
Step 8: Adding Grave Details
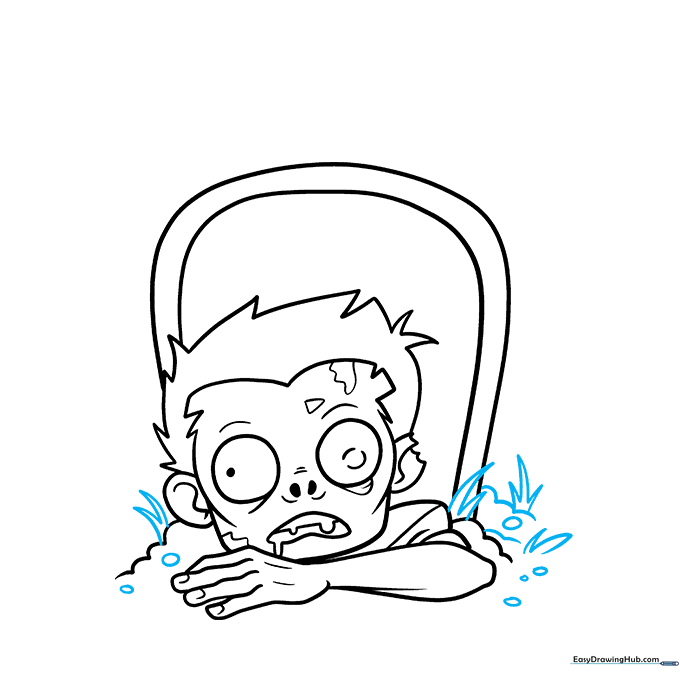
Sketch more hills, ovals, and narrow triangles to represent the soil and rocks around the grave. Teacher's Tip: Adding these small details helps ground your character in the scene, making the drawing look more complete.
Step 9: Final Touches

Use two rectangles to form a cross on top of the headstone. Outline your drawing with black ink, filling in the nostrils and left pupil for contrast. Teacher's Tip: Before you start inking, erase any stray pencil lines to keep your final piece looking clean and professional.
Step 10: Color Your Masterpiece
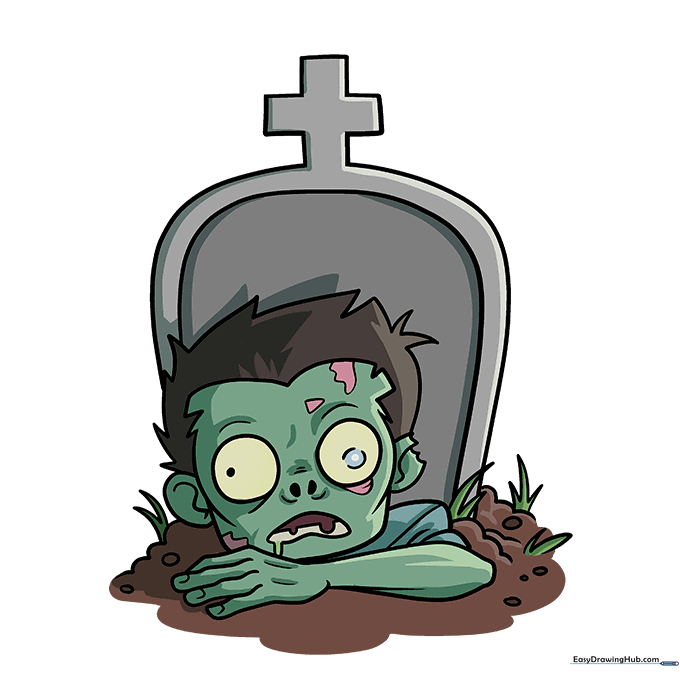
Make your creature look undead with teal skin, pink flesh, green drool, and off-white eyes. Color the shirt blue, use dark brown for the hair, and gray and maroon for the mouth. Shade the tombstone in gray, and add brown and green for the soil and grass. Teacher's Tip: Use light, circular motions when coloring to create a smooth, even finish.
More Tutorials


