How to Draw a Zebra: Simple 10-Step Guide for Kids
Bring the African savanna to your sketchbook with this easy zebra drawing tutorial, perfect for young artists ages 5 and up. You only need a pencil, an eraser, and a piece of paper to get started. Follow these simple steps to build confidence and master basic animal shapes through guided practice.
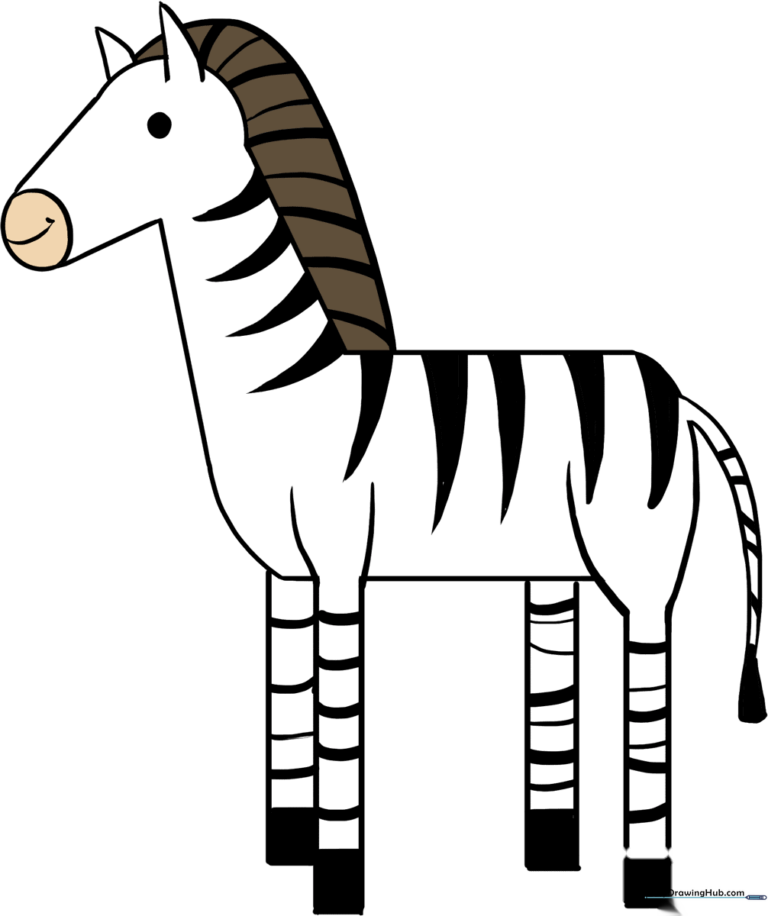
🎯 Final Result
Step-by-Step Instructions
Step 1: Sketching the Head
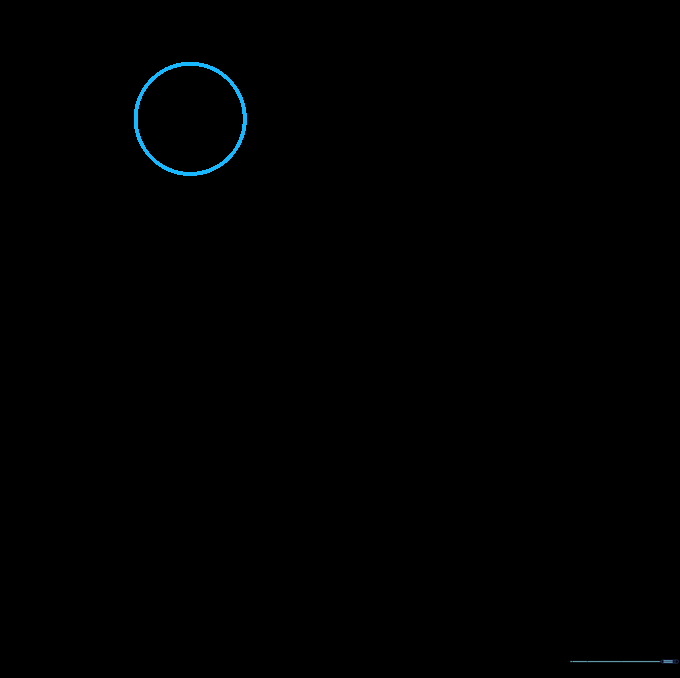
Draw a light circle to represent the zebra's head. Teacher's Tip: Keep it about the size of a golf ball; drawing it lightly makes it much easier to refine later.
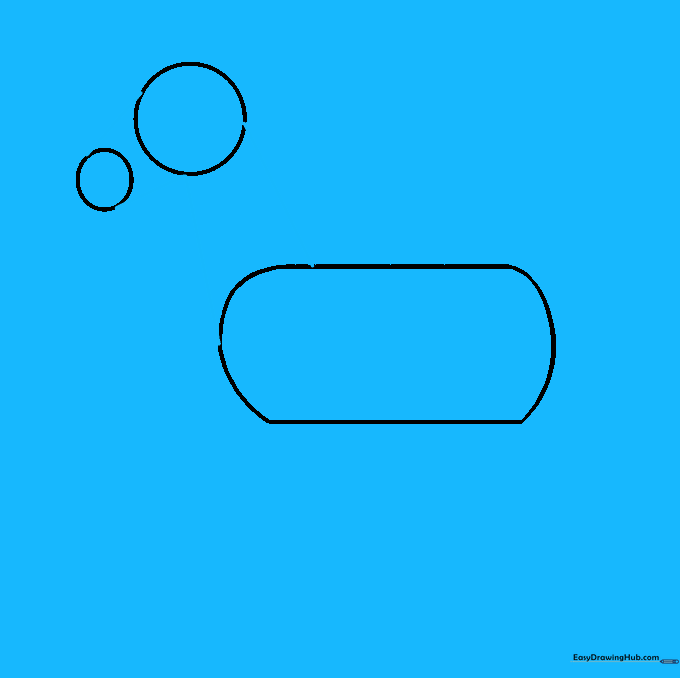
Step 2: Adding the Snout

Draw a smaller, slightly overlapping circle near the front of the head. This creates the muzzle. Teacher's Tip: Think of this as the zebra's nose area—keep it rounded and soft.
Step 3: Forming the Body

Draw a large, rounded rectangular shape for the body. Use two parallel horizontal lines connected by curves. Teacher's Tip: Imagine a loaf of bread—that's the shape we're aiming for!
Step 4: Connecting the Neck
Connect the snout to the head and the head to the body using two pairs of smooth, straight lines. Teacher's Tip: Keep these lines fluid to give the zebra a graceful, natural posture.
Step 5: Refining the Outline

Carefully erase the overlapping guide lines inside the head, neck, and body. Teacher's Tip: Use a clean eraser and gentle pressure to keep your paper smooth.
Step 6: Drawing the Legs
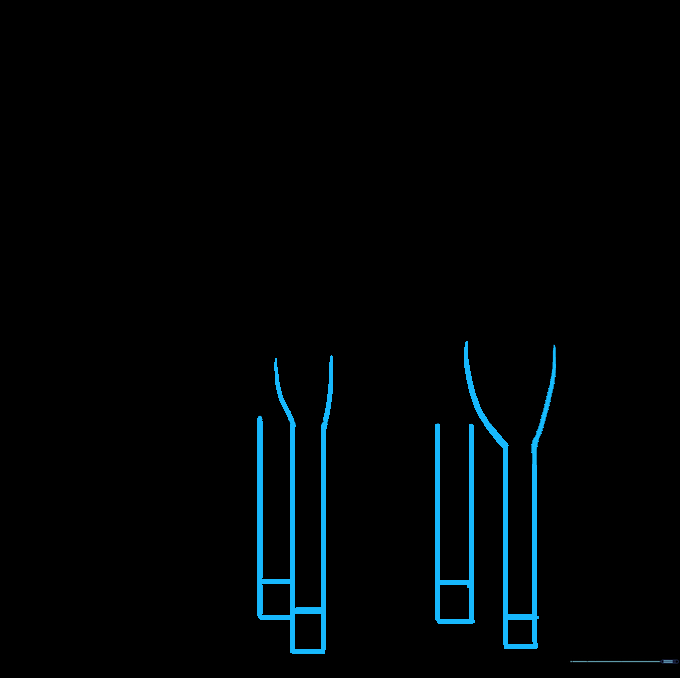
Draw four legs using parallel lines, adding small horizontal lines at the bottom for hooves. Teacher's Tip: Add slight curves at the top of the legs to show the shoulder and hip joints.
Step 7: Ears, Mane, and Tail
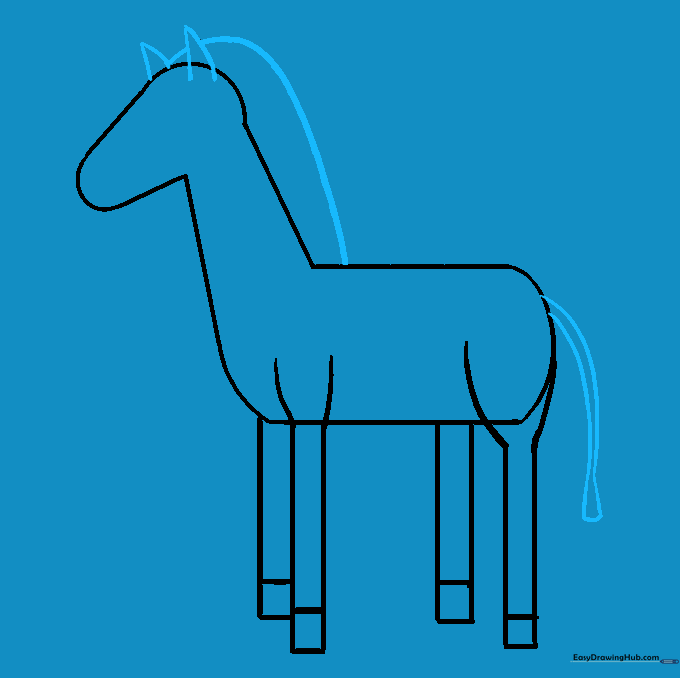
Add two triangular ears, a curved mane along the neck, and a flowing tail with a tuft at the end. Teacher's Tip: Make the mane look a bit spiky to give it texture!
Step 8: Final Cleanup

Erase any remaining guide lines from the legs, ears, and tail to finalize your outline. Teacher's Tip: Take your time here—a clean outline makes coloring much more satisfying.
Step 9: Adding the Stripes
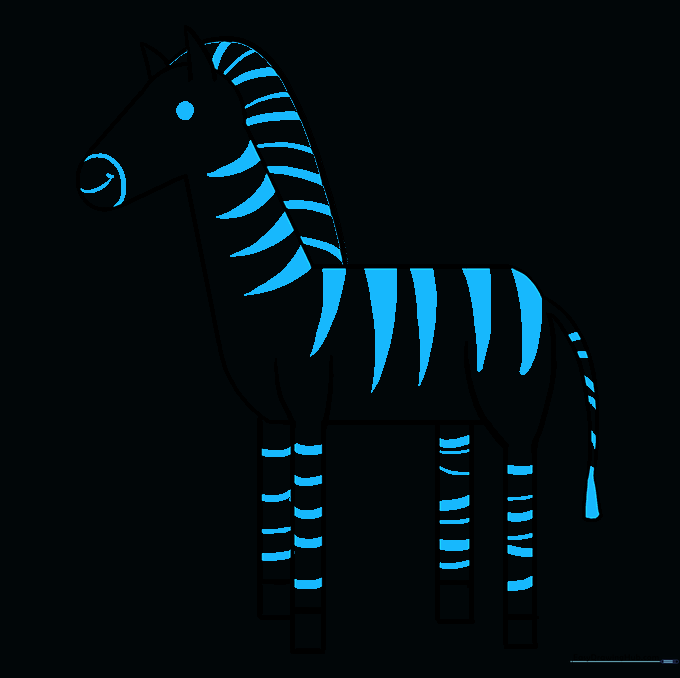
Draw thick, curved stripes on the body, legs, and tail. Add a simple smile to the snout. Teacher's Tip: Vary the size of your stripes to make your zebra look more realistic.
Step 10: Bring It to Life with Color
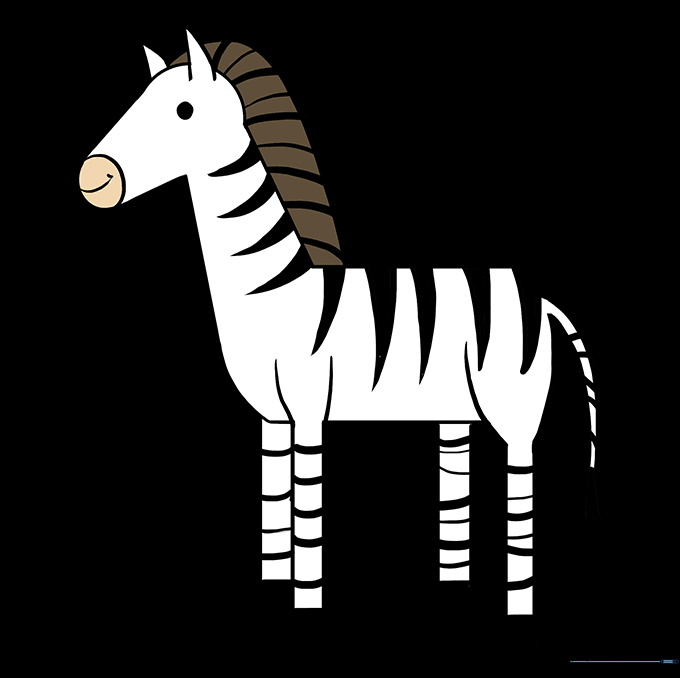
Color your zebra! Use black or brown for the stripes and keep the rest white or light gray. Teacher's Tip: Use short, confident strokes to fill in the stripes for a bold look.
More Tutorials


