How to Draw a Wizard: Easy 10-Step Guide for Kids
Bring a magical character to life with this easy-to-follow wizard drawing tutorial, perfect for young artists ages 7 and up. You will need a pencil, an eraser, and your favorite coloring markers to complete this fantasy masterpiece. Follow along to build confidence in character design and line work.
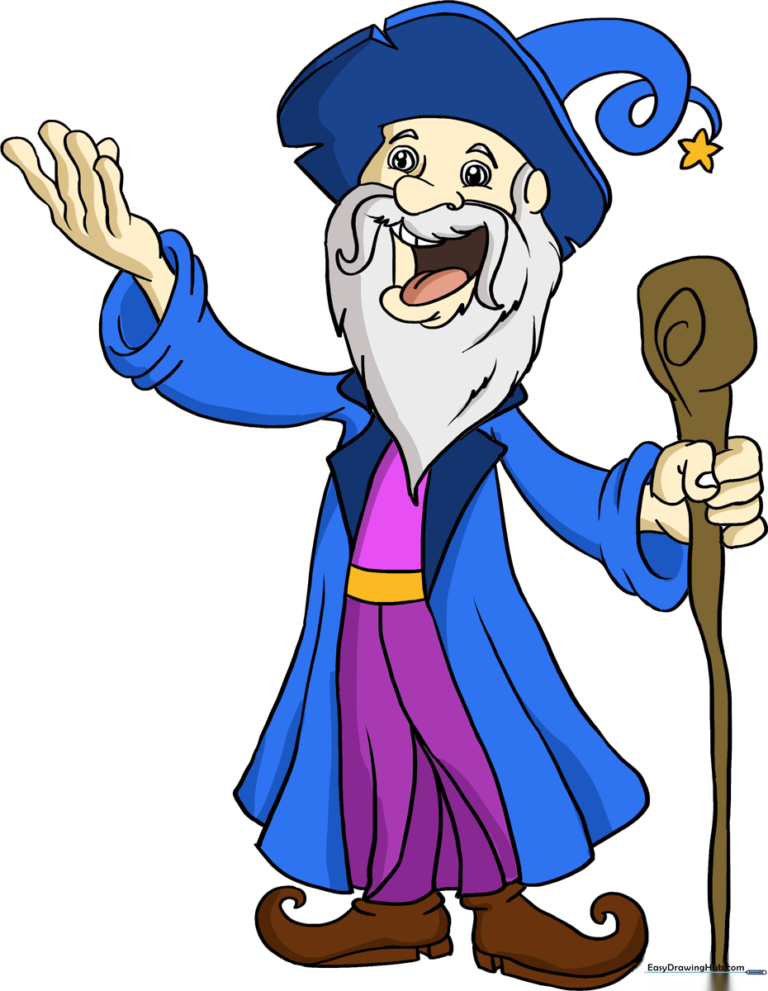
🎯 Final Result
Step-by-Step Instructions
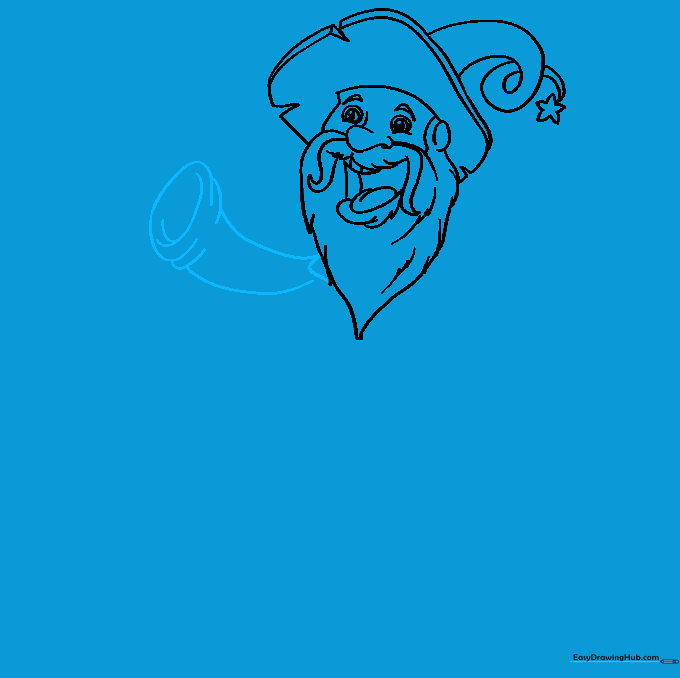
Step 1: Sketching the Magical Hat

Draw the wizard's pointed hat using two triangles that meet at the top. Connect them with a curved line for the brim. Tip: Keep your pencil lines light and loose so you can easily adjust the shape of the crown later.
Step 2: Defining the Face and Beard

Erase the bottom of the hat to make room for the face. Use jagged, wavy lines to create a bushy beard and add small circles for the eyes. Tip: Draw the beard in sections to give it a realistic, flowing texture.
Step 3: Adding the Mustache and Mouth

Draw a thick mustache using curved lines that spiral at the ends. Add a small, open mouth underneath. Tip: A little spiral at the end of the mustache adds a whimsical, cartoonish charm to your character.
Step 4: Drawing the First Sleeve
Extend two curved lines from the body to create a wide, flowing sleeve. Add small 'C' shapes at the end for the sleeve opening. Tip: Use short, quick strokes to suggest fabric folds and movement.
Step 5: Sketching the Hand
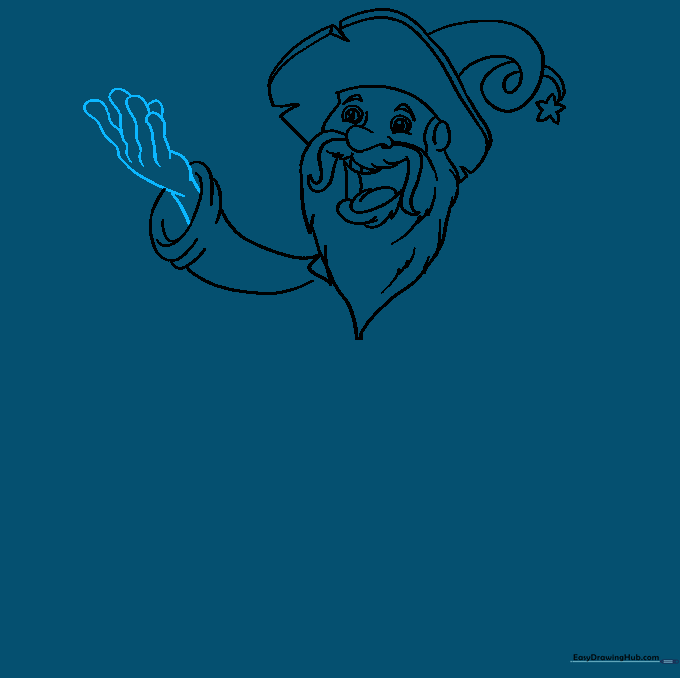
Carefully draw the hand emerging from the sleeve. Use simple curved lines for the fingers and palm. Tip: If the hand feels tricky, draw a small mitten shape first and then refine the finger lines.
Step 6: Adding the Second Sleeve

Repeat the process from Step 4 to draw the second sleeve on the opposite side. Ensure it matches the style of the first one. Tip: Keep your lines consistent to make the wizard look balanced.
Step 7: Creating the Magical Staff

Draw a long, curved line that doubles back on itself to form a staff. Add a spiral at the top for a magical effect. Tip: Use a ruler if you want the staff to be perfectly straight, or keep it wavy for a natural wood look.
Step 8: Adding Robe Details
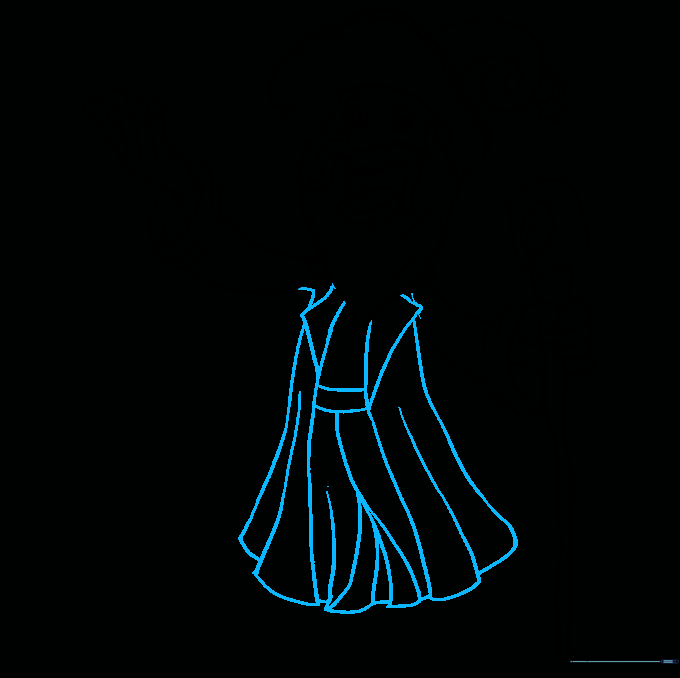
Draw the long, flowing robes of the wizard using long, vertical lines. Tip: Add a few horizontal curves at the bottom to show where the robe gathers near the feet.
Step 9: Sketching the Shoes

Finish the bottom of the drawing by adding two small, pointed shoes. Tip: Make them slightly curled at the toes to give your wizard a classic, storybook appearance.
Step 10: Bringing Your Wizard to Life with Color

Time to color! Use deep purples for the robe and hat, and soft greys for the beard. Tip: Use a darker shade of your main color to add shadows under the hat and sleeves for a 3D effect.
More Tutorials


