How to Draw a Viking: Easy 10-Step Guide for Kids
Ready to set sail on an artistic adventure? This tutorial is perfect for young artists ages 6+ who want to create their own brave Viking character. All you need is a pencil, an eraser, and a piece of paper to bring this legendary explorer to life.
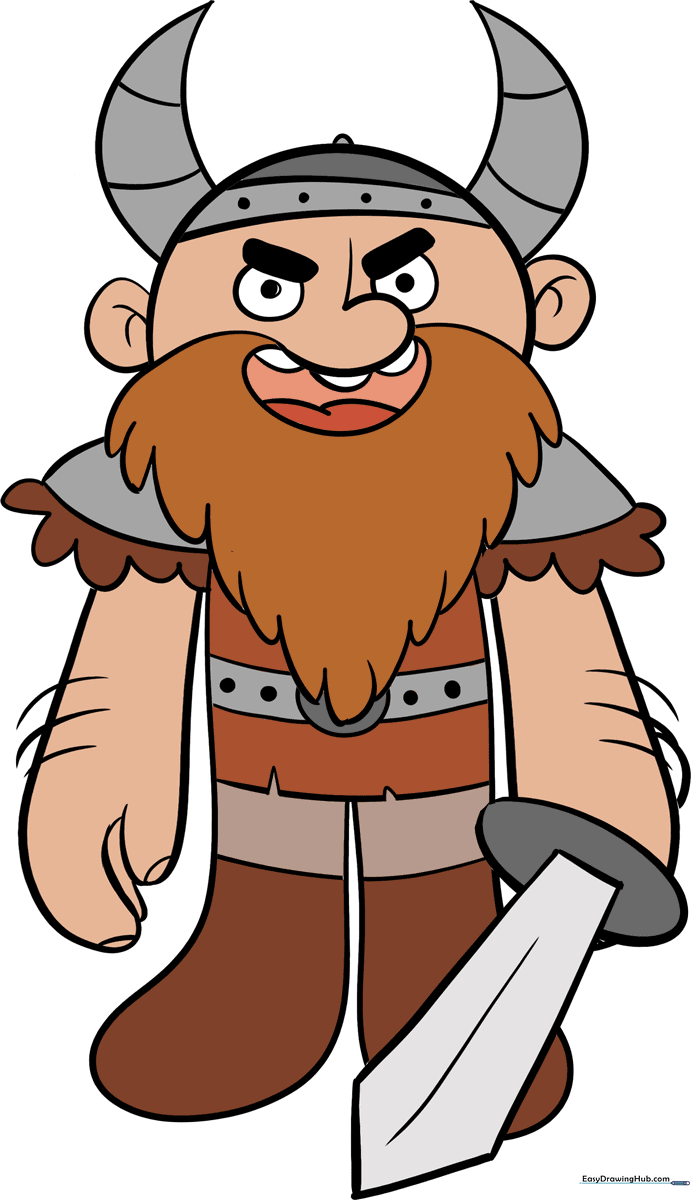
🎯 Final Result
Step-by-Step Instructions
Step 1: Sketching the Head and Eyes

Start by drawing a light circle for the head. Inside, add two smaller circles for the eyes, each with a tiny shaded pupil. Teacher's Tip: Keep your pencil lines very faint here so they are easy to erase later if you need to adjust the placement.
Step 2: Adding Facial Features and Helmet Base

Add 'C' shaped ears on the sides and a small half-circle on top for the helmet. Draw a vertical line between the eyes and a backward 'C' below it for a comical nose. Teacher's Tip: Use a light touch for the nose to keep the character looking friendly rather than sharp.
Step 3: Creating the Angry Glare and Horns
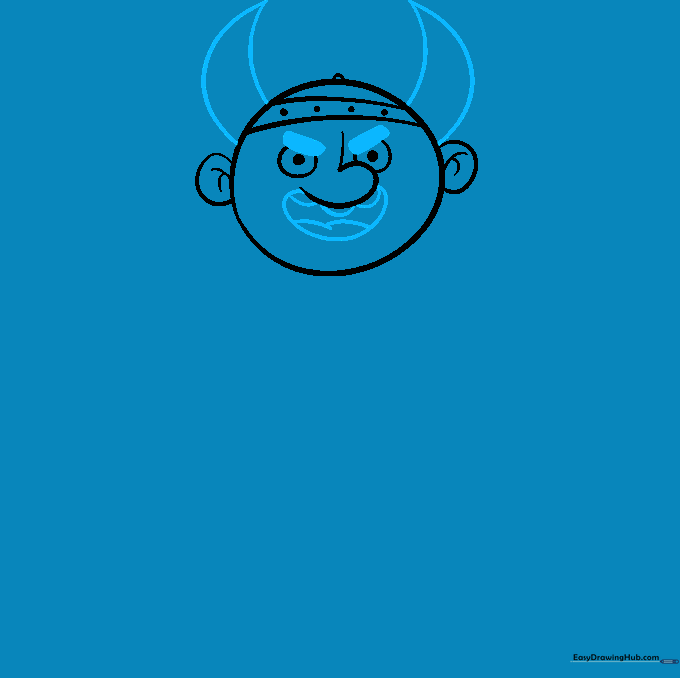
Give your Viking an 'angry' look by replacing the top of the eyes with diagonal rectangles. Draw a curved mouth with teeth, and add two sharp, pointed horns above the ears. Teacher's Tip: If the horns look uneven, remember that Viking helmets were often handmade and imperfect!
Step 4: Drawing the Bushy Beard

Erase the bottom of the head circle and replace it with a thick, bushy beard using overlapping 'U' shaped lines. Add curved bands to the horns for texture. Teacher's Tip: Vary the size of your 'U' shapes to make the beard look full and wavy.
Step 5: Outlining the Body
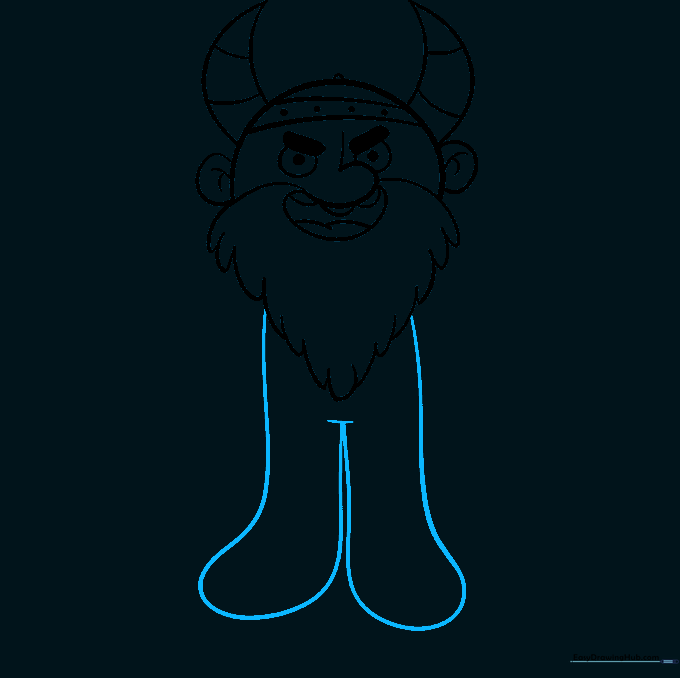
Extend two long, curved lines down from the beard and connect them at a point to form the torso and legs. Teacher's Tip: Keep these lines symmetrical to ensure your Viking stands straight and tall.
Step 6: Adding Armor and Belt
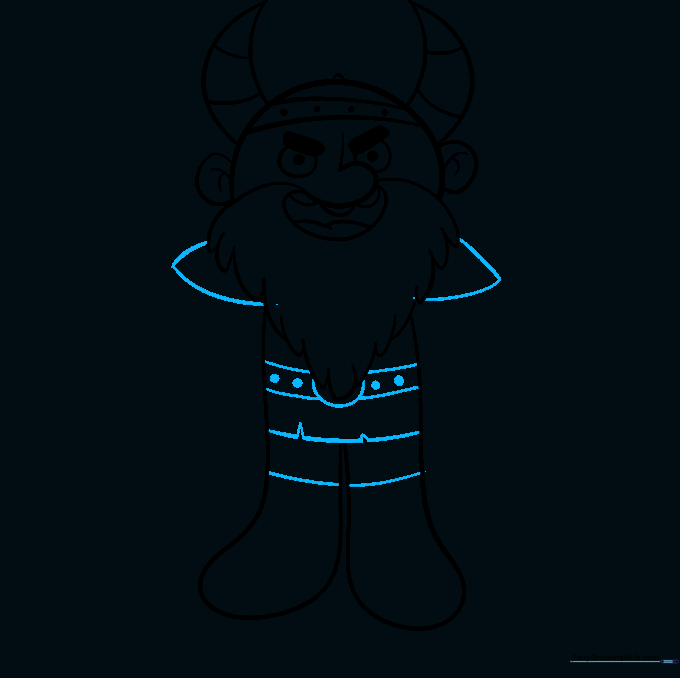
Draw triangular shoulder armor and a belt across the waist. Add small circles to the belt for studs. Finish the tunic bottom with jagged, triangular points. Teacher's Tip: Use a darker pencil stroke for the armor to make it stand out from the tunic.
Step 7: Drawing the Arms and Hands
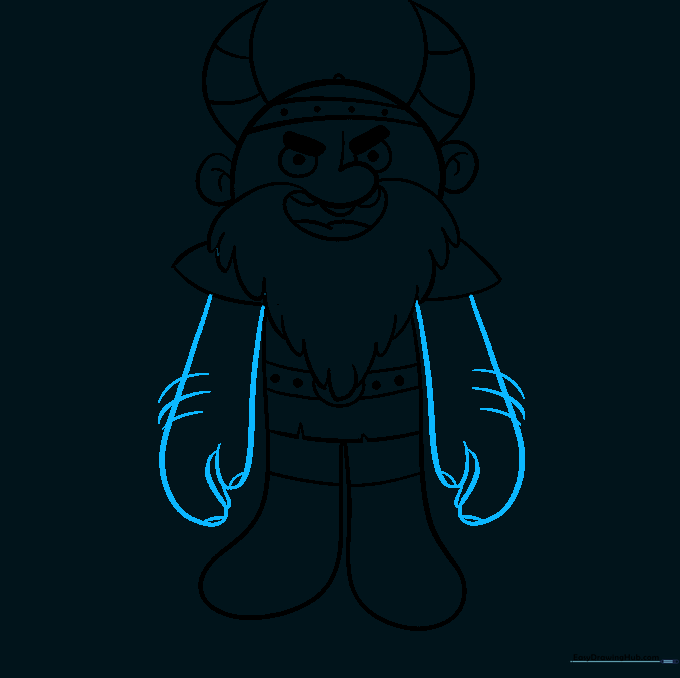
Draw large, muscular arms extending from the shoulders. Use 'U' shapes for fingers and add tiny curved lines for fingernails. Add a few small lines on the arms to represent hair. Teacher's Tip: Don't worry about making the fingers perfect; focus on the overall shape.
Step 8: Adding Furry Sleeves and Sword Guard
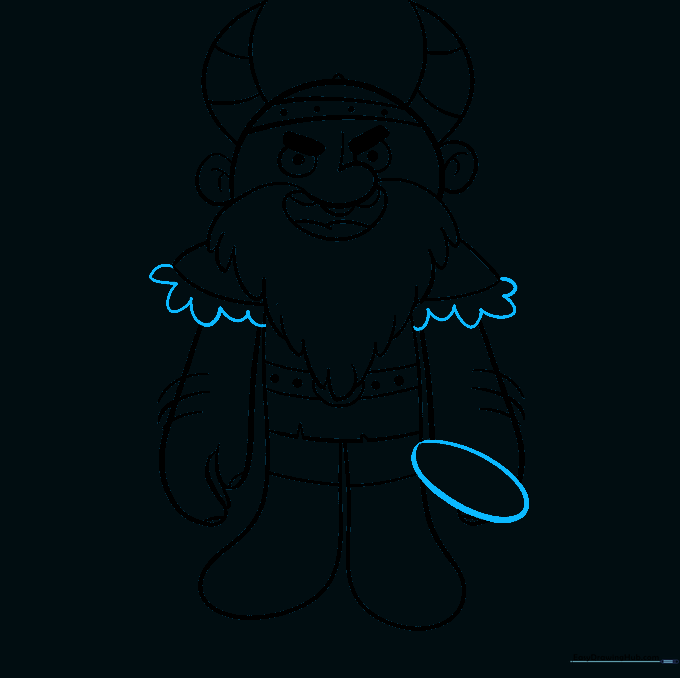
Add furry sleeves using 'U' shaped lines under the shoulders. Draw an oval across one hand to start the sword's cross-guard. Teacher's Tip: The fur texture is just a series of connected curves—keep them loose and bouncy!
Step 9: Completing the Sword

Finish the sword by drawing the blade and the pommel behind the arm. Add a center line down the blade for detail. Teacher's Tip: Use a ruler if you want the sword blade to look extra straight and sharp.
Step 10: Color Your Viking
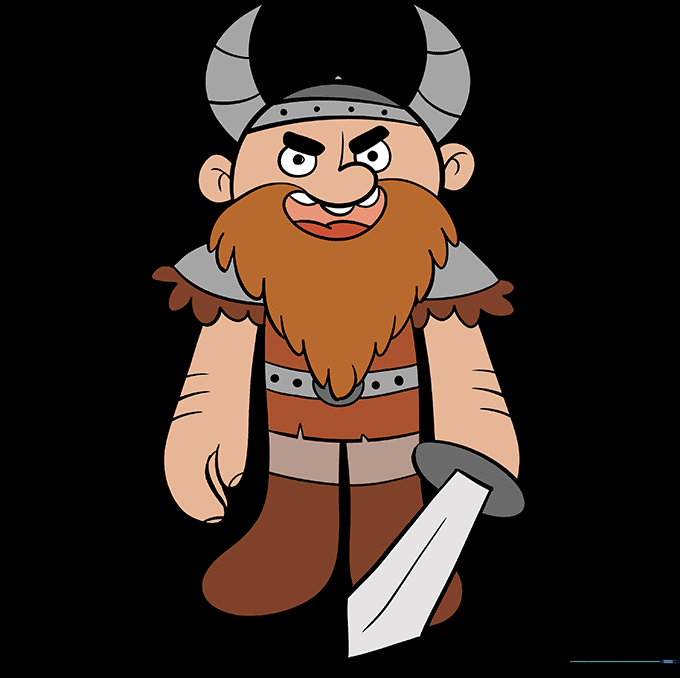
Bring your Viking to life with color! Use earthy tones like browns, grays, and metallic silvers for the armor and helmet. Teacher's Tip: Try using markers for bold lines and colored pencils for shading to give your Viking a professional, finished look.
More Tutorials


