How to Draw a Turkey Face: Easy 10-Step Guide for Kids
Looking for a fun, screen-free activity for Thanksgiving? This turkey face tutorial is perfect for artists ages 5 and up. All you need is a pencil, an eraser, and some paper to bring this festive character to life while practicing basic shape construction.
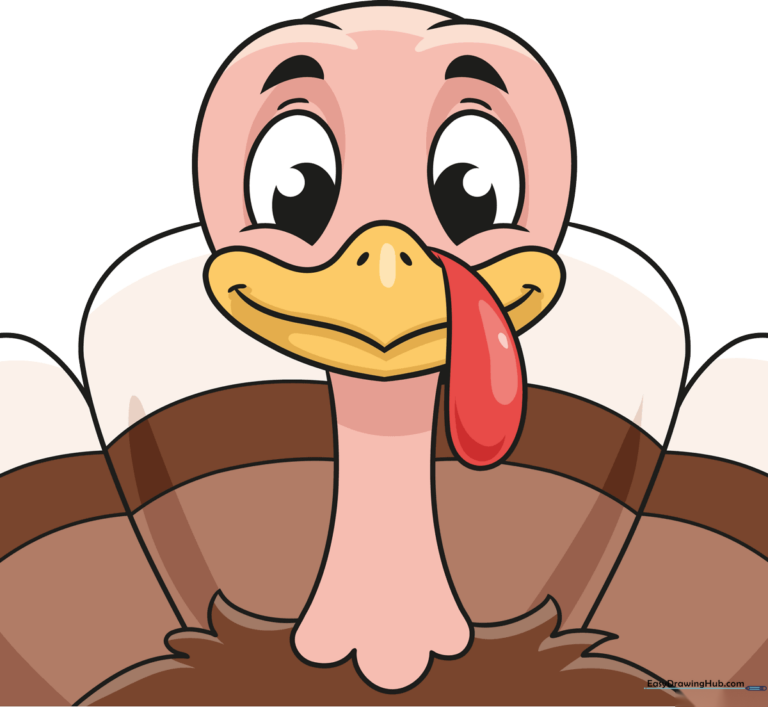
🎯 Final Result
Step-by-Step Instructions
Step 1: Sketching the Eyes

Draw two light ovals near the top of your page. Add small, overlapping curves at the bottom of each to give them a friendly, rounded look. Teacher's Tip: Keep these light so you can easily adjust the spacing if needed.
Step 2: Adding Pupil Detail

Place two smaller, solid ovals inside the eyes for pupils. Draw thick, short dashes above the eyes for eyebrows, and thinner ones underneath to suggest eyelids. Teacher's Tip: Varying your line thickness adds instant character to your drawing.
Step 3: Forming the Beak

Outline the beak using three soft, wavy hill shapes. Bring the bottom to a gentle point, similar to the bottom of a heart. Teacher's Tip: Don't press too hard; a soft point looks more natural than a sharp, jagged one.
Step 4: Defining the Mouth

Sketch a wide, curvy V-shape inside the beak. Add small dashes for the nostrils and the corners of the mouth to give your turkey a happy expression. Teacher's Tip: Use short, quick strokes for the nostrils to keep them looking subtle.
Step 5: Shaping the Head
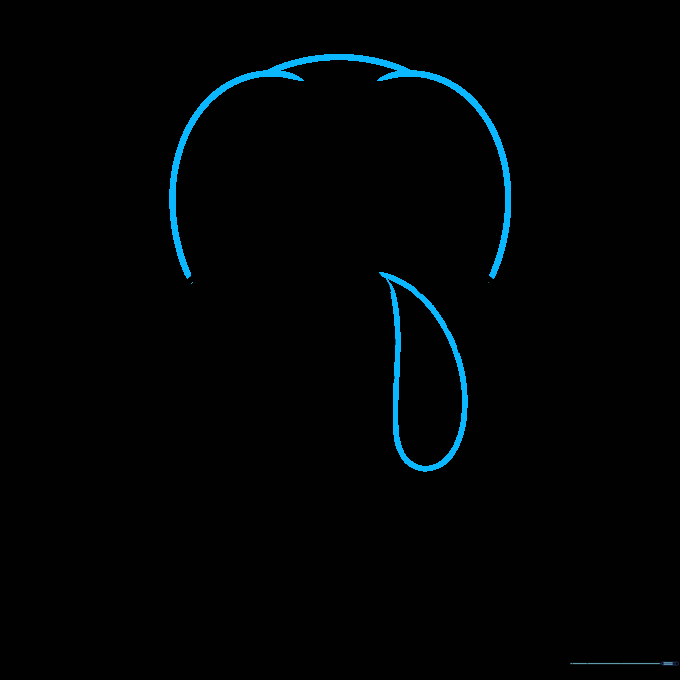
Draw a large teardrop shape over the beak area and round lines to define the top of the head. Teacher's Tip: Imagine the head is a soft balloon; keep your lines curved and fluid rather than straight.
Step 6: Drawing the Neck

Add two curved lines descending from the head to form the neck, connecting them at the bottom with three small hills. Teacher's Tip: The 'hills' represent the texture of the turkey's wattle area.
Step 7: Adding Body Texture
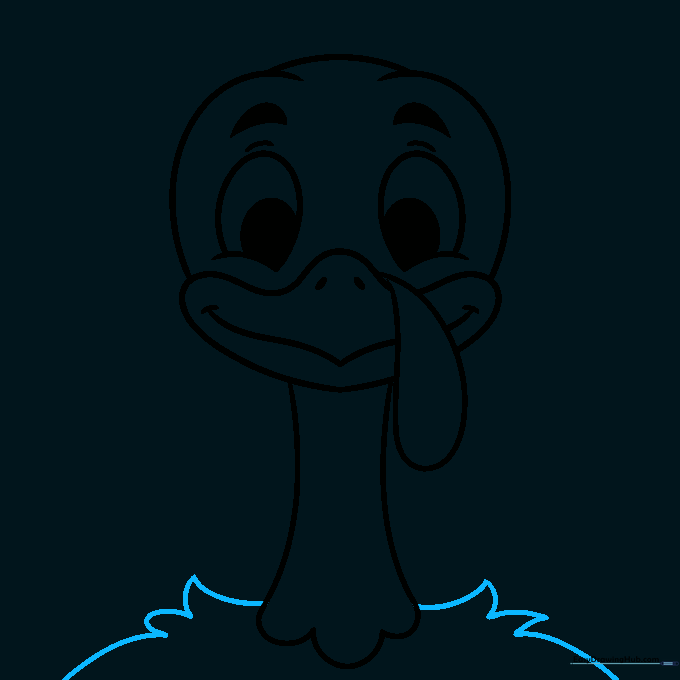
Use loose, sketchy lines to outline the body. Don't worry about perfect symmetry—feathers are naturally uneven and messy! Teacher's Tip: Let your wrist be loose to create those natural, organic-looking edges.
Step 8: Sketching Feathers
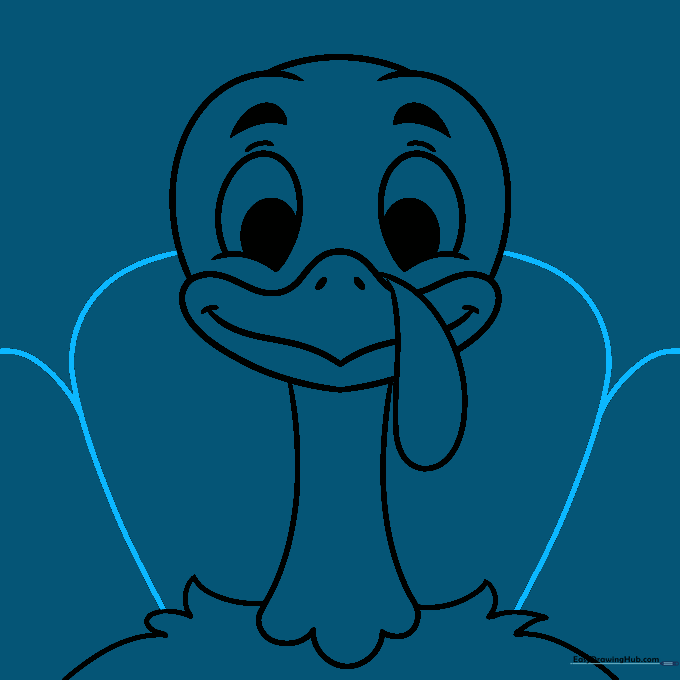
Add curved lines behind the head to begin the feather fan. Teacher's Tip: Think of these as large petals on a flower; keep them radiating outward from the center.
Step 9: Adding Wing Detail
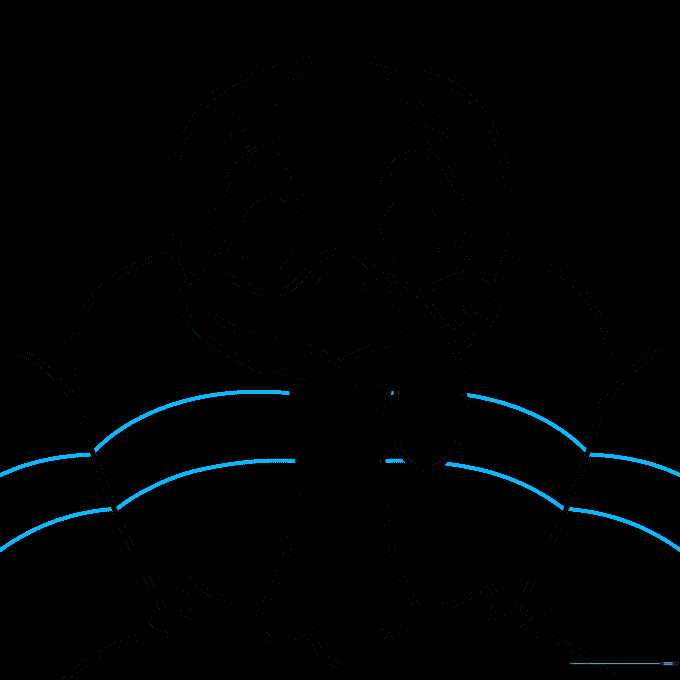
Draw parallel curves within the wing area to create stripes. Teacher's Tip: Keep the spacing between your lines consistent to make the feathers look uniform.
Step 10: Final Outline and Color
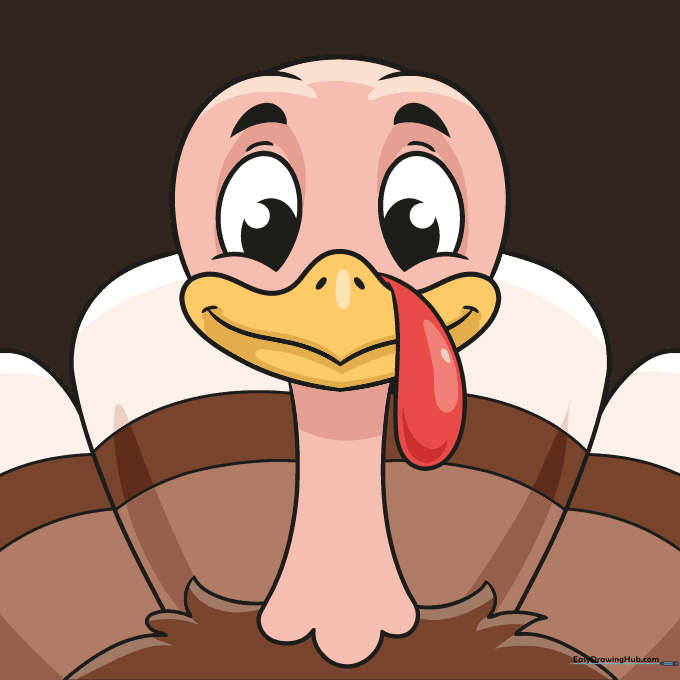
Trace your final lines with a black pen and erase your pencil marks. Color the beak yellow, the head pink, the wattle red, and use various browns for the feathers. Teacher's Tip: Use short, overlapping strokes with your colored pencils to create a soft, feathery texture.
More Tutorials


