How to Draw a Tsunami: Easy 9-Step Guide for Kids
Ready to capture the power of the ocean? This tutorial is perfect for young artists ages 6+ looking to draw a dramatic tsunami scene. You will need a pencil, eraser, black marker, and your favorite coloring supplies to bring this weather landscape to life.
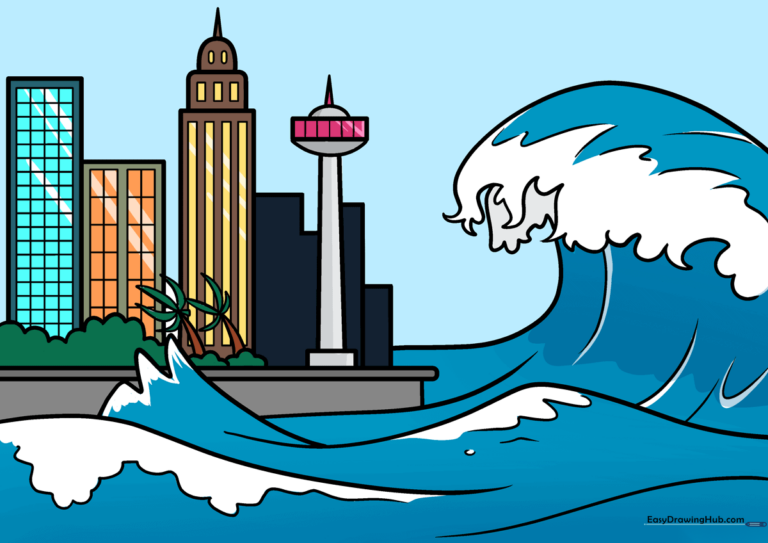
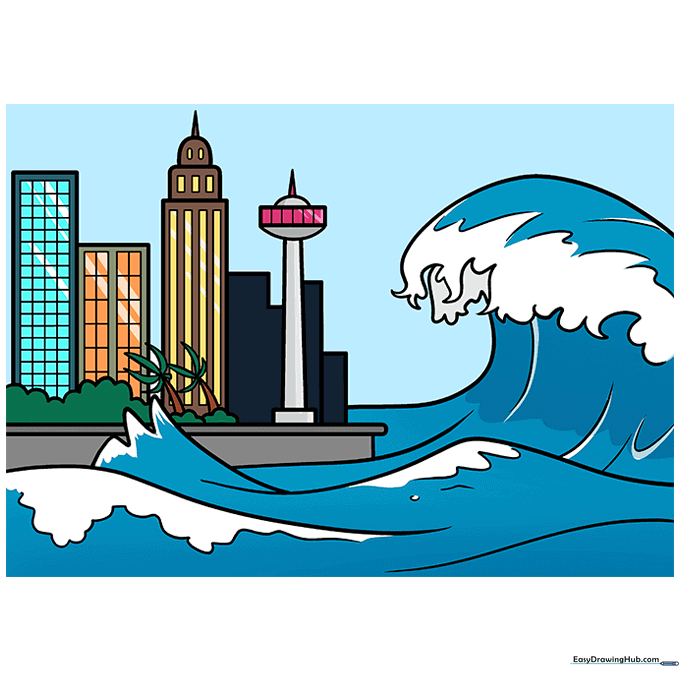
🎯 Final Result
Step-by-Step Instructions
Step 1: Sketching the Base Waves
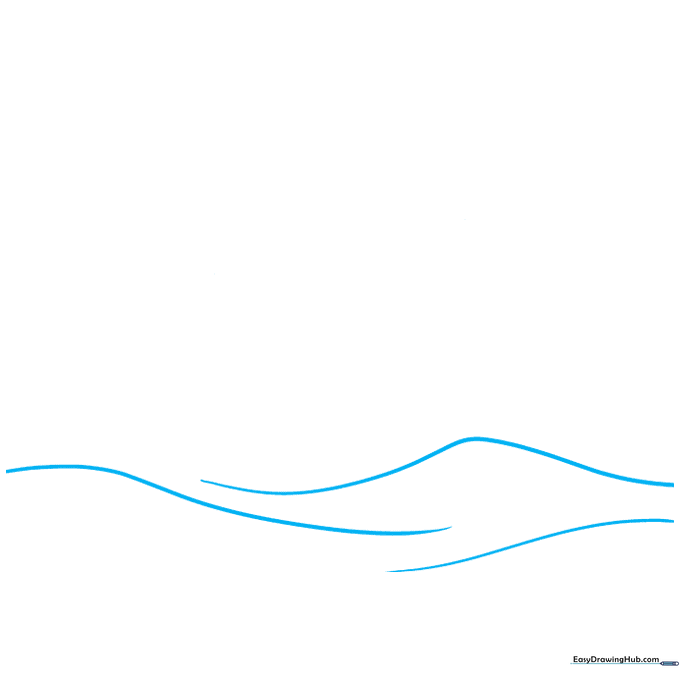
Draw light, curved, loose triangle shapes to represent the base of your waves. Teacher's Tip: Keep your pencil strokes very light here; these are just structural guides for the water's movement.
Step 2: Defining the Wave Front
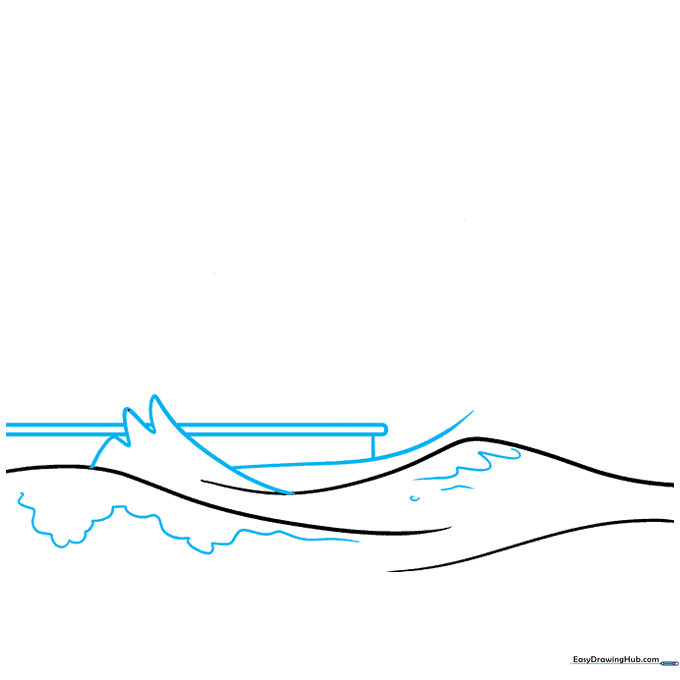
Draw rounded triangles pointing upward for the front wave. Add a curved line to the right and small loops inside to mimic the texture of sea foam. Use a ruler to draw a straight line for the ground. Tip: Use short, quick strokes for the foam to make it look bubbly.
Step 3: Adding Wave Motion
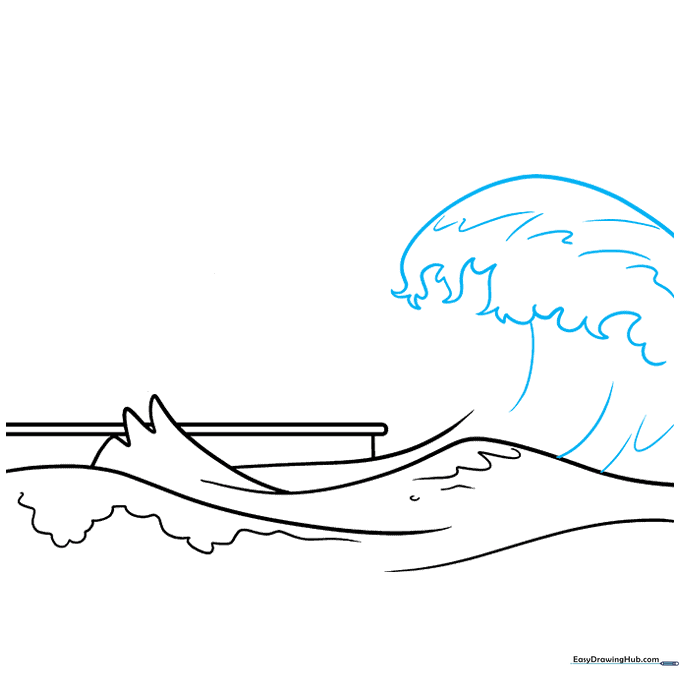
Sketch a horizontal curve near the top of the page. Add wavy, flame-like lines underneath to show the water crashing. Tip: Don't worry about making these lines perfect; water is fluid and organic, so messy lines actually look more realistic!
Step 4: Adding Coastal Details

Outline the wave with smaller loops to represent splashing water. Add narrow, pointed triangles to the side for palm trees. Tip: Keep your palm tree triangles thin so they don't overpower the wave.
Step 5: Building the Cityscape
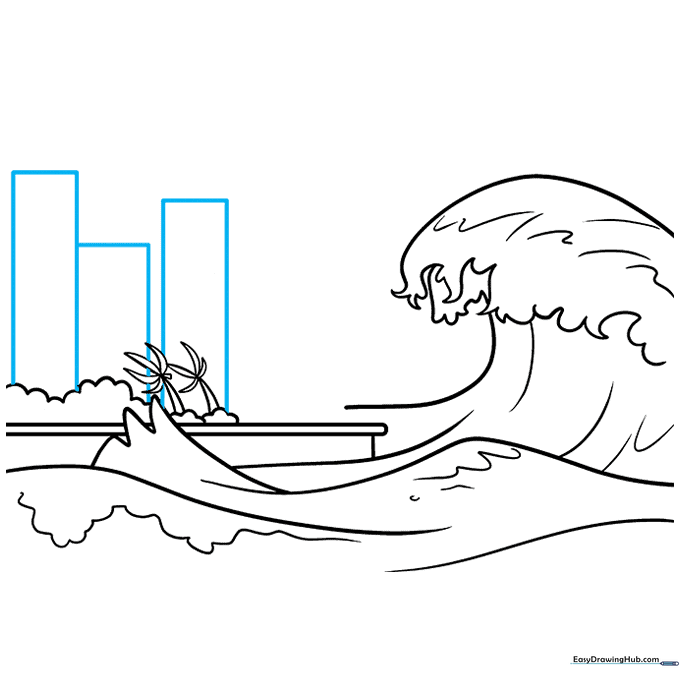
Use your ruler to draw simple rectangles behind the trees for buildings. Tip: Vary the heights of your rectangles to make your city look more interesting and realistic.
Step 6: Adding Architectural Variety

Sketch domes and additional rectangles on the right side of your city. Tip: Domes add a nice contrast to the sharp, straight lines of the other buildings.
Step 7: Refining the Skyline
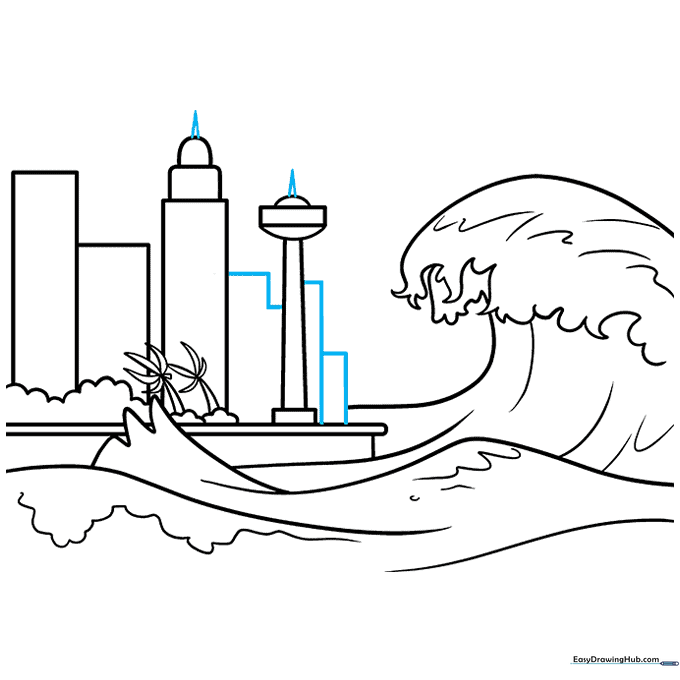
Add narrow points or spires on top of your buildings. Tip: These small details make your drawing look much more professional and finished.
Step 8: Adding Windows and Texture
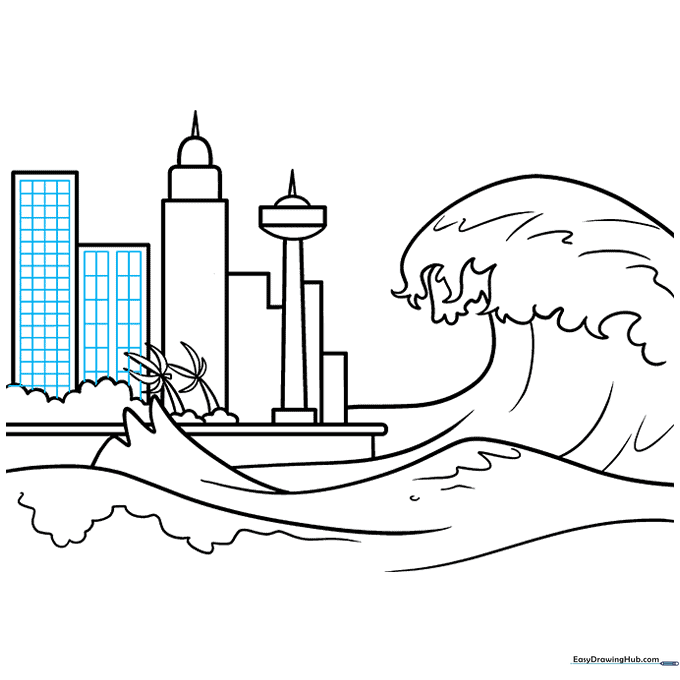
Draw grids inside the buildings using squares and rectangles. Tip: Use your ruler for the windows to keep them perfectly aligned, which makes the city look tidy.
Step 9: Final Outline and Details
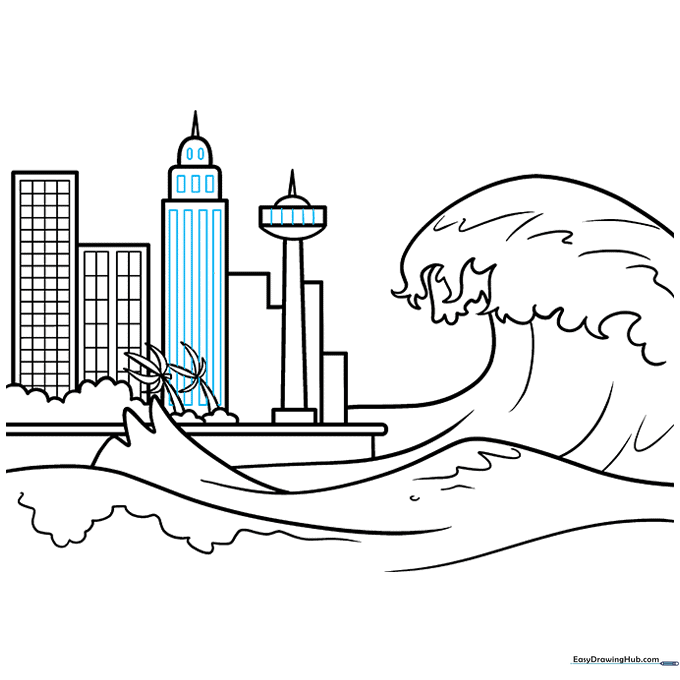
Add final details like ovals and lines to the buildings. Use a black marker to outline your entire drawing. Tip: Press firmly with your marker for the main edges, but use a lighter hand for the window details to keep them from looking too heavy.
Step 10: Bringing it to Life with Color
Color your tsunami! Use dark and light blues for the water, green for the trees, and your choice of colors for the city. Tip: Use a white gel pen or leave small white spots to represent the crashing foam of the wave.
More Tutorials


