How to Draw a Tiara: Easy 9-Step Guide for Kids
Ready to design your own royal headpiece? This tutorial is perfect for young artists ages 5 and up. All you need is a pencil, an eraser, and some paper to create a stunning tiara that builds confidence and fine motor control.
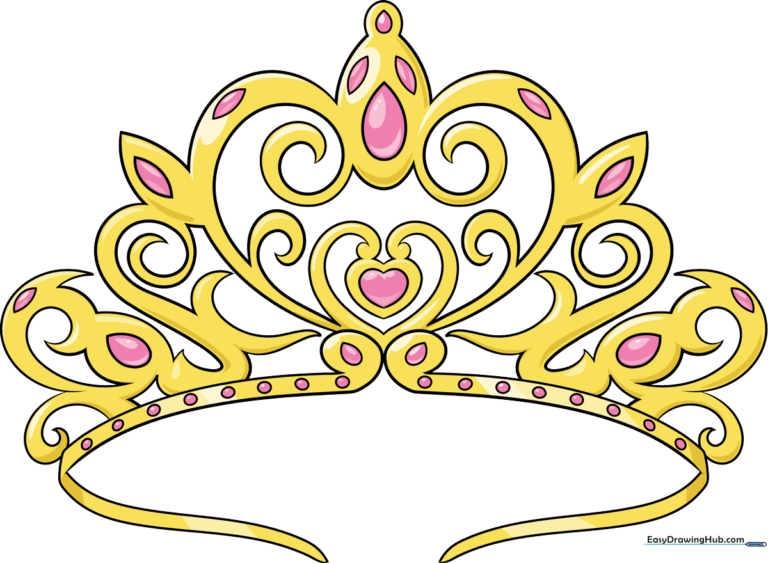
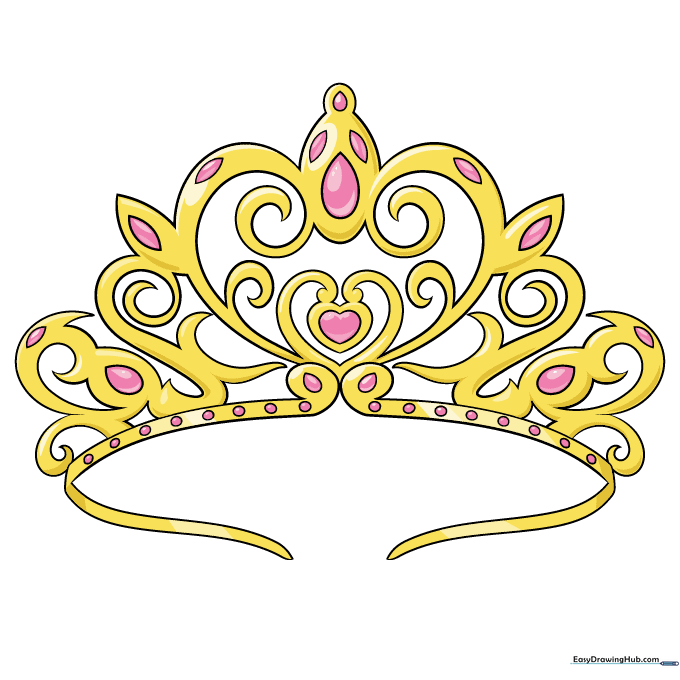
🎯 Final Result
Step-by-Step Instructions
Step 1: Sketching the Base Band

Start by drawing two long, gentle curved lines to form the base of your tiara. Add a small spiral at each end. Teacher's Tip: Keep these lines light; they act as your guide for the entire structure.
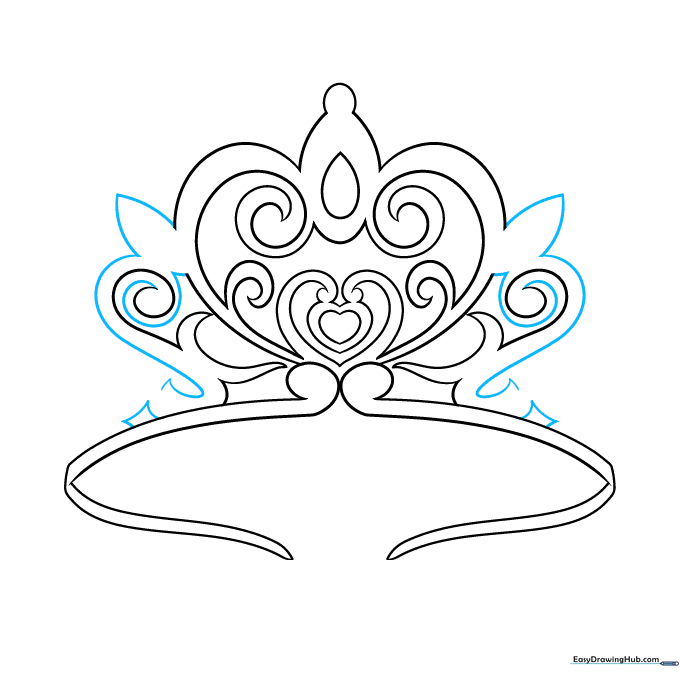
Step 2: Defining the Lower Frame
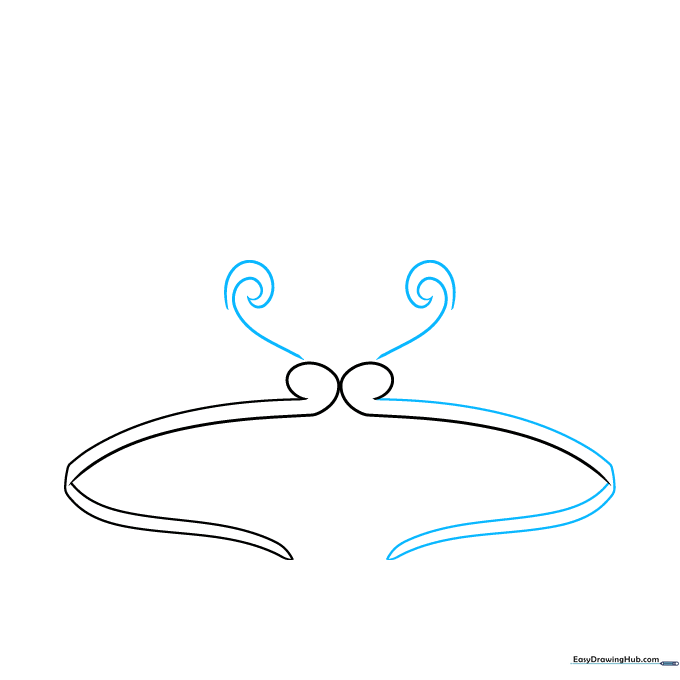
Connect the base with a smooth curved line. Above the ends, draw floating spiral shapes. Teacher's Tip: Don't worry if they aren't perfect; tiaras are ornate, so slight variations look natural.
Step 3: Adding the Center Heart
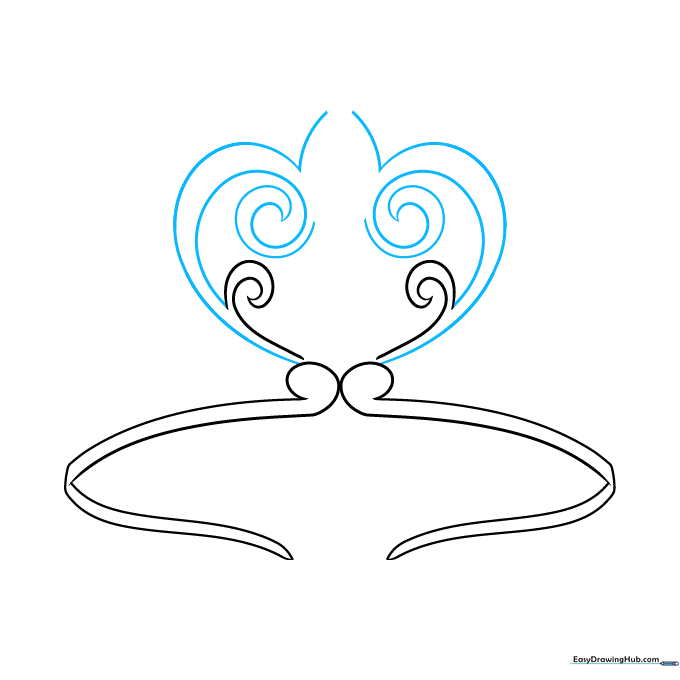
Draw a partial heart shape in the center. Extend curved lines upward from the opening. Teacher's Tip: Imagine you are drawing a soft 'M' shape to get the heart curve just right.
Step 4: Creating Decorative Spirals
Add a teardrop shape above the heart and connect it with curved lines. Teacher's Tip: Teardrops are just circles that come to a point—try drawing a small 'v' at the top to guide your pencil.
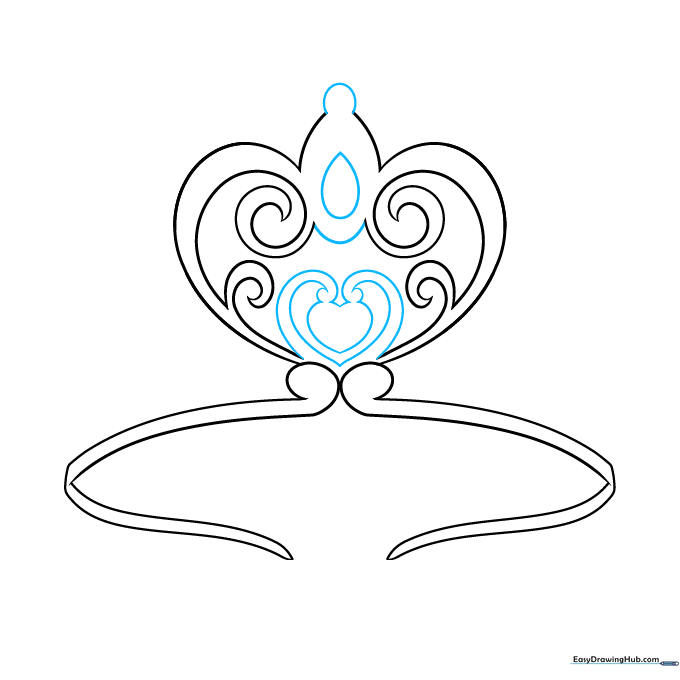
Step 5: Refining the Heart Detail

Draw a smaller heart inside the first one to create depth. Add crescent shapes around the sides. Teacher's Tip: This 'heart-within-a-heart' technique makes your drawing look professional and layered.
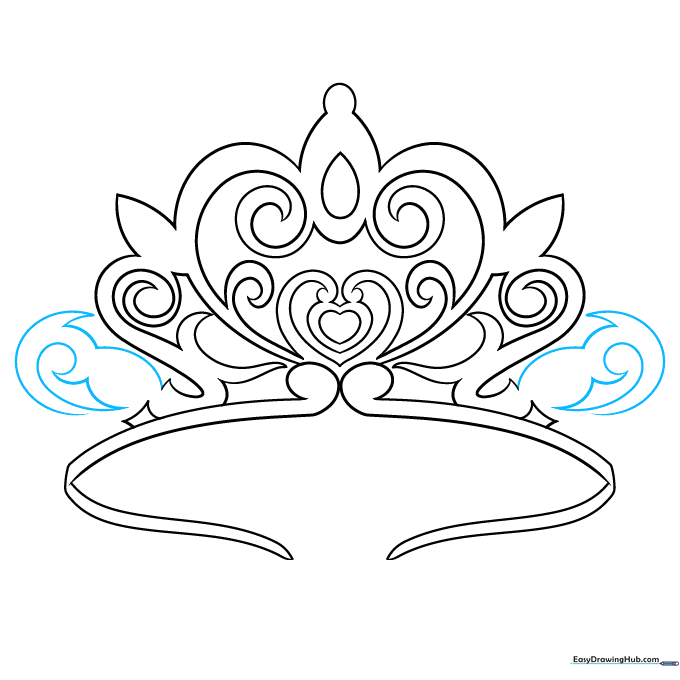
Step 6: Leaf-Shaped Accents
Use curved lines to enclose leaf-like shapes around your spirals. Teacher's Tip: Think of these as small petals; keep the points sharp to make the tiara look elegant.
Step 7: Balancing the Sides
Mirror your shapes on both sides to keep the crown balanced. Teacher's Tip: If one side looks different, that's okay! Real jewelry is often handmade and unique.
Step 8: Adding Gemstones
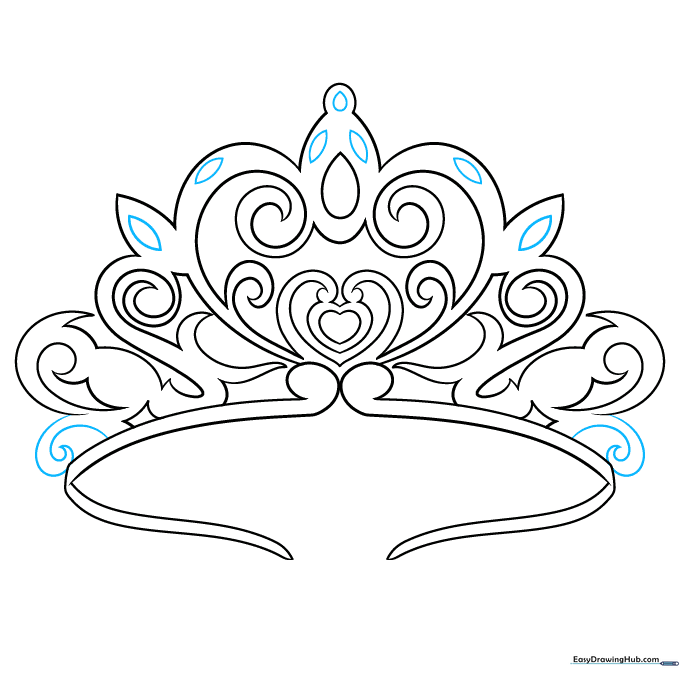
Draw teardrop-shaped gems at the top and double-pointed gems along the frame. Teacher's Tip: Draw these gems slightly larger than the lines to make them 'pop' as the focal point.
Step 9: Final Details
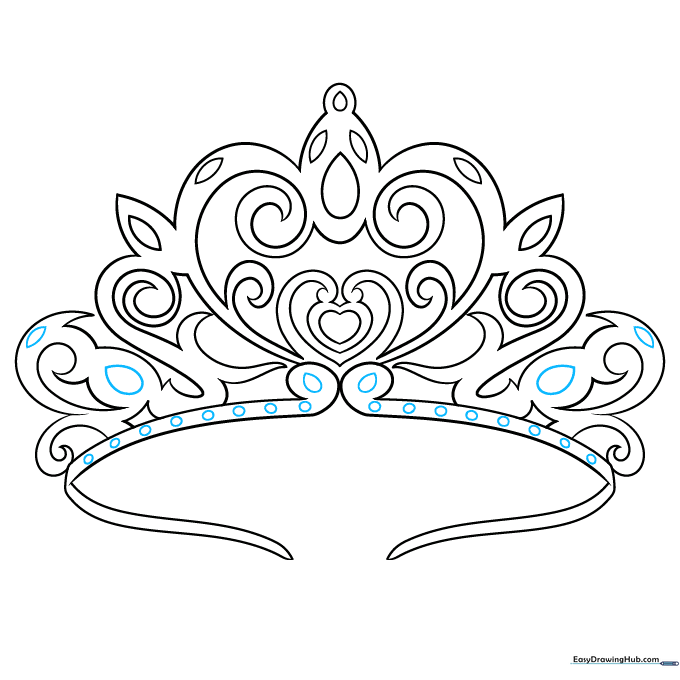
Add small circles along the base to represent pearls or tiny diamonds. Teacher's Tip: Use a steady hand to make these circles uniform for a polished look.
Step 10: Color Your Creation
Time to shine! Color your tiara with metallic shades and bright gems. Teacher's Tip: Leave a small white dot in the center of each gem to create a 'highlight' effect.
More Tutorials


