How to Draw a Tarsier: Easy 9-Step Guide for Kids
Bring this wide-eyed primate to life with our simple, kid-friendly drawing guide. Designed for ages 5 and up, this tutorial requires only a pencil, eraser, and paper to help young artists build confidence through basic shapes. Follow along to capture the tarsier's signature big-eyed look in just a few minutes.
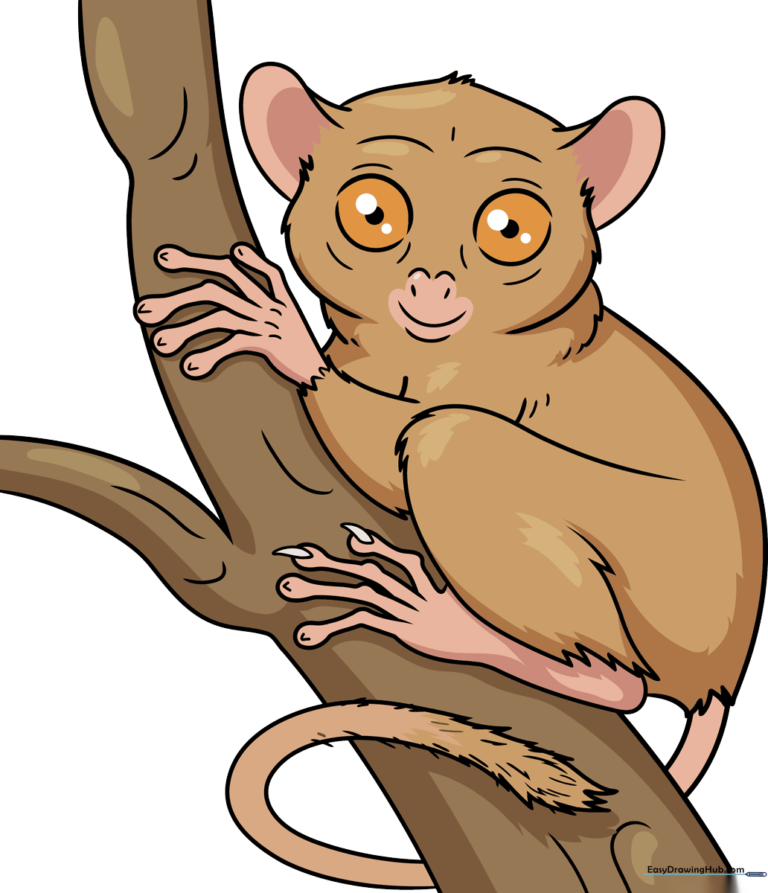
🎯 Final Result
Step-by-Step Instructions
Step 1: Sketching the Large Eyes

Start by drawing two large, nearly circular shapes for the eyes. Teacher's Tip: Leave a small gap in the corner of each circle to give them a natural, open look. Add a dark, round pupil in the center of each, then sketch the small nose and mouth below.
Step 2: Defining the Face and Ears

Use overlapping curved lines to create the ears, then add jagged, short strokes around the face to suggest soft fur. Teacher's Tip: Keep your pencil strokes light and feathery here to make the fur look fluffy rather than sharp.
Step 3: Shaping the Head and Back
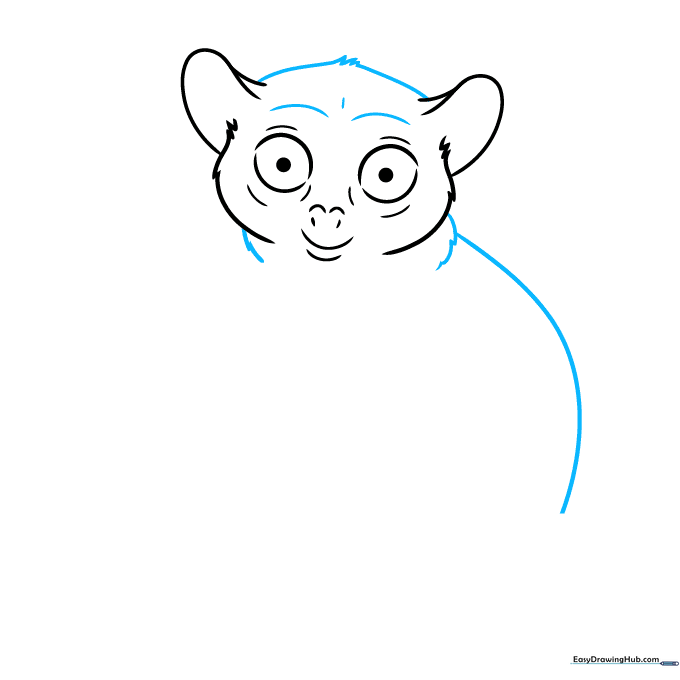
Connect the top of the head and neck using jagged, rhythmic lines. Extend a long, smooth curved line down to form the back. Teacher's Tip: Imagine the tarsier is hunched over; this curve helps show its natural posture.
Step 4: Sketching the Arms
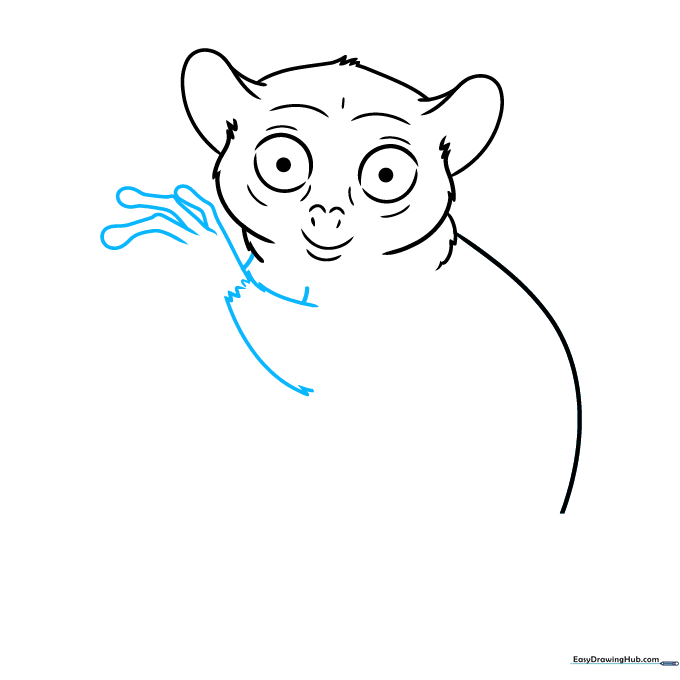
Draw the arm using two long, parallel lines that meet at a zig-zag wrist. For the fingers, use curved lines that double back, ending in small circles. Teacher's Tip: Tarsiers have long fingers; don't be afraid to make them look slightly exaggerated!
Step 5: Adding the Legs
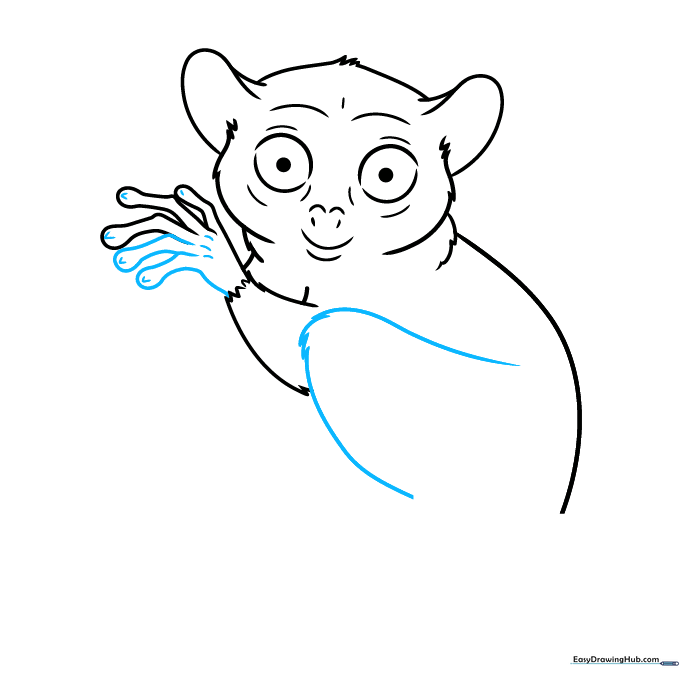
Complete the hand with more fingers, then sketch the rear leg using jagged lines to imply fur texture. Teacher's Tip: Focus on the joints—make them look slightly angled to show the tarsier is ready to jump.
Step 6: Drawing the Feet
Trace the bottom of the leg with jagged lines for fur. Draw the foot with long, curved lines for the toes, ensuring they have bulbous, rounded tips. Teacher's Tip: These rounded tips help the tarsier grip branches, so make them look soft and padded.
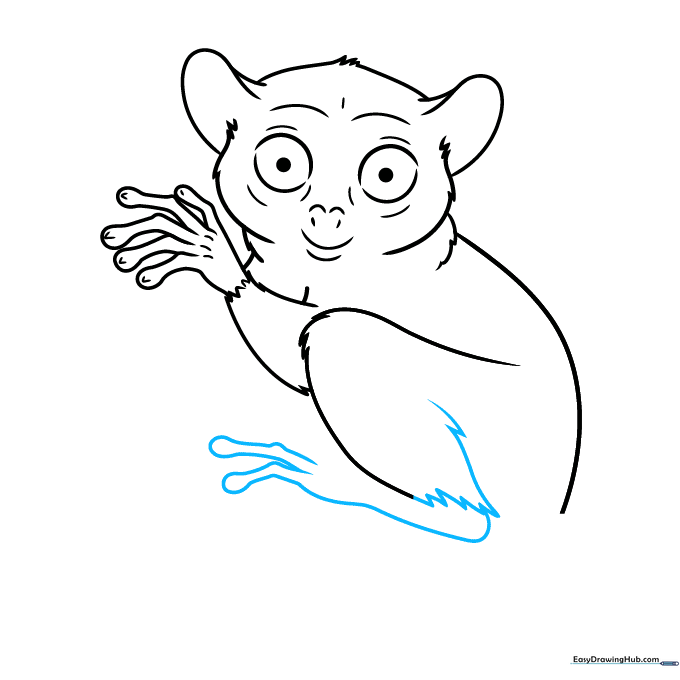
Step 7: Clinging to the Branch
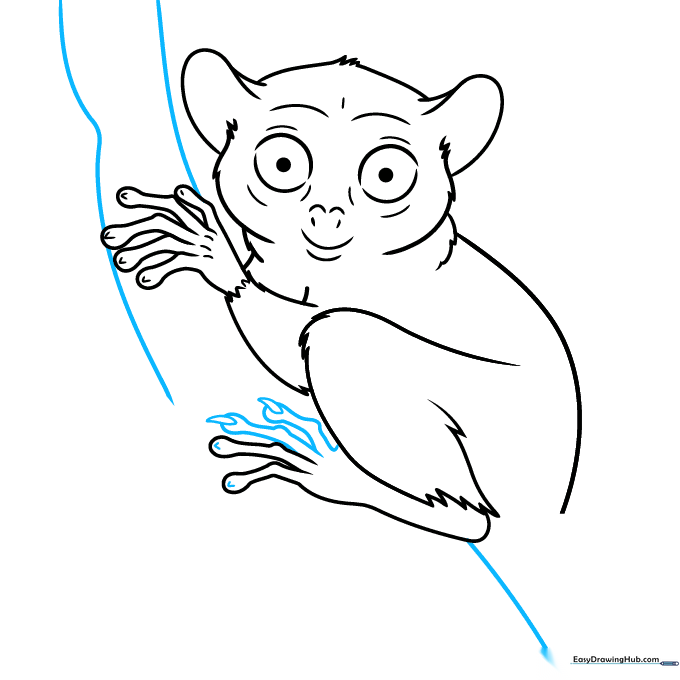
Finish the toes with small 'U' shapes and teardrop claws. Now, draw a sturdy tree branch beneath the feet using long, horizontal curved lines. Teacher's Tip: Make the branch look slightly uneven to give it a natural, organic feel.
Step 8: Adding the Tail

Complete the branch with a 'V' shaped cleft for detail. Then, draw the long tail using parallel curved lines, adding jagged fur at the base. Teacher's Tip: A long, sweeping tail helps balance the drawing's composition.
Step 9: Final Texturing
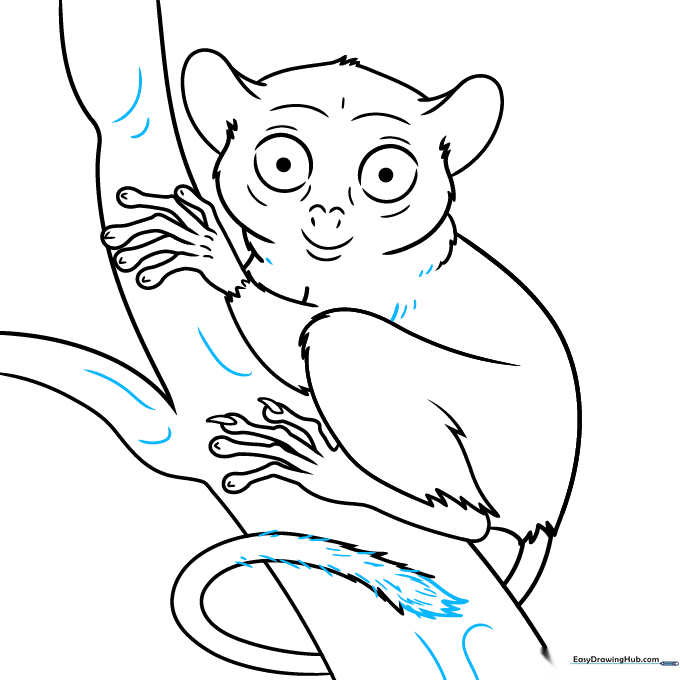
Finish the tail tip with short, quick strokes to create a brush-like texture. Add similar small lines across the body and the tree bark to bring the drawing to life. Teacher's Tip: Don't overdo it—a few well-placed lines are better than too many!
Step 10: Bringing it to Life with Color
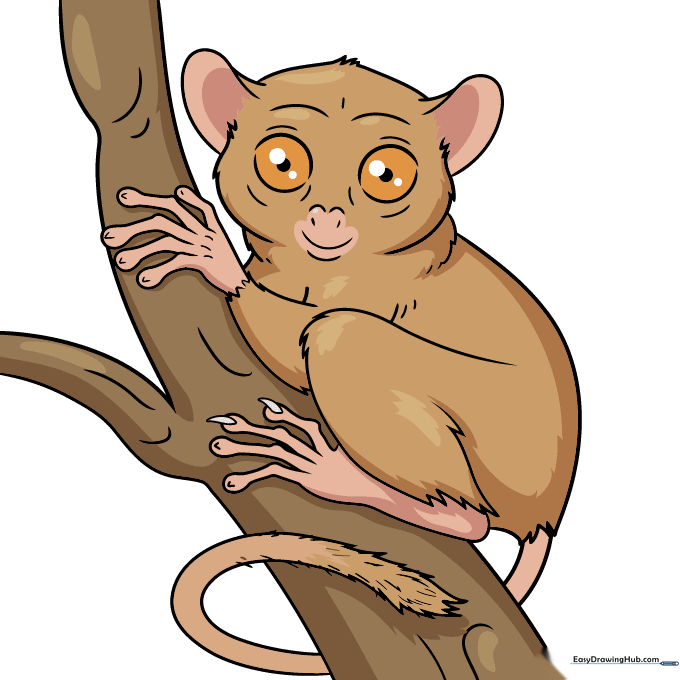
Your outline is ready! Use soft light browns for the fur and vibrant orange for those iconic, large eyes. Teacher's Tip: Use a lighter shade of brown for the belly and a darker shade for the back to add depth to your drawing.
More Tutorials


