How to Draw a Tank: Easy 10-Step Guide for Kids
Ready to build your own armored vehicle? This tutorial is perfect for young artists ages 6+ who want to master mechanical drawing. All you need is a pencil, an eraser, and a piece of paper to get started on this fun, structured challenge.
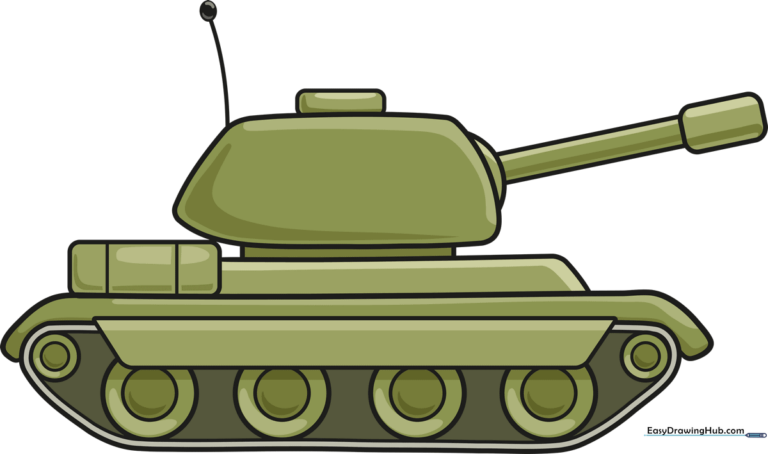
🎯 Final Result
Step-by-Step Instructions
Step 1: Sketching the Turret Base
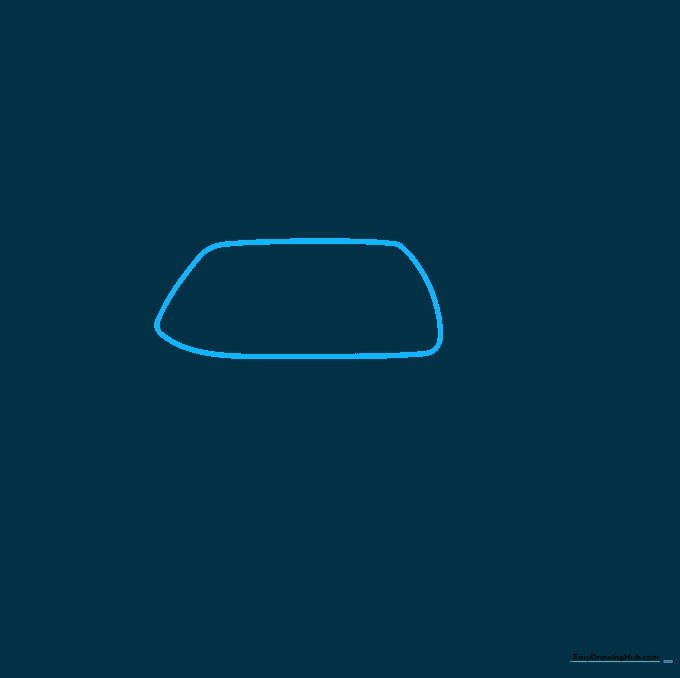
Use a soft, curved line to draw an irregular shape for the turret. Teacher's Tip: Keep your pencil pressure light so you can easily adjust the shape if it looks a bit lopsided.
Step 2: Adding Turret Details
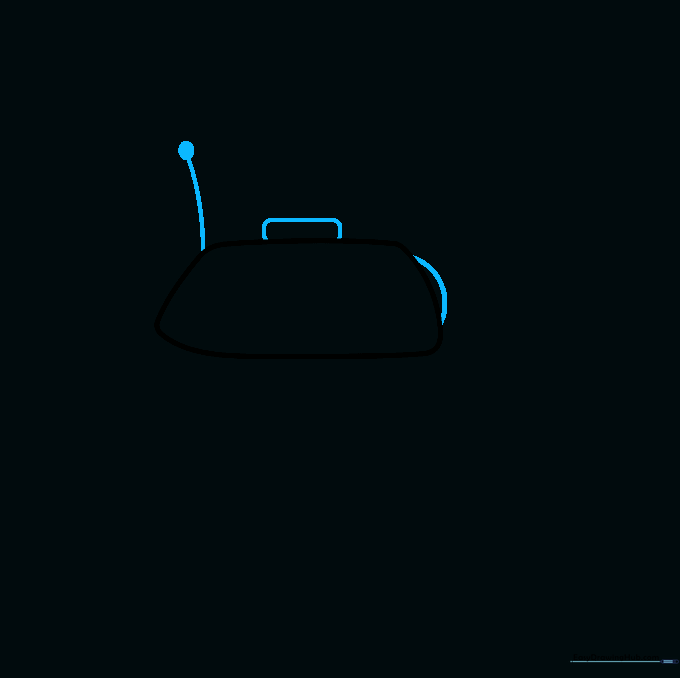
Outline a partial circle on one side and a rounded rectangle on top. Add a vertical line for the antenna with a small dot at the tip. Tip: Use a ruler if you struggle with straight lines, but freehand adds more character!
Step 3: Drawing the Gun Barrel
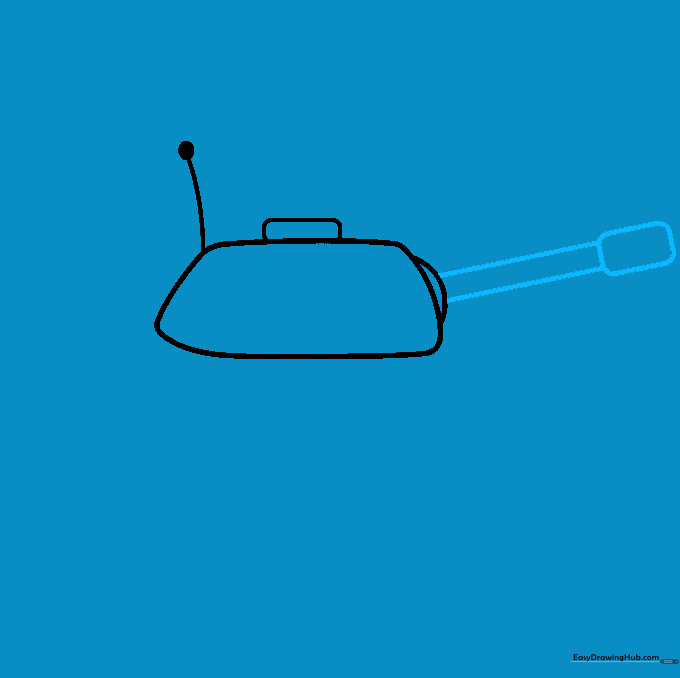
Extend two parallel lines outward to create the barrel, finishing with a rounded rectangle for the muzzle. Tip: Make sure the barrel is long enough to look powerful, but not so long that it goes off the page!
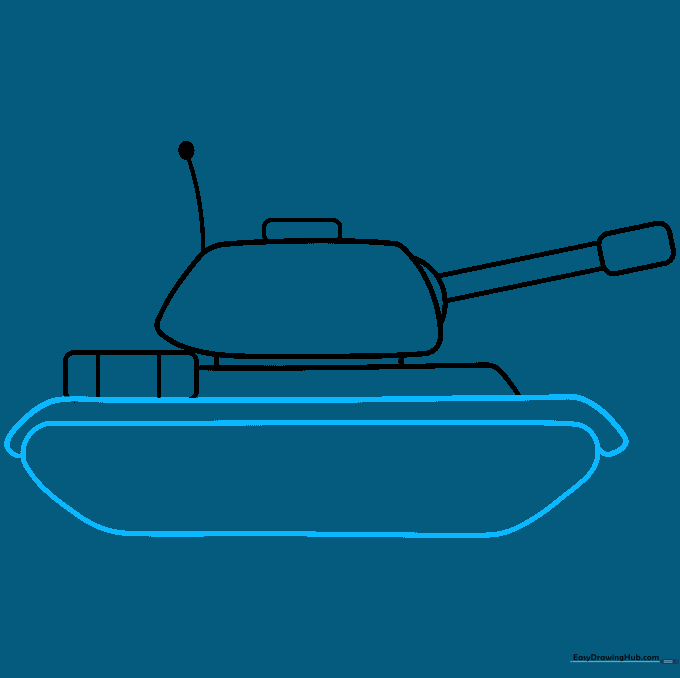
Step 4: Constructing the Upper Hull
Draw a curved line beneath the turret and connect it with short lines. Add a rounded rectangle behind the turret with vertical lines for texture. Tip: These vertical lines represent the engine vents, so keep them evenly spaced.
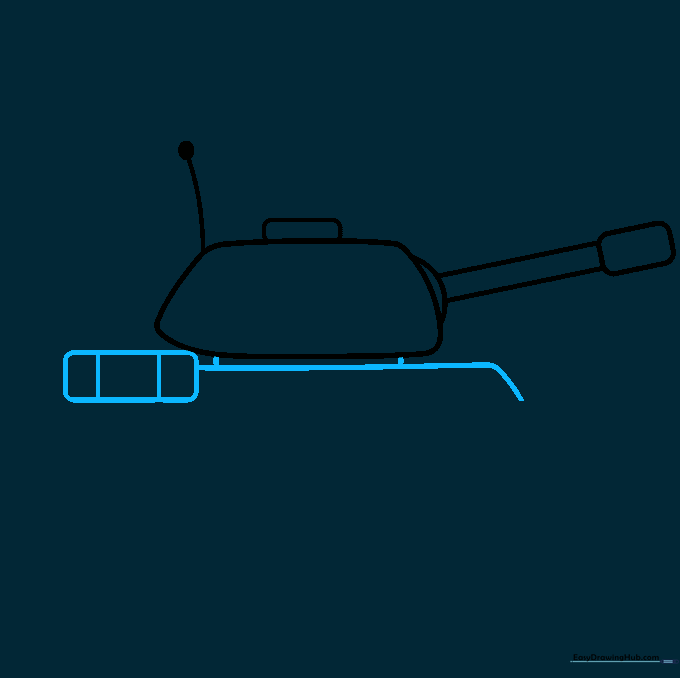
Step 5: Adding the Side Skirt
Draw a long curved line along the bottom of the hull to create the wheel track housing. Tip: Think of this as the 'fender' that protects the tank's treads.
Step 6: Defining the Treads
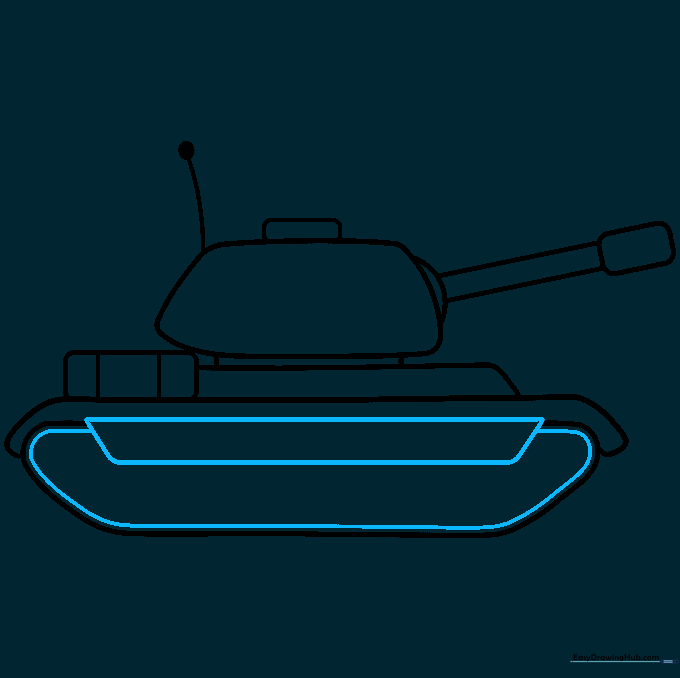
Draw an upside-down trapezoid overlapping the skirt, then add a parallel curved line. Tip: This creates the illusion of depth for the heavy metal tracks.
Step 7: Drawing the Drive Sprocket
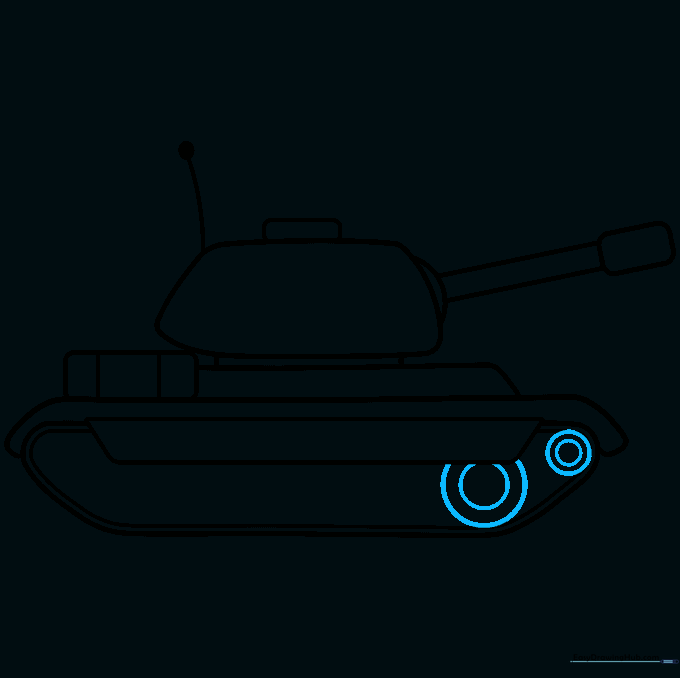
Add two small circles at the front for the drive sprocket, then start your first road wheel. Tip: Use a circular object like a coin to trace if you find freehand circles tricky!
Step 8: Adding Road Wheels
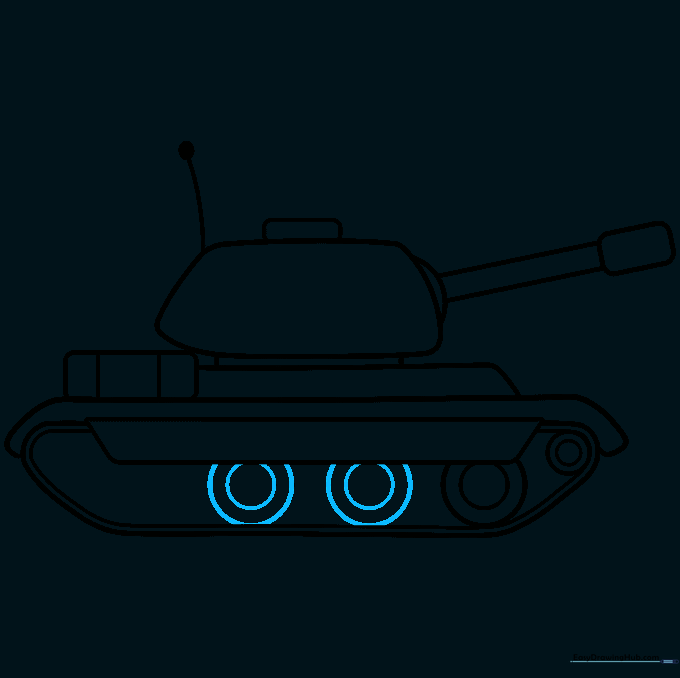
Draw two more road wheels as circles within circles. Tip: Keep them aligned in a row to make the tank look sturdy and realistic.
Step 9: Completing the Wheels
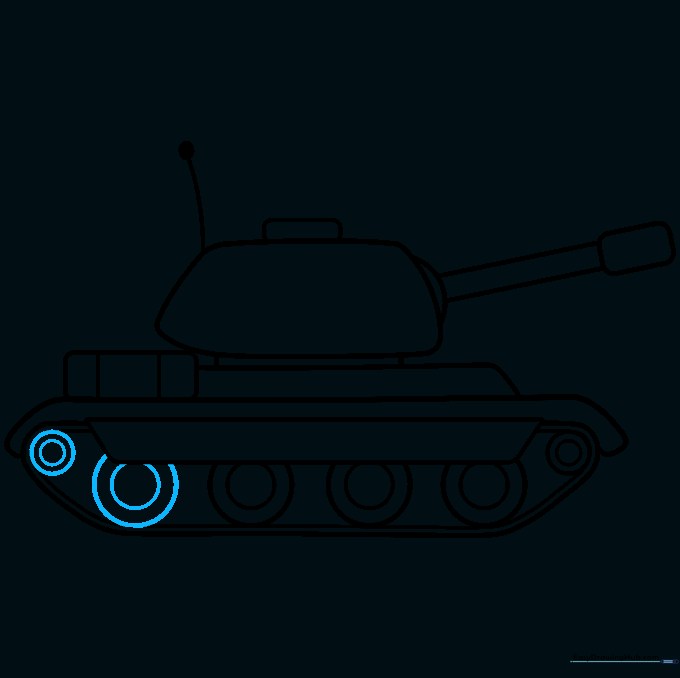
Finish the final road wheel and the rear sprocket using double circles. Tip: Check that all wheels are roughly the same size for a professional look.
Step 10: Coloring Your Tank
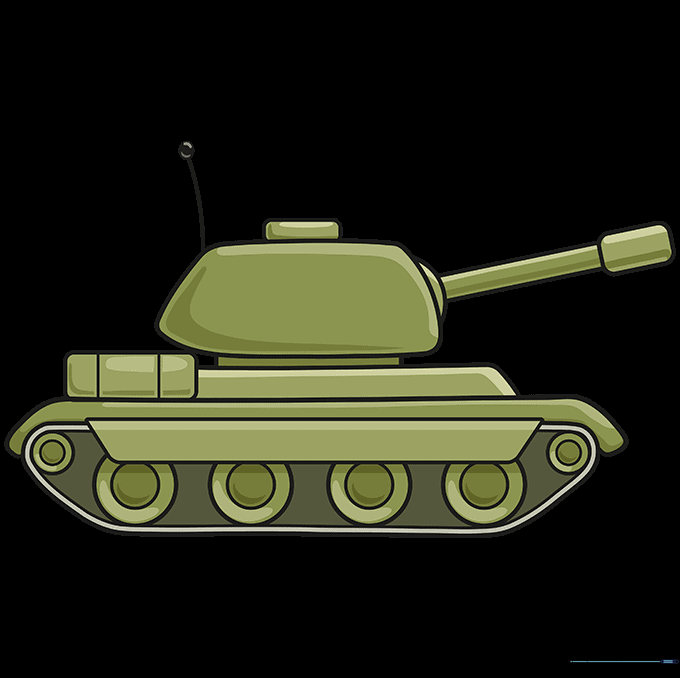
Bring your tank to life with color! Use olive greens, browns, or greys for a classic camouflage look. Tip: Use light pressure with your colored pencils to create gradients for a metallic effect.
More Tutorials


