How to Draw a Sword in Stone: Easy 10-Step Guide
Ready to create your own legendary scene? This step-by-step guide is perfect for young artists ages 6+ looking to master fantasy landscapes. You will only need a pencil, an eraser, and your favorite markers to bring this iconic sword and stone to life.
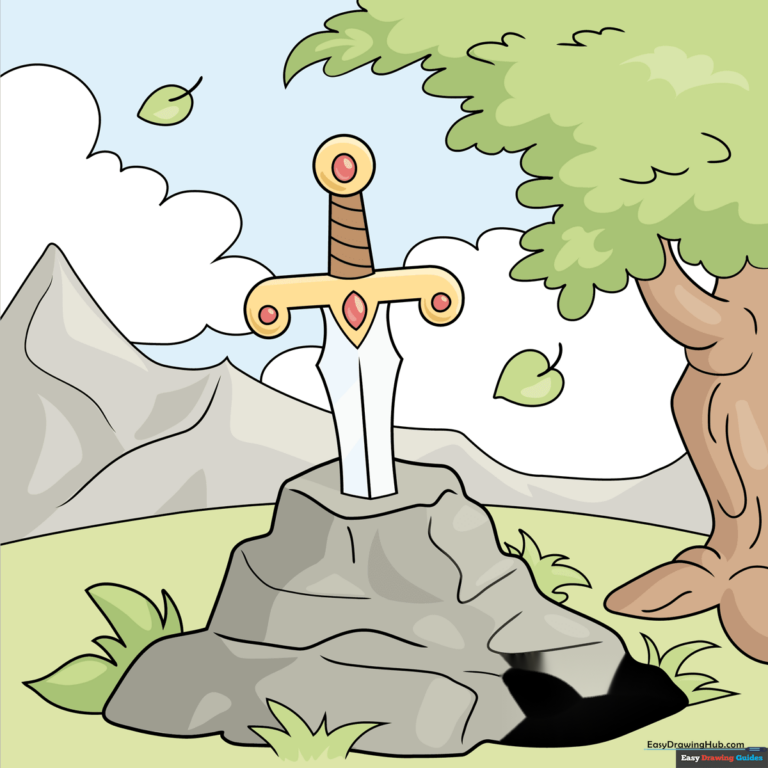
🎯 Final Result
Step-by-Step Instructions
Step 1: Sketching the Blade and Stone Base

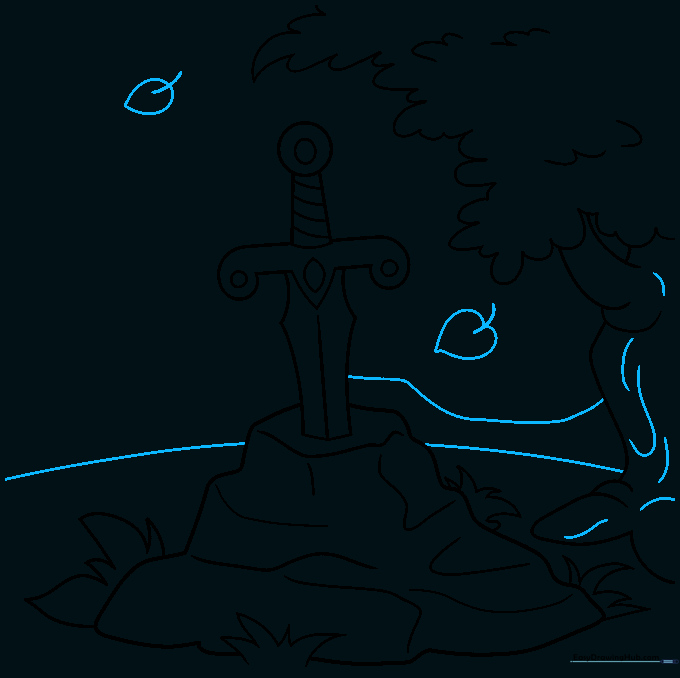
Draw the sword blade emerging from the rock using two slightly curved lines that meet at a point. Below, sketch a wavy, irregular shape for the stone. Teacher's Tip: Keep your pencil lines very light here so you can easily erase the overlapping lines inside the stone later.
Step 2: Adding the Crossguard
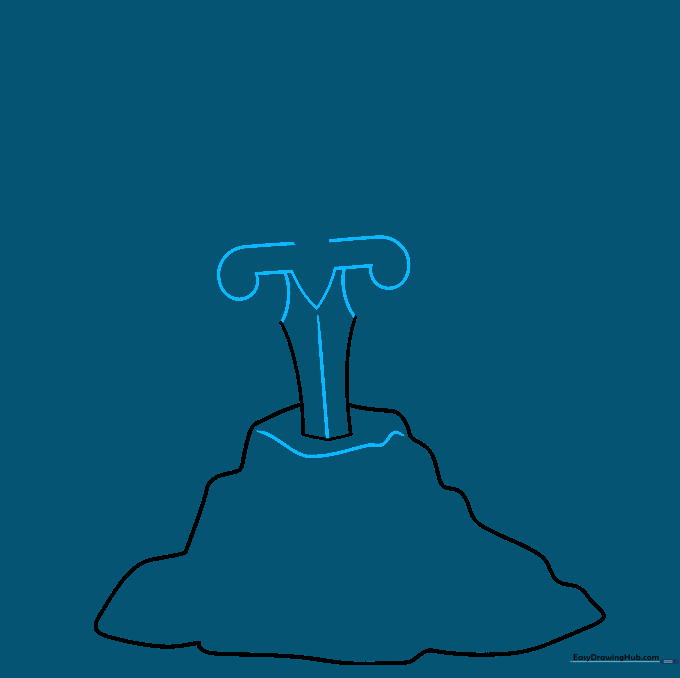
Draw a curved line across the top of the stone to show its flat surface. Add the crossguard by drawing a triangle at the base of the blade and extending lines outward. Tip: Use a ruler if you struggle with straight lines, but freehand adds a nice 'ancient' character to the sword.
Step 3: The Grip and Pommel

Draw a circle for the pommel at the top of the handle, then connect it to the crossguard with two parallel lines. Add diagonal lines across the grip for texture. Tip: Imagine you are wrapping leather around the handle—keep your lines evenly spaced for a professional look.
Step 4: Texturing the Stone and Grass

Add curved contour lines to the stone to make it look solid and heavy. At the base, draw small, sharp 'V' shapes to create tufts of grass. Tip: Vary the height of your grass tufts to make the ground look natural rather than perfectly uniform.
Step 5: Expanding the Landscape

Continue adding grass around the stone and begin sketching the gnarled roots of a nearby tree. Tip: Use overlapping lines for the roots to show that they are growing into the ground.
Step 6: Drawing the Tree Trunk
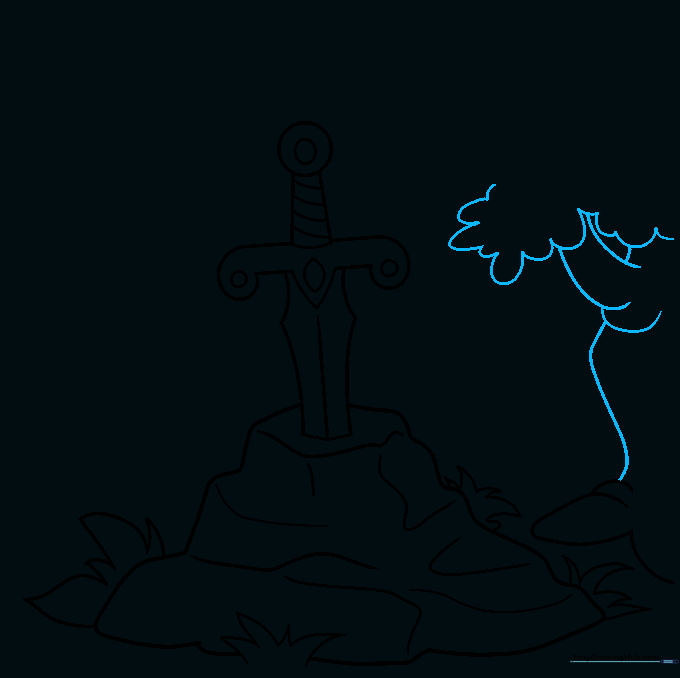
Sketch a thick, winding tree trunk using overlapping curved lines. Use short, bumpy strokes at the top to suggest the beginning of the leafy crown. Tip: Don't worry about making the trunk perfectly straight; trees in nature are full of twists and turns!
Step 7: Adding the Leafy Crown
Use a series of soft, cloud-like curved lines to outline the tree's canopy. Add a few extra loops inside the shape to represent clusters of leaves. Tip: Keep your hand loose and bouncy to create a natural, fluffy texture for the leaves.
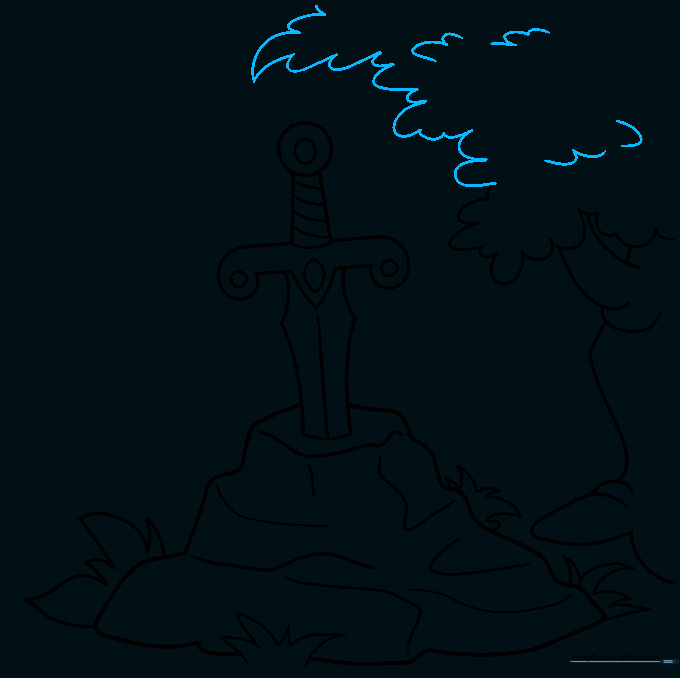
Step 8: Horizon and Falling Leaves
Draw a long, gentle curve behind the stone to create the horizon line. Add a few falling leaves by drawing small shapes with a center vein. Tip: Falling leaves add a sense of movement and 'magic' to your drawing.
Step 9: Mountains and Clouds

Complete the background by drawing jagged, triangular shapes for distant mountains. Add a few soft, puffy clouds in the sky. Tip: Use lighter pressure for the mountains to make them look further away than the sword.
Step 10: Bring Your Drawing to Life with Color
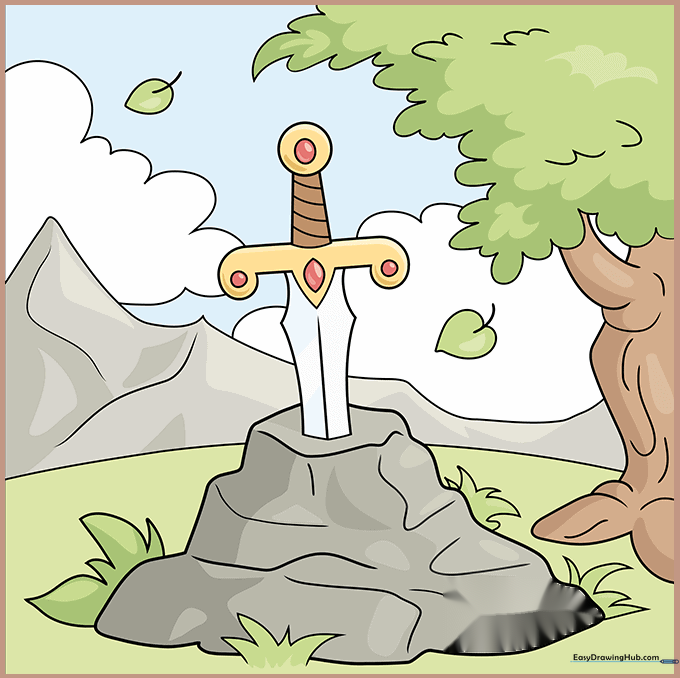
Time to color! Use metallic grays for the sword, earthy browns for the stone and tree, and vibrant greens for the grass. Tip: Try using a darker shade of gray on one side of the sword to create a simple shadow effect.
More Tutorials


