How to Draw a Stegosaurus: Easy 9-Step Guide for Kids
Bring the prehistoric world to life with this fun, easy-to-follow Stegosaurus drawing guide. Designed for young artists ages 5 and up, this activity requires only a pencil, paper, and an eraser. Follow these steps to build confidence and master the iconic shape of this gentle herbivore.
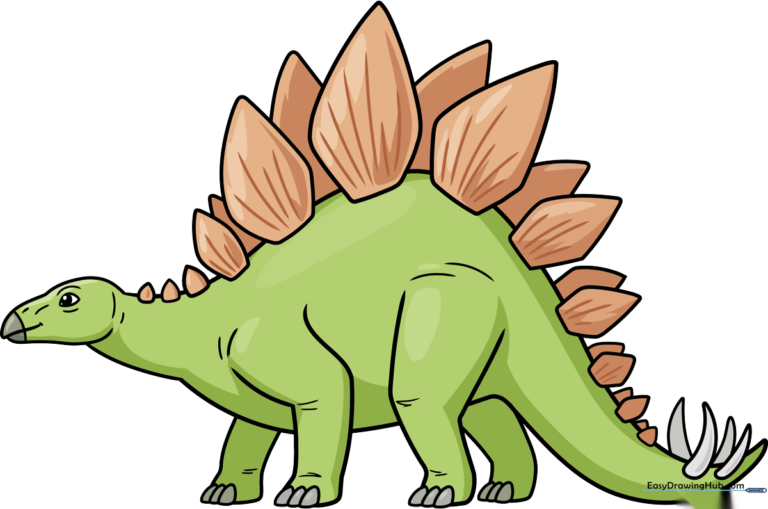
🎯 Final Result
Step-by-Step Instructions
Step 1: Sketching the Head
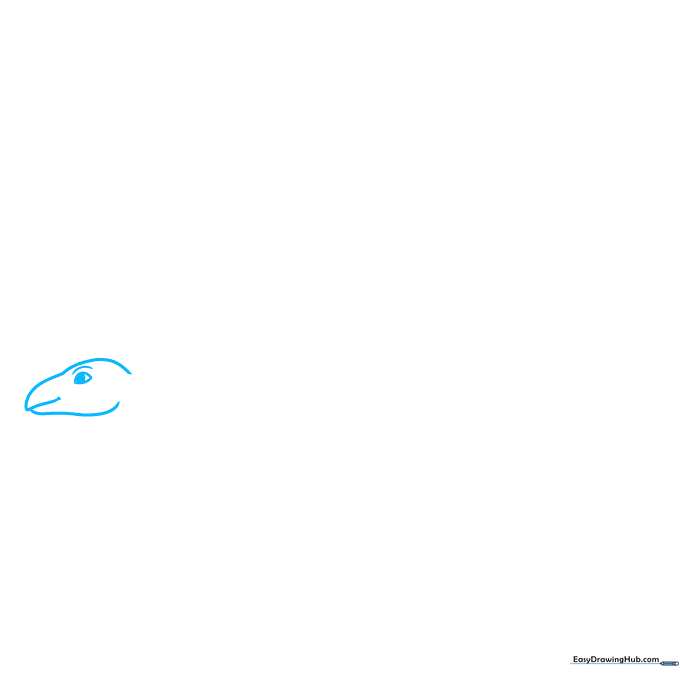
Draw the head using three gentle curved lines to form the snout and crown. Add an almond-shaped eye with a round pupil inside. Teacher's Tip: Keep your pencil pressure light here so you can easily adjust the shape if you make a mistake!
Step 2: Defining the Body Outline
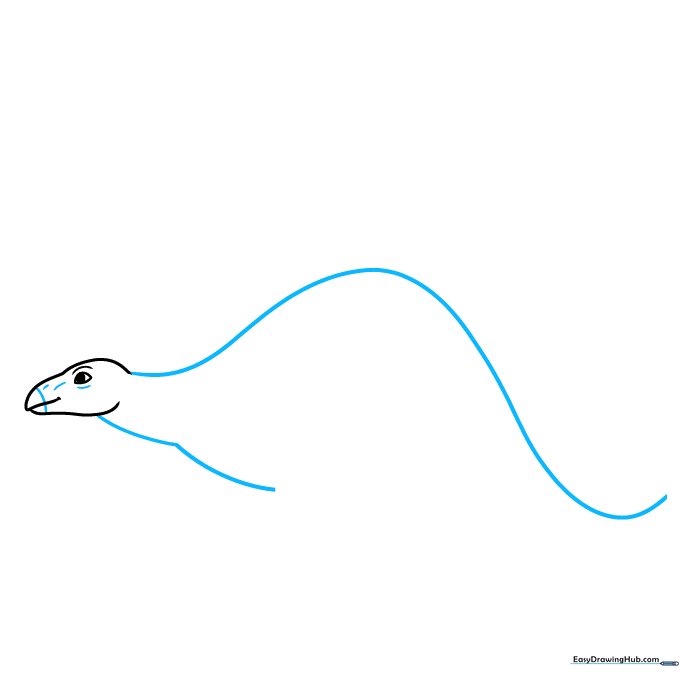
Extend long, sweeping curved lines from the head to create the neck, back, and tail. Add a few short lines near the eye to give your dinosaur character. Teacher's Tip: Think of this as drawing a long, smooth 'S' shape for the back.
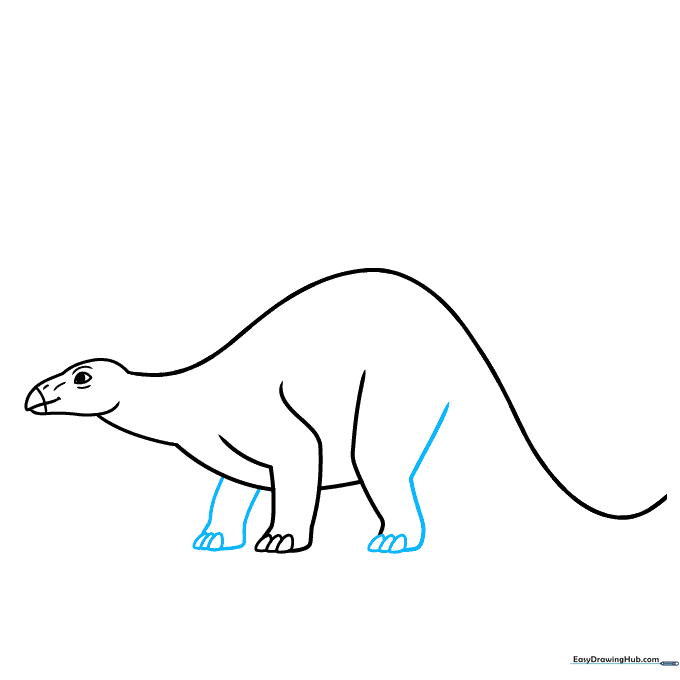
Step 3: Drawing the Front Legs
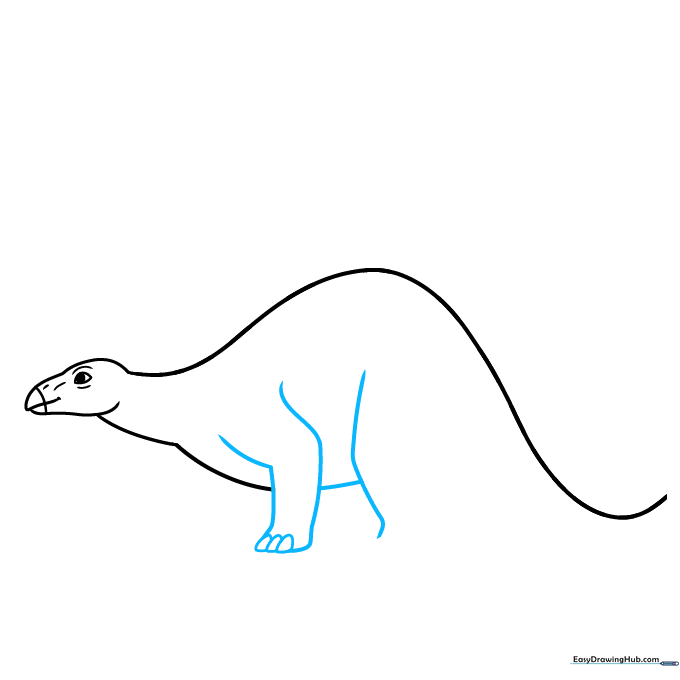
Sketch the rectangular front legs and add small, rounded triangles for the toes. Connect them with a curved line to form the belly. Teacher's Tip: Make the legs slightly wider at the bottom to give your dinosaur a sturdy, grounded look.
Step 4: Adding the Back Legs
Repeat the process for the back legs, ensuring they look solid and strong. Add the same triangular toe details. Teacher's Tip: If the legs look a bit stiff, try curving the lines slightly to show muscle movement.
Step 5: Completing the Tail
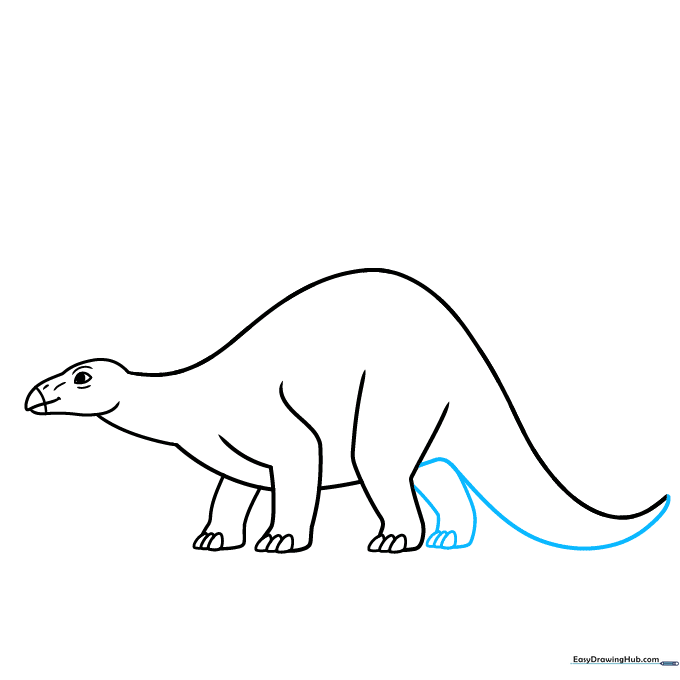
Draw a long, tapering curve from the back leg to the tip of the tail. Add the final hind leg. Teacher's Tip: Use a smooth, continuous motion for the tail to make it look like it's swishing!
Step 6: Sketching the Back Plates
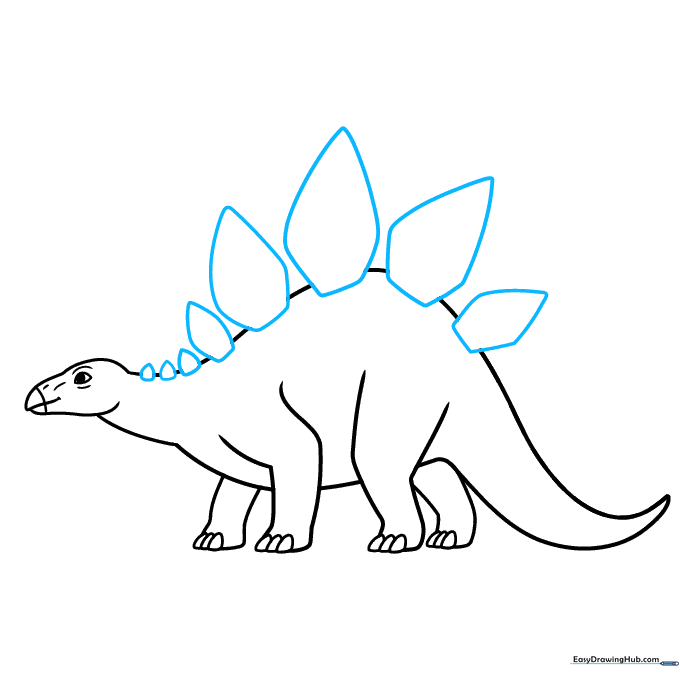
Add the iconic bony plates along the back using rounded pentagon shapes. Start small at the neck, get larger in the middle, and shrink again toward the tail. Teacher's Tip: Don't worry about making them perfect; nature is rarely symmetrical!
Step 7: Adding Depth to Plates
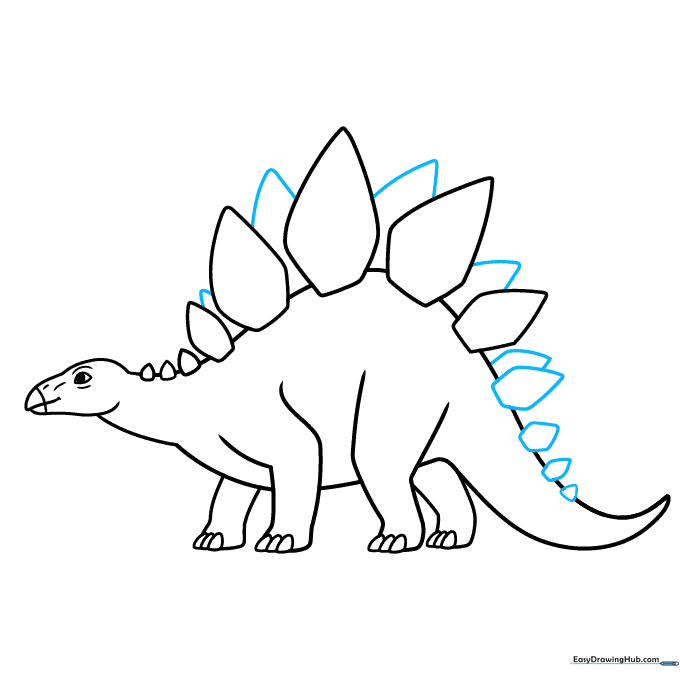
Use small 'V' shapes between the plates to suggest a second row hidden behind the first. This adds a 3D effect to your drawing. Teacher's Tip: Keep these lines faint so they don't overpower the main outline.
Step 8: Adding Tail Spikes
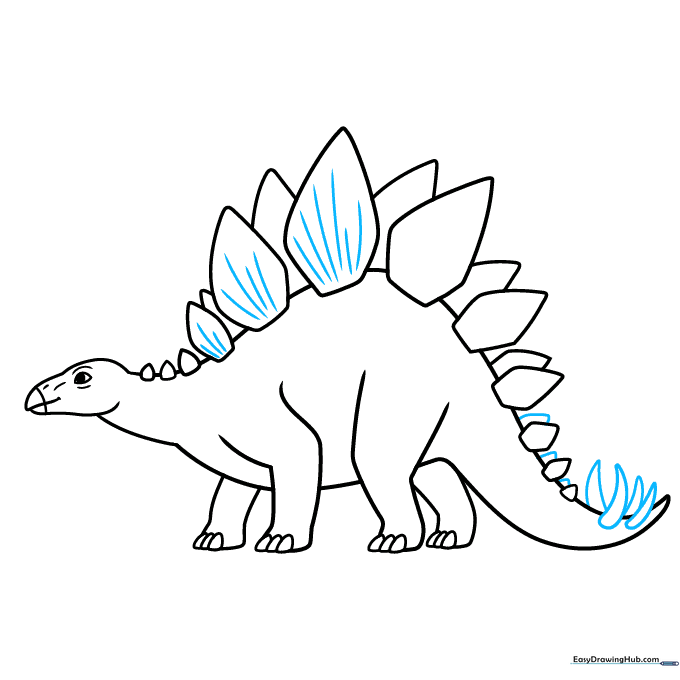
Draw the sharp, triangular spikes on the end of the tail. Add some curved lines to the plates to give them texture. Teacher's Tip: These spikes were for defense, so make them look nice and pointy!
Step 9: Final Details
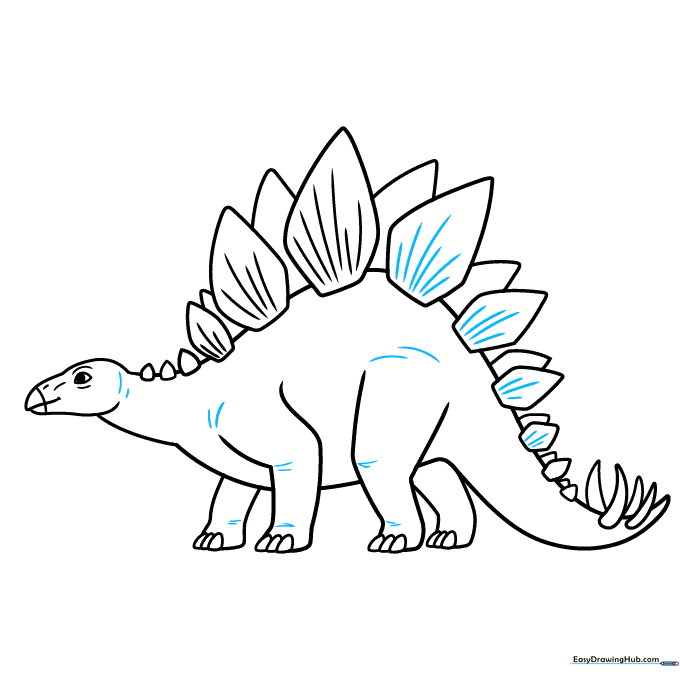
Add small contour lines at the joints—shoulders, hips, and ankles—to give your dinosaur a realistic, muscular look. Erase any stray guidelines. Teacher's Tip: Now you're ready to add color and bring your Stegosaurus to life!
Step 10: Time to Color!
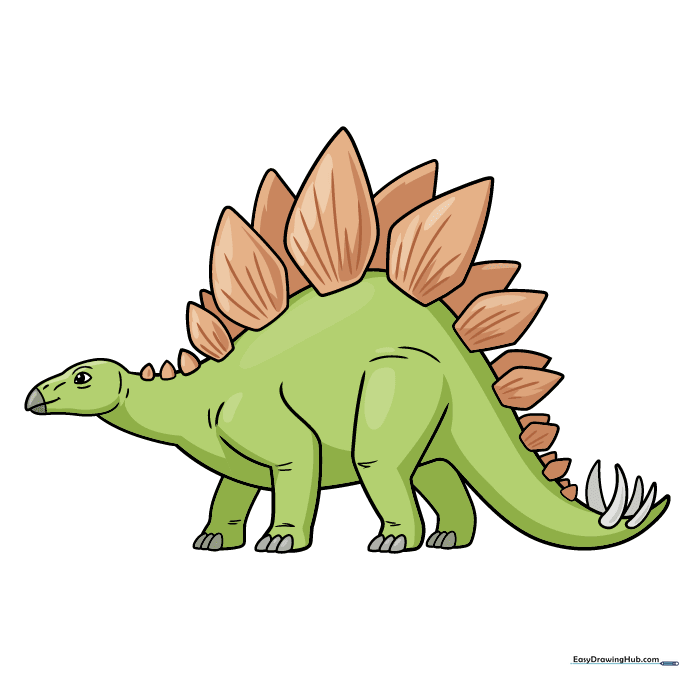
Your outline is complete! Use your favorite colors to fill in your dinosaur. Will you go with classic forest greens or something bright and imaginative? There's no right answer in art—have fun with it!
More Tutorials


