How to Draw a Spooky Forest: Easy 10-Step Guide
Create a chilling, atmospheric landscape perfect for Halloween projects or creative storytelling. This tutorial is designed for young artists ages 6+ and requires only a pencil, eraser, and paper. Follow these steps to master drawing gnarled trees and eerie silhouettes while building your confidence in landscape composition.
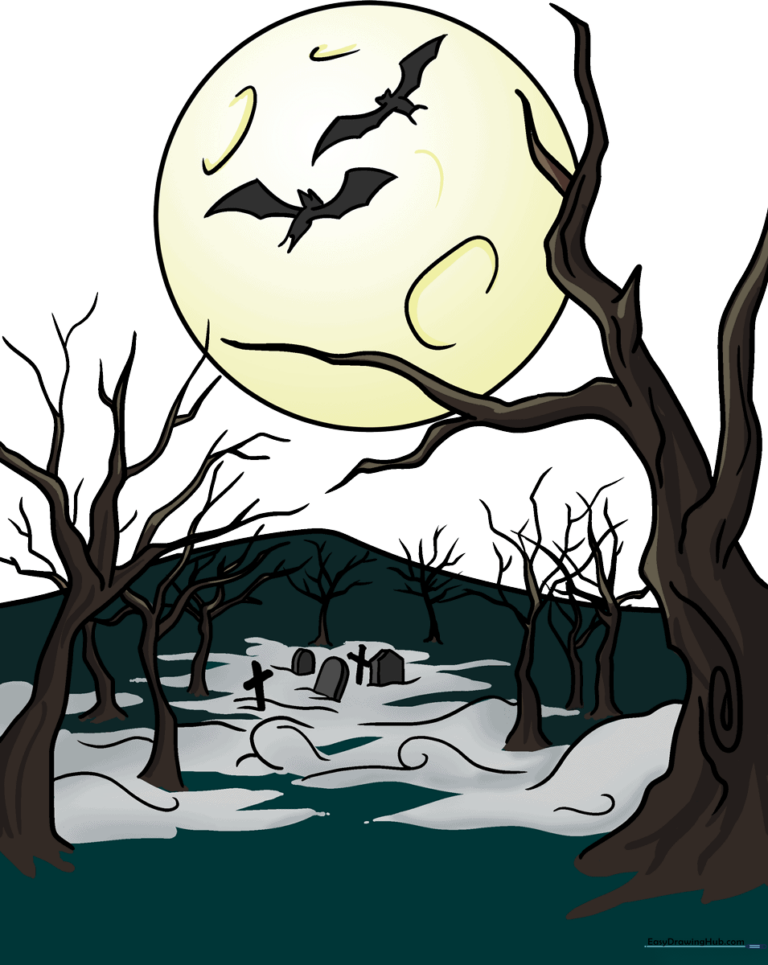
🎯 Final Result
Step-by-Step Instructions
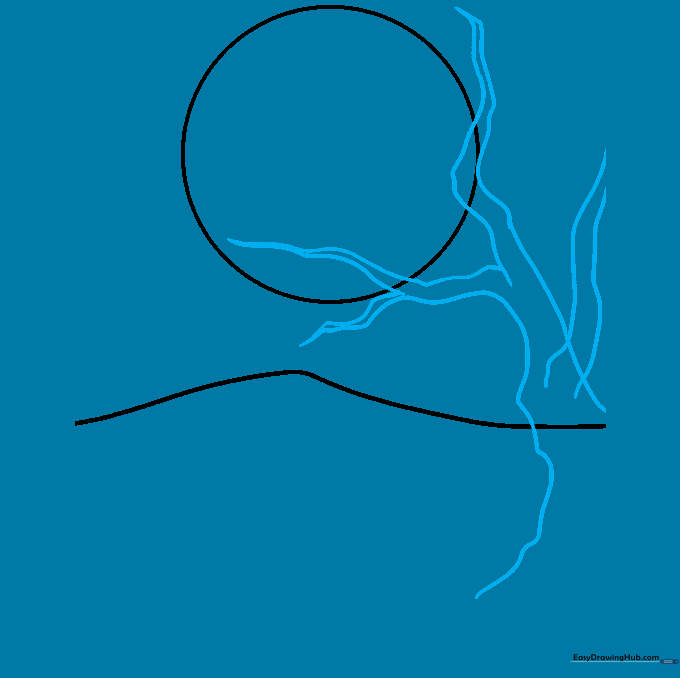
Step 1: Setting the Scene

Draw a large circle for the full moon and a curved line across the bottom for the horizon. Teacher's Tip: Keep your pencil pressure light here so you can easily erase the horizon line inside the moon later.
Step 2: Sketching the First Tree
Draw two wavy, curved lines to form the trunk, meeting in a 'V' at the top to start your branches. Teacher's Tip: Use long, sweeping motions to make the tree look tall and spindly.
Step 3: Adding Texture and Roots

Add smaller branches and a root at the base using curved lines. Add texture to the bark with tiny spirals. Teacher's Tip: Don't make the bark too uniform; random squiggles look more like old, weathered wood.
Step 4: Growing the Forest

Draw a second tree using the same 'V' branch technique. Teacher's Tip: Vary the height of your trees to create depth in your drawing.
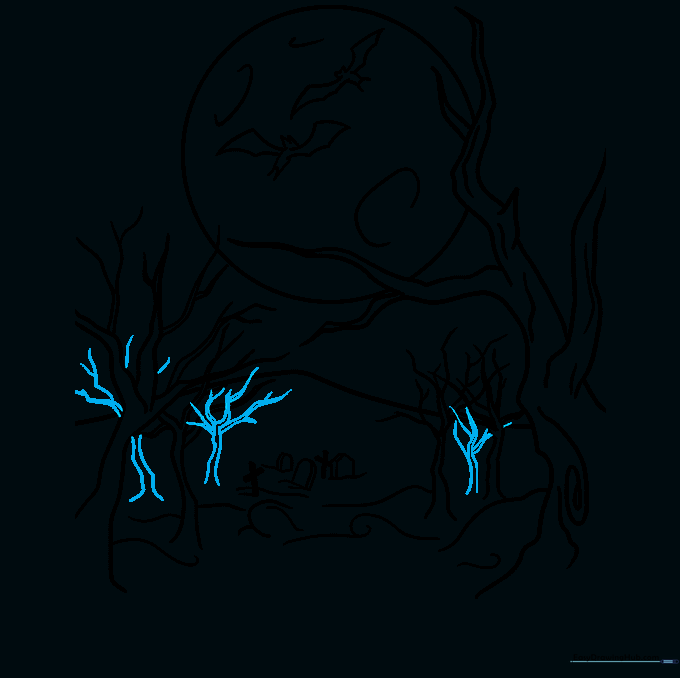
Step 5: Creating Depth
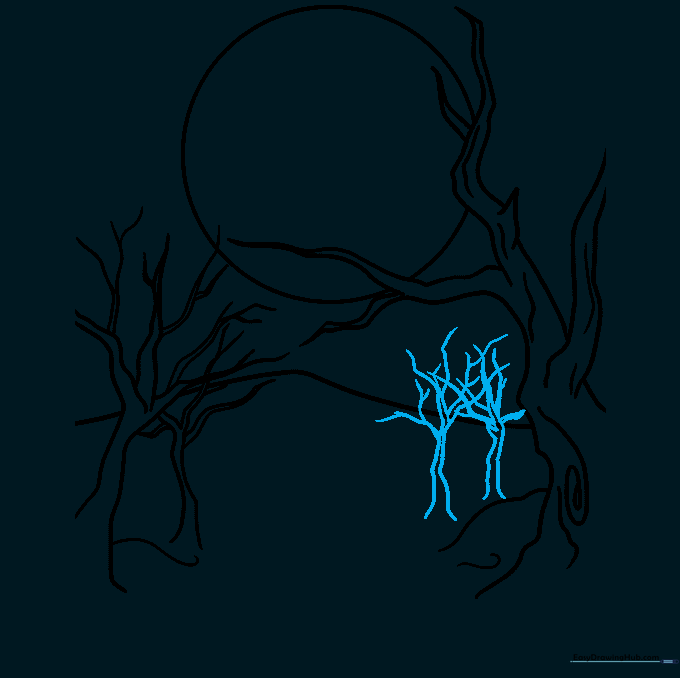
Draw smaller trees in the background. Teacher's Tip: Objects further away should be drawn smaller and higher up on the page to create a sense of distance.
Step 6: Adding a Graveyard
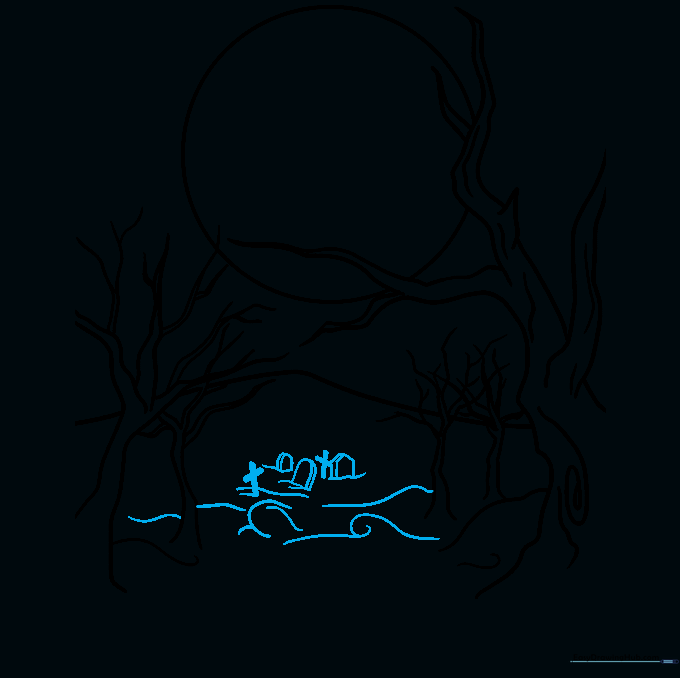
Sketch rounded and pentagon-shaped tombstones with 't' shapes for crosses. Teacher's Tip: Use parallel lines on the sides of the stones to give them a 3D, blocky look.
Step 7: Moon Details and Bats
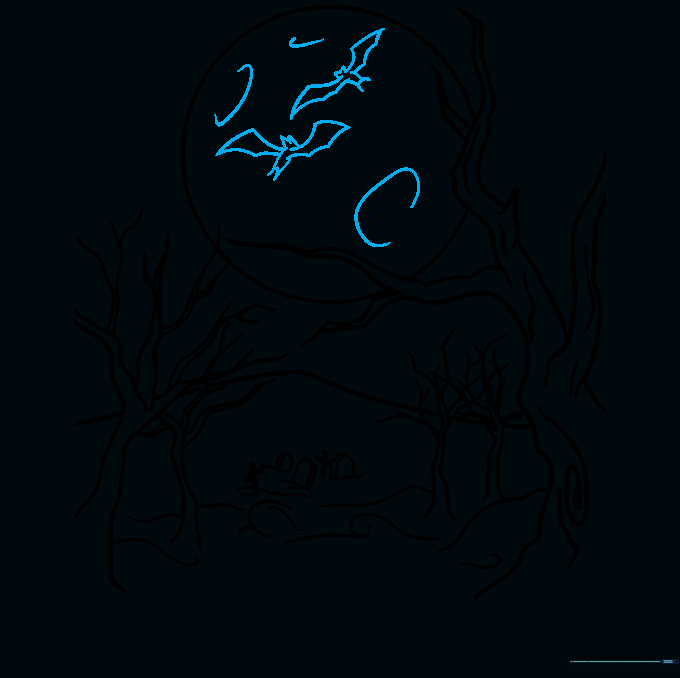
Add craters to the moon with 'C' shapes and draw small bats flying. Teacher's Tip: Keep the bats simple—a 'W' shape with rounded wings works perfectly for a silhouette.
Step 8: Filling the Forest
Add more distant trees to fill the space. Teacher's Tip: Overlap some branches to make the forest look dense and tangled.
Step 9: Final Touches

Add final details to the furthest trees to complete the forest floor. Teacher's Tip: Use a darker pencil for the trees in the foreground to make them 'pop' against the background.
Step 10: Coloring Your Masterpiece
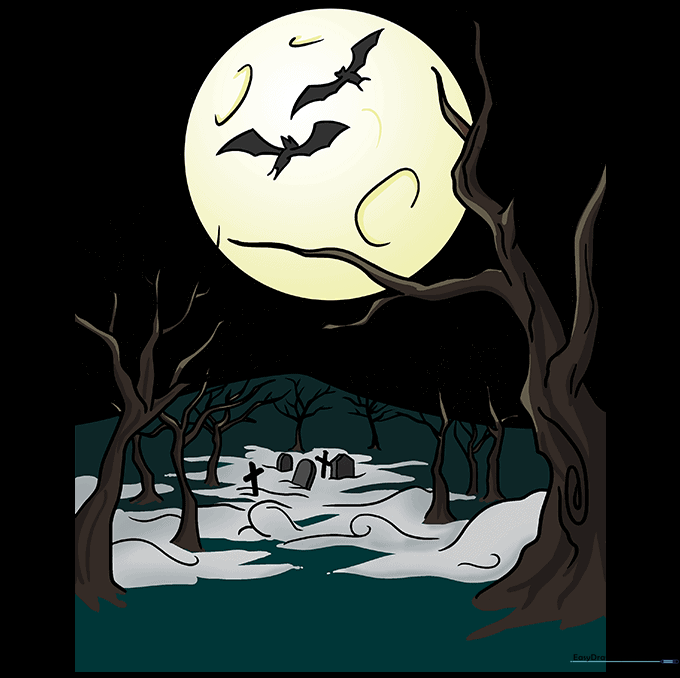
Color your forest using dark blues, purples, and blacks. Teacher's Tip: Use a yellow or pale orange for the moon to create a high-contrast, spooky glow.
More Tutorials


