How to Draw a Spaceship: Easy 10-Step Guide for Kids
Blast off into creativity with this fun, screen-free drawing activity! Designed for young artists ages 5 and up, this tutorial uses basic geometric shapes to build a classic flying saucer. All you need is a pencil, an eraser, and your favorite markers to bring your space explorer to life.
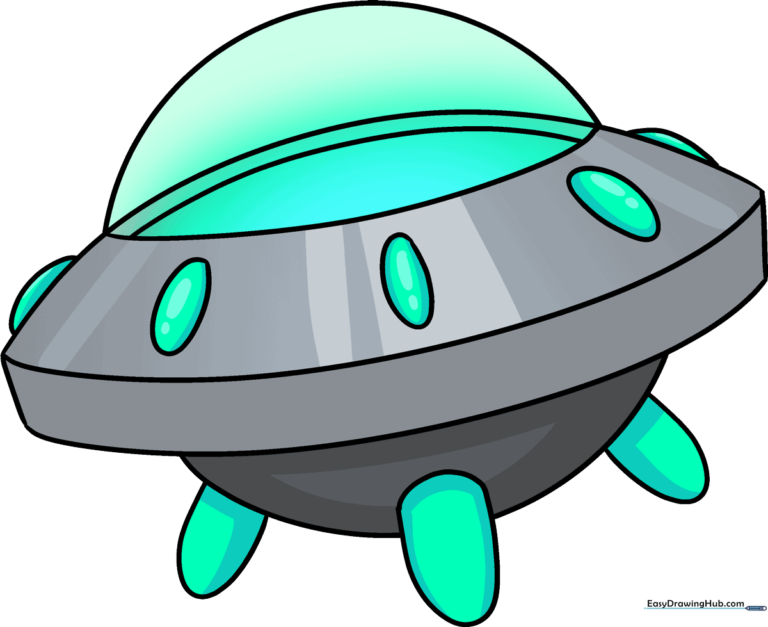
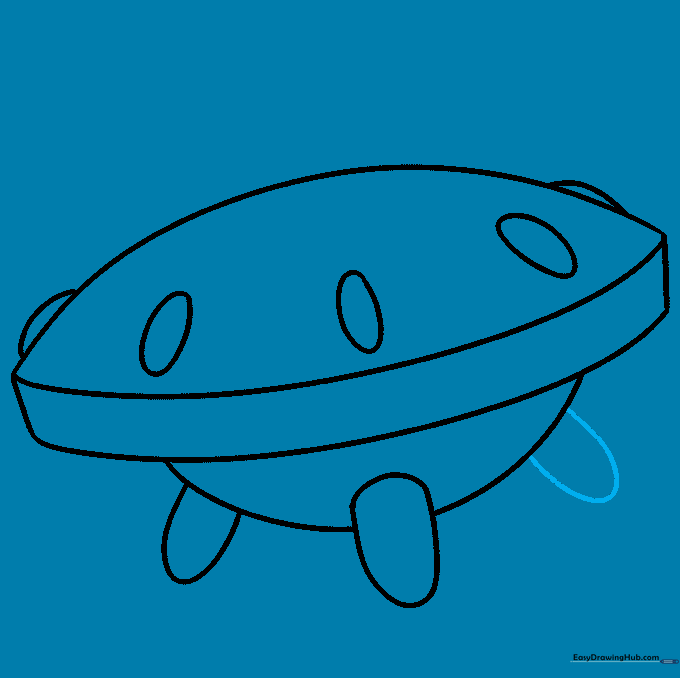
🎯 Final Result
Step-by-Step Instructions
Step 1: Sketching the Saucer Base

Draw two long, gentle curves to create the main body of the saucer. Connect them at the ends with short, slanted straight lines. Teacher's Tip: Keep these lines light; they act as your 'map' for the rest of the ship.
Step 2: Adding Depth
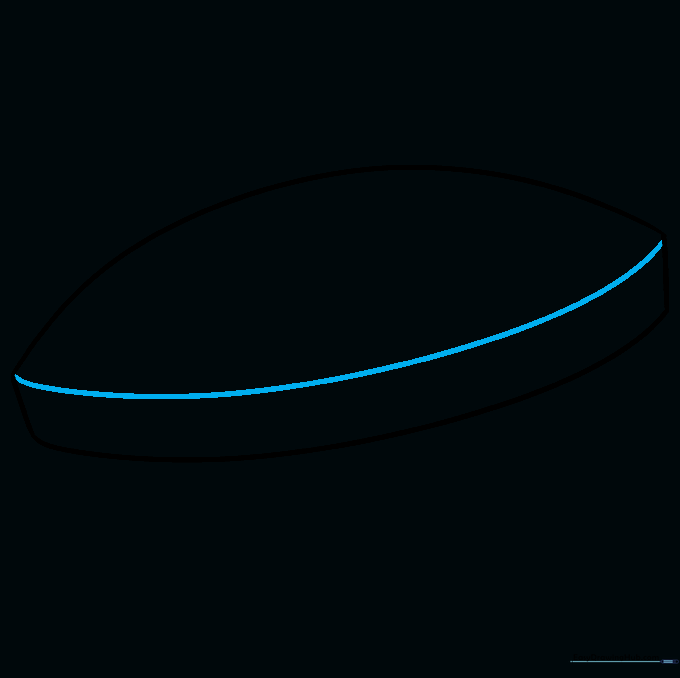
Draw a long, sweeping curved line connecting the tops of your side lines. This creates the 'lid' of the saucer and gives it a 3D look. Tip: Imagine you are drawing a bowl turned upside down.
Step 3: Designing the UFO Lights
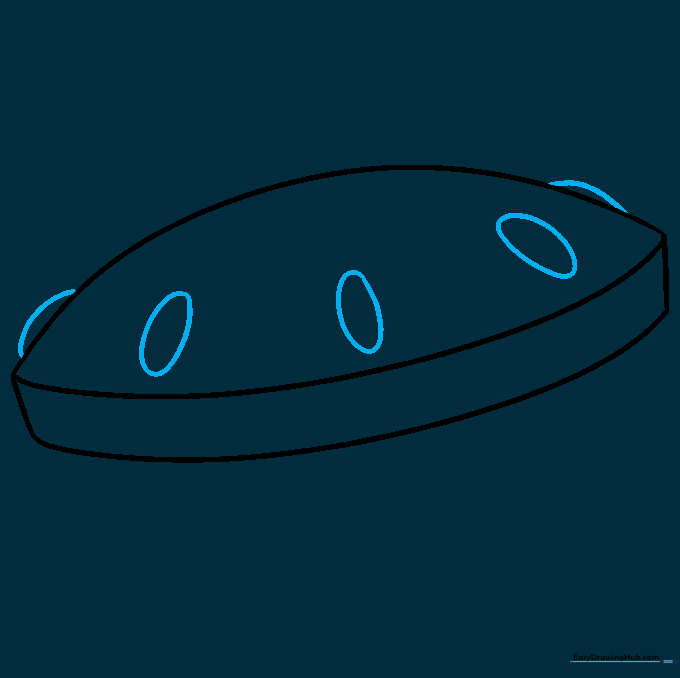
Add several small ovals along the middle section of the ship. These are your classic glowing UFO lights! Tip: Space them out evenly to make the ship look balanced.
Step 4: Preparing the Landing Gear
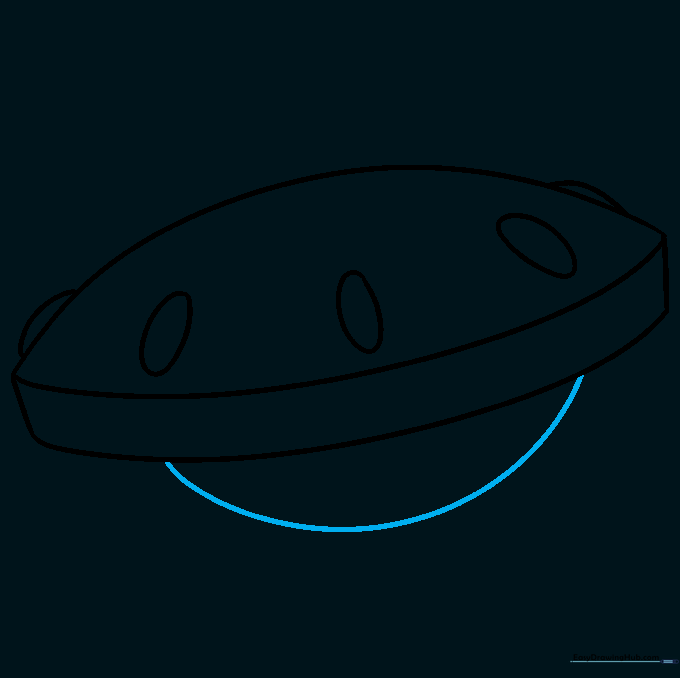
Draw a large, shallow curved line beneath the ship to act as the base for your landing gear. Tip: Keep this curve smooth so the ship looks like it's resting on a flat surface.
Step 5: First Landing Prop
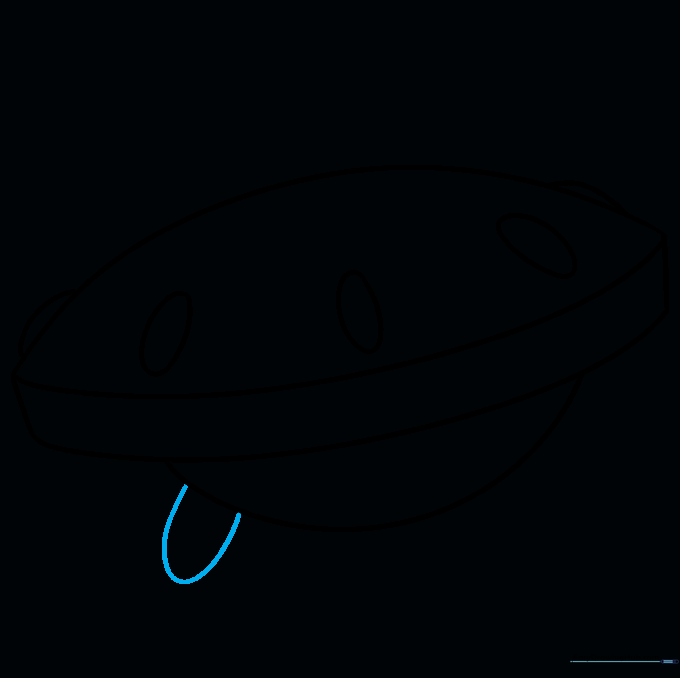
Extend a curved line from the base and loop it back to form a sturdy 'foot' for the ship. Tip: Think of this as a small, rounded triangle shape.
Step 6: Second Landing Prop
Add a second landing prop on the other side. If you make a mistake, just use your eraser—that's what it's for! Tip: Make sure the two props are roughly the same size.
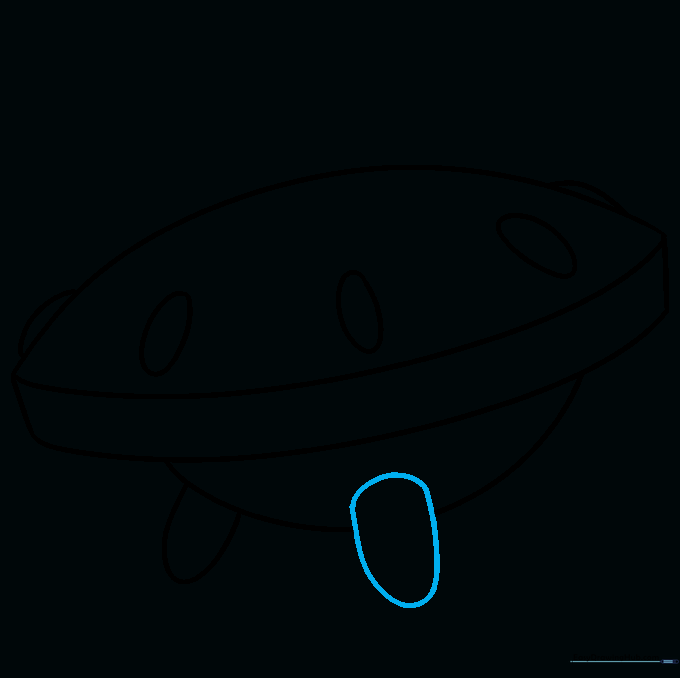
Step 7: Final Landing Prop
Draw the third landing prop in the center. Now your ship looks stable and ready to land on a distant planet!
Step 8: The Cockpit Window
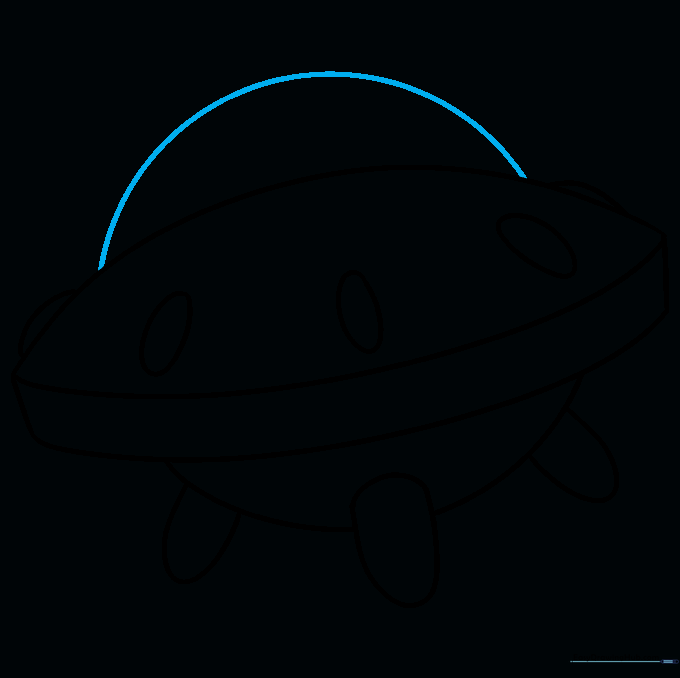
Draw a large, partial circle on the top of the ship for the windshield. Tip: Leave a little space at the top for the frame of the window.
Step 9: Refining the Cockpit
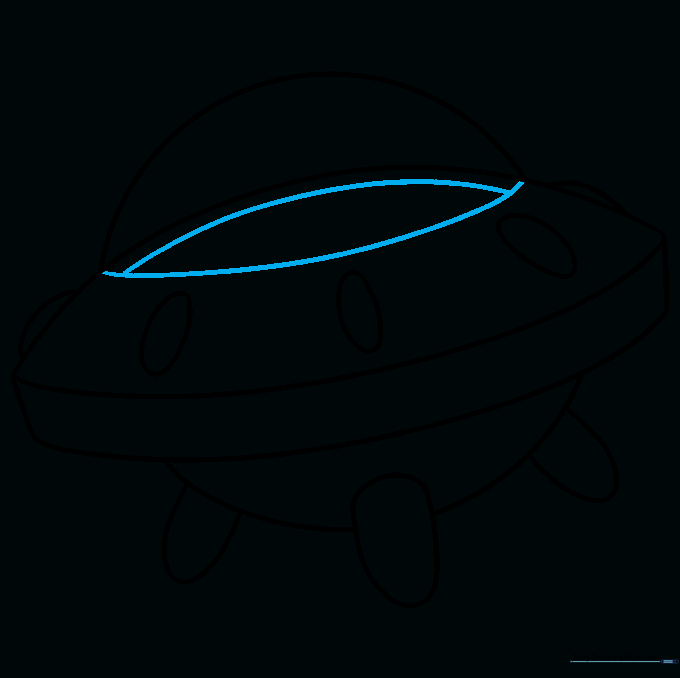
Add a curved line across the top of the window to show the opening. Add a small detail line to show the thickness of the glass. You're almost done!
Step 10: Adding Color
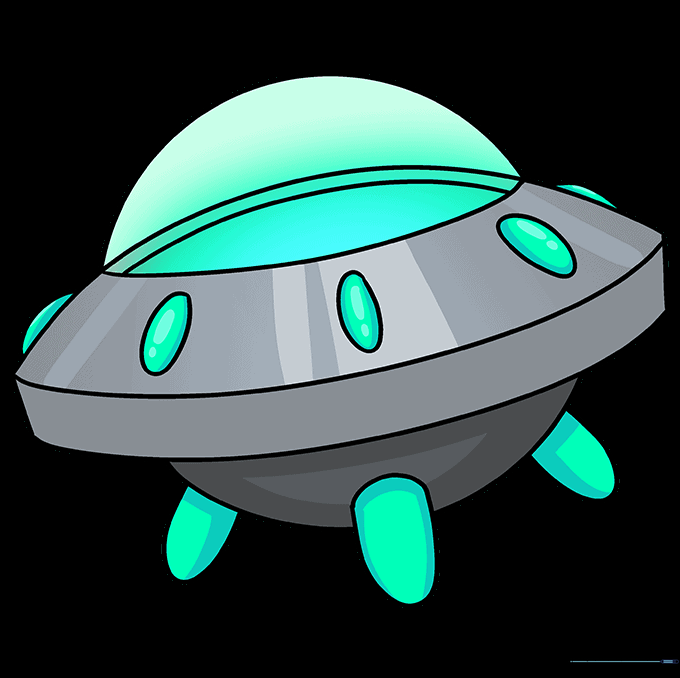
Time to bring your ship to life! Use metallic colors like silver or grey for the body, and bright neon colors for the lights. Tip: Use a darker shade around the edges to make it look shiny.
More Tutorials


