How to Draw a Snow Globe: Easy 10-Step Winter Art Guide
Bring a touch of winter magic to your sketchbook with this easy snow globe drawing tutorial. Designed for young artists ages 6+, this activity uses basic shapes to build a complex-looking holiday scene. Grab your pencil, eraser, and markers to start creating your own miniature snowy world.
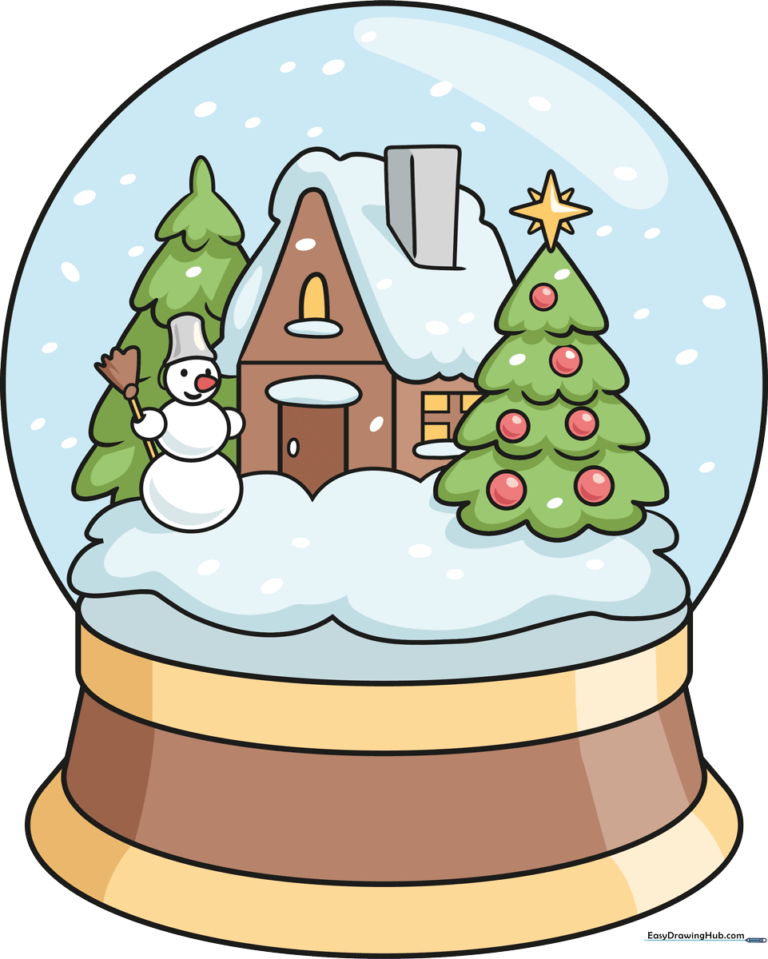
🎯 Final Result
Step-by-Step Instructions
Step 1: Sketching the Sturdy Base
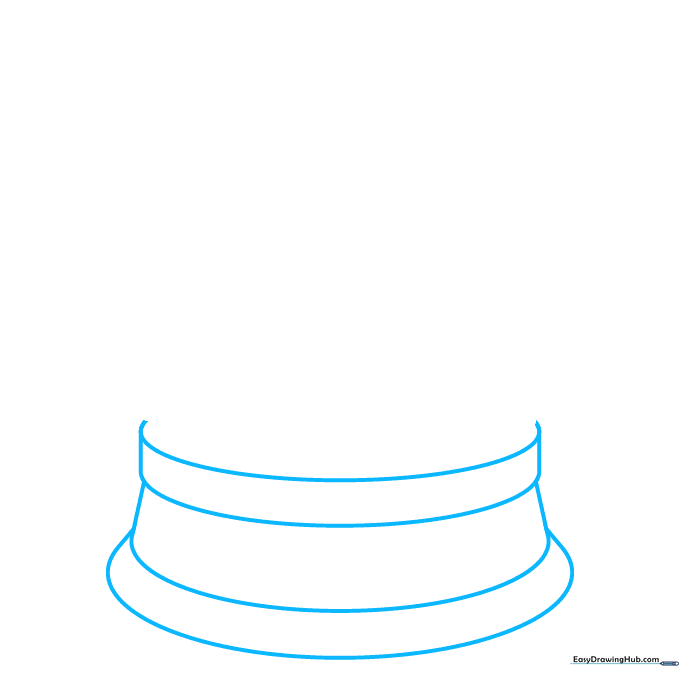
Start by drawing the base of the globe using three stacked, rounded rectangles. Teacher's Tip: Keep your pencil lines light and loose; this base acts as the anchor for your entire drawing, so don't press too hard yet!
Step 2: Defining the Glass Dome
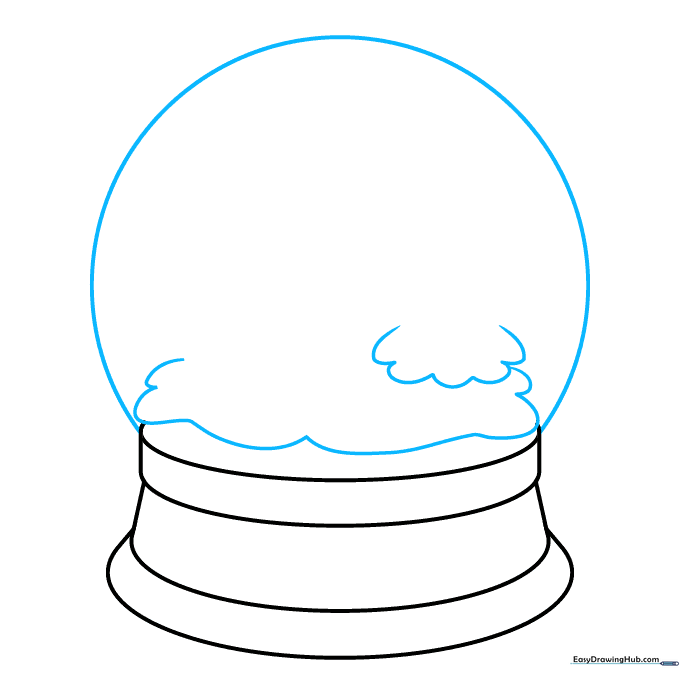
Draw a large, smooth arc on top of the base to create the glass dome. Inside, add wavy lines at the bottom to represent snowdrifts. Tip: Imagine the dome is a giant bubble—keep the curve consistent for a professional look.
Step 3: Adding the Christmas Tree
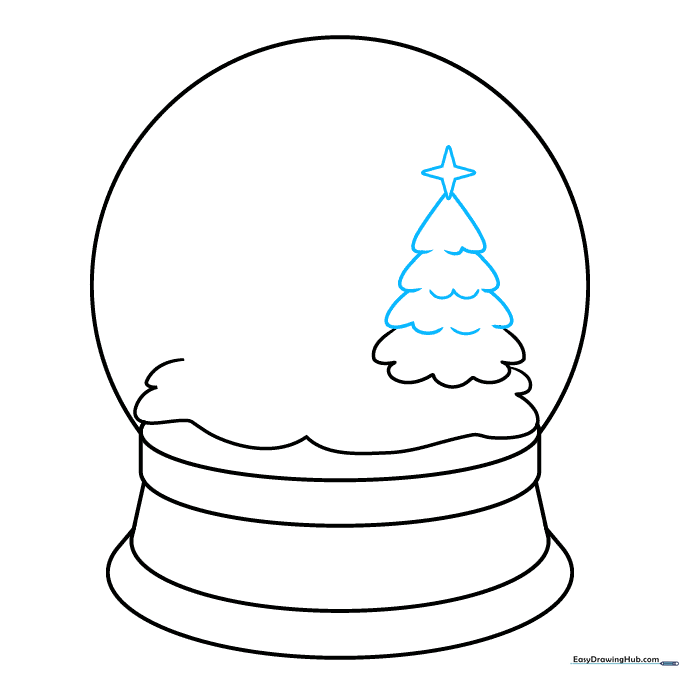
Sketch a pine tree using stacked, jagged triangles. Top it off with a four-pointed star. Tip: Don't worry about making the tree perfectly symmetrical; real pine trees are wonderfully irregular!
Step 4: Decorating and Starting the Snowman
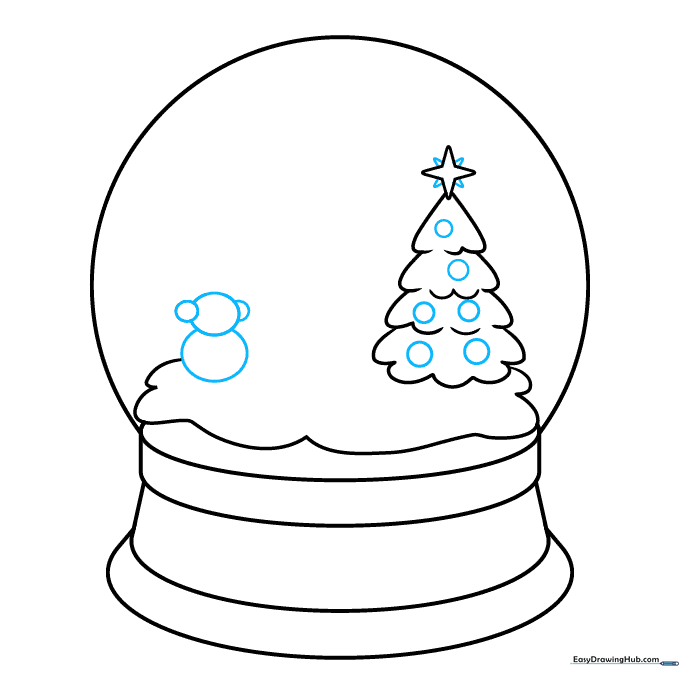
Add small circles as ornaments on your tree, then draw three overlapping circles below to form the body of a snowman. Tip: Make the bottom circle the largest to give your snowman a stable, grounded appearance.
Step 5: Giving the Snowman Personality
Draw a bucket hat, a carrot nose, and a friendly smile on your snowman. Add a broomstick using two straight lines and a small brush at the top. Tip: Use a tiny triangle for the nose to make it look sharp and pointy.
Step 6: Sketching the Winter Cottage
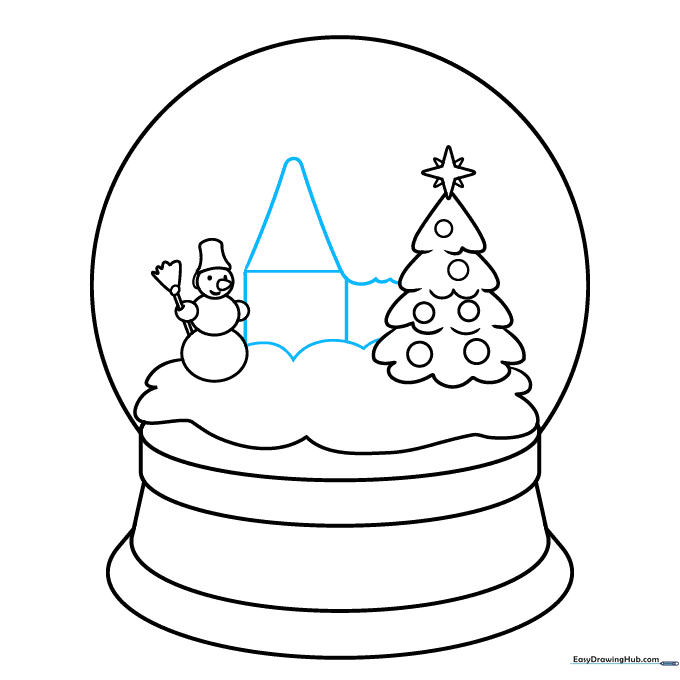
Draw a small house behind the snowman using simple straight lines for walls and a peaked roof. Add a layer of snow on the roof. Tip: Keep the house slightly smaller than the snowman to create a sense of depth.
Step 7: Adding Cottage Details
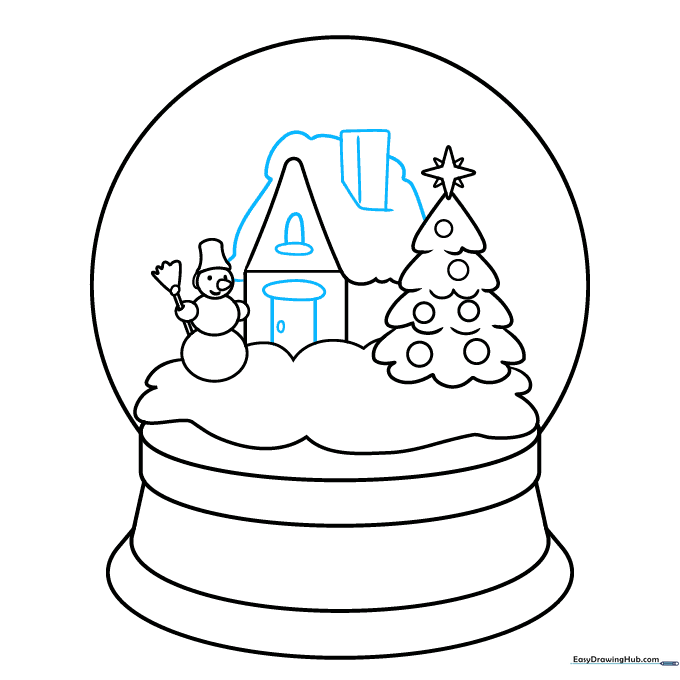
Add a rectangular door, a chimney, and a doorknob. Use ovals to draw soft snowdrifts around the base of the house. Tip: A little chimney smoke adds a cozy, warm feeling to your winter scene.
Step 8: Filling the Background
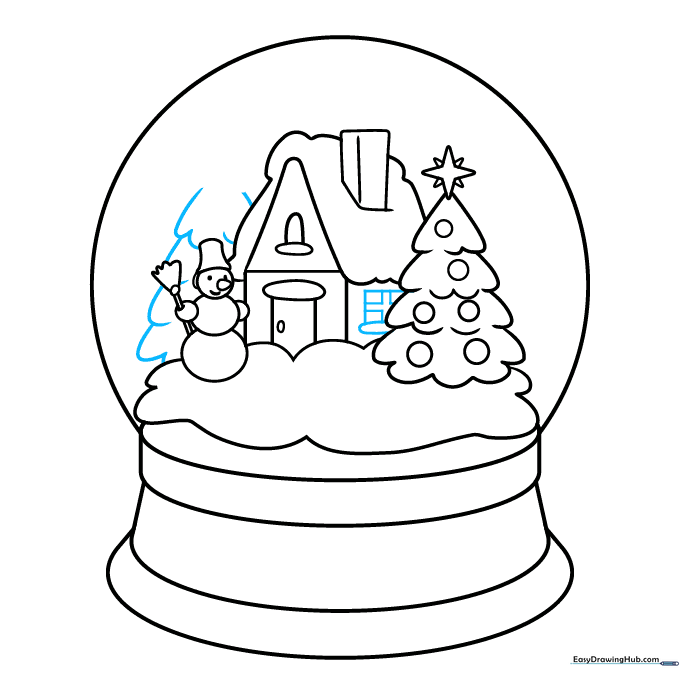
Draw a window on the side of the house and add another pine tree in the background to fill the space. Tip: Use overlapping lines to make the background tree look further away than the one in the front.
Step 9: Adding the Falling Snow
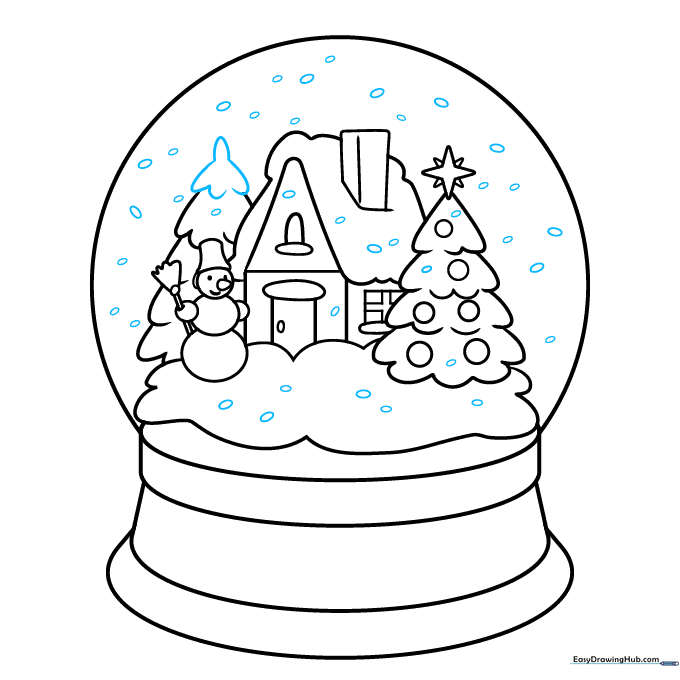
Finish the background tree and scatter small ovals throughout the inside of the globe to represent falling snow. Tip: Vary the size of the ovals to create a sense of depth—larger ones look closer to the glass!
Step 10: Bringing It to Life with Color
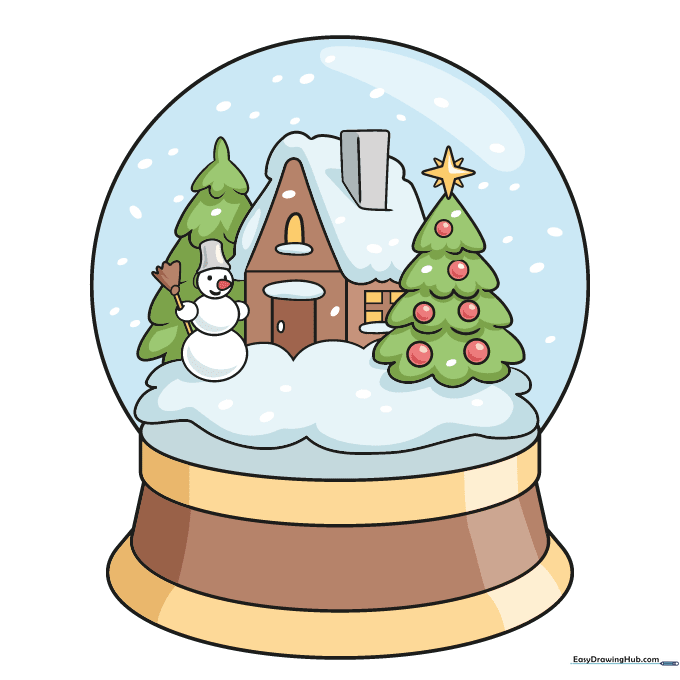
Your outline is ready! Use light blue for the glass dome to suggest liquid, and earthy browns for the base. Tip: Use a white gel pen or leave small white spots to create a 'glittery' highlight effect on the glass.
More Tutorials


