How to Draw a Skull in Profile: Easy 10-Step Guide
Perfect for young artists and beginners, this step-by-step tutorial breaks down the complex structure of a human skull into simple, manageable shapes. You only need a pencil, an eraser, and a piece of paper to get started. Follow along to build your confidence in drawing anatomy and proportions.
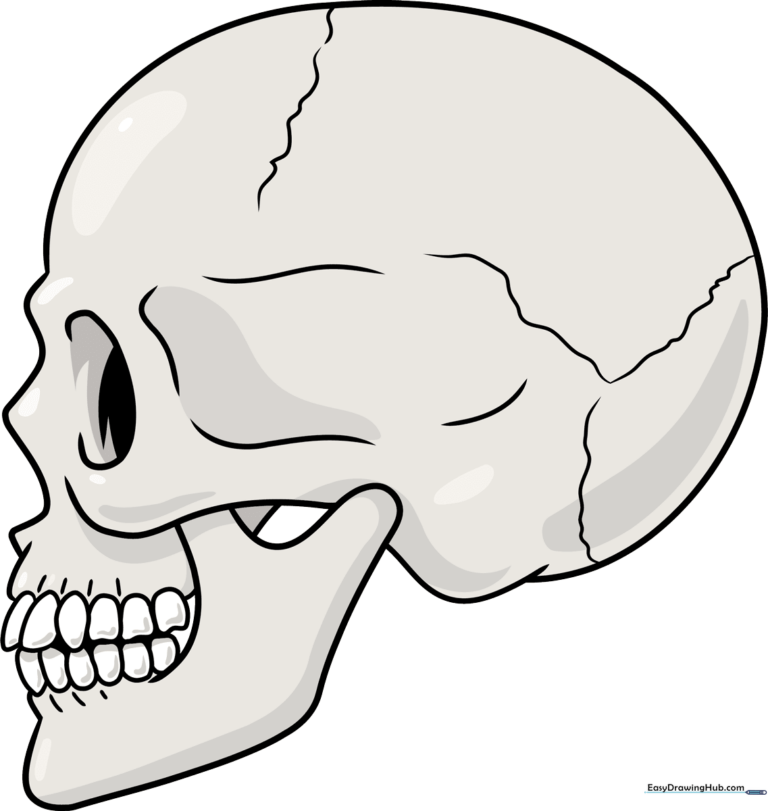
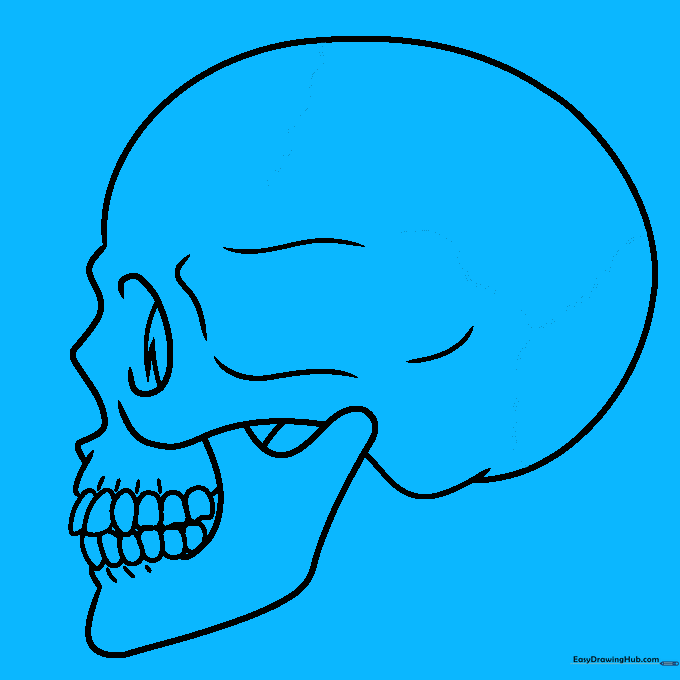
🎯 Final Result
Step-by-Step Instructions
Step 1: Sketching the Eye Socket

Start by drawing a 'C' shaped line to form the outer edge of the eye socket. Inside, add jagged, curved lines to define the orbit. Teacher's Tip: Keep your pencil pressure light here so you can easily adjust the shape if it looks a bit too wide.
Step 2: Defining the Brow and Nose

Draw a wavy line extending from the eye socket to map out the brow bone and the nasal cavity. Teacher's Tip: Think of the nasal cavity as an upside-down teardrop shape to get that natural anatomical look.
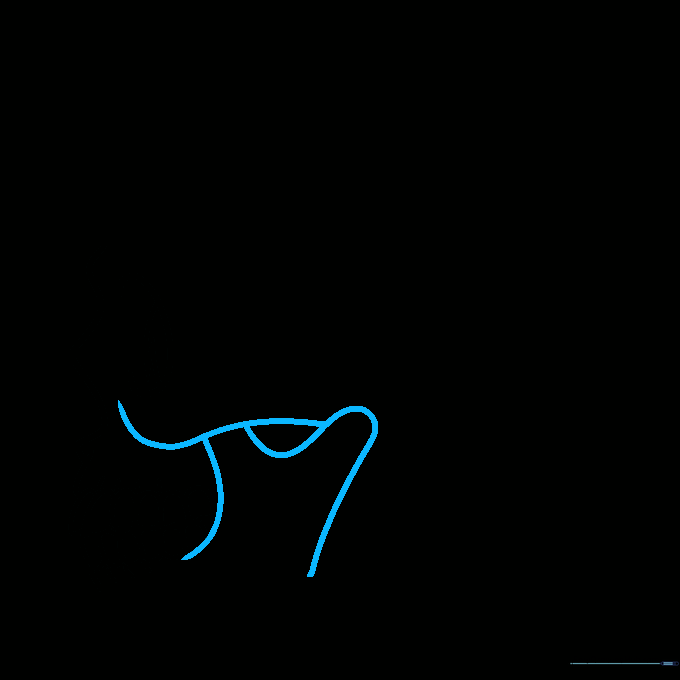
Step 3: Starting the Upper Teeth

Sketch a short curved line for the upper jaw, then add several overlapping rounded shapes beneath it for the teeth. Teacher's Tip: Don't worry about making the teeth perfect; slightly irregular shapes actually look more realistic.
Step 4: Adding the Lower Teeth

Continue the row of upper teeth and begin sketching the lower jaw teeth directly beneath them. Teacher's Tip: Notice how the bottoms of the teeth are slightly flattened—this helps create the illusion of a chewing surface.
Step 5: Refining the Jawline

Finish the lower teeth and draw curved lines at the base of both rows to connect them. Teacher's Tip: Extend the lines where the teeth meet to give the jaw depth and structure.
Step 6: Shaping the Side of the Skull
Use three curved lines to sketch the side of the skull, crossing below the eye and above the mouth. Teacher's Tip: Take your time with the third line; it should double back on itself to create the hinge of the jaw.
Step 7: Enclosing the Cranium
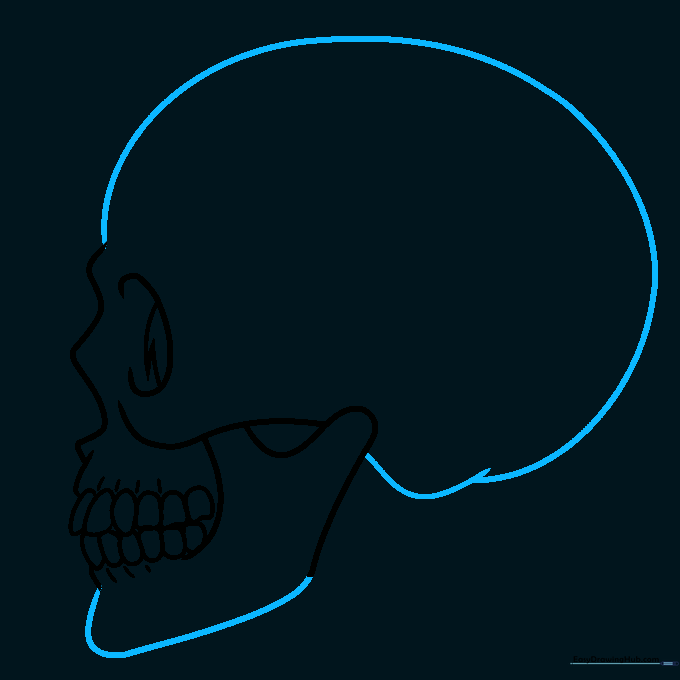
Connect the jaw lines to enclose the lower jaw, then draw a large curve from the top of the skull to the back. Teacher's Tip: Use a long, sweeping motion for the cranium to keep the line smooth and rounded.
Step 8: Adding Anatomical Contours
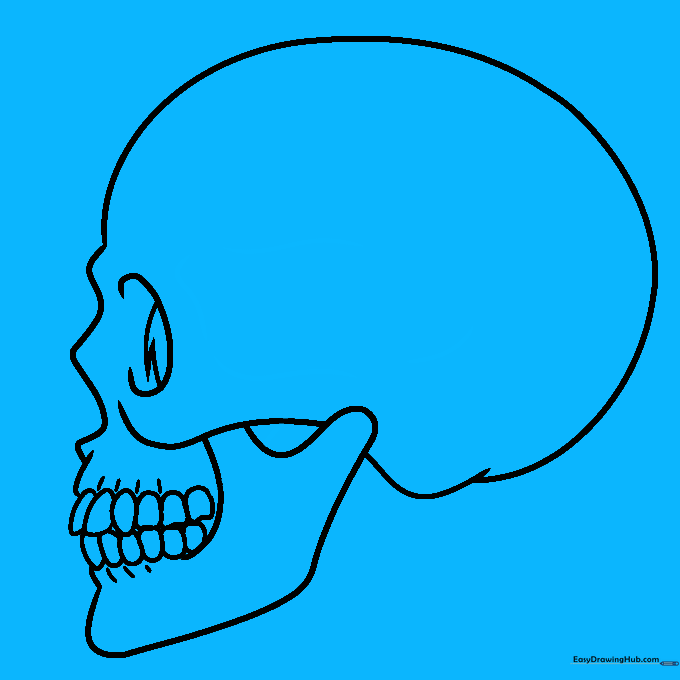
Add contour lines to the side of the cranium and jawbone to show depth. Teacher's Tip: These small lines help the skull look 3D rather than flat on the page.
Step 9: Adding Texture and Cracks
Finish the outline by drawing thin, wavy lines across the cranium to represent natural bone cracks. Teacher's Tip: Keep these lines irregular—nature is rarely perfectly straight!
Step 10: Adding Color

Bring your drawing to life with color. We used an off-white shade to mimic the look of aged bone. Teacher's Tip: Use a slightly darker grey for the eye socket and nasal cavity to create a sense of depth.
More Tutorials


