How to Draw a Sitting Cartoon Cat: Easy 9-Step Guide
Looking for a fun, screen-free activity? This guide is perfect for budding artists ages 5 and up. All you need is a pencil, paper, and an eraser to bring this playful cat to life while practicing basic shapes and line control.
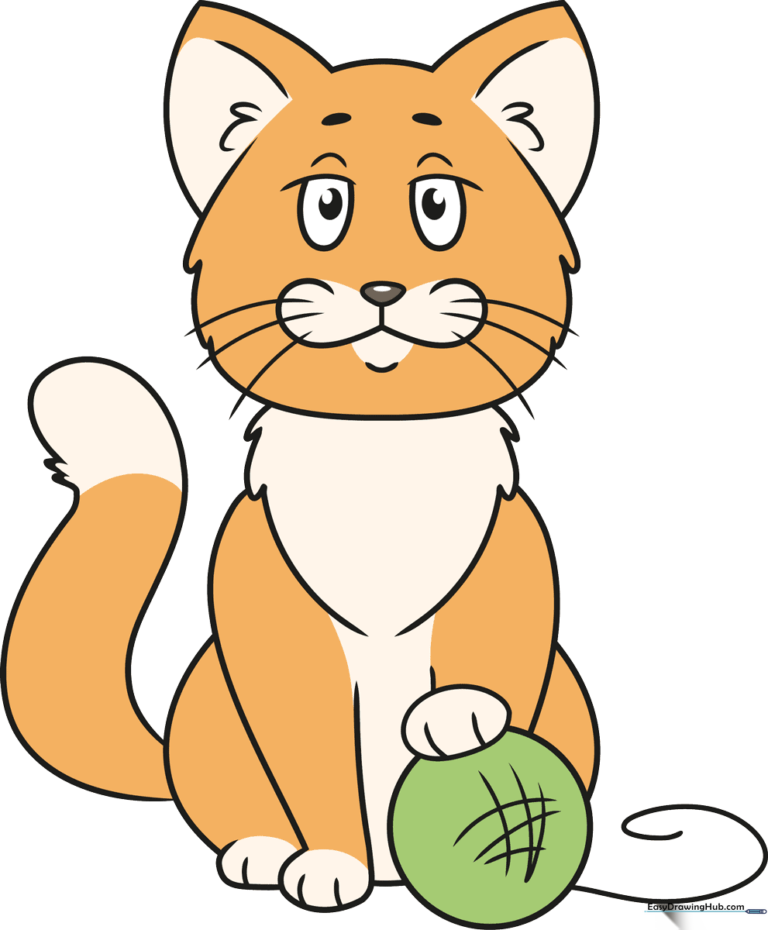
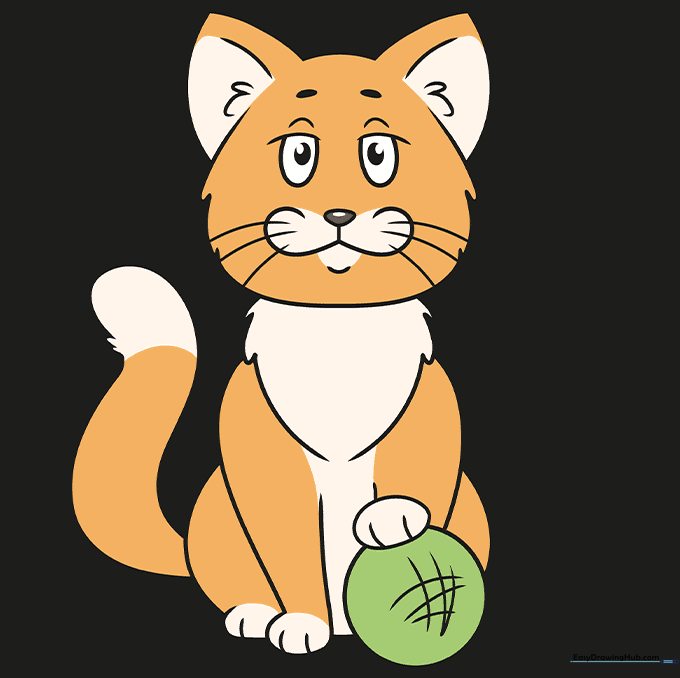
🎯 Final Result
Step-by-Step Instructions
Step 1: Sketching the Furry Chest

Start by drawing the ruff of fur on the cat's chest. Use a series of connected, jagged curved lines. Teacher's Tip: Keep your pencil pressure light so you can easily adjust the shape if it looks a bit too pointy!
Step 2: Drawing the Front Leg

Draw a long, graceful curved line for the front leg. Curve it inward near the bottom to form the paw, then double it back to create the leg's thickness. Add a few small lines at the base for toes. Tip: Imagine the leg is shaped like a soft, rounded banana.
Step 3: Adding the Shoulder and Paw

Outline the shoulder with a smooth curve and add an oval shape for the raised paw. Use short, quick strokes to define the toes. Tip: Keep the paw oval slightly tilted to give the cat a more natural, relaxed posture.
Step 4: Sketching the Yarn Ball

Draw a circle beneath the paw to represent a ball of yarn. Add vertical and diagonal curved lines across the circle to create a crisscross texture. Tip: Don't worry about making the lines perfectly straight; yarn is soft and messy!
Step 5: Defining the Body and Tail

Use curved lines to outline the cat's back and rear foot. Add a spiral line trailing from the yarn ball to show the loose string. Tip: The overlap of lines on the rear foot helps create a sense of depth and weight.
Step 6: Drawing the Head and Ears
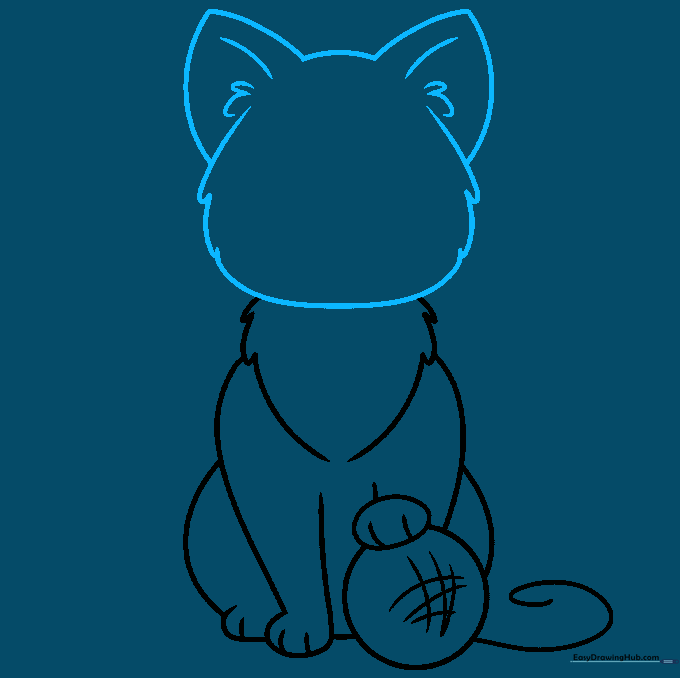
Sketch the head using soft, connected curves to suggest fur. Add two triangular ears on top and connect them with a gentle arch. Tip: Draw the ears slightly rounded at the tips to make the cat look friendly rather than sharp.
Step 7: Adding Expressive Eyes
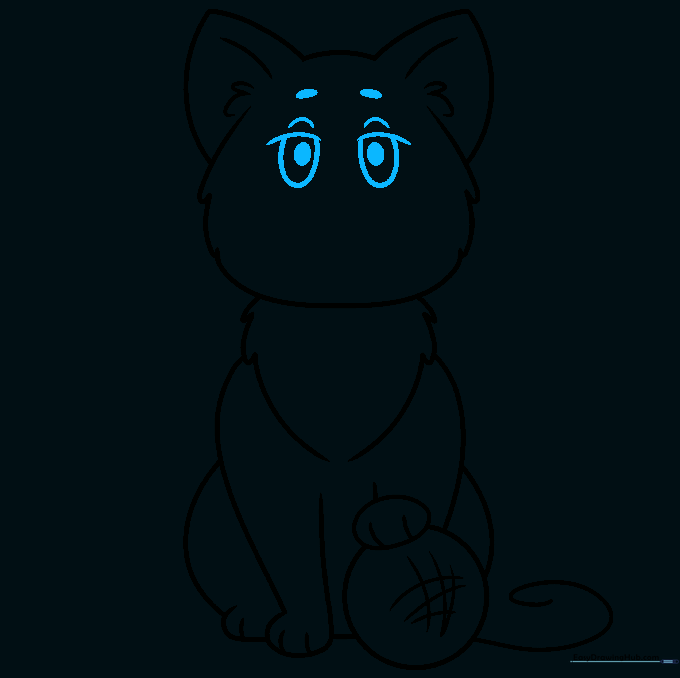
Draw two large, oval-shaped eyes with curved eyelids above them. Add a small circle inside each for the pupil. Tip: Placing the pupils slightly off-center can make the cat look like it's curiously watching the yarn ball.
Step 8: Facial Features and Whiskers
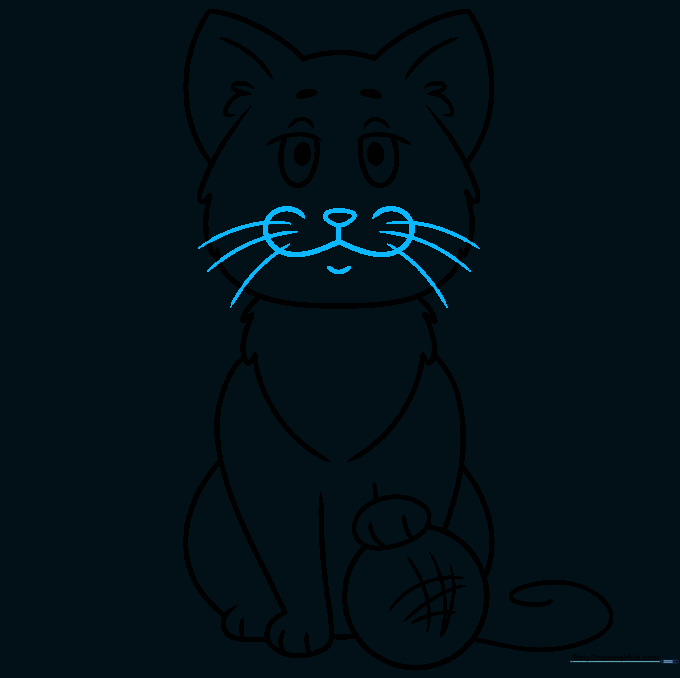
Draw a 'W' shape for the mouth and an inverted triangle for the nose. Add long, sweeping lines for whiskers. Tip: Use a single, confident stroke for each whisker to make them look sharp and clean.
Step 9: The Final Tail
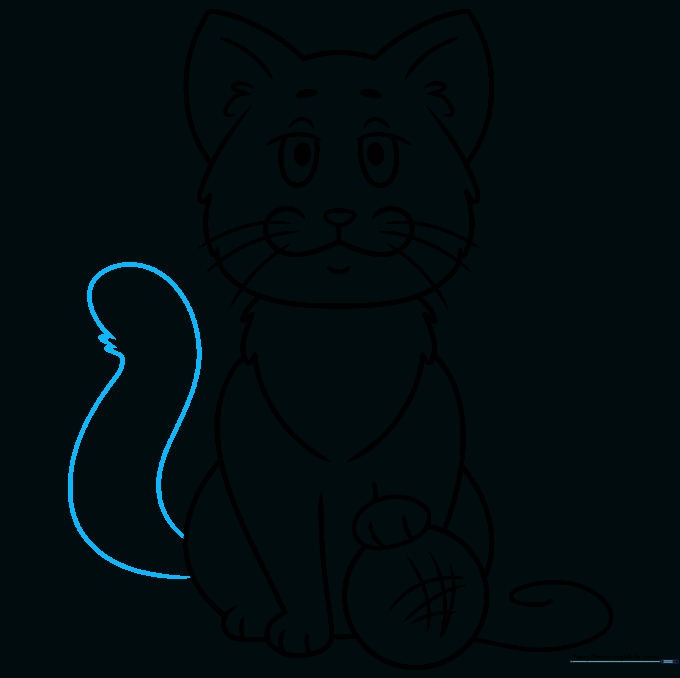
Finish your drawing by adding a long, curved tail. Add a few jagged lines along the edge to show the fur texture. Tip: Make the tail thick at the base and slightly thinner toward the tip for a realistic cartoon look.
Step 10: Bringing Your Cat to Life with Color
Time to color! Whether you choose orange tabby stripes, solid black, or spotted fur, have fun with your palette. Tip: Use a darker shade of your main color to add soft shadows under the chin and tail for a 3D effect.
More Tutorials


