How to Draw a Ship in a Bottle: Easy 9-Step Guide
Ready to capture a miniature adventure on paper? This tutorial is perfect for young artists ages 6+ looking to practice perspective and detail. You'll only need a pencil, an eraser, and a piece of paper to bring this classic maritime mystery to life.
🎯 Final Result

Step-by-Step Instructions
Step 1: Sketching the Glass Bottle
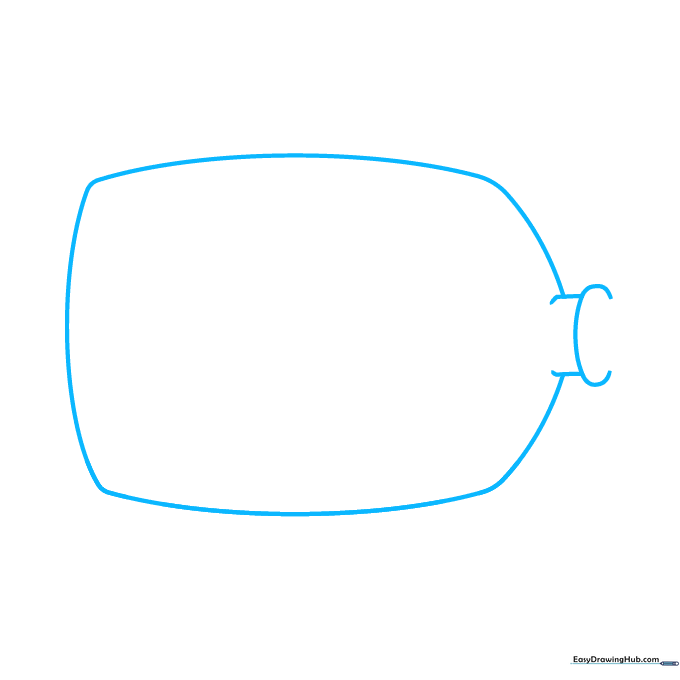
Draw a large, elongated oval for the body of the bottle. Add two short vertical lines at the top for the neck, connected by a curved 'C' shape. Teacher's Tip: Keep your pencil pressure light so you can easily adjust the shape if it looks a bit lopsided.
Step 2: Adding the Cork
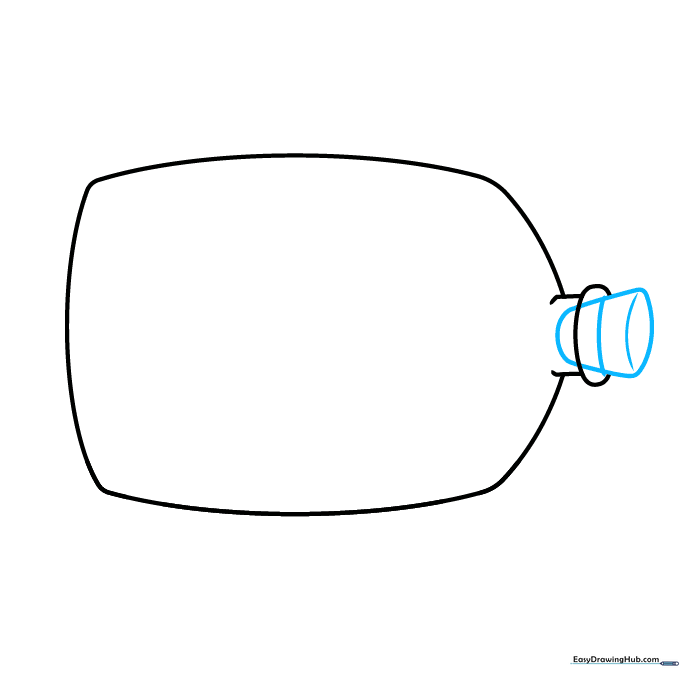
Draw a rounded trapezoid at the very top of the bottle neck to create the cork. Add a curved band across it to give it a realistic, three-dimensional look. Teacher's Tip: Imagine the cork is a cylinder; adding that slight curve makes it look like it's actually sitting inside the opening.
Step 3: The Ship's Foundation
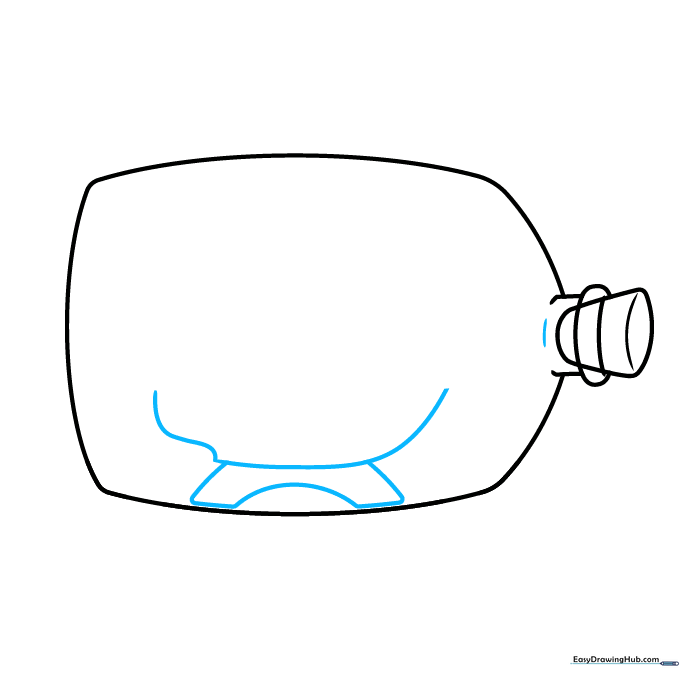
Inside the bottle, draw a long, gentle curve for the ship's keel. Below it, sketch a small 'rainbow' shape to act as the stand. Teacher's Tip: Make sure the ship is centered in the bottle so it looks balanced.
Step 4: Shaping the Hull
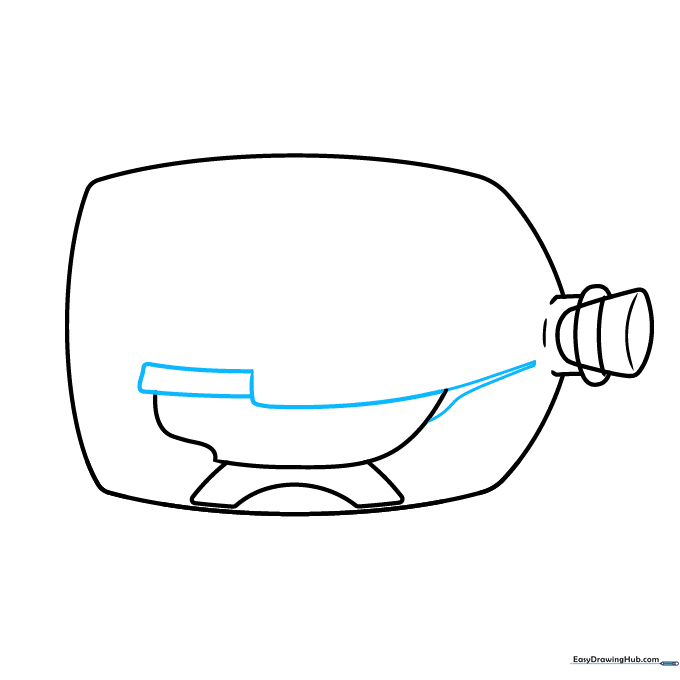
Draw a curved rectangle above the keel to form the main deck. Add a pointed bowsprit at the front using two meeting curved lines. Teacher's Tip: The bowsprit is the 'nose' of the ship—keep it sharp to make the boat look fast!
Step 5: First Sails
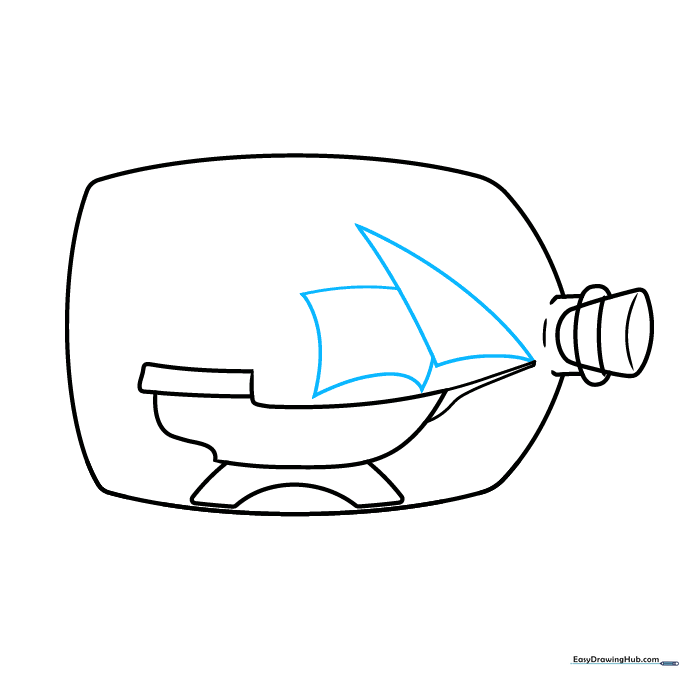
Sketch a triangle and a rectangle above the deck to represent the first set of sails. Teacher's Tip: Don't worry about perfect straight lines; sails often billow in the wind, so slightly curved edges look more natural.
Step 6: Adding Masts and More Sails
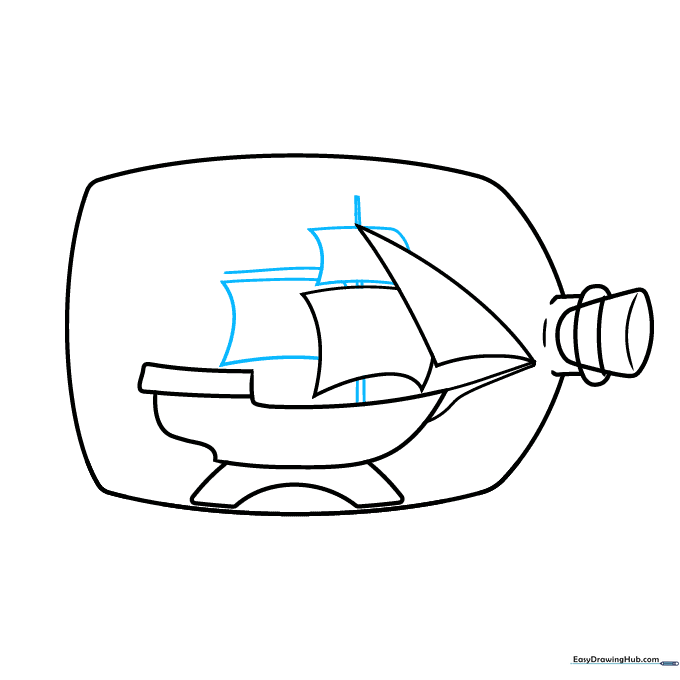
Add two more rectangular sails. Draw vertical parallel lines connecting them to form the mast. Teacher's Tip: Keep your mast lines thin and straight to contrast with the soft curves of the sails.
Step 7: Completing the Rigging
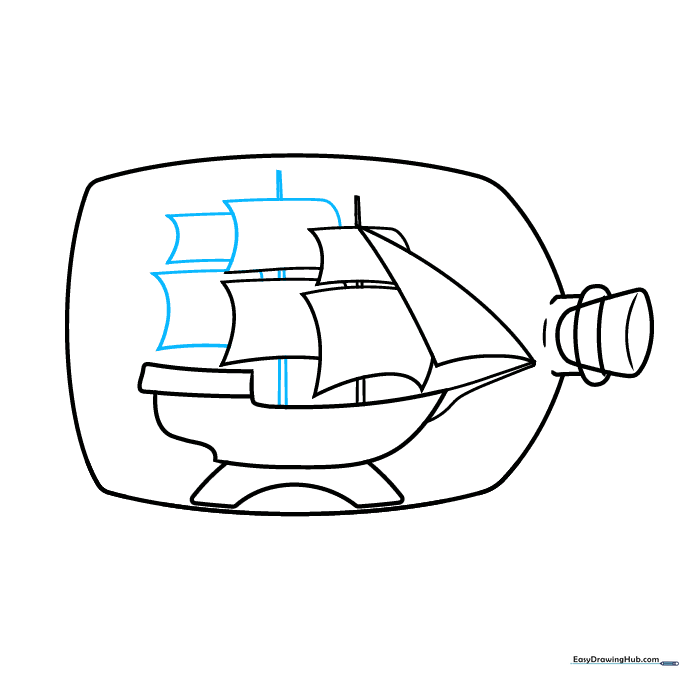
Finish the rectangular sails and add two additional sails using curved lines. Ensure the mast lines extend behind the sails for a layered effect. Teacher's Tip: Layering your lines helps create depth, making the ship look like it has real volume.
Step 8: Final Details
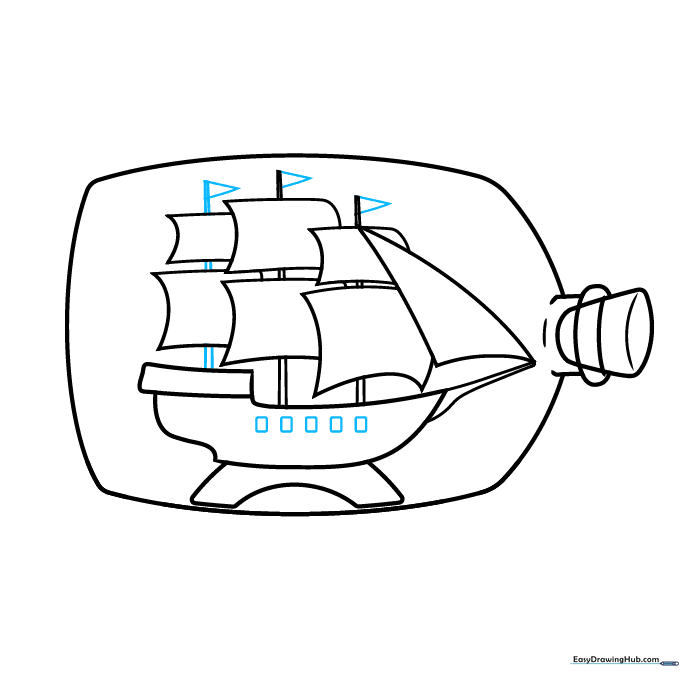
Draw small triangles at the top of the masts for flags (pennants) and add small rectangles along the hull for portholes. Teacher's Tip: Portholes are tiny—keep them uniform in size to make the ship look professional.
Step 9: Glass Depth and Final Stand

Add curved lines across the bottle's neck and base to show the glass's roundness. Finish the stand at the bottom with a trapezoid shape. Teacher's Tip: Erase any overlapping lines inside the bottle to make it look like the ship is safely tucked behind glass.
Step 10: Bring It to Life with Color

Time to color! Use rich browns for the wooden ship and crisp whites or creams for the sails. Add a light blue tint to the bottle to mimic glass. Teacher's Tip: Use a white gel pen or leave small white spots on the bottle to create a 'glass reflection' effect.
More Tutorials


