How to Draw a Shark Head: Easy 9-Step Guide for Kids
Ready to dive into the deep blue? This shark head drawing tutorial is perfect for young artists ages 5 and up. You will only need a pencil, an eraser, and a black marker to bring this ocean predator to life while practicing your line control and symmetry.
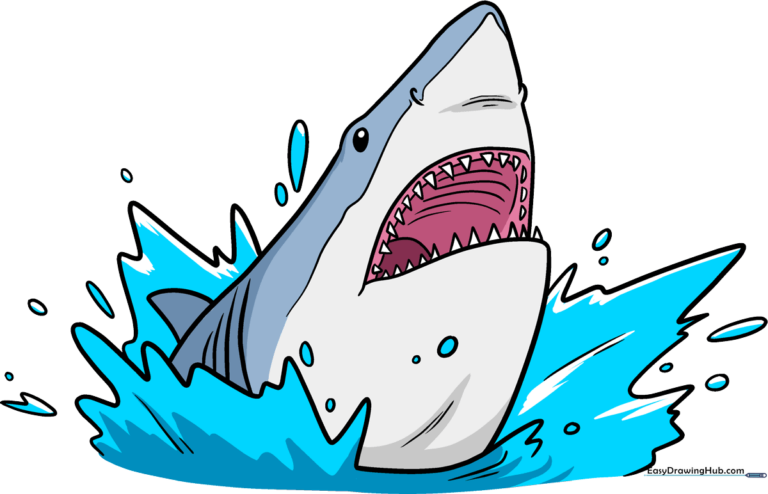
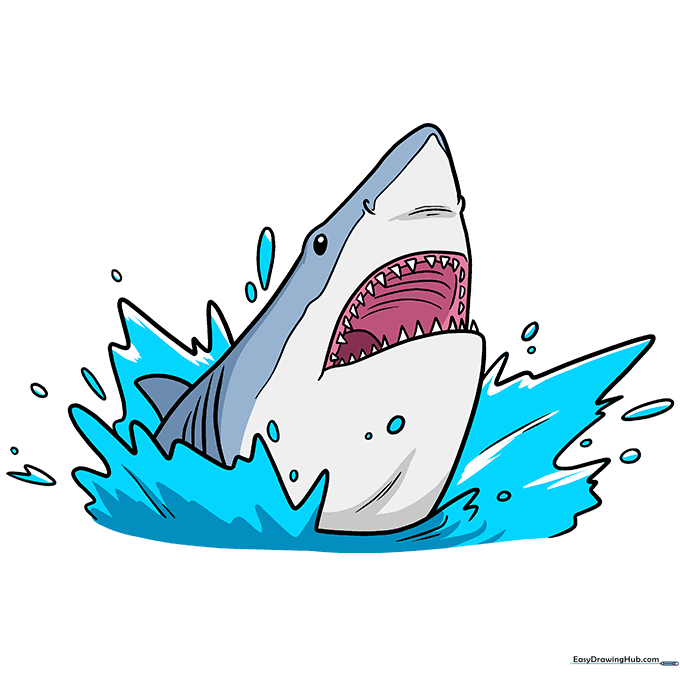
🎯 Final Result
Step-by-Step Instructions
Step 1: Sketching the Basic Head Shape

Draw a soft oval with a small circle inside for the eye. Tip: Keep your pencil pressure light so you can easily adjust the shape later if it looks a bit lopsided.
Step 2: Adding Facial Features
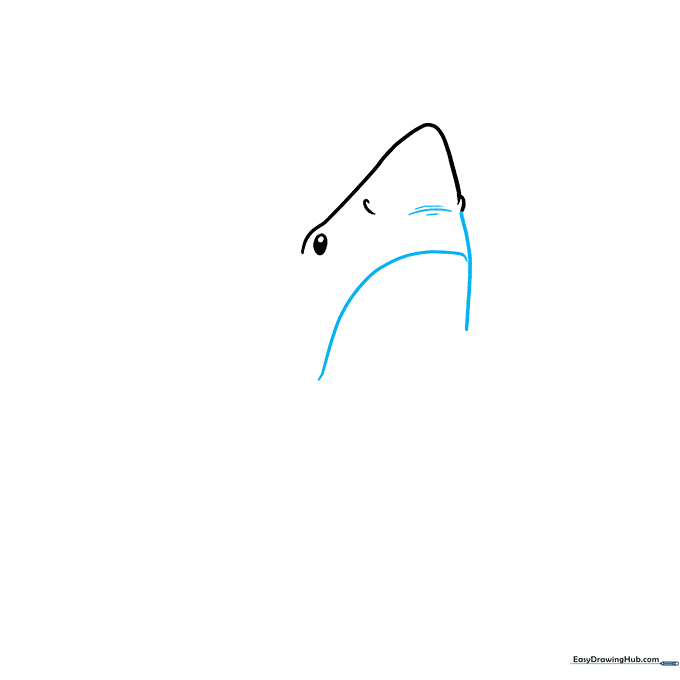
Sketch a gentle curve for the snout and add three small horizontal dashes near the nose area. Tip: These dashes represent the shark's nostrils, so keep them small and neat.
Step 3: Defining the Mouth
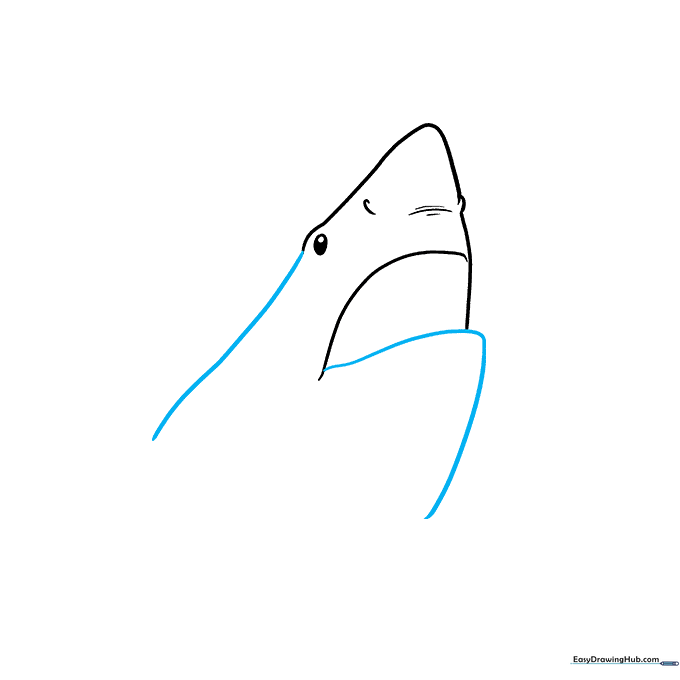
Draw a large, wide triangle shape to outline the open mouth. Tip: Make the triangle wide to give your shark a friendly, cartoonish grin.
Step 4: Adding Texture and Detail
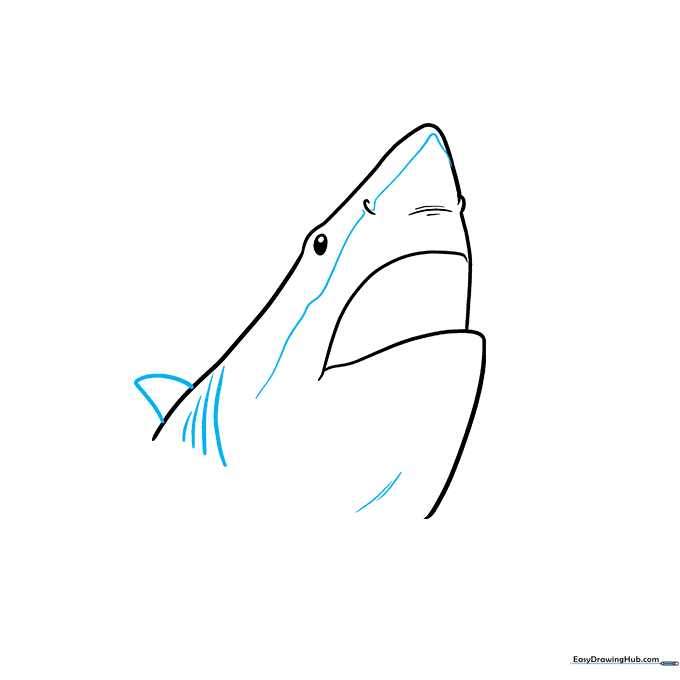
Add small dashes near the bottom of the head and a wavy line between the mouth and eye. Tip: These details help define the shark's anatomy and make it look more realistic.
Step 5: Drawing the Teeth

Draw a curved line for the tongue and add several small, sharp triangles for the teeth. Tip: Vary the size of the triangles to make the teeth look natural and jagged.
Step 6: Creating the Splash
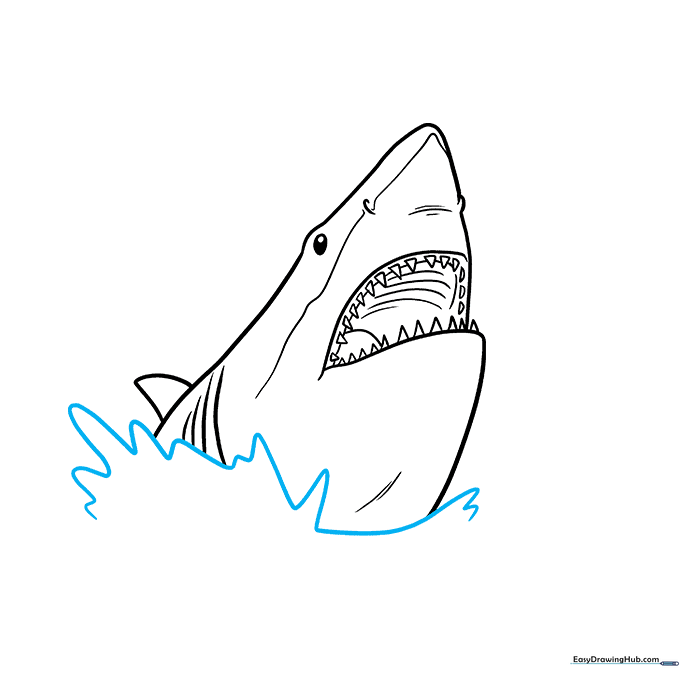
Use a squiggly line to draw a splash effect around the shark's head. Tip: Don't worry about making the lines perfect; water splashes are naturally irregular and messy!
Step 7: Refining the Splash
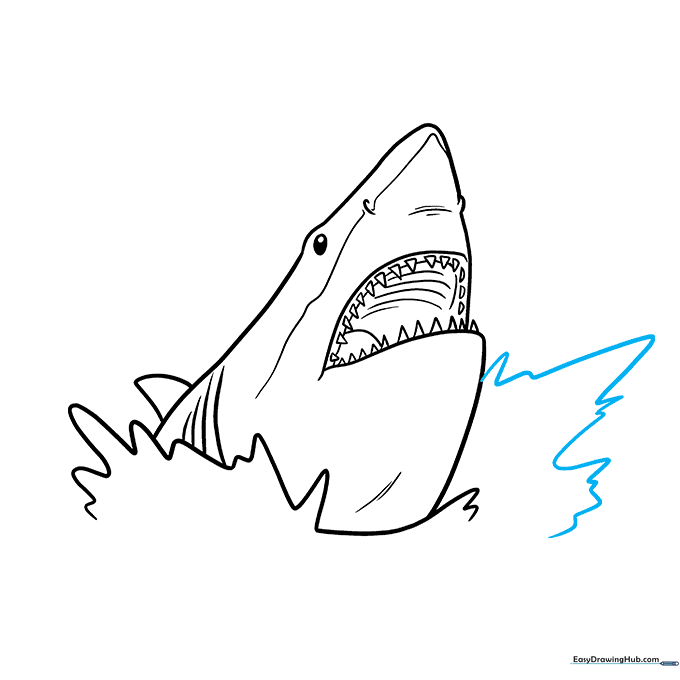
Repeat the splash effect on the right side, making the lines pointier. Tip: Varying the sharpness of your lines adds energy and movement to your drawing.
Step 8: Adding Depth
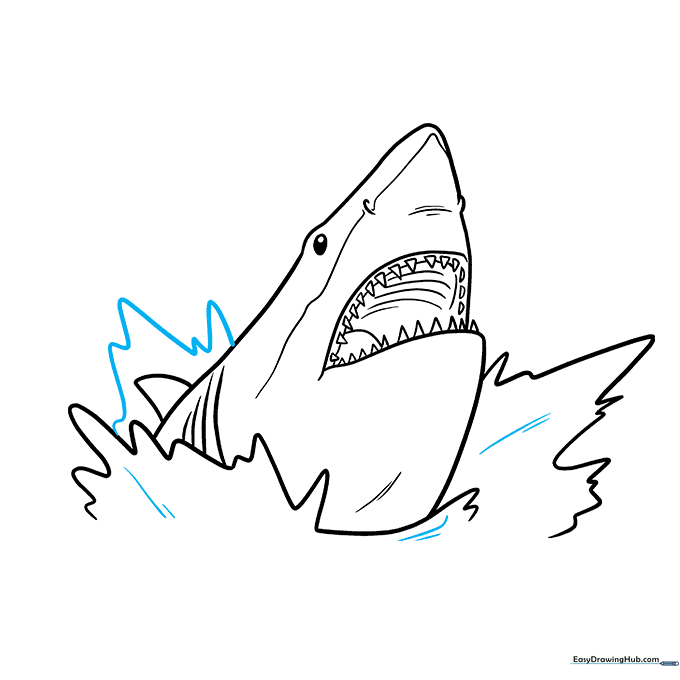
Draw another wave behind the shark head and add small dashes inside the water. Tip: These dashes create the illusion of bubbles and moving water.
Step 9: Final Outline
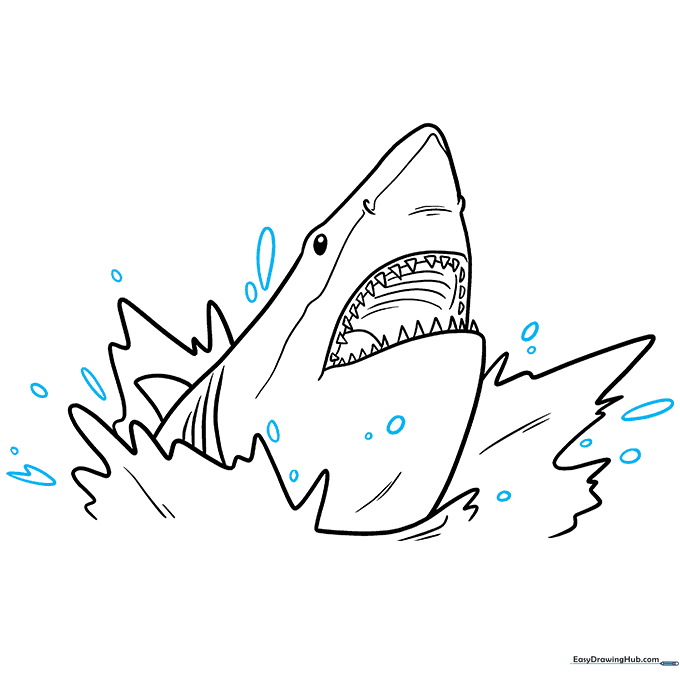
Add small circles and teardrop shapes around the waves to complete the 'bursting' effect. Use a black marker to outline your work and erase any leftover pencil marks. Tip: Use thicker lines for the shark and thinner lines for the water bubbles to create visual contrast.
Step 10: Coloring Your Shark
Color the top of the shark blueish-gray and the belly a pale gray. Use maroon for the inside of the mouth and bright blue for the water. Tip: Use light pressure with your blue pencil to create a nice gradient effect on the shark's skin.
More Tutorials


