How to Draw a Scary Pumpkin: Easy 9-Step Guide
Get ready for Halloween with this fun, spooky pumpkin drawing project! Designed for artists ages 5 and up, this tutorial uses basic shapes to build a character that pops off the page. Grab your pencil, eraser, and markers to start building your own patch of scary pumpkins.
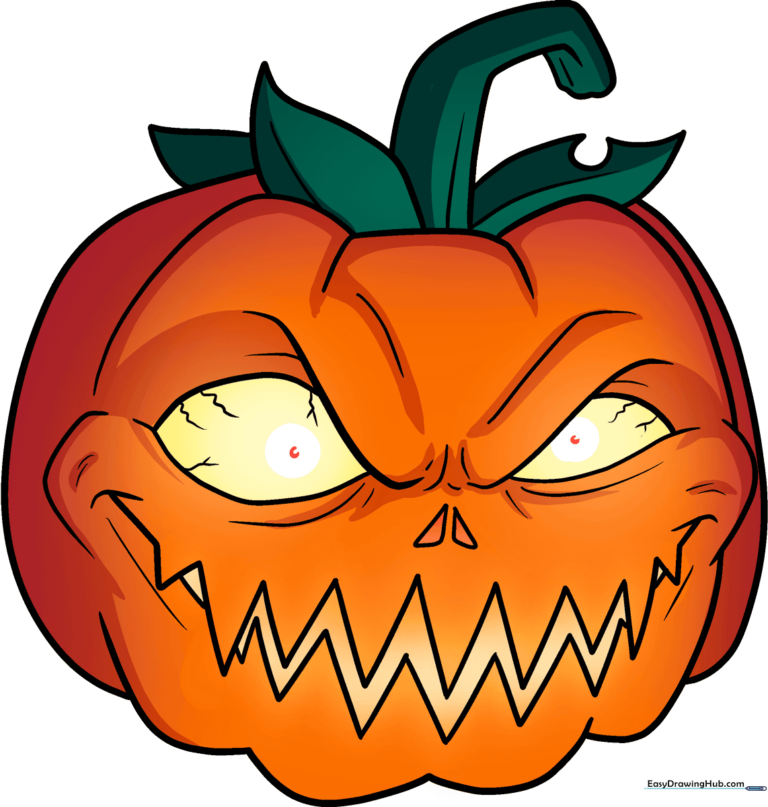
🎯 Final Result
Step-by-Step Instructions
Step 1: Sketching the Eyes
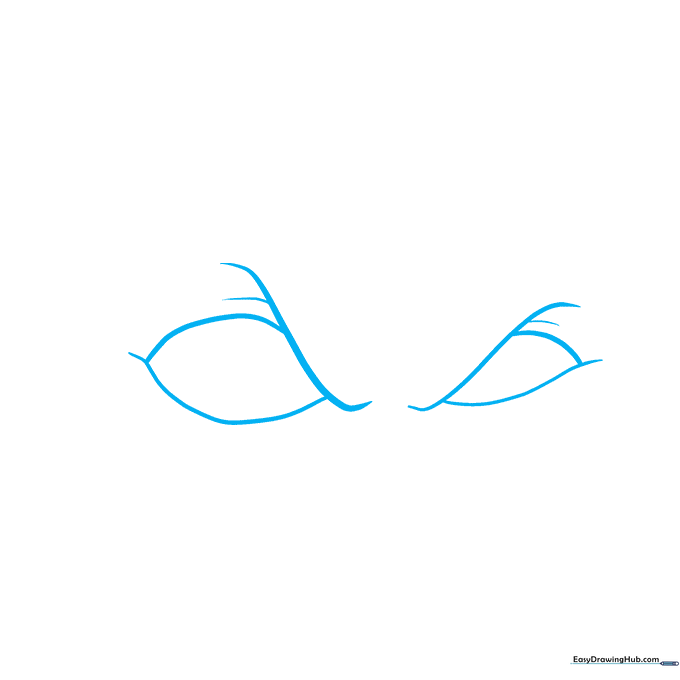
Draw two diagonal slashes near the center of your paper. Sketch horizontal curves underneath and connect them with vertical lines. Tip: Keep these shapes small to leave plenty of room for the rest of the face.
Step 2: Defining the Features
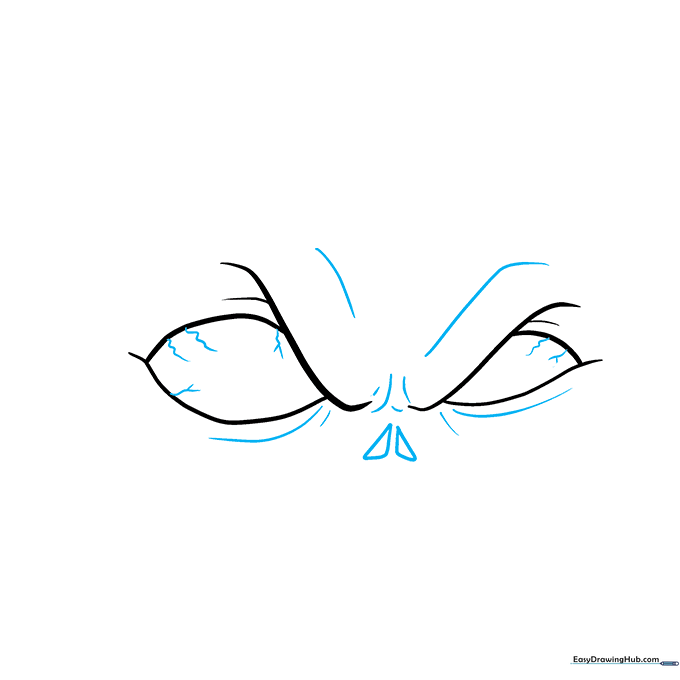
Add sketchy lines around the eyes to give them depth. Outline the nostrils with two small triangles, and use wiggly lines to suggest pumpkin veins. Tip: Use short, quick strokes to make the lines look organic and slightly weathered.
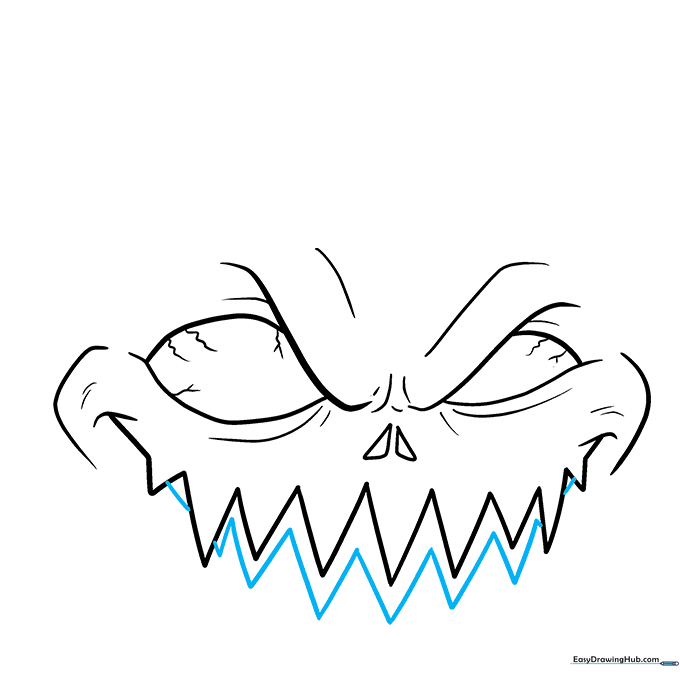
Step 3: Creating the Mouth
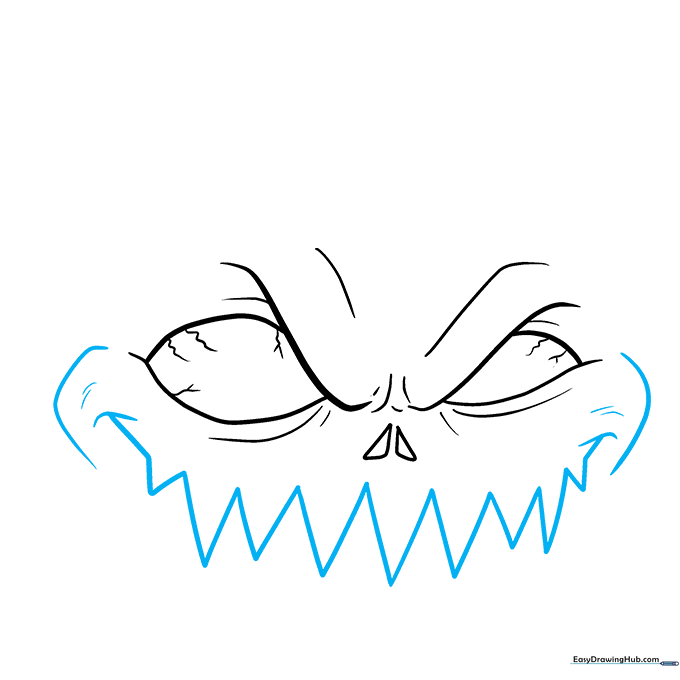
Draw jagged, mountain-like triangles beneath the eyes for teeth. Add a dash on either side of the mouth to widen the grin. Tip: Don't worry about making the triangles perfect; uneven teeth make the pumpkin look scarier!
Step 4: Refining the Face
Sketch additional triangles and straight lines to define the jaw and cheek structure. This helps the face look like it is carved into a round pumpkin surface.
Step 5: Shaping the Base
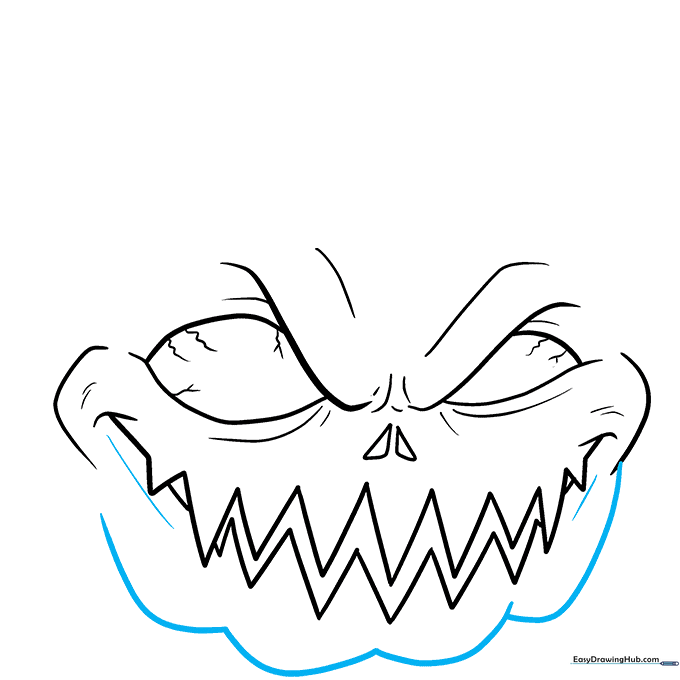
Draw four wide curves beneath the mouth to form the chin. Add diagonal lines on the sides to connect the face to the rest of the pumpkin body.
Step 6: Adding the Top

Draw two hills above the eyes and a semi-rectangle in the center to serve as the base for the stem. Tip: Keep these curves soft to maintain the round shape of the pumpkin.
Step 7: Sketching Leaves
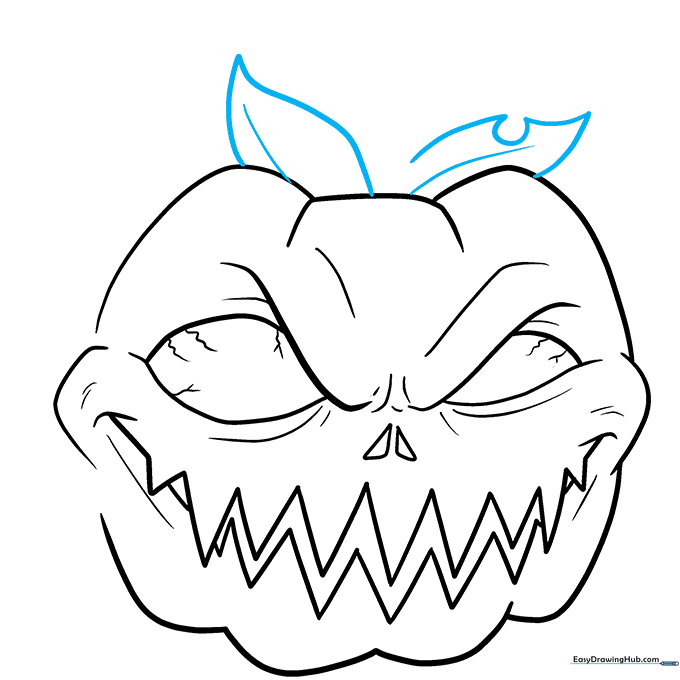
Draw loose teardrop shapes for leaves. Add a line inside each for the vein, and cut a small circle out of one leaf to make it look like it has been nibbled by bugs.
Step 8: Adding the Stem
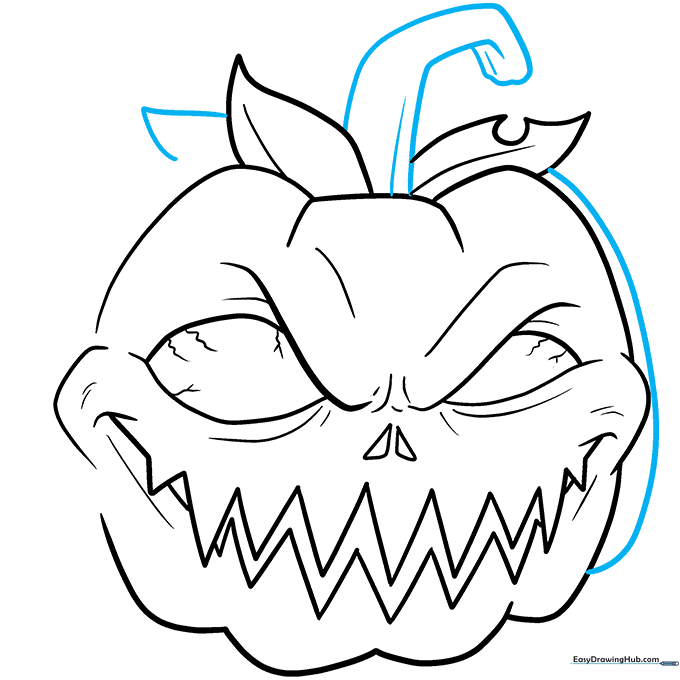
Draw the stem using vertical lines and a wavy top. Add straight lines inside the stem to give it a woody texture. Tip: Vary the thickness of your lines to make the stem look sturdy.
Step 9: Final Outline
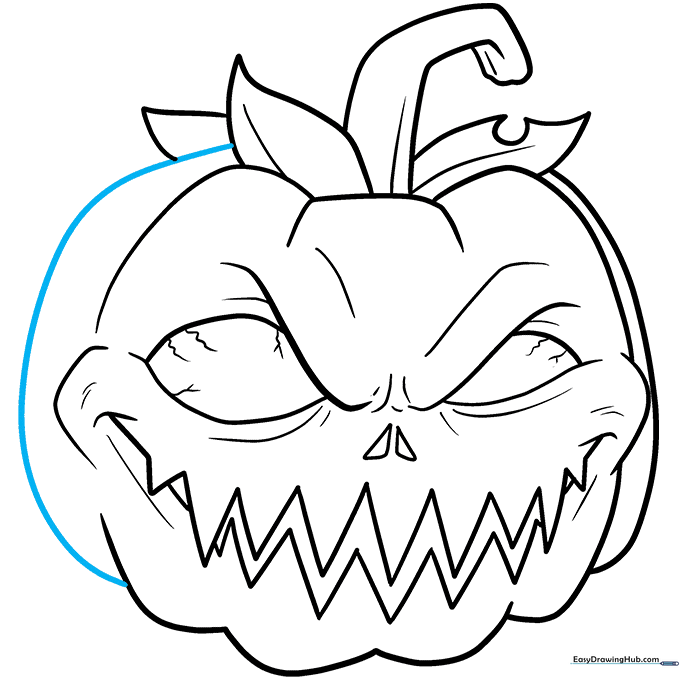
Add a wide curve on the left side to complete the pumpkin's round body. Once you are happy with the sketch, use a black marker to outline your work. Tip: Use a thinner pen for small details and a thicker one for the outer edges to make your drawing pop.
Step 10: Adding Color
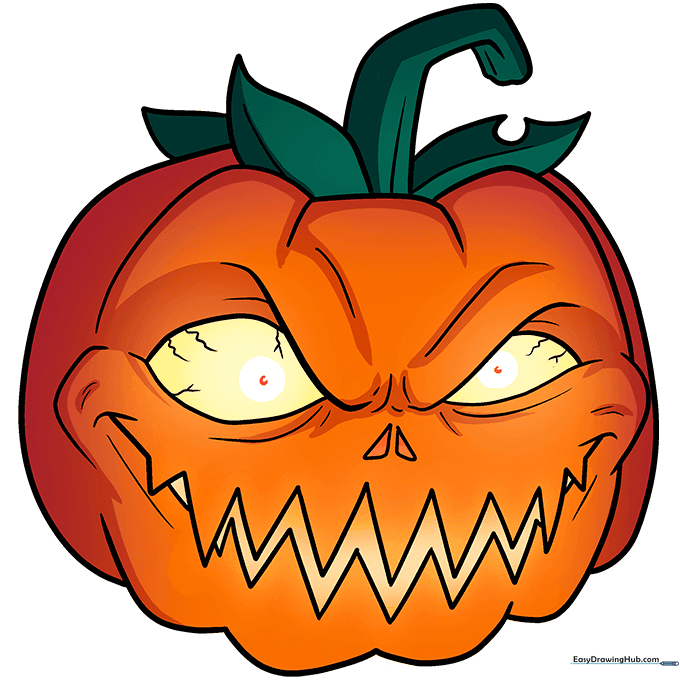
Color the eyes and mouth pale yellow to mimic a glowing candle. Use orange shades for the pumpkin, making them darker near the edges for a 3D effect. Finish by coloring the leaves and stem in deep green.
More Tutorials


