How to Draw a Sad Cat: Easy 10-Step Guide for Beginners
Perfect for young artists ages 5 and up, this tutorial helps you express emotions through character design. You only need a pencil, an eraser, and a piece of paper to bring this little feline to life. Follow along to practice basic shapes and expressive line work.
🎯 Final Result

Step-by-Step Instructions
Step 1: Sketching the Expressive Eyes

Draw two loops, then add flatter curves underneath to form semi-ovals. Sketch small ovals inside for pupils and fill them in. Add a tiny dash above each eye to suggest furrowed brows. Teacher's Tip: Keep these shapes symmetrical to make the face look balanced.
Step 2: Defining the Muzzle and Nose

Draw a soft curve above the eyes, then sketch a small, kidney-bean shape for the nose. Add two V-shapes underneath for the mouth, connecting them to the nose with a short vertical line. Teacher's Tip: A slight downward curve at the corners of the mouth reinforces the 'sad' emotion.
Step 3: Creating the Ear Structure

Start the left ear with a wavy line that curves downward. Add a small tuft of fur at the tip. Repeat this on the right side. Teacher's Tip: Use short, quick strokes to make the ears look soft and furry rather than stiff.
Step 4: Adding Folded Ear Details

Draw overlapping curves inside the ears to create a folded-over effect. Add a small cluster of fur on the forehead. Teacher's Tip: Overlapping lines create depth, making your drawing look more three-dimensional.
Step 5: Sketching the Neck Fur
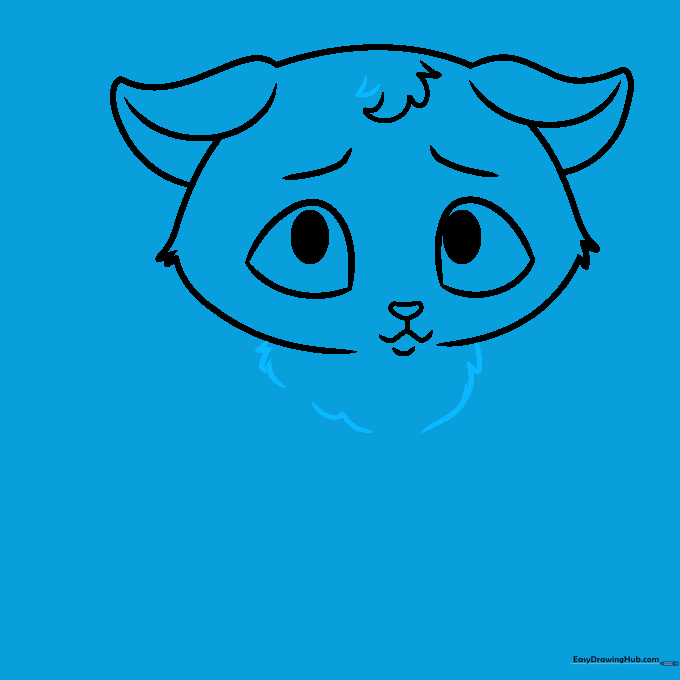
Use loose, zigzagging lines to draw the fur around the neck. Add a small triangle on the forehead for a fur pattern. Teacher's Tip: Don't worry about making the fur lines perfect; real fur is messy and irregular!
Step 6: Outlining the Body

Draw two long, opposing curves to form the back and chest. Add a vertical line that ends in a hook for the front leg. Teacher's Tip: Keep your pencil pressure light here so you can adjust the body shape if needed.
Step 7: Drawing the Tail

Sketch a large, sweeping curve for the tail. Use sketchy, short lines to give it a furry texture, curling the end inward. Teacher's Tip: A curled tail can also help convey the cat's sad, tucked-in posture.
Step 8: Adding Paw Details
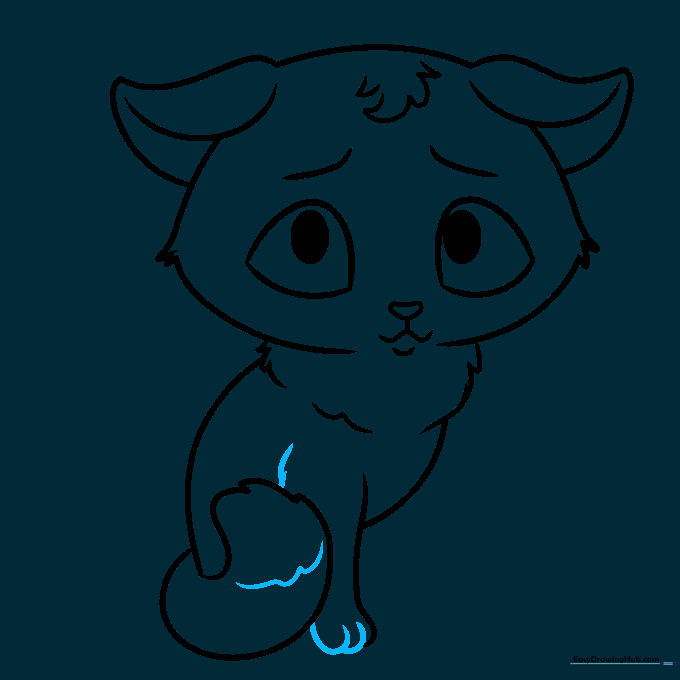
Add more texture lines to the tail and body. Draw small, overlapping loops at the bottom of the legs to represent the toes. Teacher's Tip: Keep the toes small to maintain the 'cartoon' style of the drawing.
Step 9: Finalizing the Leg Outline

For the right leg, draw a hook shape, add the toes, and connect it back to the body with a clean line. Teacher's Tip: Ensure the leg connects smoothly to the body so the cat doesn't look like it's floating.
Step 10: Coloring and Finishing

Outline your drawing in black and erase any stray pencil marks. Use cool grays for the body to emphasize the 'sad' mood, and soft pink for the nose and ears. Teacher's Tip: Use lighter pressure with your gray pencil on the chest and paws to create a highlight effect.
More Tutorials


