How to Draw a Sad Anime Face: Easy Step-by-Step Guide
Capturing emotion is the secret to bringing anime characters to life. This tutorial is designed for artists ages 8+ to master the nuances of a sad expression using basic shapes. Grab your pencil and eraser, and let’s practice how to convey deep feelings through character design.
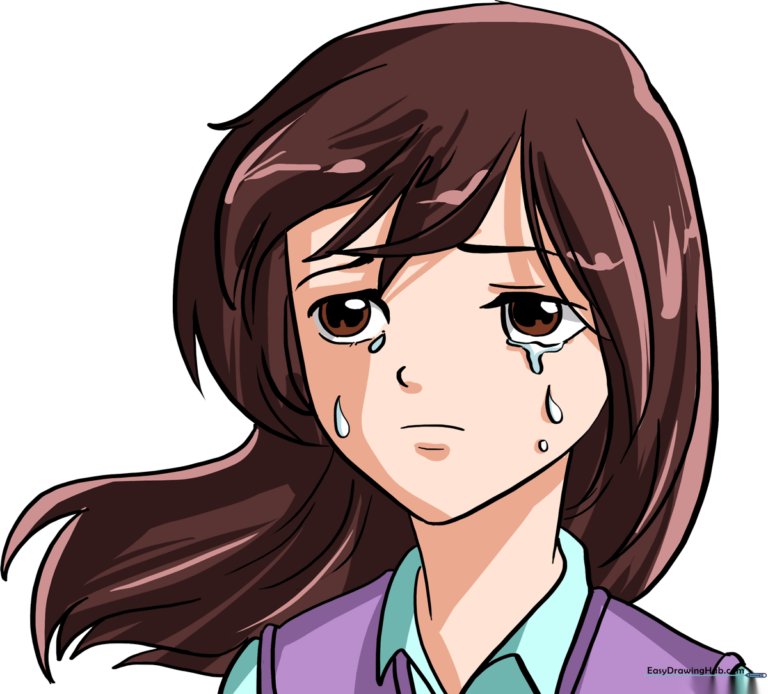
🎯 Final Result
Step-by-Step Instructions
Step 1: Sketching the Face Contour

Draw a smooth, curved line to form the cheek and chin. Teacher's Tip: Keep your pencil pressure light so you can easily refine the jawline later if it looks too sharp.
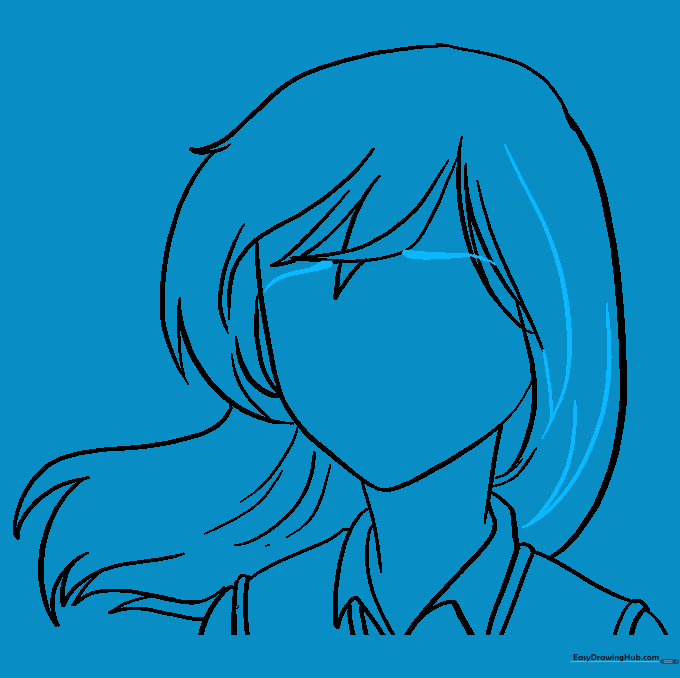
Step 2: Framing the Hairline
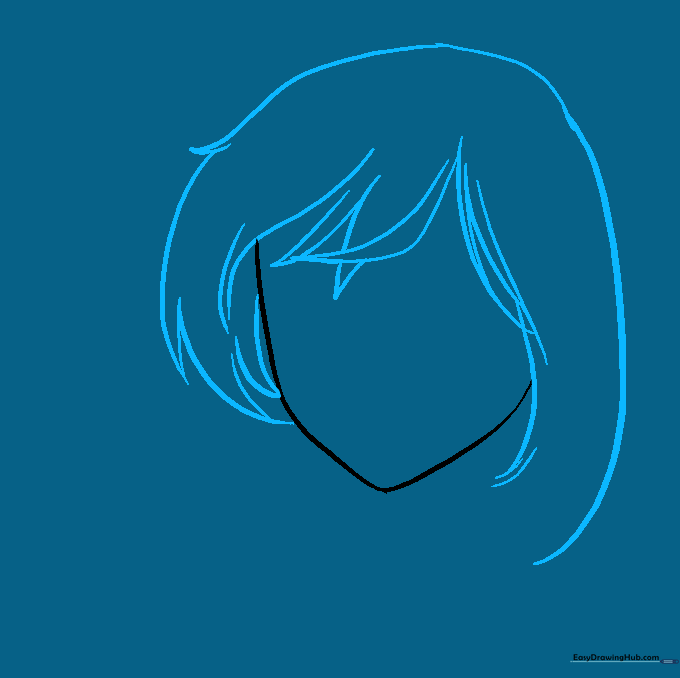
Enclose the top of the head with long, sweeping curves. Add locks of hair using two lines that meet at a sharp point. Tip: Vary the length of the hair strands to make the hair look natural and flowing.
Step 3: Adding Movement to Hair
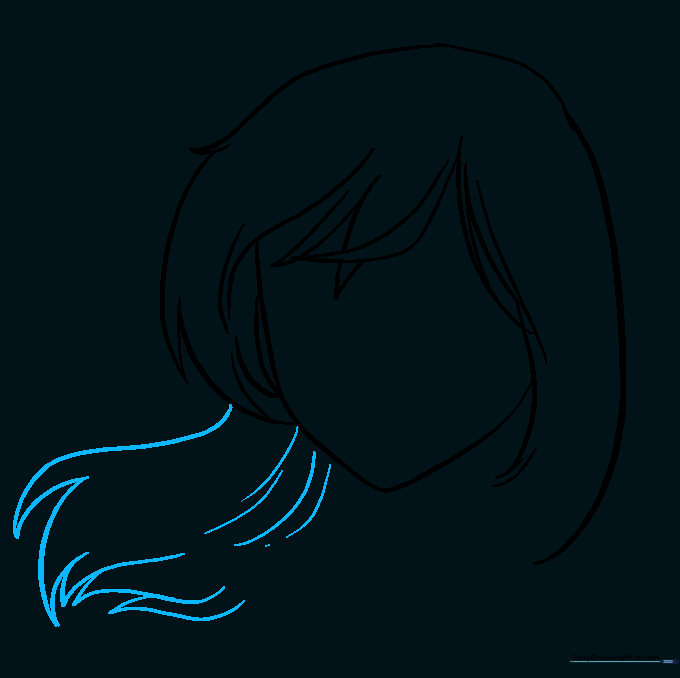
Draw longer, wind-swept strands of hair. Allow the lines to meet at jagged, sharp points. Tip: Think of the hair as ribbons; use long, fluid strokes to give it a sense of motion.
Step 4: Drawing the Neck and Collar
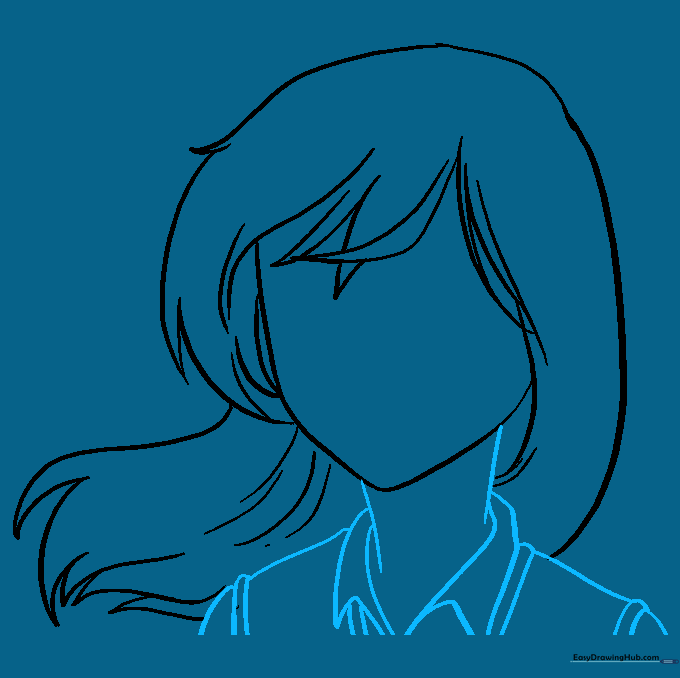
Extend two lines down for the neck and draw a triangular collar shape. Tip: Ensure the neck lines are centered under the chin to keep the character's posture balanced.
Step 5: Refining Hair and Brows
Add texture lines to the hair and draw thick, curved lines for the eyebrows. Tip: Angle the eyebrows downward toward the center to immediately create a sad or worried expression.
Step 6: Drawing the First Eye
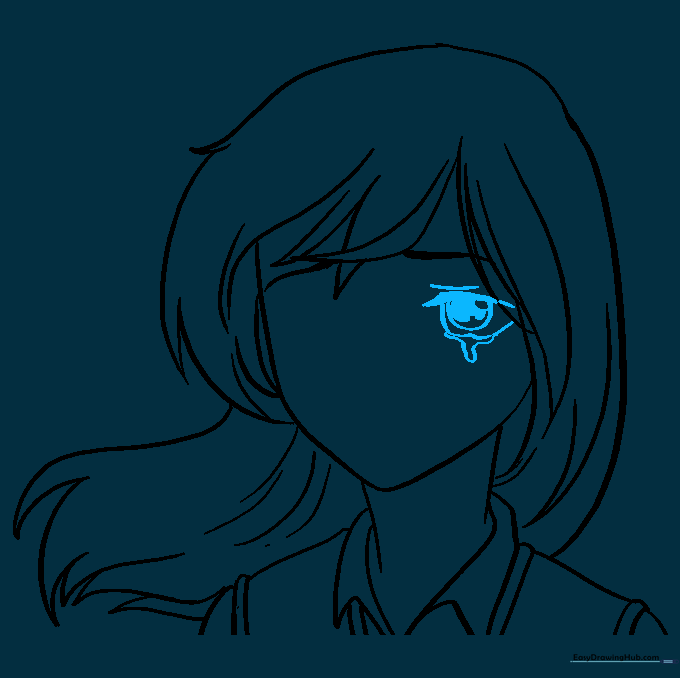
Draw a thick upper eyelid and a tear shape beneath it. Fill the eye with concentric circles for the pupil. Tip: Leave a small white dot inside the pupil to act as a 'glint'—this makes the eyes look shiny and teary.
Step 7: Drawing the Second Eye

Repeat the process for the second eye, ensuring it matches the first in size. Tip: Keep the tear shape consistent to maintain the character's emotional state.
Step 8: Adding Tears and Nose

Draw a small, simple line for the nose and add teardrops streaming down the cheek. Tip: Use varying sizes for the teardrops to make them look more realistic as they fall.
Step 9: Final Touches

Sketch a small, frowning mouth and finalize the chin. Clean up any overlapping lines with your eraser. Tip: A slight downward curve for the mouth is all you need for a sad expression.
Step 10: Bring It to Life with Color
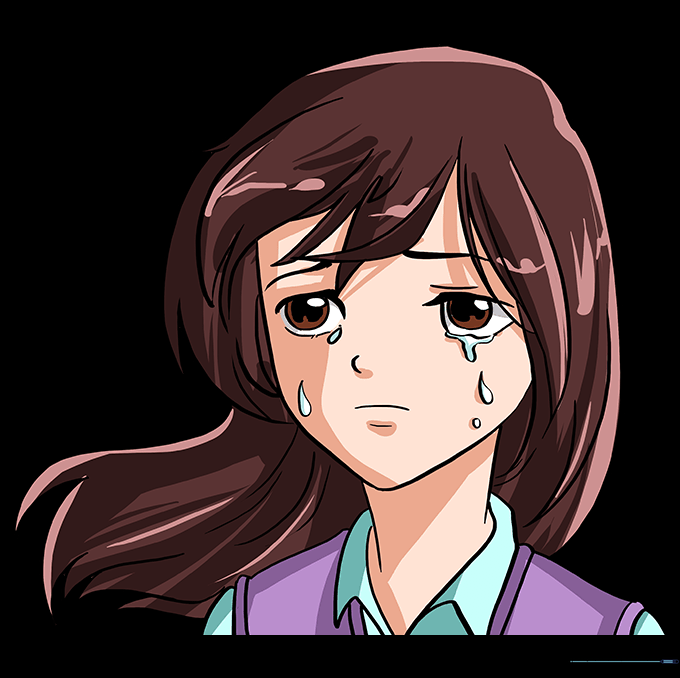
Color your character using your favorite medium. Tip: Use cooler tones like blues or soft purples to emphasize the 'sad' mood of the drawing.
More Tutorials


