How to Draw a Sacred Heart: Easy 10-Step Guide
This tutorial is perfect for artists ages 8+ looking to practice complex line work and symmetry. You will need a pencil, eraser, and fine-liner pen to complete this design. Follow along to master the art of weaving shapes and expressive flame details.
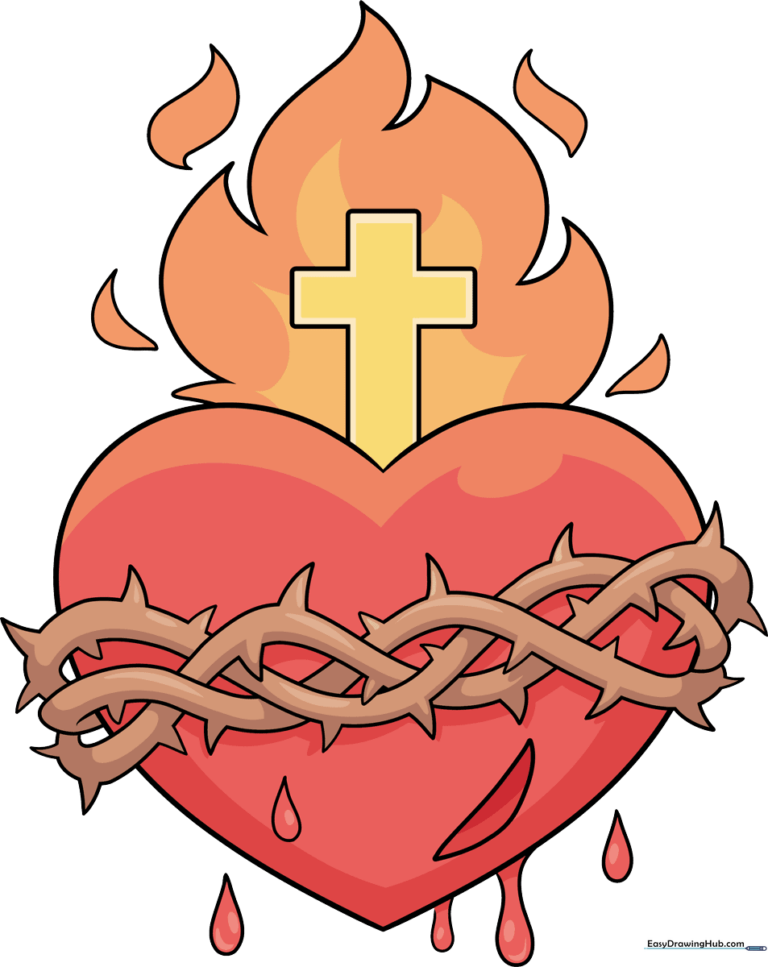
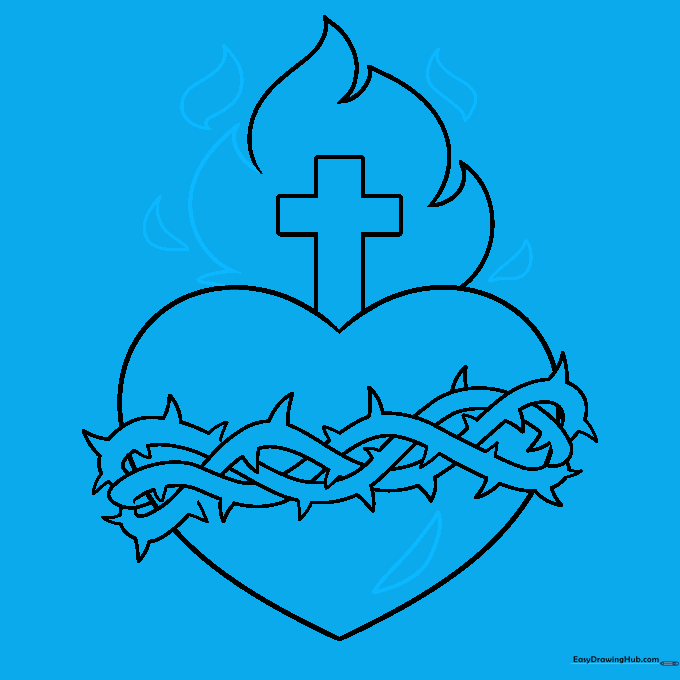
🎯 Final Result
Step-by-Step Instructions
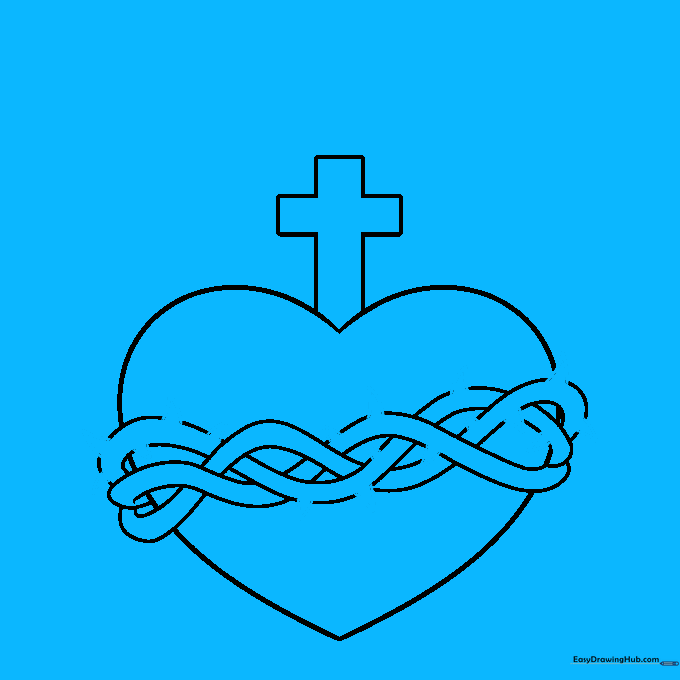
Step 1: Sketching the Base Heart and Cross

Draw a large, symmetrical heart shape occupying the bottom half of your paper. Add a simple cross centered on top. Teacher's Tip: Keep your pencil pressure light so you can easily adjust the proportions if the heart looks lopsided.
Step 2: Creating the First Ribbon Layer

Draw two parallel squiggly lines across the front of the heart to create a ribbon-like band. Teacher's Tip: Think of this like a snake wrapping around the heart; make the curves soft and fluid.
Step 3: Weaving the Second Ribbon

Add a second ribbon shape that weaves in and out of the first. Teacher's Tip: To create the 'woven' effect, ensure the lines of the second ribbon stop where they would be hidden behind the first.
Step 4: Completing the Woven Pattern

Add a third ribbon section that weaves between the previous two. Teacher's Tip: Check your overlaps—if a line goes 'over' one ribbon, it should go 'under' the next to maintain the pattern.
Step 5: Adding Initial Thorns
Sketch small triangles along the edges of your ribbons to represent thorns. Teacher's Tip: Vary the size of the triangles to make them look more natural and organic.
Step 6: Finishing the Thorn Wreath
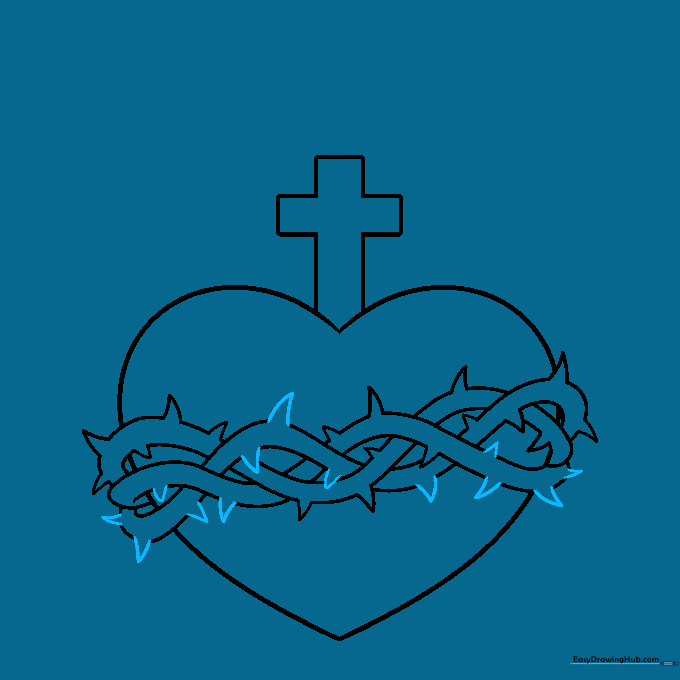
Add more thorns to fill out the wreath. Teacher's Tip: Avoid overcrowding; leave a little space between each thorn so the drawing stays clean and readable.
Step 7: Sketching the Base Flames
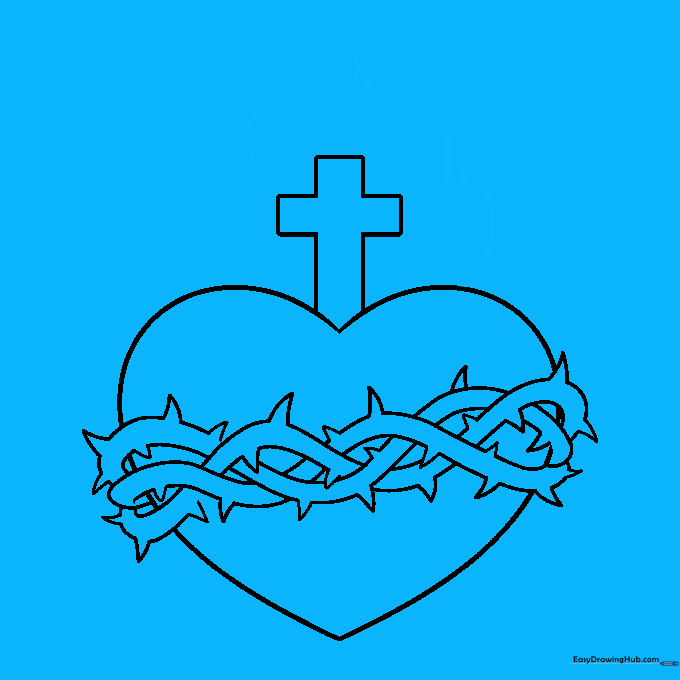
Draw curved, pointed shapes rising from the cross to create flames. Teacher's Tip: Use loose, sweeping wrist motions to make the flames look energetic rather than stiff.
Step 8: Adding Flame Details
Add more layers of flames around the cross and a small detail at the bottom of the heart. Teacher's Tip: Vary the height of the flames to create a more dynamic, flickering effect.
Step 9: Finalizing the Outline
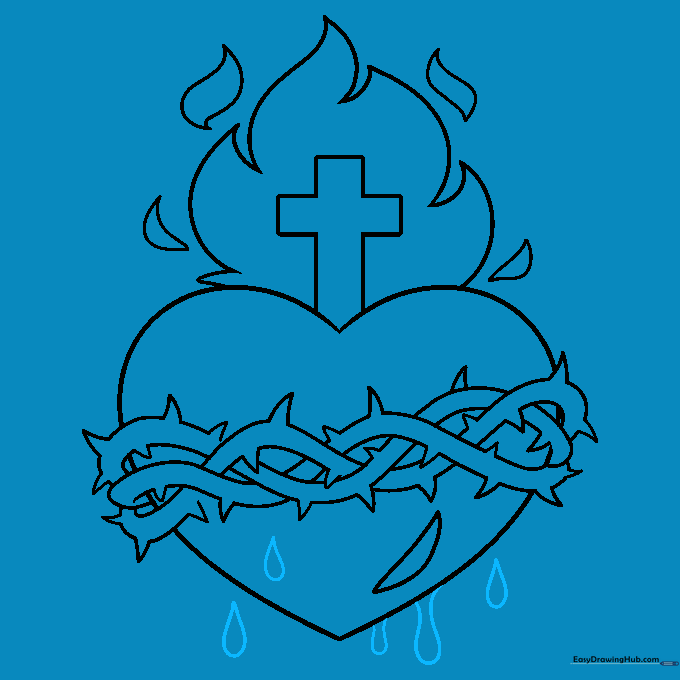
Add small teardrop shapes at the bottom to represent drips. Teacher's Tip: Use a fine-liner pen to go over your pencil lines, then erase the stray pencil marks for a professional look.
Step 10: Adding Color and Depth

Color the heart in deep reds, using darker shades for shadows. Use bright oranges and yellows for the flames to make them 'pop.' Teacher's Tip: Use a light brown for the thorns to create contrast against the vibrant red heart.
More Tutorials


