How to Draw a Rose with Stem: Easy 20-Step Guide
Capture the elegance of a rose with this beginner-friendly tutorial. Designed for artists ages 7 and up, this guide uses basic shapes to build a complex-looking flower. All you need is a pencil, an eraser, and a piece of paper to get started.
🎯 Final Result

Step-by-Step Instructions
Step 1: Sketching the Stem Base

Draw a long, gentle curve from the center of your paper toward the bottom. Teacher's Tip: Keep your pencil pressure light so you can easily adjust the shape later.
Step 2: Adding Stem Thickness

Draw two additional curved lines mirroring your first line, one on each side. Tip: Try to keep the distance between the lines consistent for a natural look.
Step 3: Closing the Stem

Connect the bottom ends of your three lines with a small, rounded curve. This creates the base of your rose stem.
Step 4: Sketching Thorns

Add three small triangles on each side of the stem, pointing slightly upward. Tip: Keep them sharp to make them look like real rose thorns.
Step 5: Refining the Stem

Erase the center guide line and the bottom lines of the thorns. Extend the thorn lines slightly to give them a natural, organic look.
Step 6: Leaf Veins (Right)

Draw two arcs on the right side of the stem, meeting at a point. This will serve as the central vein for your first leaf.
Step 7: Leaf Veins (Left)

Repeat the process on the left side of the stem. These veins provide the structure for your leaves.
Step 8: Shaping the First Leaf

Use small, jagged arcs to outline the leaf around the vein. Tip: Rose leaves have serrated edges, so don't worry about making them perfectly smooth!
Step 9: Shaping the Second Leaf
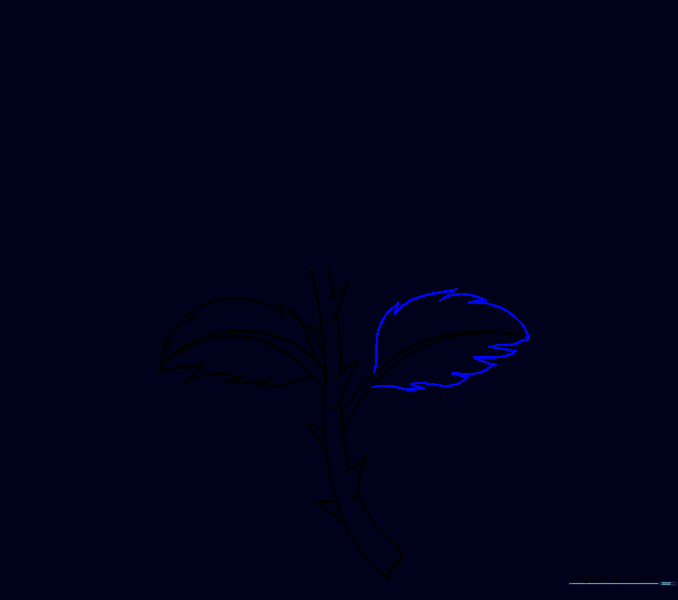
Repeat the jagged outline for the second leaf. Ensure the points connect back to the tip of the vein.
Step 10: Adding Leaf Detail

Draw small, curved lines radiating from the central vein to the edges of the leaves. This adds realistic texture.
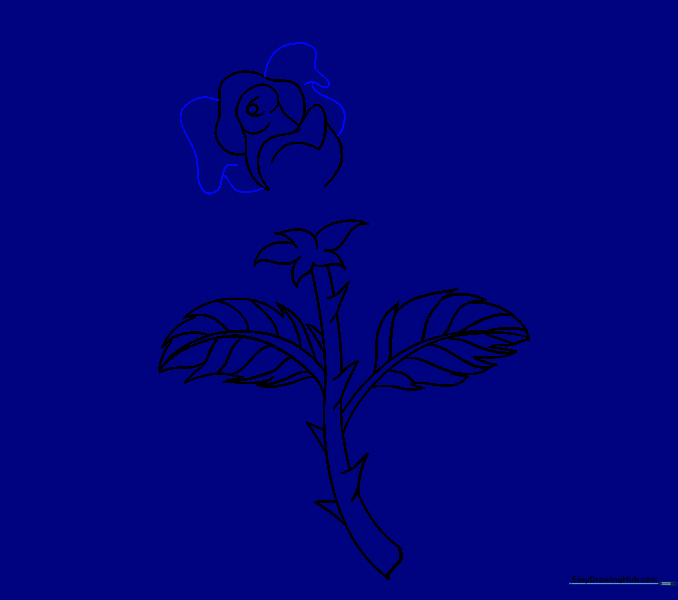
Step 11: The Sepals

Draw a five-pointed star shape at the top of the stem. These are the sepals that cradle the rosebud.
Step 12: Starting the Bloom

Draw a small circle near the top, then a half-circle around it. This is the center of your rose.
Step 13: Building Petals

Draw an irregular oval around the center, then add long, curving lines extending outward. This creates the first layer of petals.
Step 14: Adding Depth

Use a series of overlapping arcs to create a new petal. This adds volume to the bloom.
Step 15: Enveloping Petals

Draw a large, sweeping curved line that wraps around the center section.
Step 16: Side Petals
Add a petal on each side of the bloom using two simple curved lines for each.
Step 17: Connecting the Bloom
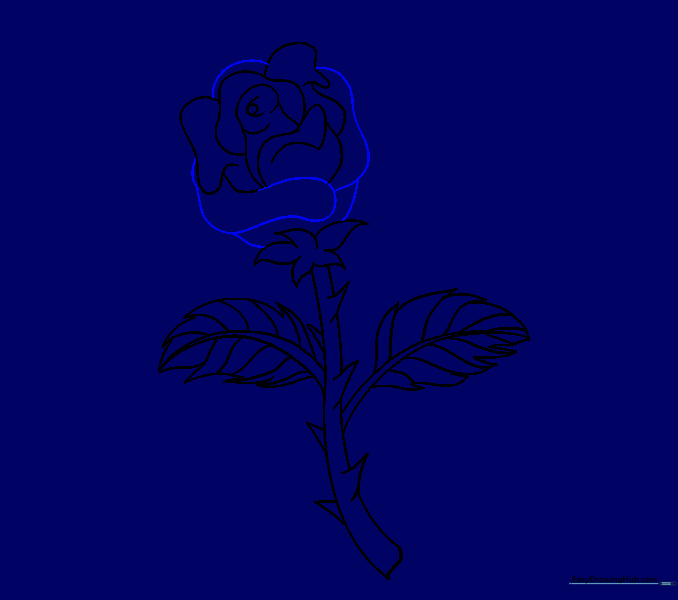
Connect the petals to the base and the stem using smooth, flowing lines.
Step 18: Outer Petals

Add five more petals around the outer edge to make the flower look full and lush.
Step 19: Final Details

Add small, triangular leaflets at the corners of the bloom to finish the structure.
Step 20: Color and Shading

Bring your rose to life with vibrant reds and greens. Use darker shades in the folds of the petals to create depth.
More Tutorials


