How to Draw a Rooster: Easy 10-Step Guide for Kids
Ready to bring a farmyard friend to life? This tutorial is perfect for artists ages 5 and up. All you need is a pencil, an eraser, and a piece of paper to practice your line work and shapes.
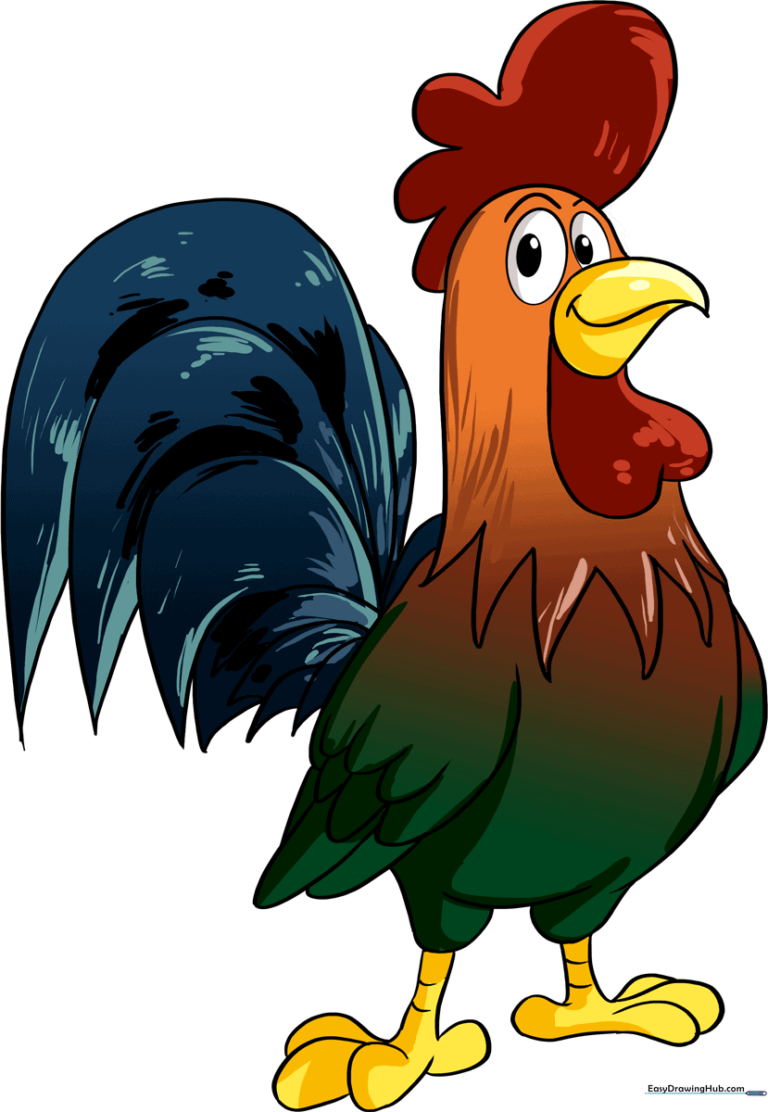
🎯 Final Result
Step-by-Step Instructions
Step 1: Sketching the Head

Draw a light circle for the head. Teacher's Tip: Keep this small—about the size of a coin—to leave plenty of room on your paper for the tail and body.
Step 2: Adding the Comb

Use curved lines to draw an irregular, bumpy shape on top of the head. This is the rooster's comb. Tip: Think of it like drawing a series of small, connected hills.
Step 3: The Beak and Wattle

Draw a teardrop shape for the beak, then add a line across it to create a 'smile.' Below the beak, add an inverted heart shape for the wattle. Tip: Keep the wattle soft and rounded to make your rooster look friendly.
Step 4: Neck Feathers
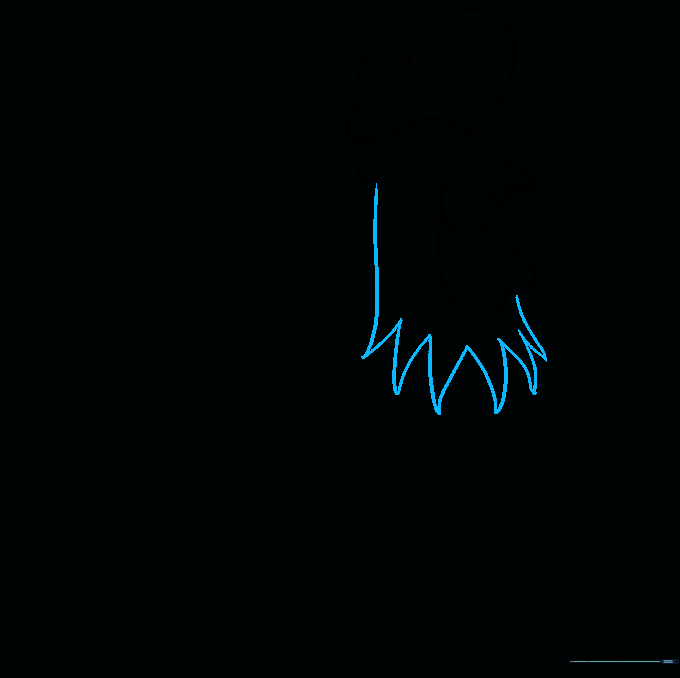
Erase the bottom of your head circle and replace it with jagged, V-shaped lines. This creates the texture of neck feathers. Tip: Vary the length of your 'V' shapes to make the feathers look natural.
Step 5: Detailing the Wing
Use overlapping 'U' shaped lines to outline the wing. Tip: These 'U' shapes act as individual feathers, so try to keep them consistent in size.
Step 6: Forming the Body

Draw a large, open semicircle for the torso. Connect the lines using 'U' shapes where the legs will attach. Tip: Don't worry about making the lines perfectly smooth; feathers are naturally messy!
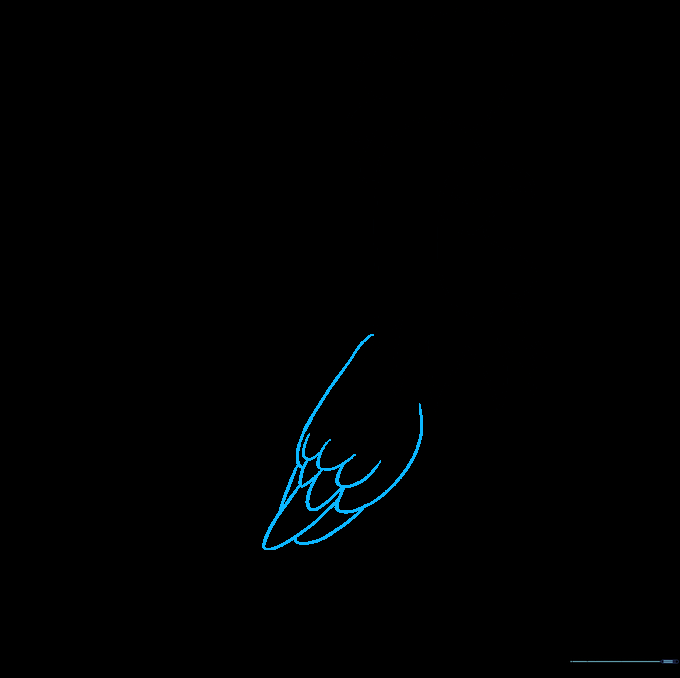
Step 7: Drawing the Feet
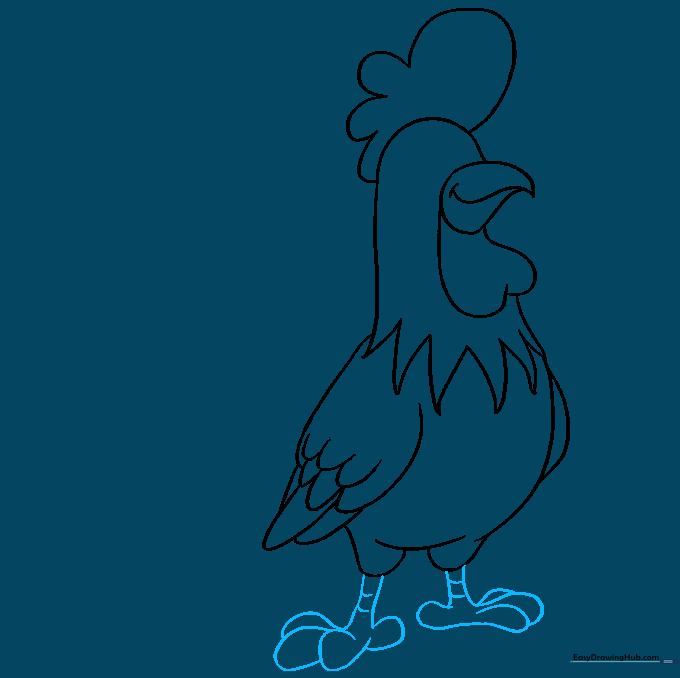
Draw two parallel lines for each leg, ending in three toes made of overlapping 'U' shapes. Add small horizontal lines on the legs for detail. Tip: Make sure the feet are wide enough to help your rooster 'stand' on the page.
Step 8: The Tail Feathers
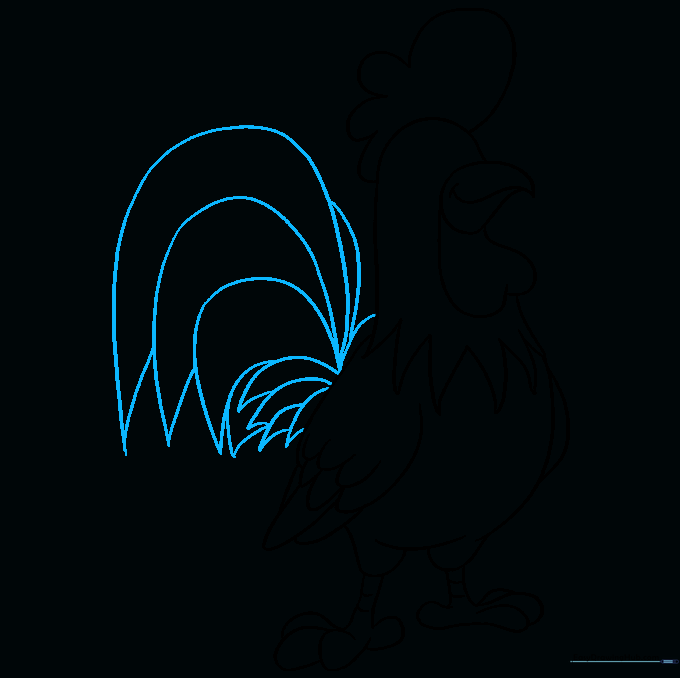
Draw long, flowing tail feathers. Start with small ones near the body and make them longer as you move outward. Tip: Use long, sweeping curves to give the tail a sense of movement.
Step 9: Facial Features
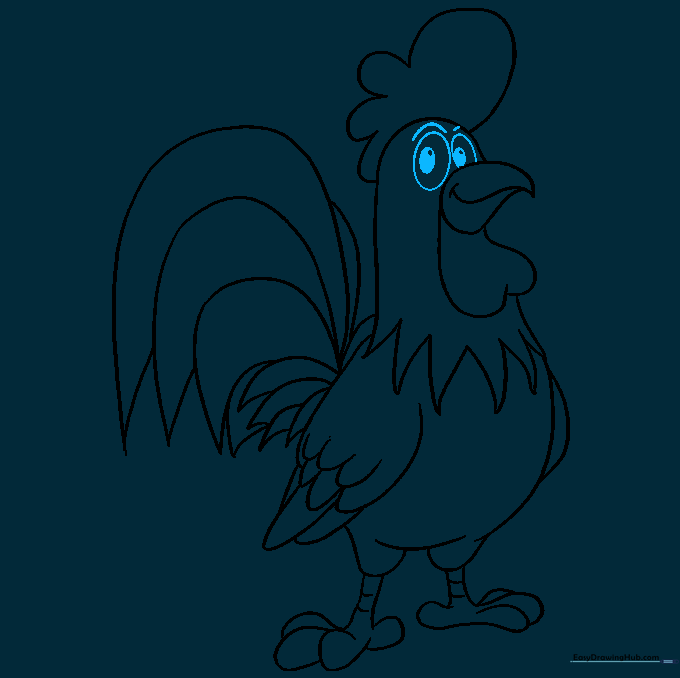
Draw the eye using two small ovals, one inside the other. Shade the center to create a pupil. Add a small curved line above for the eyebrow. Tip: A simple eyebrow gives your rooster a lot of character!
Step 10: Adding Color
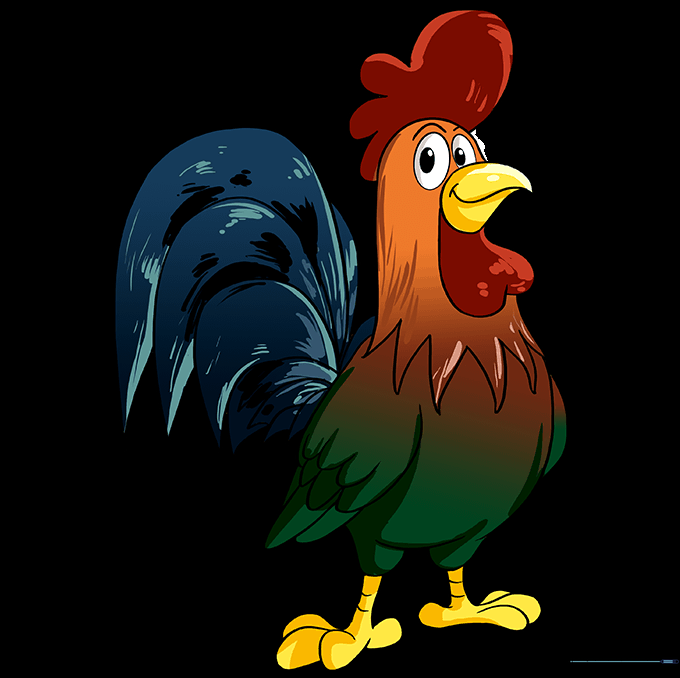
Bring your rooster to life with color! Use bright reds for the comb and wattle, and try mixing blues, greens, or oranges for the feathers. Tip: Try a 'Dominique' pattern by alternating black and white stripes on the feathers.
More Tutorials


