How to Draw a Reindeer Face: Easy 9-Step Guide for Kids
Bring some holiday cheer to your sketchbook with this fun, beginner-friendly reindeer face tutorial. Designed for ages 5 and up, this activity requires only a pencil, eraser, and paper to build confidence in character design. Follow these simple steps to create your own festive friend, complete with a Santa hat and jingle bell.
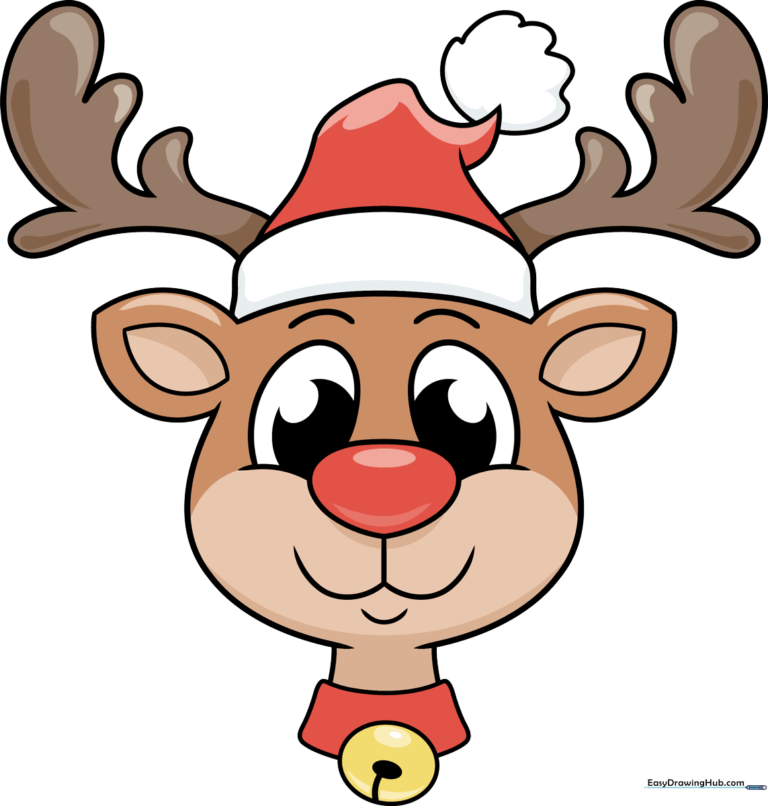
🎯 Final Result
Step-by-Step Instructions
Step 1: Sketching the Expressive Eyes

Start by drawing two curved lines to form the cheeks. Above these, sketch two partial ovals for the eyes. Add two smaller circles inside each for the pupils and shade them in. Teacher's Tip: Keep your pencil pressure light here so you can easily adjust the shape if the eyes look uneven.
Step 2: Adding the Nose and Smile

Draw a large, rounded oval for the nose and a gentle 'W' shape below it for a happy mouth. Add a small curved line above each eye to create expressive eyebrows. Teacher's Tip: A slightly larger nose gives your reindeer a cute, cartoonish look!
Step 3: Defining the Face and Ears
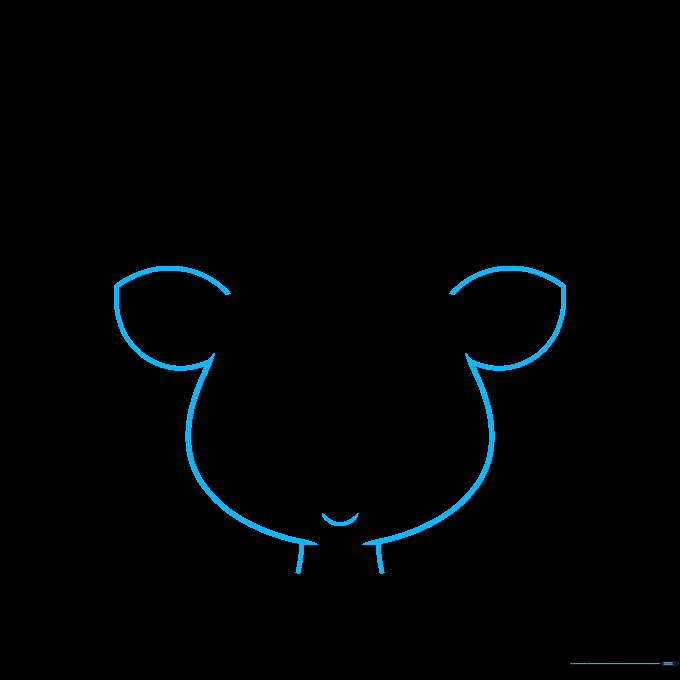
Outline the face by drawing two curved lines for each ear, meeting at a point. Extend the cheek lines downward to form the neck and add a 'U' shape for the chin. Teacher's Tip: Make sure the ears are symmetrical to keep the face looking balanced.
Step 4: Detailing Ears and Starting the Hat
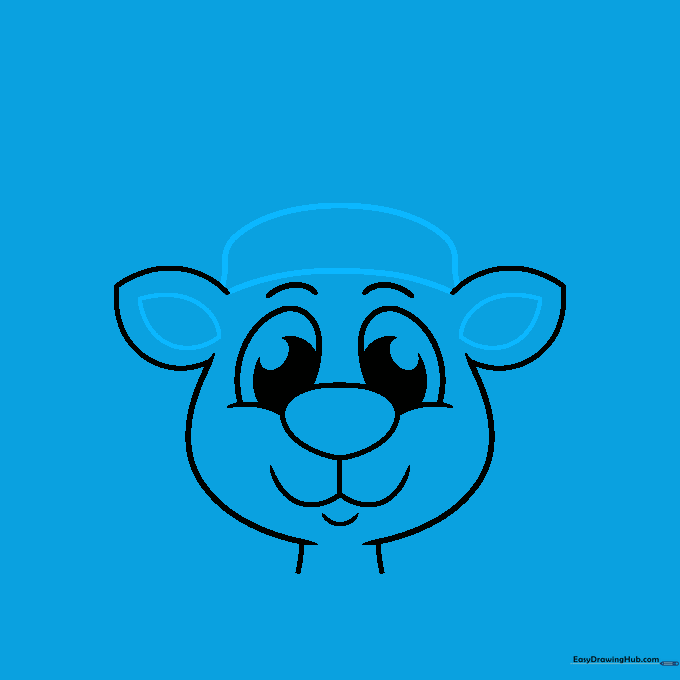
Add a double-pointed teardrop shape inside each ear for depth. Then, draw a rounded rectangle across the top of the head to begin the Santa hat. Teacher's Tip: Use short, light strokes to get the curve of the hat brim just right.
Step 5: Shaping the Santa Hat

Draw the top of the hat using overlapping curved lines to create a soft, crooked triangle shape. Teacher's Tip: Don't worry about making the lines perfectly straight; a slightly floppy hat looks more natural and cozy.
Step 6: Adding the Pom-Pom and Antler
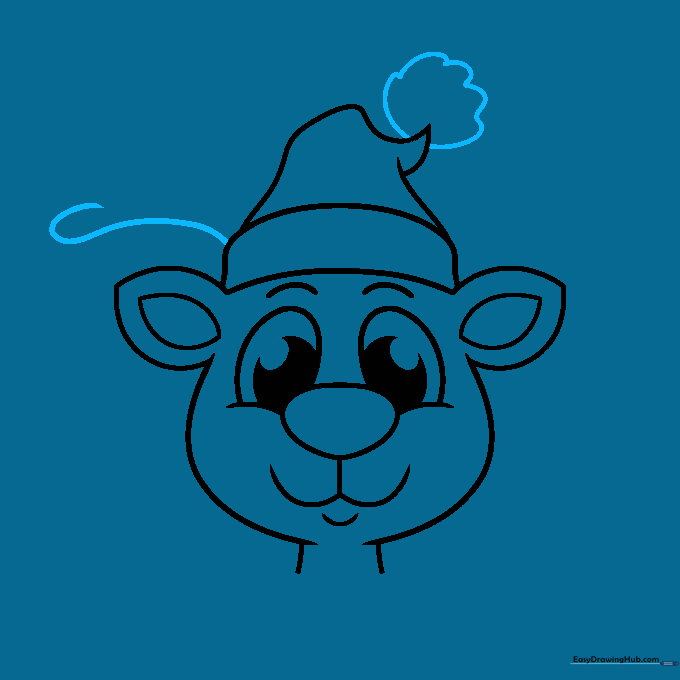
Draw a fluffy, rounded pom-pom at the tip of the hat. Then, extend a curved line from the side of the hat and loop it back to start the first antler. Teacher's Tip: Use a 'bumpy' line for the pom-pom to give it a soft, fuzzy texture.
Step 7: Completing the First Antler
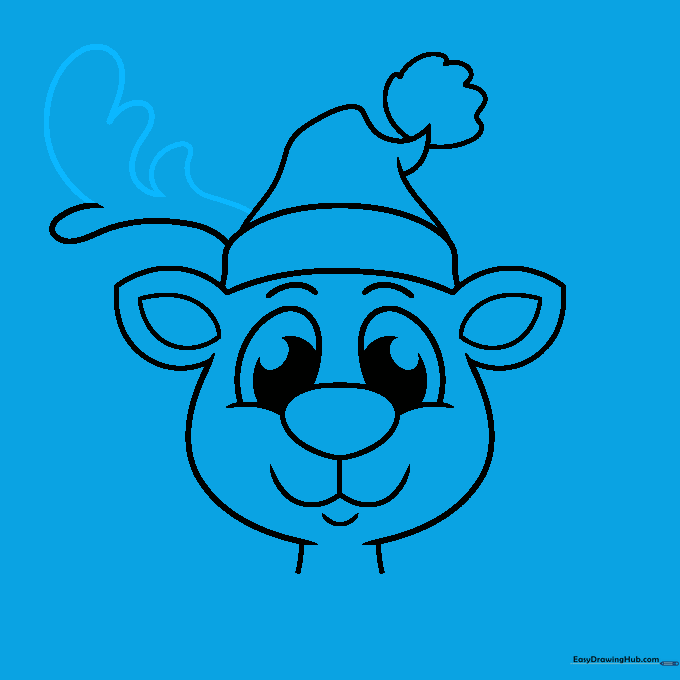
Finish the antler by adding several points using curved lines that double back on themselves. Teacher's Tip: Think of the antler as a tree branch—keep the lines fluid and organic.
Step 8: Drawing the Second Antler
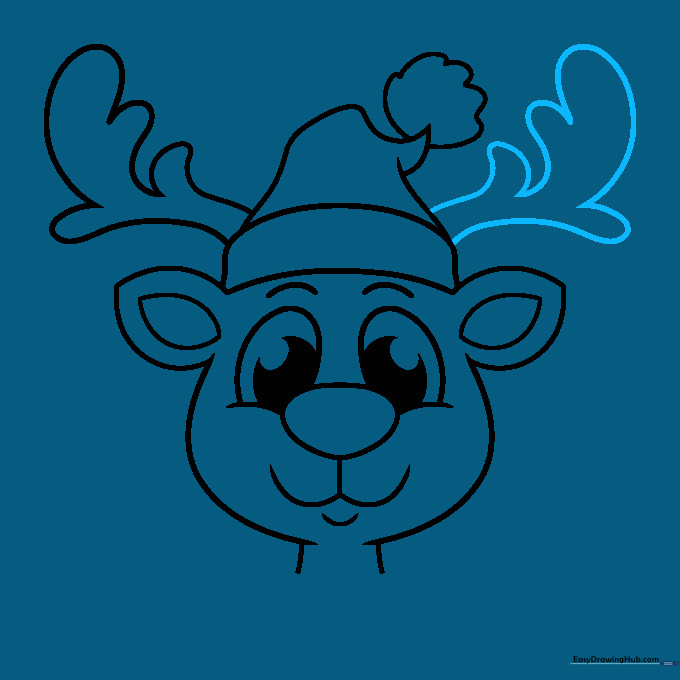
Repeat the process on the other side to draw the second antler. Ensure the points are similar in style to the first one for consistency. Teacher's Tip: If you want a fun twist, make this antler slightly different to give your reindeer more personality!
Step 9: Adding the Final Festive Details

Draw a collar and a jingle bell around the neck. Add a small oval and a thick line to the bell to show detail. Teacher's Tip: Use a darker pencil stroke for the bell to make it stand out as a shiny accessory.
Step 10: Bringing Your Reindeer to Life with Color
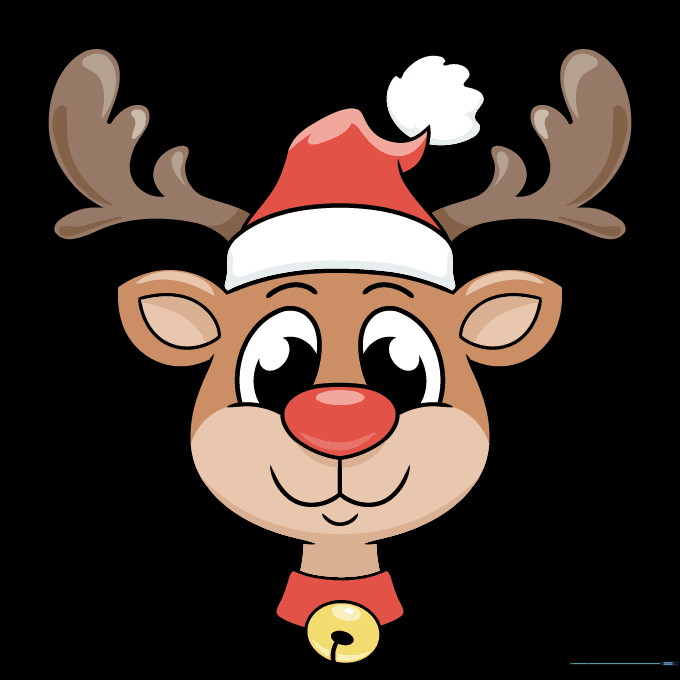
Time to color! Use warm browns for the fur, a bright red for the nose, and classic red and white for the hat. Teacher's Tip: Use light, circular motions with your colored pencils to create a smooth, even coat of color.
More Tutorials


