How to Draw a Rattlesnake: Easy 10-Step Guide
Ready to bring a desert reptile to life? This tutorial is perfect for young artists ages 6+ looking to practice fluid, curved lines. All you need is a pencil, an eraser, and a piece of paper to master this slithering friend.
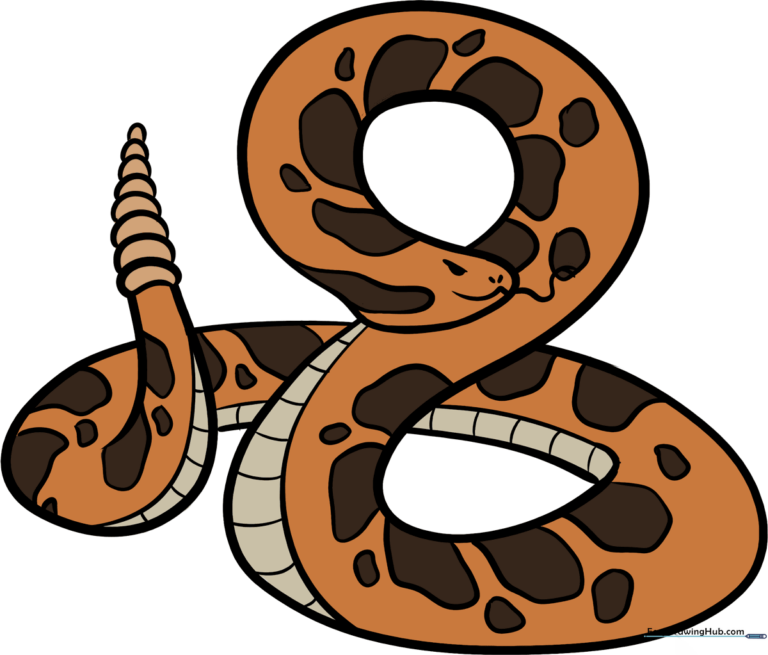
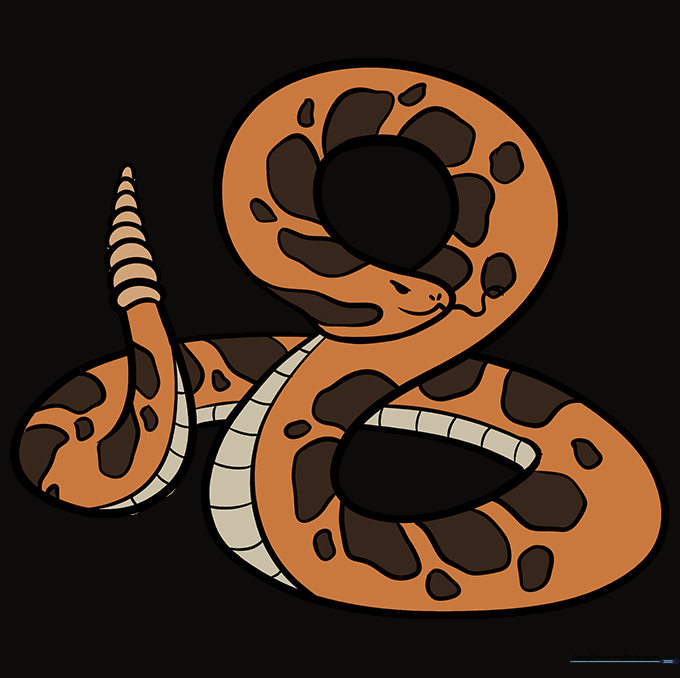
🎯 Final Result
Step-by-Step Instructions
Step 1: Sketching the Body Curve

Draw a long, sweeping curved line that looks like an upside-down letter 'S'. Teacher's Tip: Keep your pencil pressure light so you can easily adjust the shape if your snake looks a bit too wiggly!
Step 2: Creating the Body Thickness

Draw a second 'S' shaped line that mirrors the first, connecting at the ends to form a figure-eight shape. Teacher's Tip: Focus on keeping the space between the lines consistent to make the snake look uniform.
Step 3: Forming the Tail

Extend the lines at the end of the body to a gentle point. Teacher's Tip: Think of this like drawing a long, thin triangle that curves slightly to follow the body's motion.
Step 4: Sketching the Head

Draw a rounded, slightly flattened shape at the front of the body for the head. Teacher's Tip: If you make a mistake, use your eraser to soften the lines before redrawing—don't press too hard!
Step 5: Adding Facial Features

Add a wavy line for the mouth and a forked 'Y' shape for the tongue. Use small, shaded ovals for the eyes and nostrils. Teacher's Tip: Keep the eyes small to give the snake a more focused, realistic look.
Step 6: Drawing the Rattle
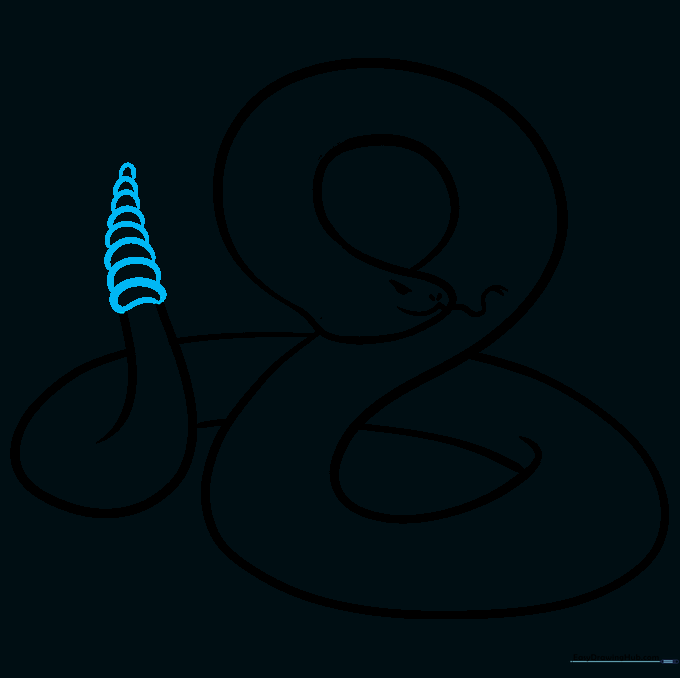
Erase the very tip of the tail and add a series of small, overlapping rounded segments. Teacher's Tip: Make each segment slightly smaller than the one before it to create a natural-looking rattle.
Step 7: Defining the Belly

Draw a long, curved line along the bottom of the snake's body to separate the belly from the back. Teacher's Tip: Follow the curve of the body exactly to keep the snake looking three-dimensional.
Step 8: Adding Belly Scales
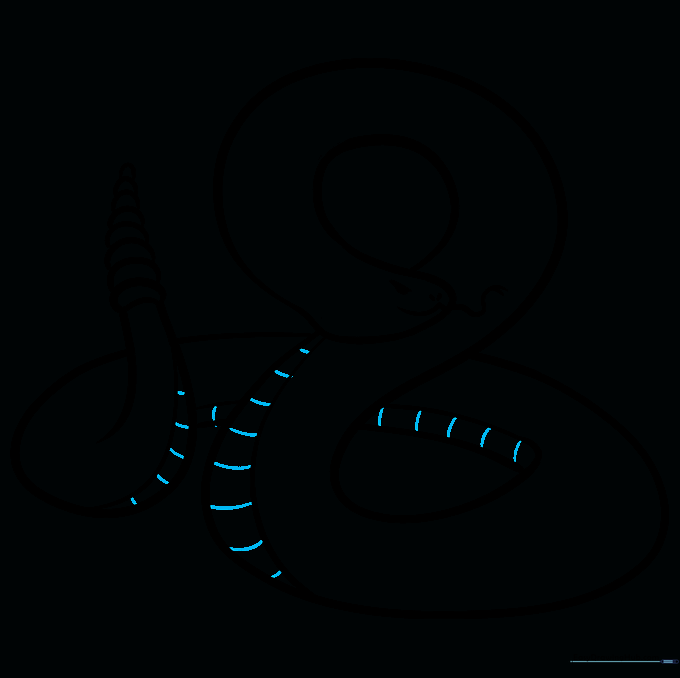
Add short, evenly spaced lines along the belly section to create the look of scales. Teacher's Tip: Keep these lines parallel to each other for a clean, professional finish.
Step 9: Adding Camouflage Patterns
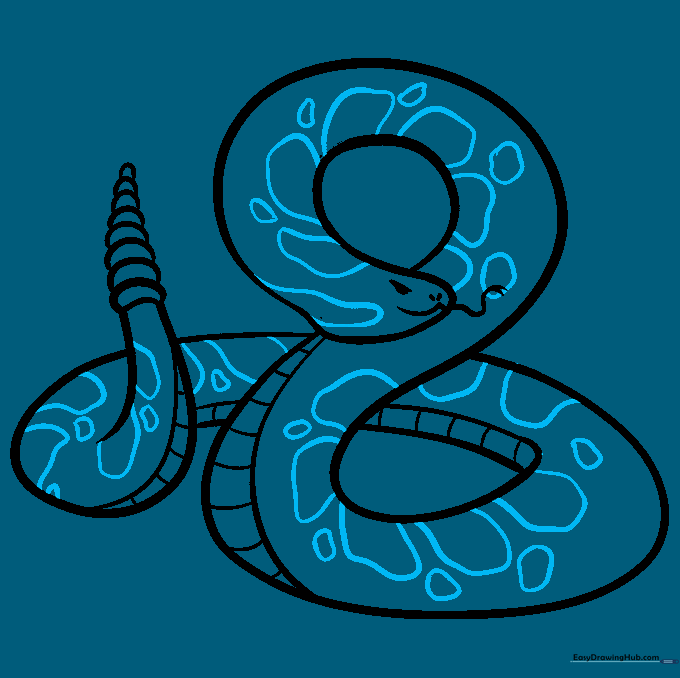
Fill the back of the snake with irregular, blotchy shapes. Teacher's Tip: Don't worry about making them perfect—nature is rarely symmetrical, and these spots help the snake blend into the desert!
Step 10: Bringing it to Life with Color
Time to color! Use earthy tones like brown, tan, or grey for the body, and make the markings a darker shade to help them stand out. Teacher's Tip: Use a darker brown for the spots and a lighter cream for the belly to create depth.
More Tutorials


