How to Draw a Rainbow: Easy 10-Step Guide for Kids
Bring a splash of color to your sketchbook with this fun, beginner-friendly rainbow tutorial. Designed for children ages 5 and up, this project uses basic shapes to build confidence and fine motor control. All you need is a pencil, an eraser, and your favorite set of colored markers or crayons.
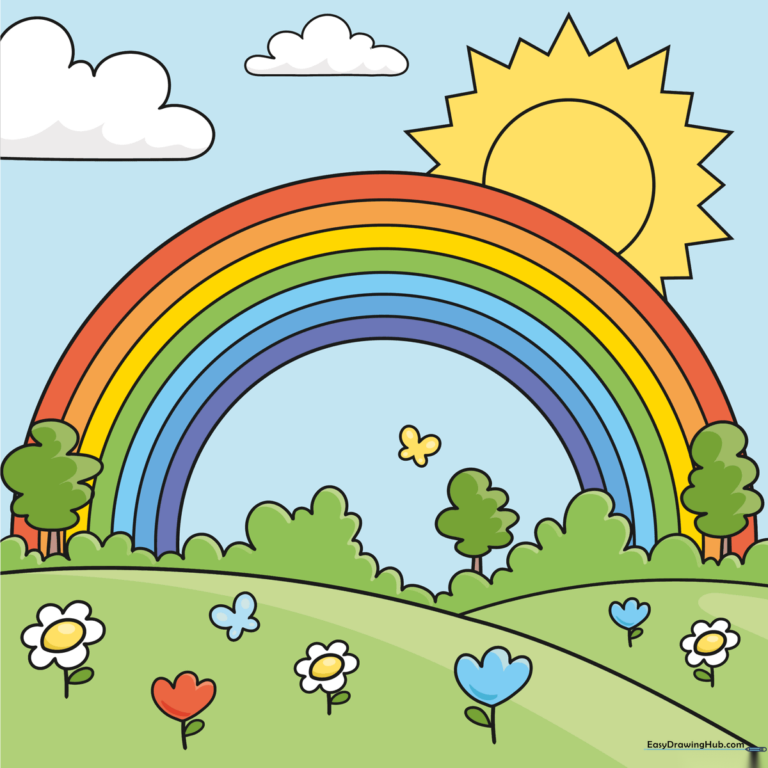
🎯 Final Result
Step-by-Step Instructions
Step 1: Sketching the Rolling Hills

Start by drawing two long, gentle curved lines to create overlapping hills at the bottom of your page. Teacher's Tip: Keep these lines loose and wavy to make the landscape look natural and soft.
Step 2: Adding Distant Bushes

Use a series of small, connected 'U' shapes along the horizon line to create bushes. Then, draw two vertical lines for a tree trunk and a rounded top for the crown. Tip: Vary the size of your 'U' shapes to make the bushes look more realistic.
Step 3: Growing the Forest
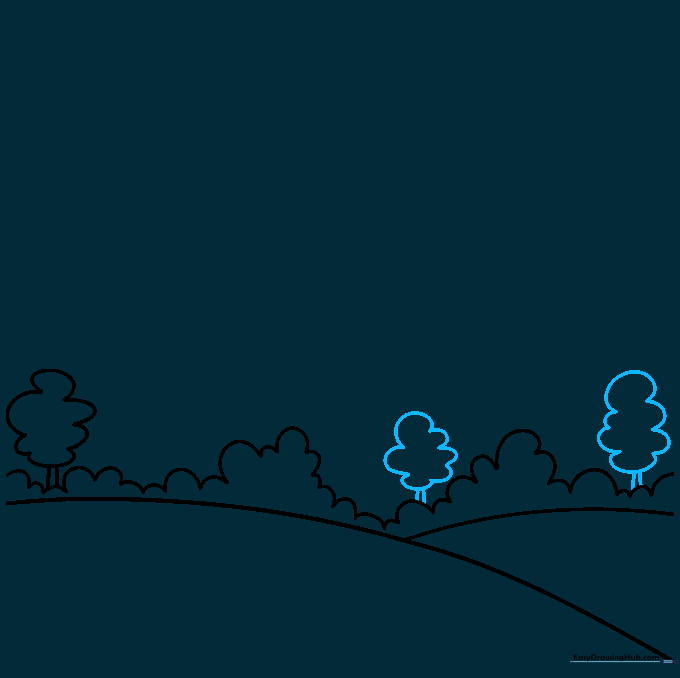
Add more trees to your horizon using the same trunk-and-crown technique. Tip: Try placing your trees at different heights to create a sense of depth in your drawing.
Step 4: Drawing the Rainbow and Sun

Draw two large, parallel 'U' shapes arching across the sky for your rainbow. On the side, draw a partial circle for the sun with jagged, triangular rays. Tip: Use your full arm movement to get a smooth, clean arch for the rainbow.
Step 5: Adding Color Bands and a Daisy

Divide your rainbow into sections by drawing smaller 'U' shapes inside the arch. Then, draw a daisy on the hill: start with an oval center and add petal shapes around it. Tip: Keep your flower petals uniform in size for a tidy look.
Step 6: Planting More Flowers

Add another daisy and a tulip to your garden. Use curved lines for the tulip petals and add a simple stem with a teardrop-shaped leaf. Tip: Drawing flowers at different heights makes your meadow look lush and full.
Step 7: Filling the Meadow

Continue adding more daisies and tulips across the hillside. Tip: Don't worry about making them identical; nature is full of variety, so some flowers can be slightly larger or smaller than others.
Step 8: Adding Butterflies

Bring your scene to life by drawing butterflies fluttering near the flowers. Use 'U' shapes to create the four wings for each butterfly. Tip: Keep the butterflies small so they look like they are in the distance.
Step 9: Drawing Fluffy Clouds
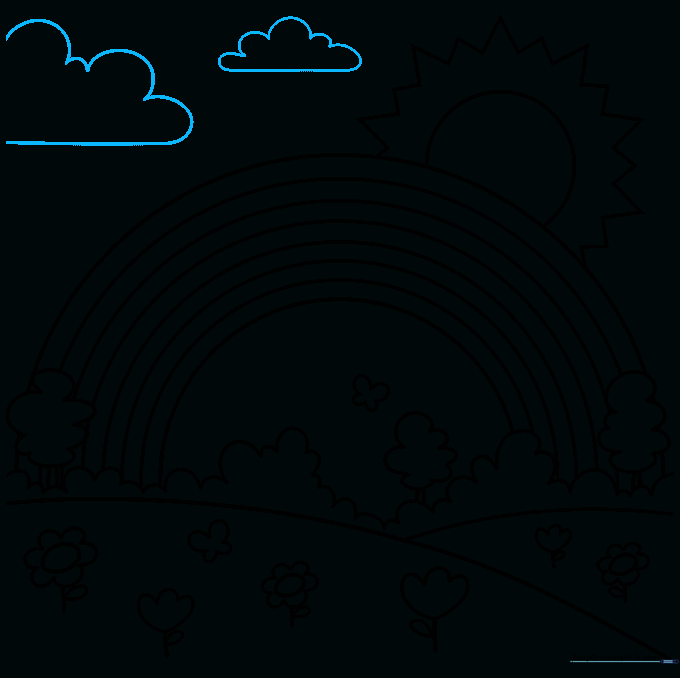
Finish your outline by adding clouds in the sky. Use a flat line for the base and bumpy, curved lines for the fluffy top. Tip: Clouds are great for hiding any mistakes you might have made in the sky area!
Step 10: Coloring Your Rainbow
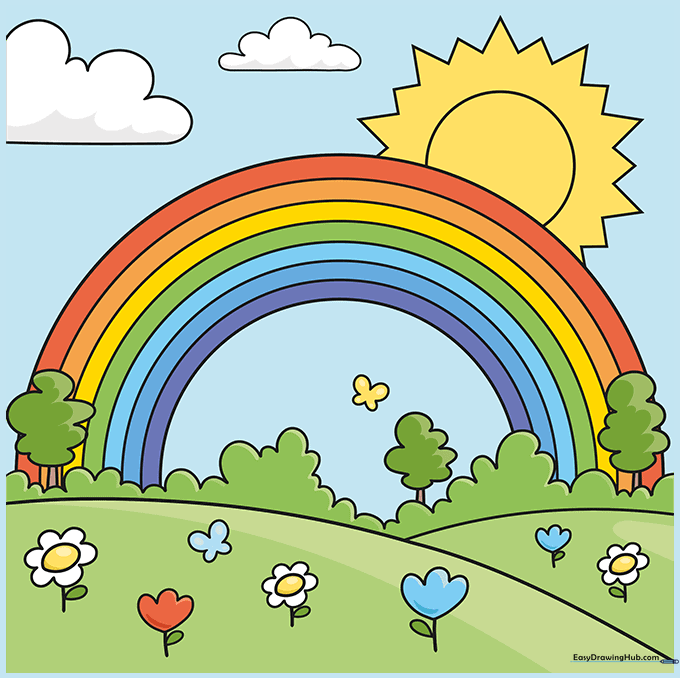
Time to color! Use the mnemonic 'ROY G. BIV' to remember the order: Red, Orange, Yellow, Green, Blue, Indigo, and Violet. Tip: Use light pressure with your crayons to blend the colors beautifully.
More Tutorials


