How to Draw a Rag Doll: Easy 9-Step Guide for Kids
Bring a classic toy to life with this simple rag doll drawing guide, perfect for artists ages 5 and up. You will only need a pencil, an eraser, and your favorite markers or crayons to complete this project. Follow these steps to practice basic shapes and character design while creating your own huggable masterpiece.
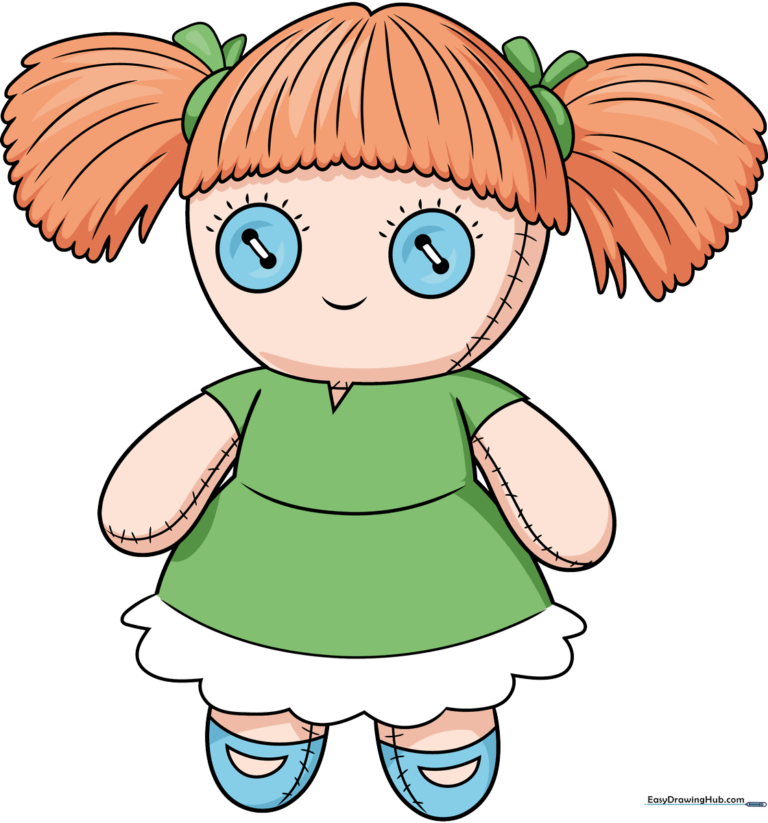
🎯 Final Result
Step-by-Step Instructions
Step 1: Sketching the Button Eyes
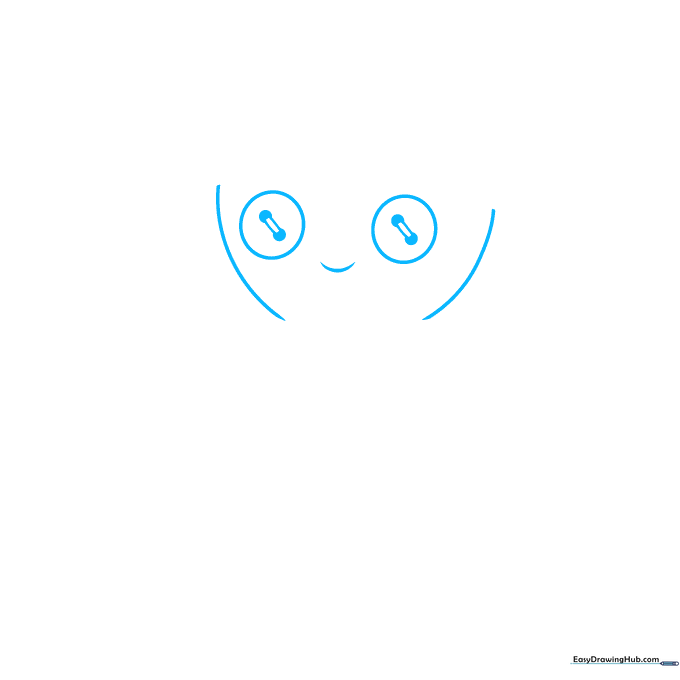
Draw two circles for the eyes and shade smaller circles inside to represent buttonholes. Connect them with two short lines to show the thread. Add curved lines for the sides of the face and a small arc for a smile. Teacher's Tip: Keep the eyes symmetrical to give your doll a friendly, balanced expression.
Step 2: Drawing the Hairline
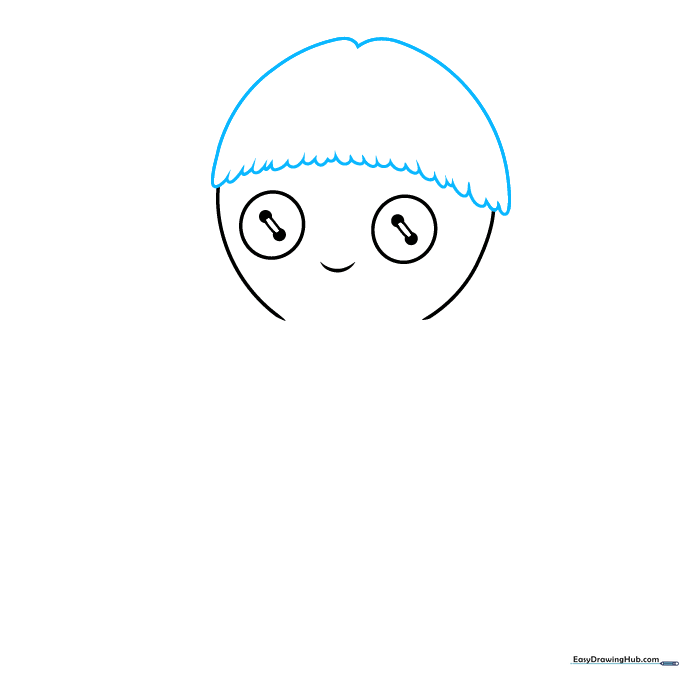
Create a series of connected 'U' shapes across the forehead to form the bangs. Extend curved lines from the sides to meet at the top of the head. Teacher's Tip: Use short, quick strokes to make the hair look soft and rounded.
Step 3: Adding Hair Ties and Ponytails
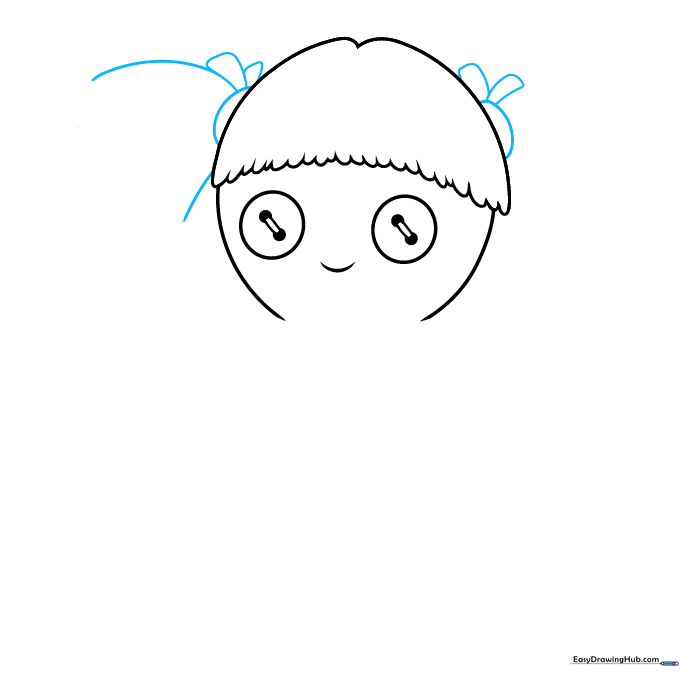
Draw partial ovals on the sides of the head for hair ties, then add rectangular ribbons. Extend curved lines from these ties to create the shape of the ponytails. Teacher's Tip: Make sure the ponytails look bouncy by curving the lines outward.
Step 4: Finishing the Ponytail Ends
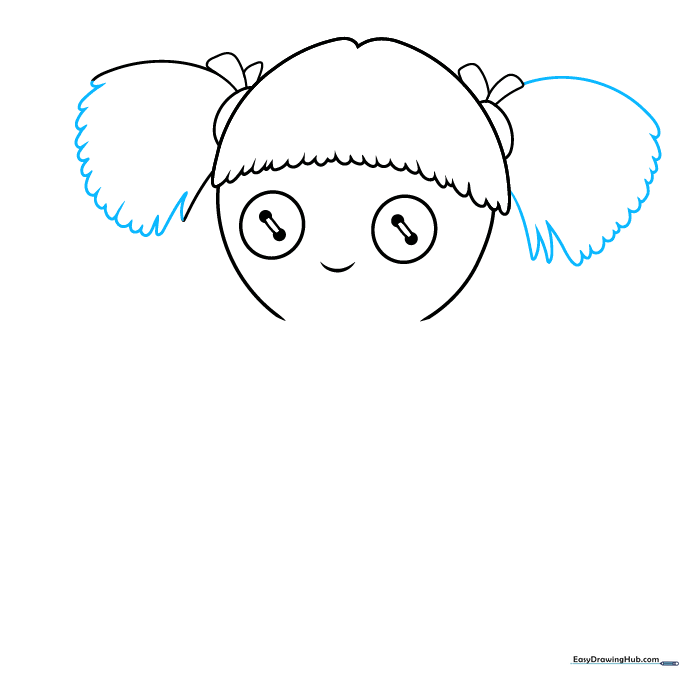
Extend two long lines from each hair tie and connect the ends with a series of 'U' shapes to create a scalloped, fabric-like texture. Teacher's Tip: This scalloped edge makes the hair look like it is made of yarn or fabric.
Step 5: Sketching the Torso and Arms
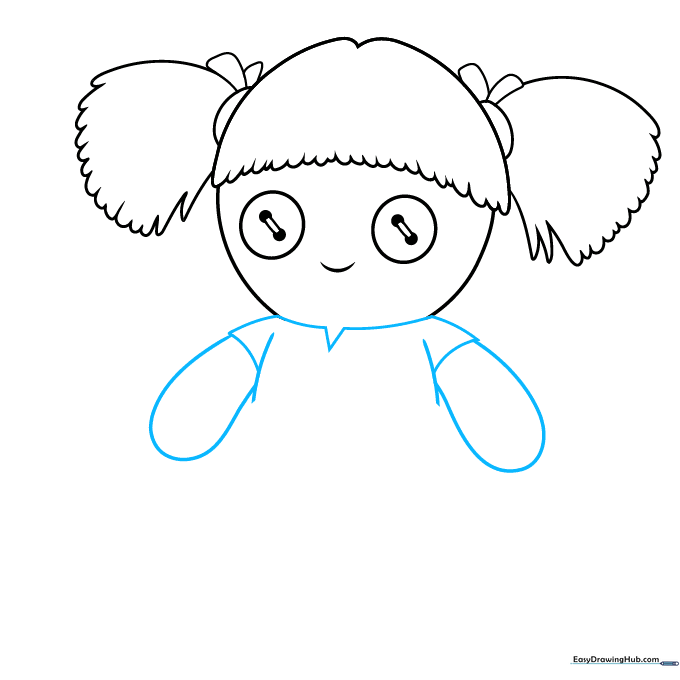
Draw a 'V' shape under the head for the neck, then sketch the sleeves and torso using overlapping curved lines. Extend the arms outward. Teacher's Tip: Keep the arms simple and rounded to maintain the 'stuffed' look of a rag doll.
Step 6: Drawing the Dress and Legs
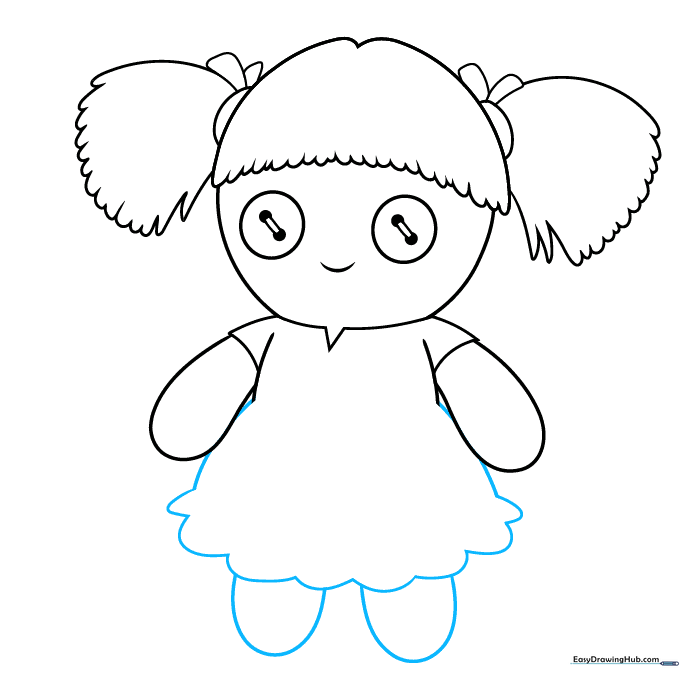
Use connected curved lines to create the scalloped bottom of the dress. Add two half-ovals below for the legs. Teacher's Tip: Ensure the legs are centered under the dress for a balanced look.
Step 7: Adding Hair Texture and Shoes
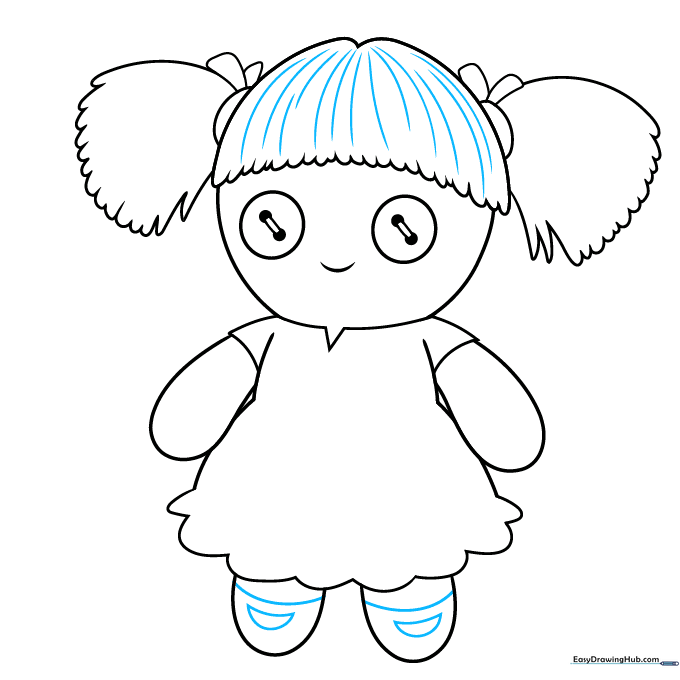
Add long curved lines to the hair for texture. Band the legs with a curved line and add a semicircle at the bottom of each for the shoes. Teacher's Tip: The shoe lines should be slightly wider than the legs to look like separate pieces of fabric.
Step 8: Adding Seam Details
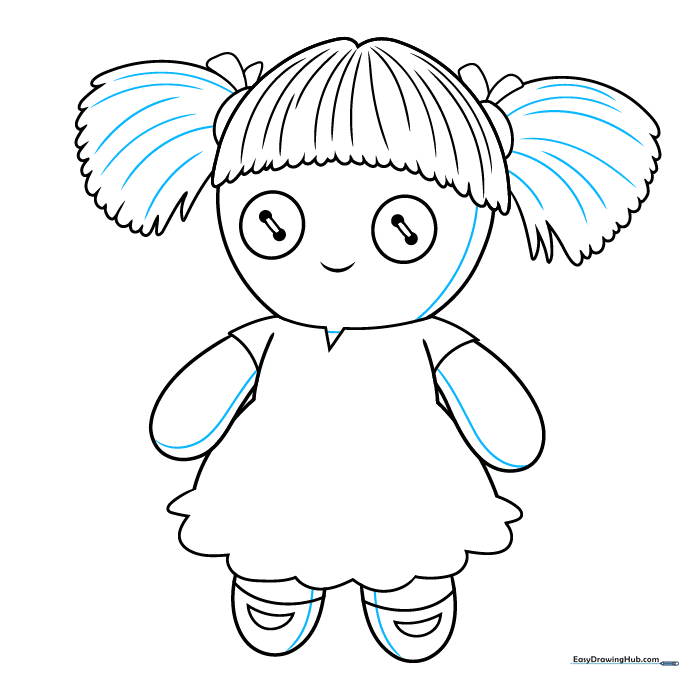
Draw curved lines along the arms, legs, and face to indicate fabric seams. Add more texture to the ponytails. Teacher's Tip: These lines are what make the drawing look like a real sewn doll!
Step 9: Final Touches
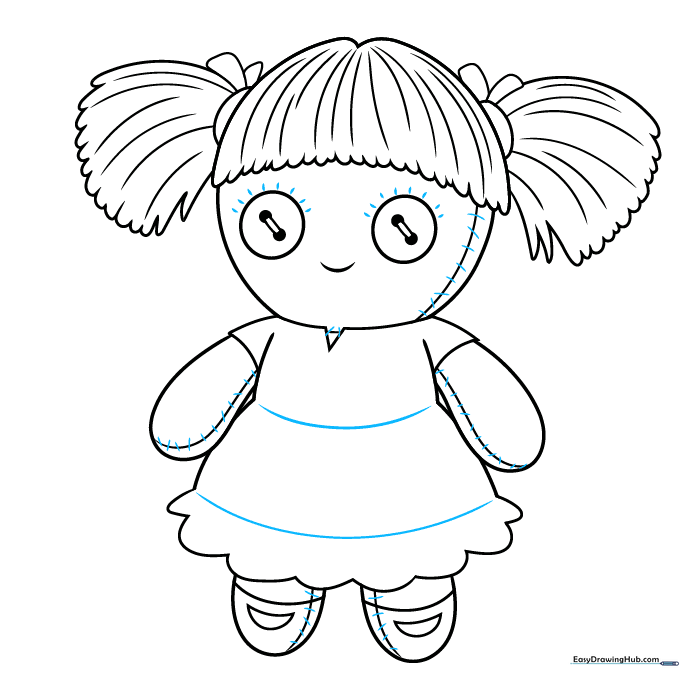
Draw lines across the dress and add small dashes along all seams to represent stitches. Add eyelashes to the eyes. Teacher's Tip: Use a fine-tip pen for these small details to make them pop.
Step 10: Color Your Creation
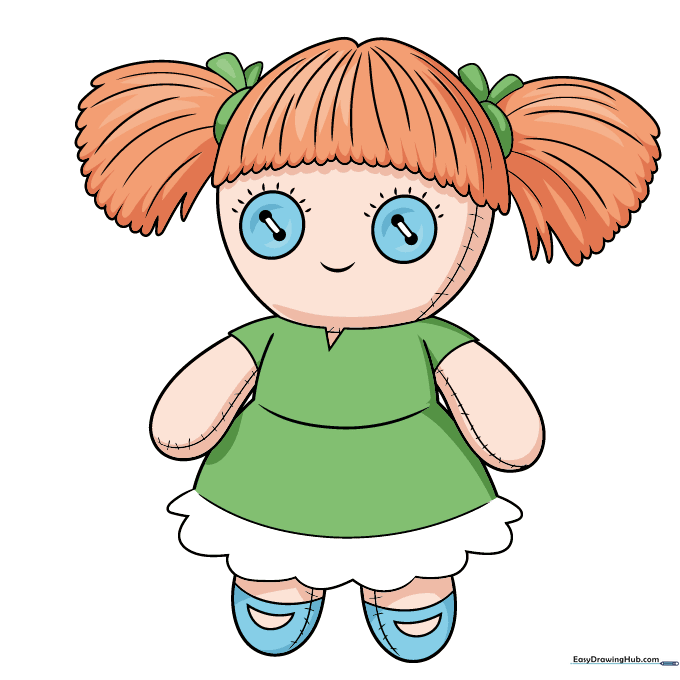
Your outline is complete! Now, choose your favorite colors to bring your rag doll to life. Consider using patterns like polka dots or stripes for the dress.
More Tutorials


