How to Draw a Pretty Girl: Easy 10-Step Portrait Guide
Ready to bring a character to life? This tutorial is perfect for budding artists ages 7+ looking to master basic facial features and hair flow. All you need is a pencil, an eraser, and a sheet of paper to get started on your portrait journey.
🎯 Final Result

Step-by-Step Instructions
Step 1: Sketching the Expressive Eyes

Start by drawing two almond-shaped outlines for the eyes, leaving the corners slightly open. Add two circles inside for the irises and shade them in to create depth. Teacher's Tip: Keep your pencil pressure light here so you can easily adjust the symmetry later.
Step 2: Defining Brows and Eyelids
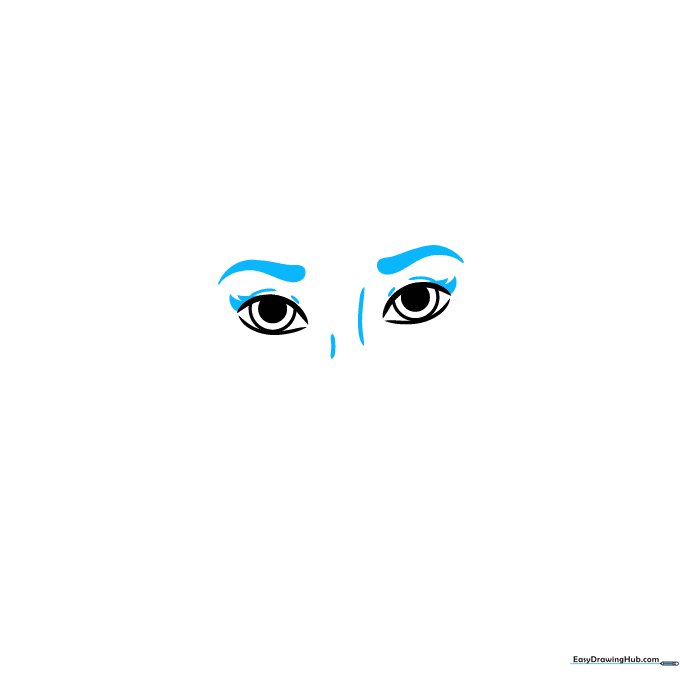
Add character to your portrait by drawing thick, arched eyebrows above the eyes. Use delicate, curved lines to define the crease of the eyelids and the bridge of the nose. Teacher's Tip: Use short, flicking motions with your pencil to make the eyelashes look natural and soft.
Step 3: Adding the Nose and Lips
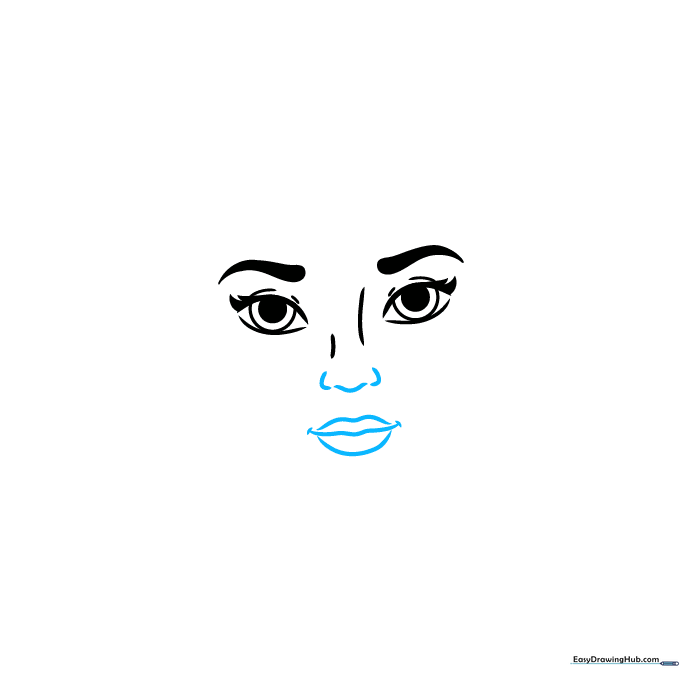
Use three soft, curved lines to suggest the tip and nostrils of the nose. For the mouth, draw a horizontal line for the opening, then add curved shapes for the upper and lower lips. Teacher's Tip: Keep the mouth line small to maintain a cute, cartoon-style proportion.
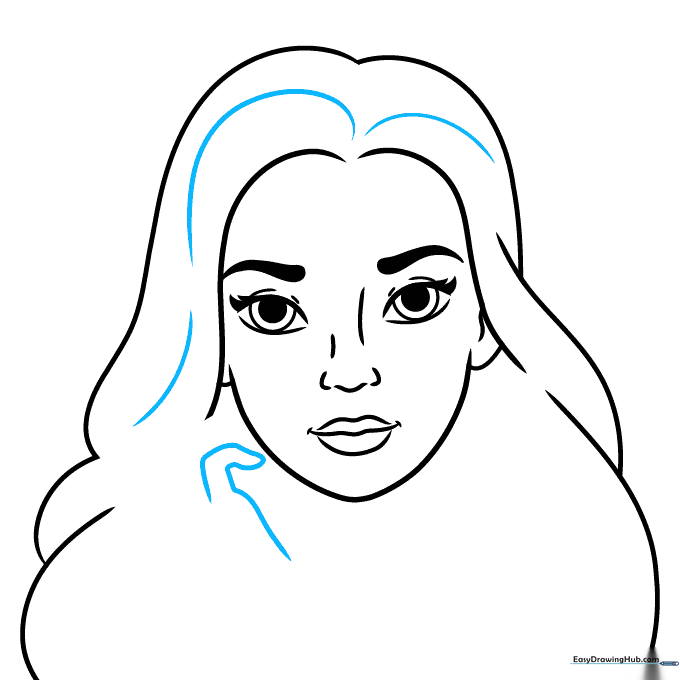
Step 4: Shaping the Face and Hairline
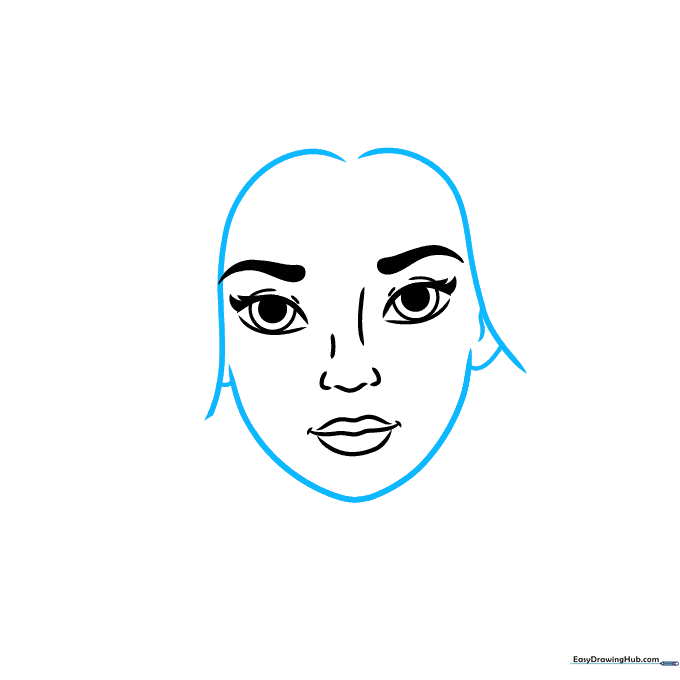
Frame the face with long, sweeping lines that form the chin and cheeks. Add small curves for the ears and start the hair outline. Teacher's Tip: Don't worry if the hair lines don't meet perfectly at the top; this creates a more organic, flowing look.
Step 5: Illustrating the Hair
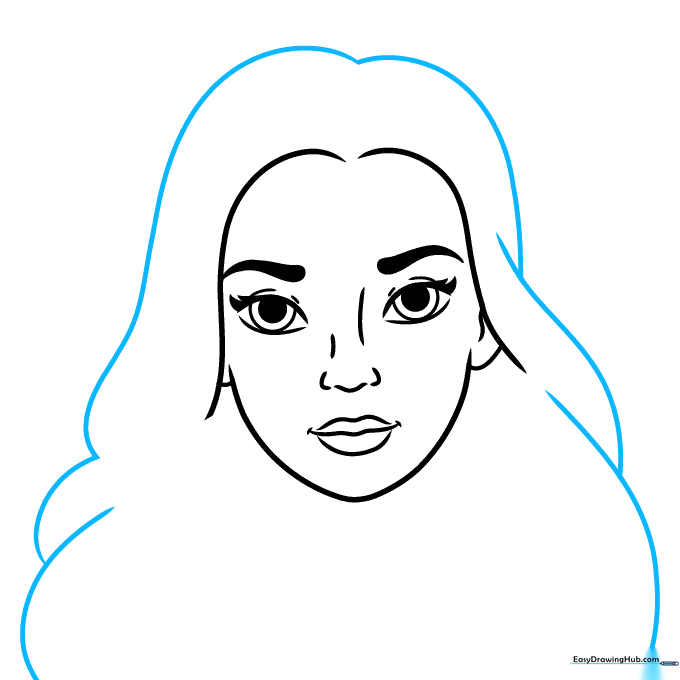
Continue the hair by drawing long, overlapping curved lines that cascade down the sides of the face. Teacher's Tip: Vary the length of your strokes to make the hair look voluminous and layered rather than flat.
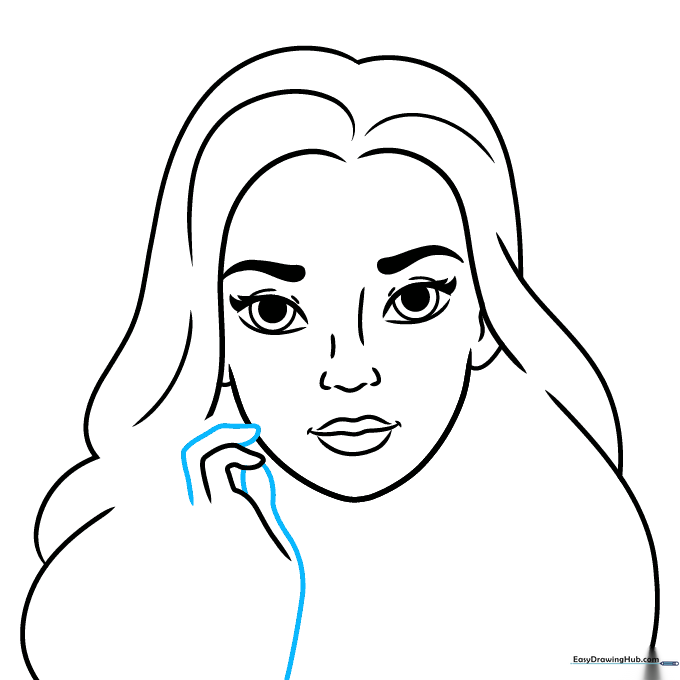
Step 6: Adding Hair Texture and Hand
Add fine curved lines throughout the hair to show texture. Below the chin, begin sketching the hand by drawing a curved line that doubles back to form a finger. Teacher's Tip: Drawing hands is tricky—focus on the 'C' shape of the fingers rather than individual knuckles.
Step 7: Completing the Hand and Arm
Draw the remaining fingers and the thumb using smooth, rounded lines. Extend the thumb line downward to create the forearm. Teacher's Tip: Ensure the arm width is consistent so it looks proportional to the head.
Step 8: Shoulders and Neckline
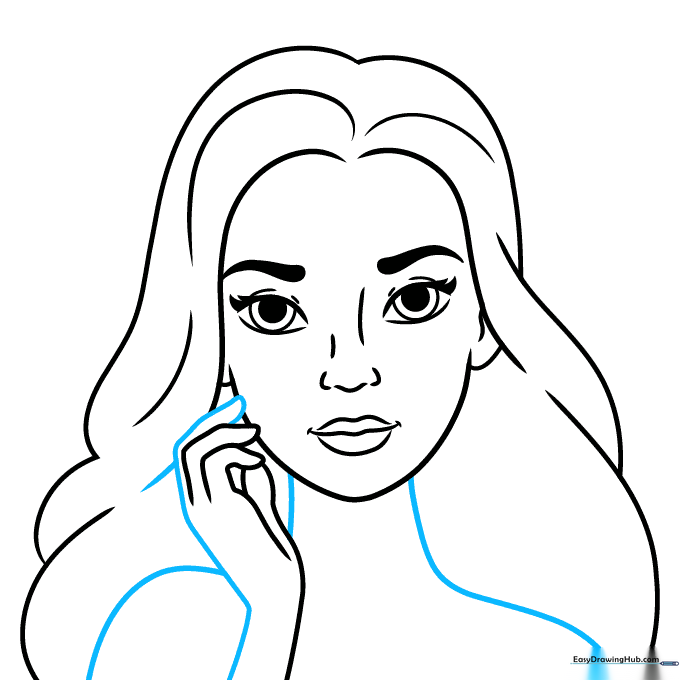
Draw the final finger to complete the hand, then extend lines from the head to form the neck and shoulders. Teacher's Tip: Keep the shoulder lines sloping gently to make the pose look relaxed.
Step 9: Final Details and Shirt
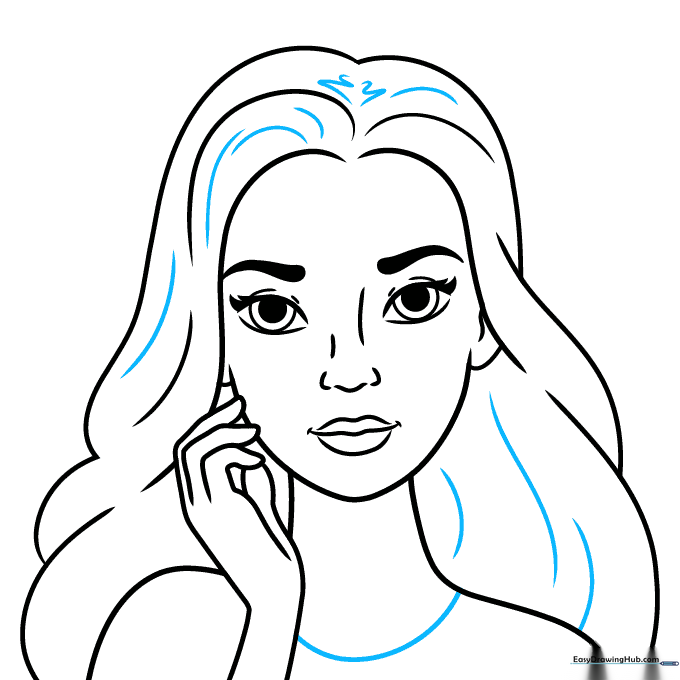
Add final texture to the hair using zigzag lines for a bit of flair. Draw a curved line across the neck to represent the collar of a shirt. Teacher's Tip: Use a darker pencil or pen to go over your final lines before erasing your initial construction marks.
Step 10: Bringing Your Portrait to Life with Color

Time to color! Use your favorite markers or pencils. We chose brunette hair and brown eyes, but feel free to experiment with vibrant pinks, blues, or rainbow highlights. Teacher's Tip: Use a lighter shade for the base of the hair and a darker shade for the shadows to give it a 3D effect.
More Tutorials


