How to Draw a Potted Plant: Easy 10-Step Guide
Bring nature to your sketchbook with this fun, beginner-friendly potted plant tutorial. Designed for ages 5 and up, this project requires only a pencil, eraser, and paper to create a cheerful hibiscus-style plant. Follow along to practice basic shapes and build confidence in your drawing skills.
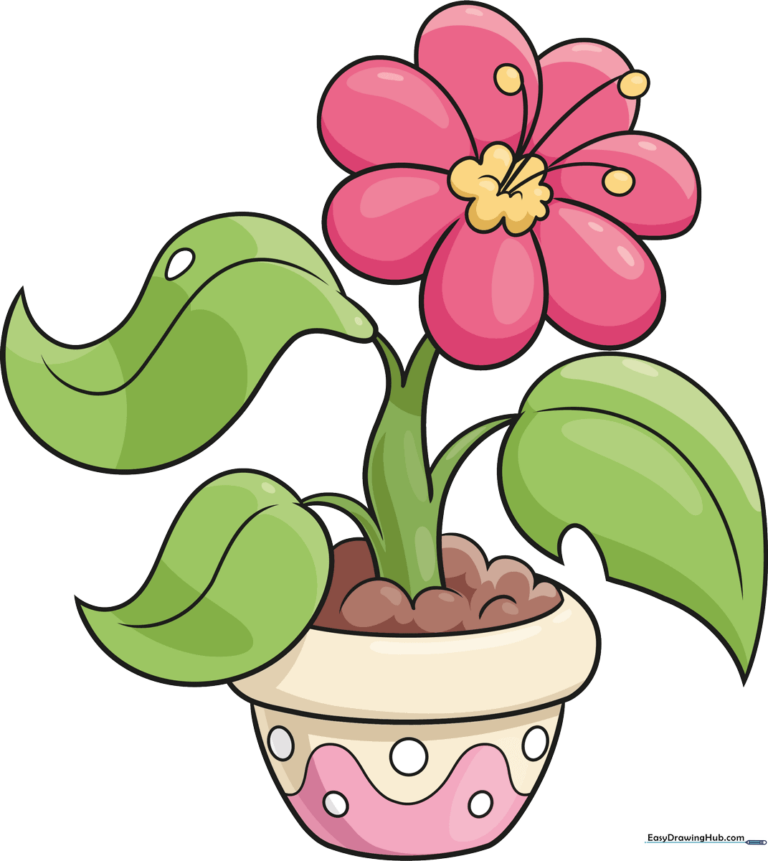
🎯 Final Result
Step-by-Step Instructions
Step 1: Sketching the Pot Base

Draw a wide, curved shape for the pot body and add a horizontal band for the rim. Teacher's Tip: Keep your lines light and loose; if the pot looks a bit wobbly, that just adds character!
Step 2: Defining the Soil and Stems

Add a small mound of soil inside the pot using 'U' shapes, then sketch the beginning of your plant stems. Teacher's Tip: Think of the soil as a soft pillow for your plant to rest on.
Step 3: Adding the First Large Leaf

Draw a large, pointed leaf extending from the stem with a central vein line. Teacher's Tip: Leaves aren't perfectly symmetrical in nature, so don't worry if one side is slightly different from the other.
Step 4: Adding Leaf Detail
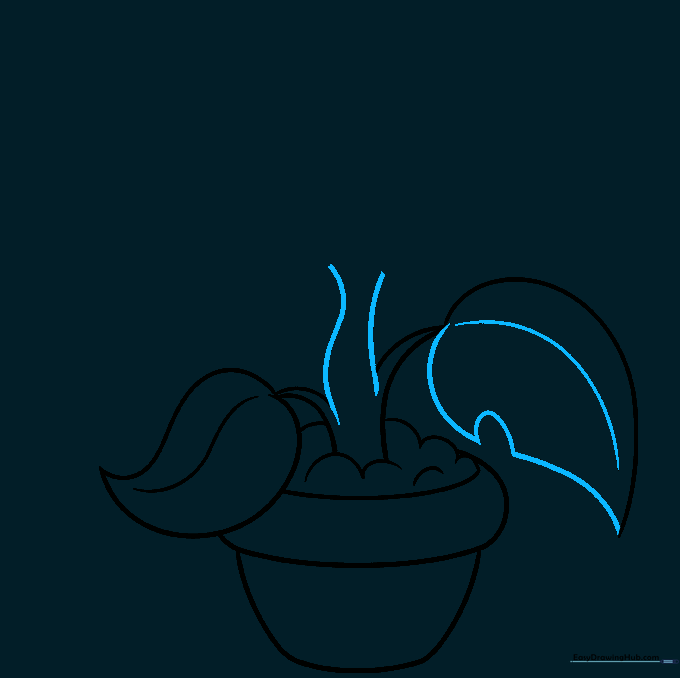
Add a small 'U' notch to the edge of the leaf to make it look like a hungry caterpillar visited! Teacher's Tip: Adding these small 'imperfections' makes your drawing look more realistic and fun.
Step 5: Branching the Stem
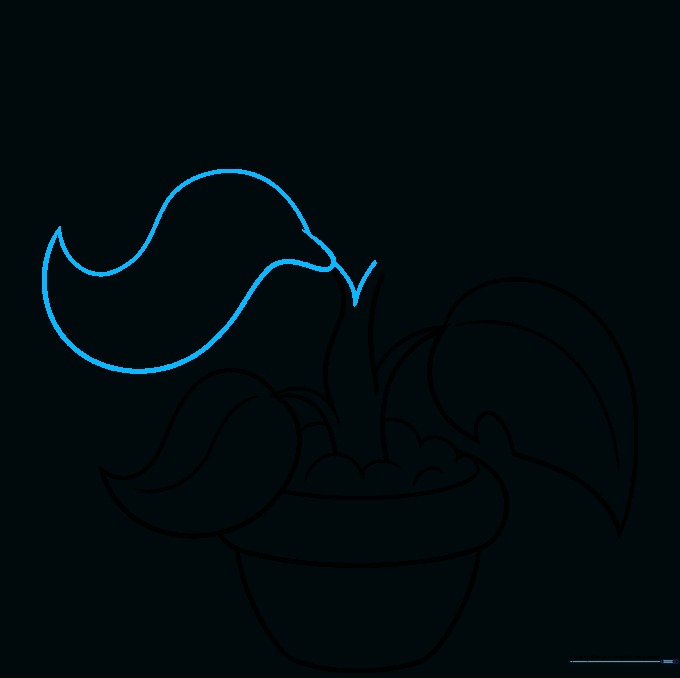
Use a 'V' shape to split your main stem into two, then sketch the outline of a second large leaf. Teacher's Tip: Use smooth, flowing motions with your wrist to get those nice curves.
Step 6: Starting the Flower Petals
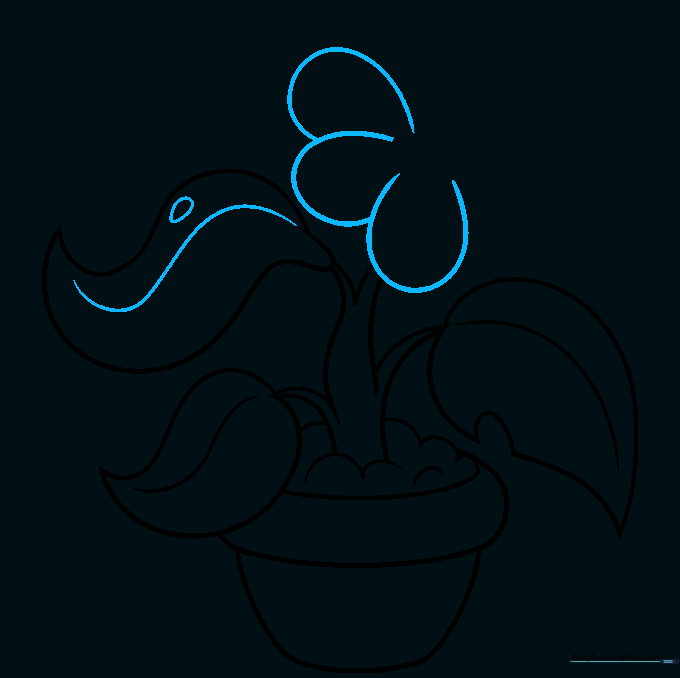
Add a vein to your second leaf and start the flower petals using overlapping 'U' shapes. Teacher's Tip: Overlapping lines create depth, making your flower look 3D instead of flat.
Step 7: Completing the Blossom
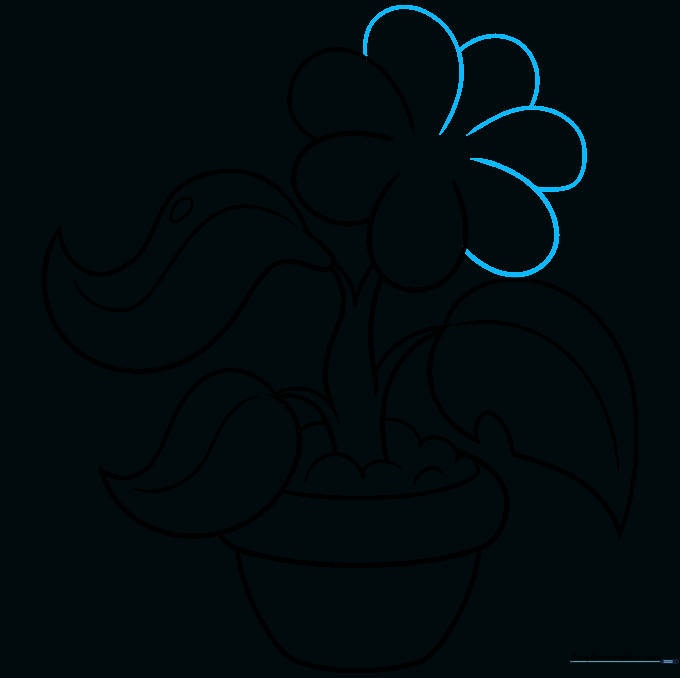
Continue adding more overlapping 'U' shapes to fill out the flower head. Teacher's Tip: Keep your petals varied in size to make the flower look natural and full.
Step 8: Adding Filaments and Anthers

Draw the center of the flower and add thin lines with small circles on top for the filaments. Teacher's Tip: These tiny details are what make your drawing look like a real hibiscus!
Step 9: Final Touches

Add any final filaments to balance the flower center. Teacher's Tip: Take a moment to erase any stray guidelines inside your petals to keep the drawing clean.
Step 10: Bring It to Life with Color
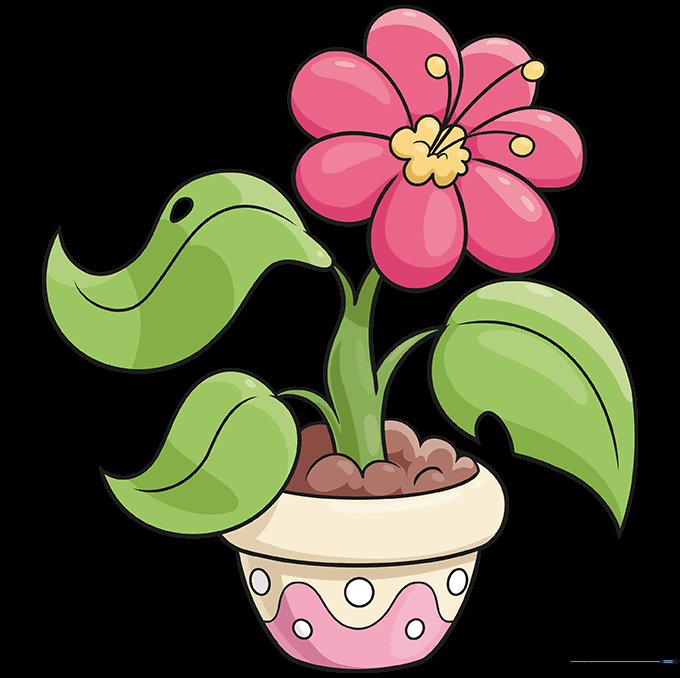
Color your plant using bright reds, oranges, or pinks for the hibiscus flower. Teacher's Tip: Use a darker shade of green near the veins of the leaves to add a professional-looking shadow.
More Tutorials


