How to Draw a Poop Emoji: Easy 10-Step Guide
Looking for a fun, silly drawing project? This step-by-step guide is perfect for artists ages 5 and up. All you need is a pencil, an eraser, and a piece of paper to bring this iconic character to life while practicing your curved line control.
🎯 Final Result

Step-by-Step Instructions
Step 1: Sketching the Base

Draw a wavy, scalloped line on a diagonal slant to form the side of the emoji. Then, loop the line back underneath to create the rounded base. Teacher's Tip: Keep your wrist loose to make these curves look soft and organic.
Step 2: Forming the Peak

Draw another scalloped line to enclose the shape, bringing the lines together at a gentle point at the top. Tip: Imagine you are drawing a soft-serve ice cream cone!
Step 3: Adding Layers

Add diagonal curved lines across the body to create the appearance of stacked layers. Tip: Connect the low points of your outer curves to keep the layers looking balanced.
Step 4: Placing the Eyes
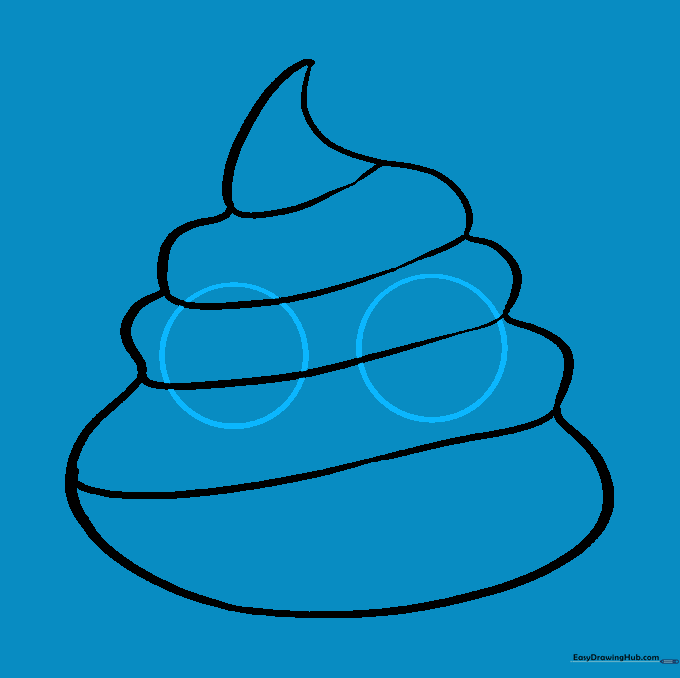
Draw two large circles for the eyes. Don't worry if they cross over the diagonal lines; we will clean that up next. Tip: Try to make the circles the same size for a symmetrical look.
Step 5: Cleaning the Eyes

Carefully erase the diagonal lines inside the two eye circles. Tip: Use a kneaded eraser if you have one; it’s great for picking up small graphite marks without smudging.
Step 6: Adding Pupils

Draw a smaller circle inside each eye and shade them in completely. Tip: Leave a tiny white dot unshaded in each pupil to give the emoji a 'sparkle' or lively look.
Step 7: Drawing the Mouth
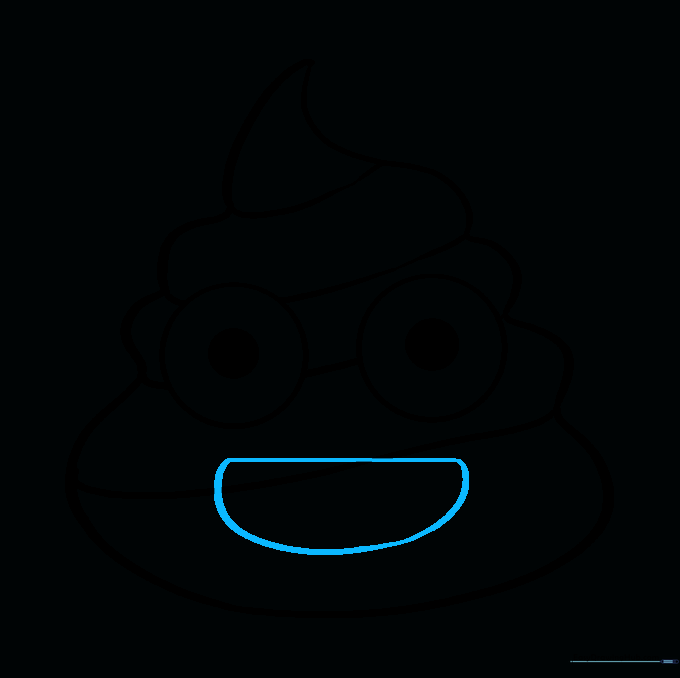
Draw a wide, happy mouth using a straight line for the top and a curved line for the bottom. Tip: Keep the mouth centered between the eyes for a friendly expression.
Step 8: Refining the Mouth

Erase any diagonal body lines that are visible inside the mouth area. Tip: Take your time here; a clean mouth makes the emoji look much more professional.
Step 9: Adding Teeth and Tongue
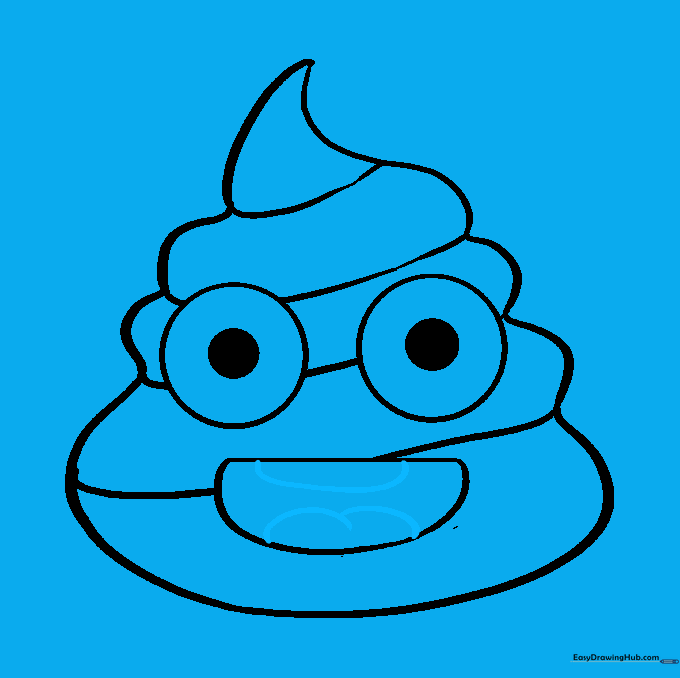
Add a curved line for the tongue and a small line for the upper teeth inside the mouth. Tip: Keep these lines simple to ensure the emoji remains easy to color later.
Step 10: Bringing it to Life with Color

Color your emoji! Use a rich brown for the body and a bright red for the tongue. Tip: Use circular coloring motions to get an even, smooth coat of color.
More Tutorials


