How to Draw a Pirate Hat: Easy 10-Step Guide for Kids
Ready to set sail on an artistic adventure? This tutorial is perfect for young artists ages 5+ looking to master the iconic pirate hat. Grab your pencil, eraser, and paper, and follow these simple steps to build your own swashbuckling accessory from scratch.
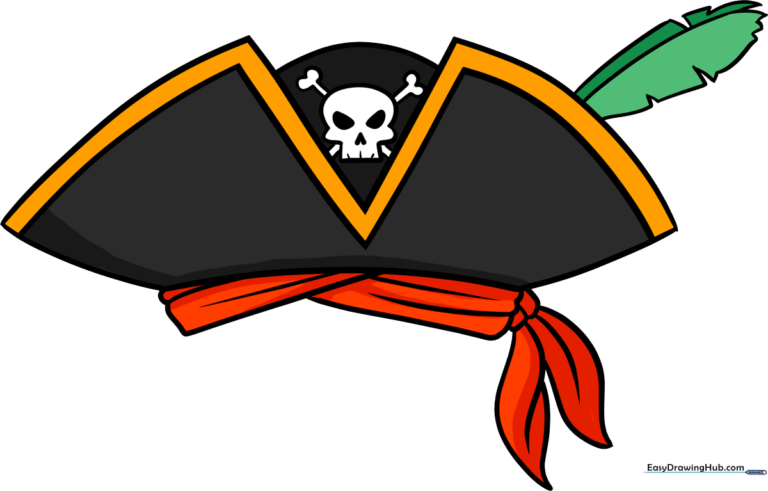
🎯 Final Result
Step-by-Step Instructions
Step 1: Sketching the Brim Base

Start by drawing the base of the hat's brim using a series of gentle, curved lines. Teacher's Tip: Keep your pencil pressure light so you can easily adjust the shape if it looks a bit lopsided.
Step 2: Defining the Top Brim
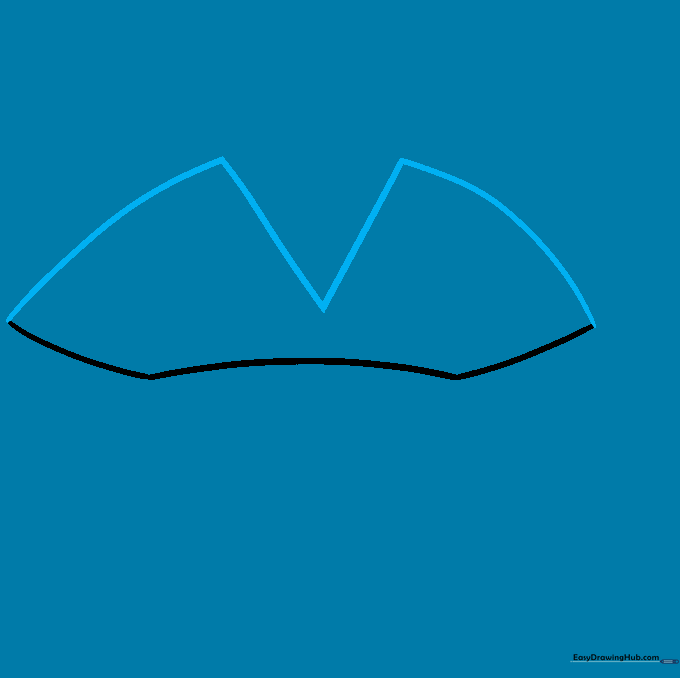
Sketch a large 'V' shaped line above your base to form the top of the brim, then connect it to the sides with smooth curves. Teacher's Tip: Think of this shape like a wide, open bird's wing.
Step 3: Adding Brim Detail
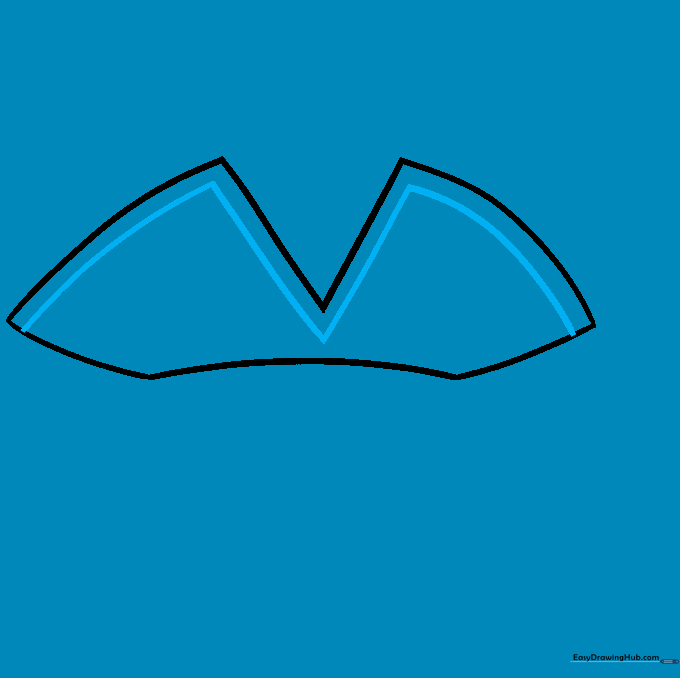
Add depth by drawing straight and curved lines parallel to the top edge of the brim. Teacher's Tip: Use a ruler if you want perfectly straight lines, or go freehand for a more rugged, weathered pirate look.
Step 4: Drawing the Crown
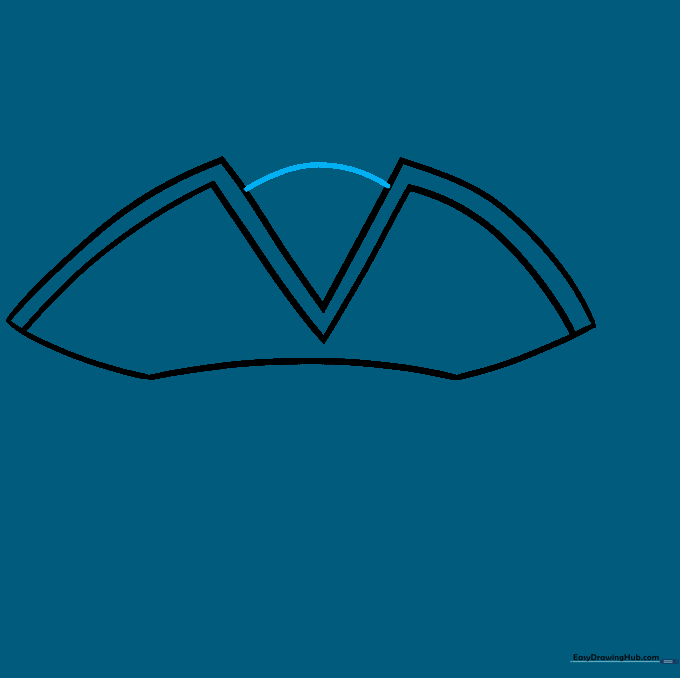
Draw a curved line near the top of the 'V' to define the crown of the hat. Teacher's Tip: This line should look like a soft arch, giving the hat a rounded, 3D appearance.
Step 5: Sketching the Skull and Crossbones
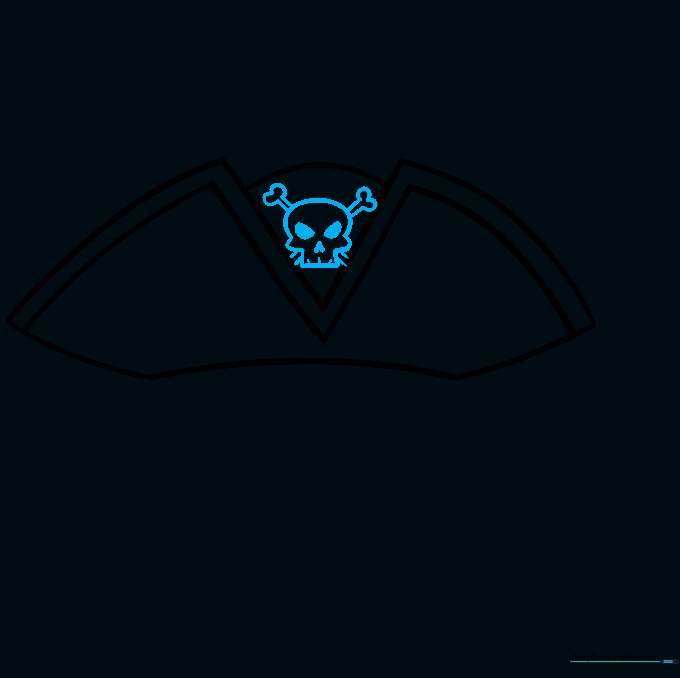
Draw a skull with eye sockets, a nose, and teeth, then add crossed bones behind it. Teacher's Tip: Keep the skull simple—two dark ovals for eyes and a small triangle for the nose are all you need for a cartoon style.
Step 6: Adding the Bandana
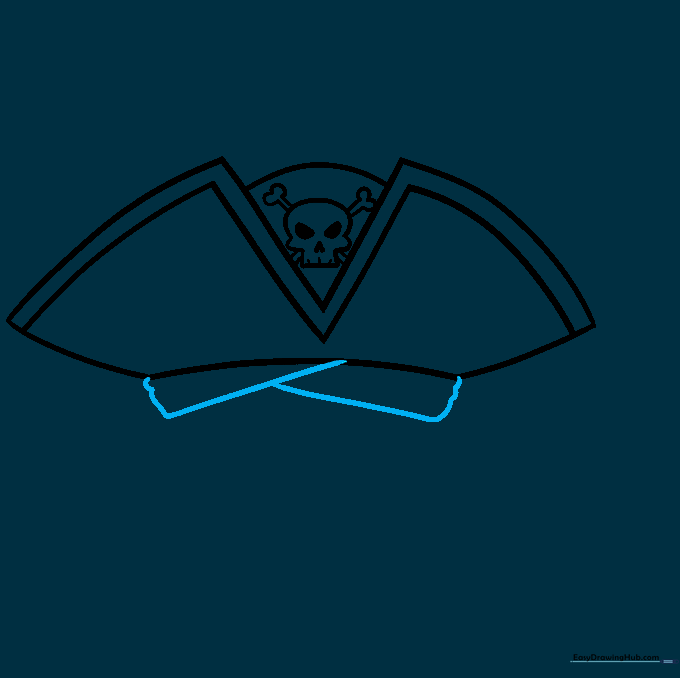
Extend diagonal lines from the bottom of the hat to create a bandana. Teacher's Tip: Imagine the bandana is wrapping around the head—the lines should follow the curve of the hat's base.
Step 7: Texturing the Bandana
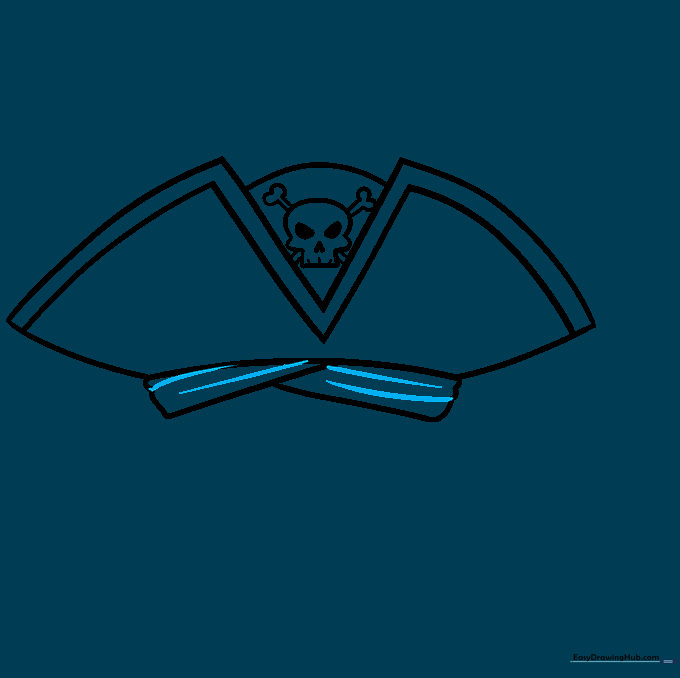
Add small, curved lines to the bandana to create the look of fabric folds. Teacher's Tip: Don't overthink these lines; just a few short, irregular curves will make the cloth look soft and realistic.
Step 8: Drawing the Bandana Knot
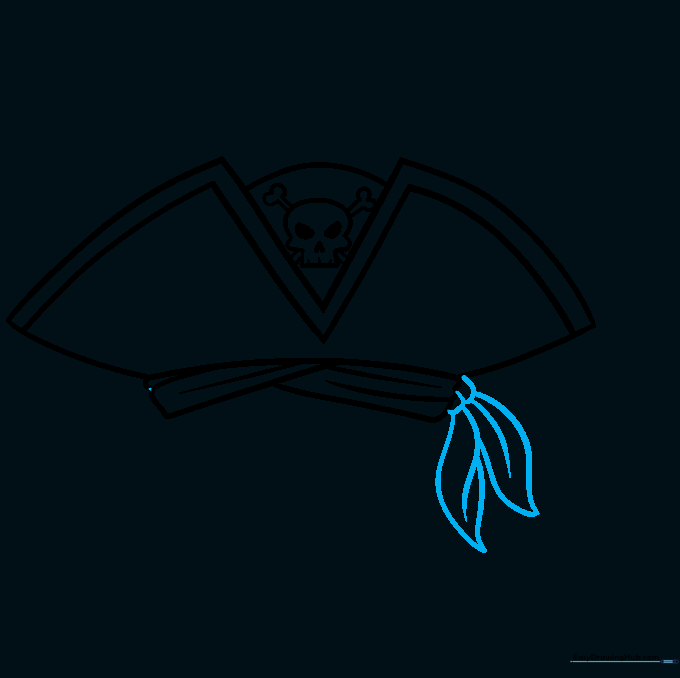
Draw the knot on the side of the hat with overlapping curved lines, then add the trailing ends. Teacher's Tip: Make the ends of the bandana look like they are flowing in the wind by drawing them slightly pointed.
Step 9: Adding a Feather

Draw a large feather tucking into the side of the hat using a center line and small 'V' shapes for the barbs. Teacher's Tip: Vary the size of your 'V' shapes to make the feather look fluffy and natural.
Step 10: Coloring Your Masterpiece

Bring your pirate hat to life with color! Use classic black for the hat, white for the skull, and bold colors for the bandana and feather. Teacher's Tip: Use colored pencils to add light shading on one side of the hat to give it a professional, rounded look.
More Tutorials


