How to Draw a Pilgrim: Easy 10-Step Guide for Kids
Bring history to life with this fun, screen-free drawing activity perfect for ages 6 and up. All you need is a pencil, an eraser, and a piece of paper to create your own cartoon Pilgrim. Follow these simple steps to build confidence and develop your artistic skills.
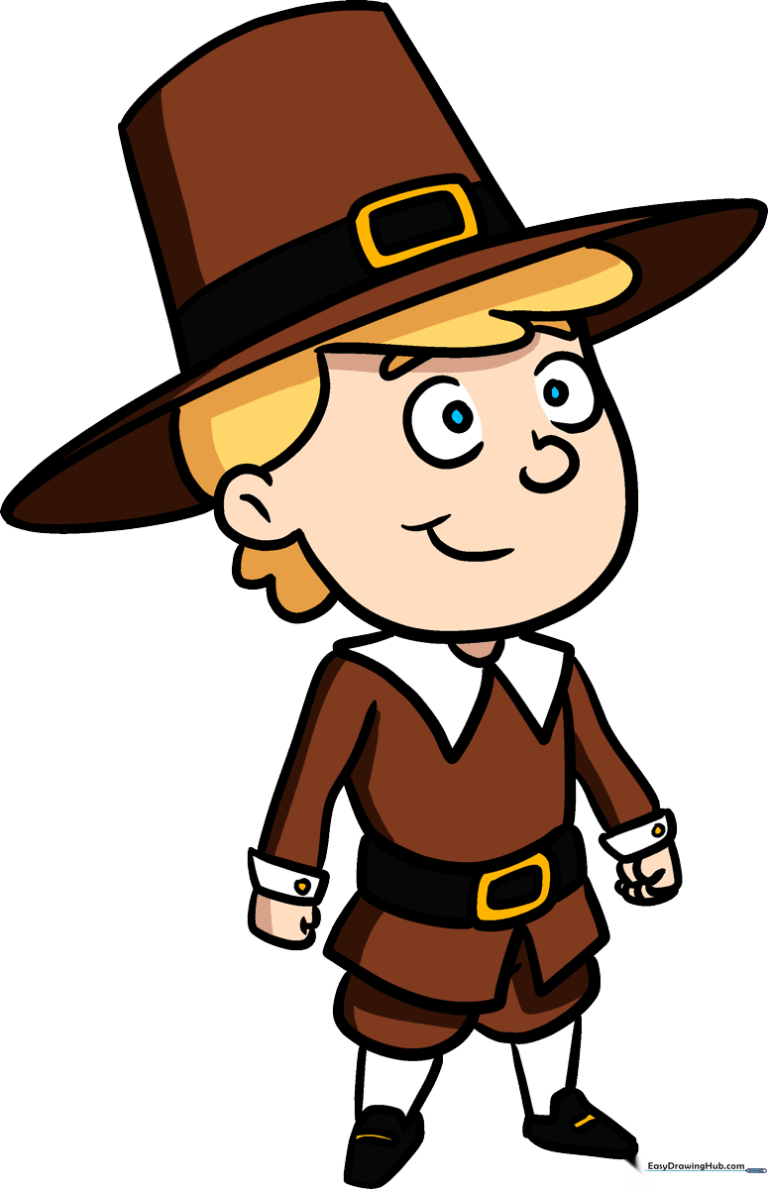
🎯 Final Result
Step-by-Step Instructions
Step 1: Sketching the Hat Brim

Start by drawing the wide brim of the hat using a long, gentle curve. Teacher's Tip: Keep your pencil lines light and loose so you can easily adjust the shape if it looks a bit lopsided.
Step 2: Adding the Hat Crown and Buckle

Draw the tall, rectangular crown of the hat sitting on the brim. Add a small square buckle in the center. Teacher's Tip: Use a ruler if you want perfectly straight lines, or embrace a hand-drawn look for more character.
Step 3: Drawing Hair and Ears

Add the hair using soft 'U' shapes around the base of the hat. Place a small 'C' shape on the side for the ear. Teacher's Tip: Don't worry about making the hair perfectly symmetrical; natural hair has texture and movement.
Step 4: Outlining the Face

Connect the hair to create the jawline with a smooth, curved line. Add a small bump for the nose. Teacher's Tip: Practice drawing the nose shape on a scrap piece of paper first to get the curve just right.
Step 5: Adding Facial Features
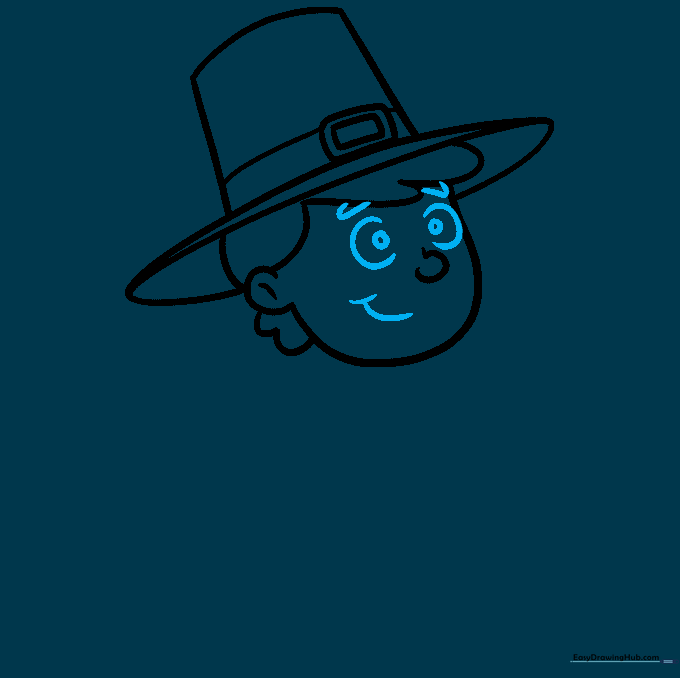
Draw the eyes, eyebrows, and a small mouth. Teacher's Tip: Keep the eyes simple with small circles for pupils to give your character a friendly, approachable expression.
Step 6: Drawing the Collar and Torso
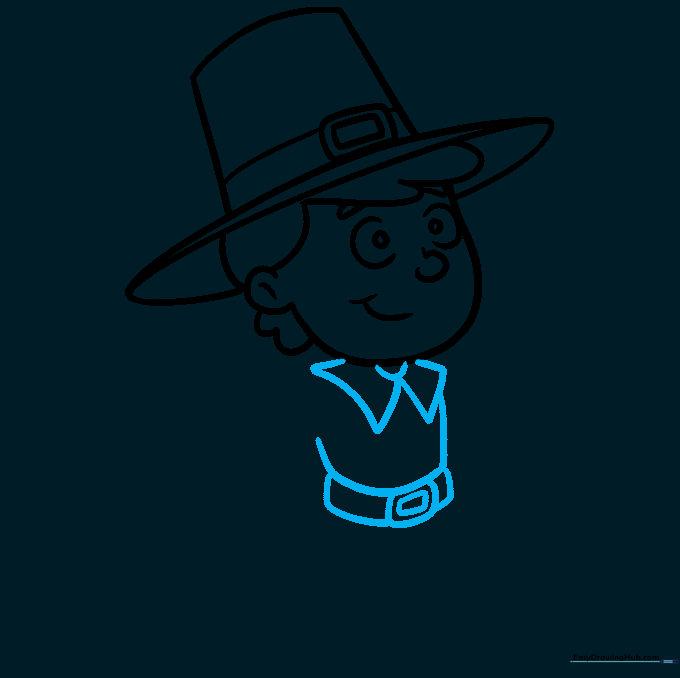
Sketch the wide, triangular collar and the torso below. Add a belt with a buckle. Teacher's Tip: Make sure the collar is wide enough to frame the neck area nicely.
Step 7: Adding Arms and Hands
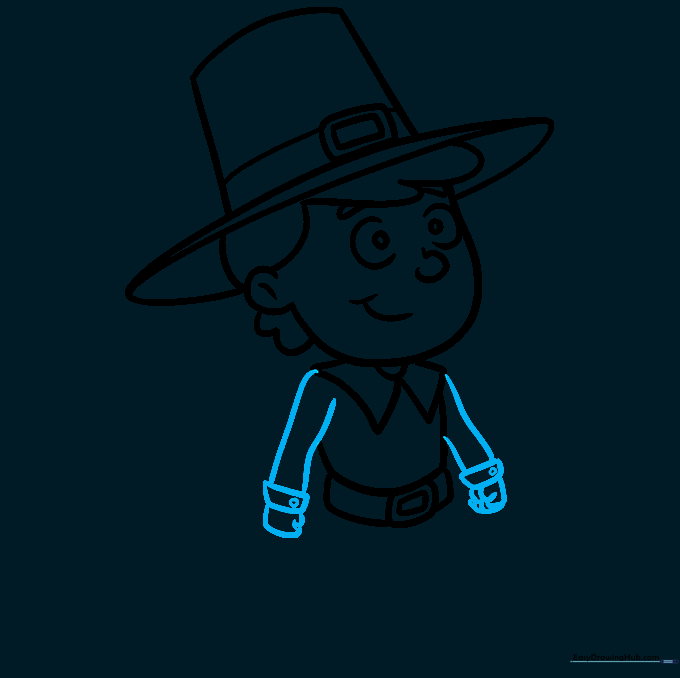
Draw the sleeves and hands. Add a small circle on the cuff for a button. Teacher's Tip: Hands can be tricky, so use simple curved shapes to represent the fingers rather than trying to draw every detail.
Step 8: Drawing the Shirt Tails and Pants
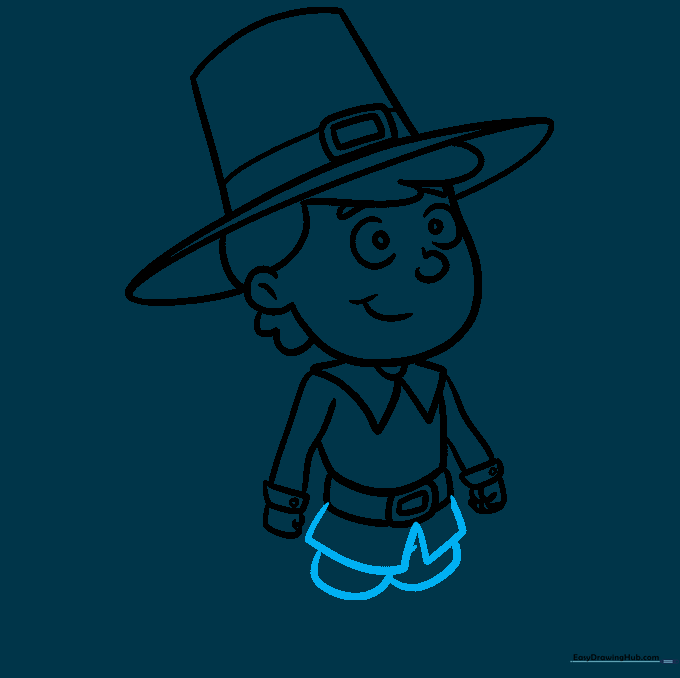
Add the shirt tails below the belt and the top of the pants. Teacher's Tip: Keep these shapes rounded to maintain the cartoon style of the character.
Step 9: Completing the Legs and Shoes
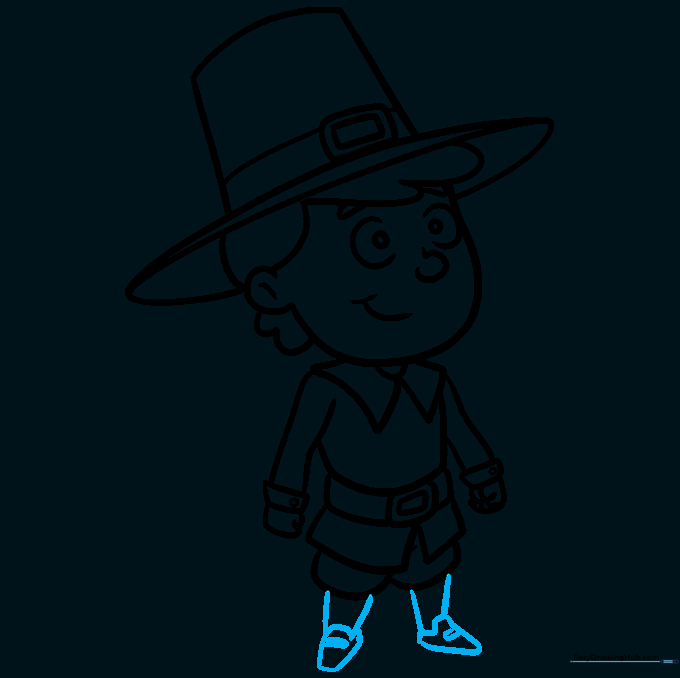
Finish the lower legs and add the shoes with their signature buckles. Teacher's Tip: Ensure the feet are pointing in the same direction to keep the character balanced.
Step 10: Adding Color
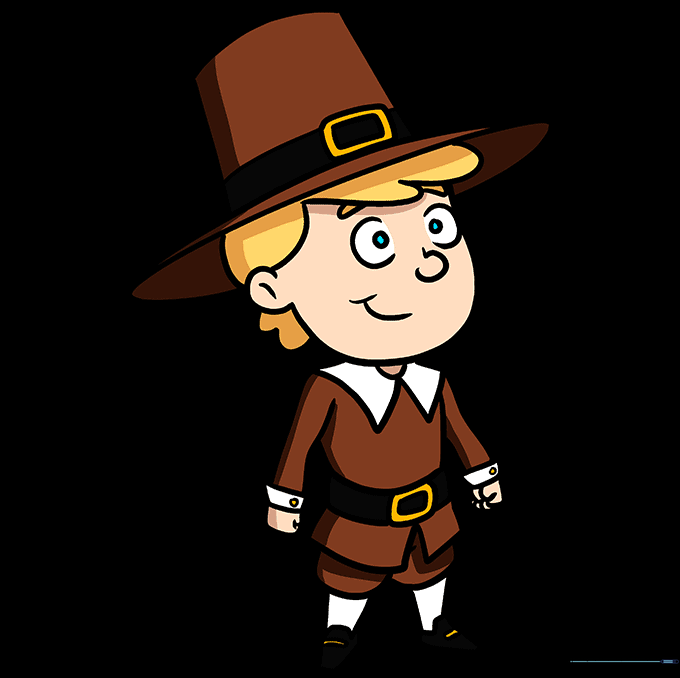
Color your Pilgrim! Use traditional dark tones for the outfit, or get creative with brighter colors if you want to depict a wealthier historical figure. Teacher's Tip: Use colored pencils for better control over shading.
More Tutorials


