How to Draw Pikachu: Easy 10-Step Guide for Kids
Bring your favorite electric Pokémon to life with this simple, step-by-step drawing guide designed for ages 5 and up. You will only need a pencil, an eraser, and a piece of paper to get started. Follow along to build confidence in your sketching skills and create a vibrant, professional-looking Pikachu character.
🎯 Final Result

Step-by-Step Instructions
Step 1: Sketching the Eyes

Draw two circles for the eyes. Inside each, add a smaller oval and shade the space between them to create a bright, alert look. Teacher's Tip: Keep these circles symmetrical to give Pikachu that signature friendly expression.
Step 2: Adding the Nose and Mouth

Place a small, rounded triangle between the eyes for the nose. Below it, draw a 'W' shape for the mouth, adding a small tongue inside. Tip: Use light pressure here so the mouth looks soft and cute, not harsh.
Step 3: Shaping the Face

Outline the cheeks and chin using smooth, curved lines. Leave a small gap where the ears will eventually attach. Tip: Imagine you are drawing a soft, rounded pear shape.
Step 4: Drawing the Long Ears
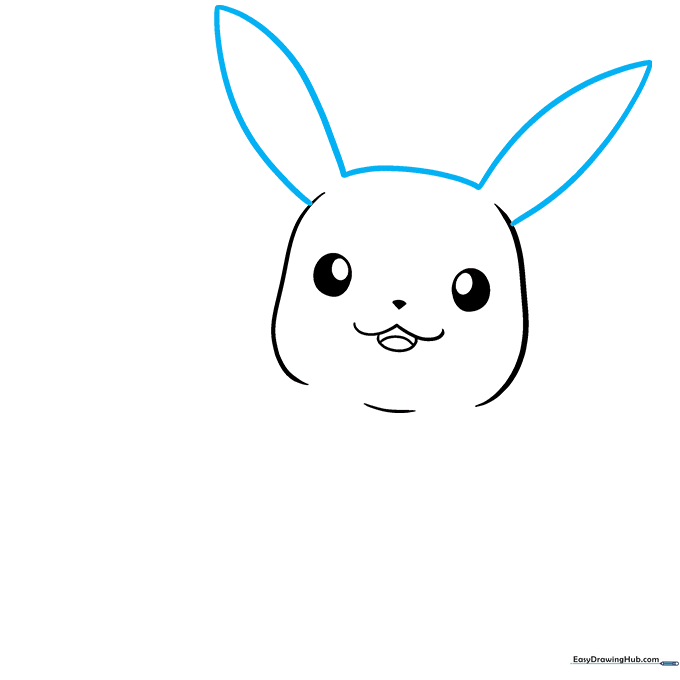
Extend two tall, curved pairs of lines from the top of the head, meeting at points. Connect them to the head with a soft curve. Tip: Make the ears long and slender to capture Pikachu's iconic silhouette.
Step 5: Adding Ear Tips and Cheeks
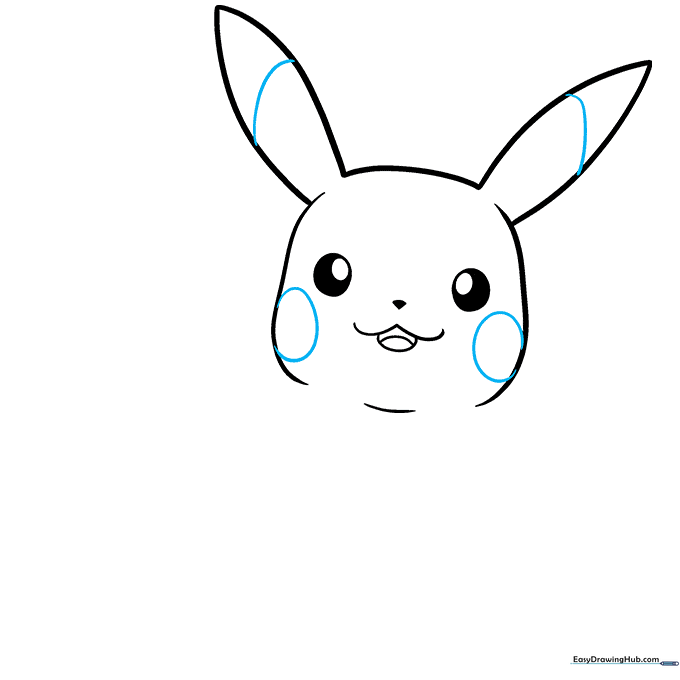
Draw a curved line across the top of each ear for the black tips. Add an oval on each cheek. Tip: Ensure the cheek ovals are perfectly centered on the widest part of the face.
Step 6: Sketching the Arms
Draw two small arms using curved lines, finishing with a zigzag stroke to represent the fingers. Tip: Keep the arms close to the body to maintain the character's compact, cute proportions.
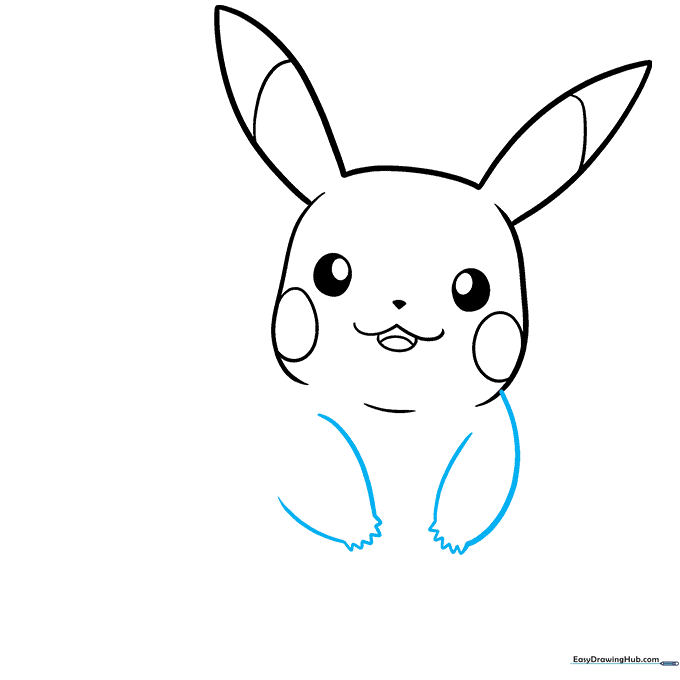
Step 7: Defining the Body

Connect a long, sweeping curved line from the cheek down to the opposite arm to enclose the torso. Tip: A smooth, continuous motion creates a more professional-looking outline.
Step 8: Adding the Feet

Use overlapping curved lines at the base of the body to sketch the feet and toes. Tip: Keep the feet rounded to match the soft, cartoonish style of the character.
Step 9: Drawing the Lightning Tail

Draw the signature lightning-bolt tail using straight lines that form 'L' angles. It should start narrow near the body and widen into a rectangle. Tip: Use a ruler if you struggle with straight lines, but freehand adds more character!
Step 10: Adding Color

Bring your Pikachu to life! Use bright yellow for the body, red for the cheeks, pink for the mouth, and black for the ear tips. Tip: Use light, circular motions when coloring to keep the pigment smooth and even.
More Tutorials


