Master One-Point Perspective: Easy 10-Step Drawing Guide
Unlock the secrets of 3D art with this one-point perspective exercise, perfect for students ages 8+. All you need is a pencil, a ruler, and a clean sheet of paper to transform flat shapes into depth-filled forms. Follow these steps to master the vanishing point technique and build your spatial drawing confidence.
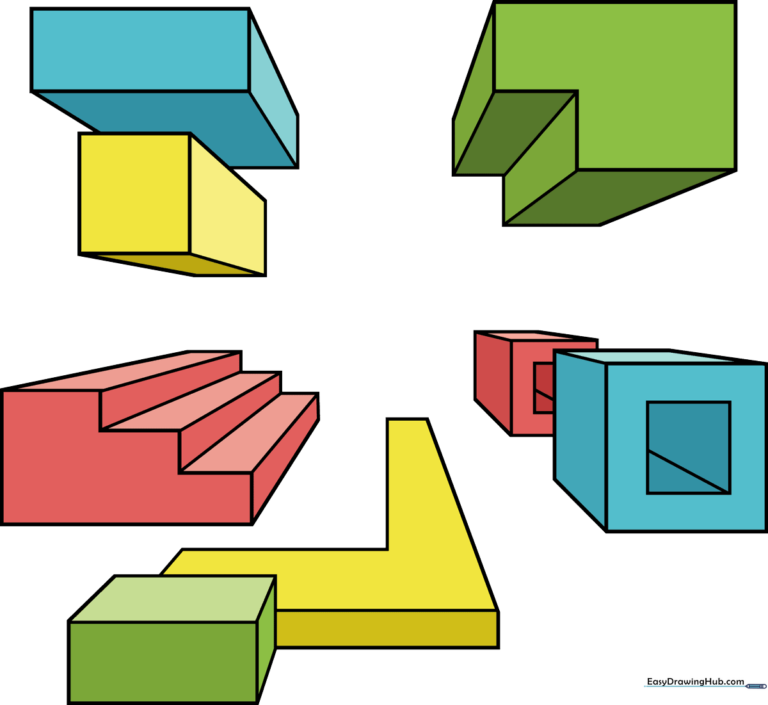
🎯 Final Result
Step-by-Step Instructions
Step 1: Setting the Vanishing Point
Place a small dot in the center of your page—this is your 'vanishing point.' Near the top corner, draw a rectangle. Use your ruler to connect three of the rectangle's corners to the center dot with light diagonal lines, then draw an 'L' shaped line between them. Teacher's Tip: Keep these lines very faint; you will need to erase them later!
Step 2: Creating Overlapping Prisms
Erase the excess lines between your shape and the center point to reveal a solid prism. Now, draw a second square overlapping the first, and repeat the process of connecting corners to the vanishing point. Teacher's Tip: Overlapping shapes is the quickest way to make a drawing look professional and complex.
Step 3: Adding Depth with Indentations
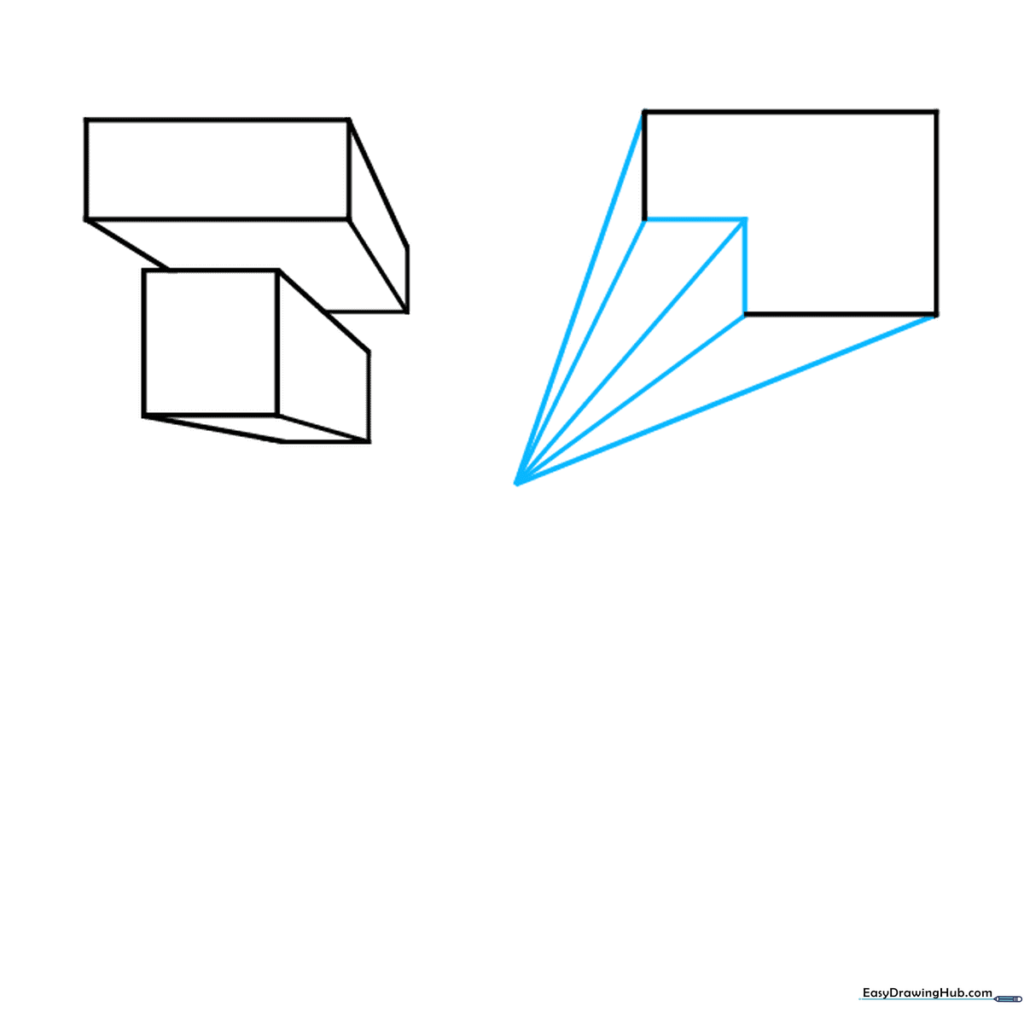
Draw an 'L' shaped line inside your rectangle to create a carved-out effect. Connect the five corners of this new shape back to your vanishing point. Teacher's Tip: Use a sharp pencil to ensure your lines are precise; accuracy is key when working with perspective.
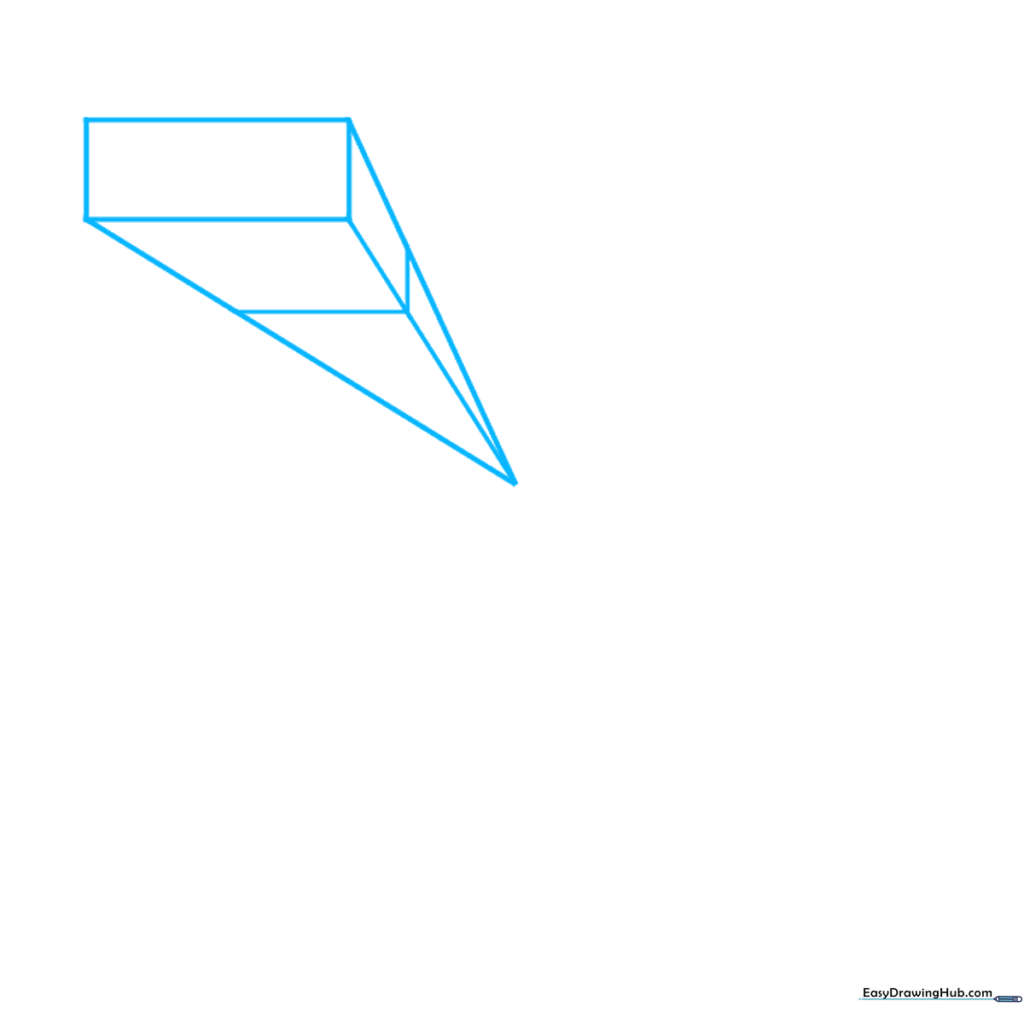
Step 4: Building Staircase Forms
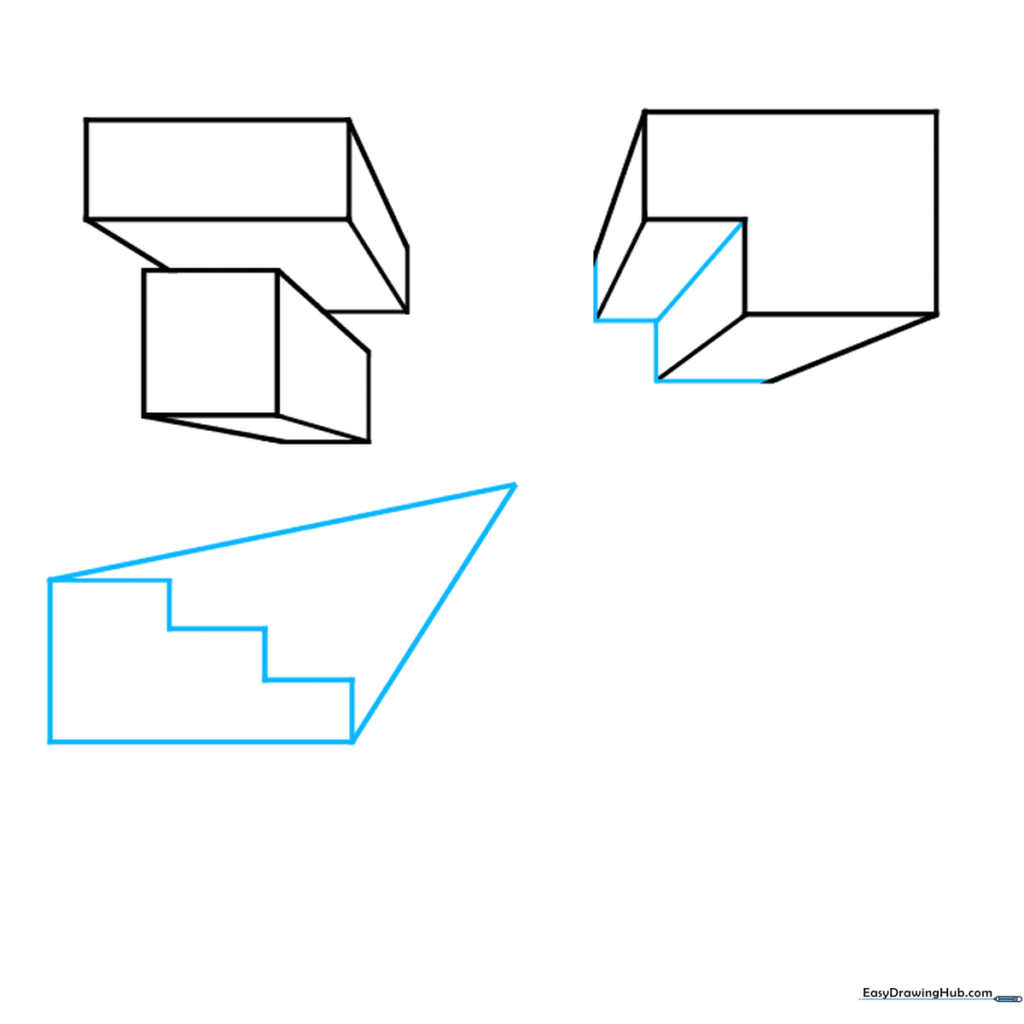
Draw a 'W' shaped line across your diagonals, then erase the lines leading to the center. In the opposite corner, sketch a stair-like shape using straight horizontal and vertical lines. Teacher's Tip: Always check that your vertical lines are perfectly straight—if they tilt, the perspective will look 'off'.
Step 5: Defining the Stairs
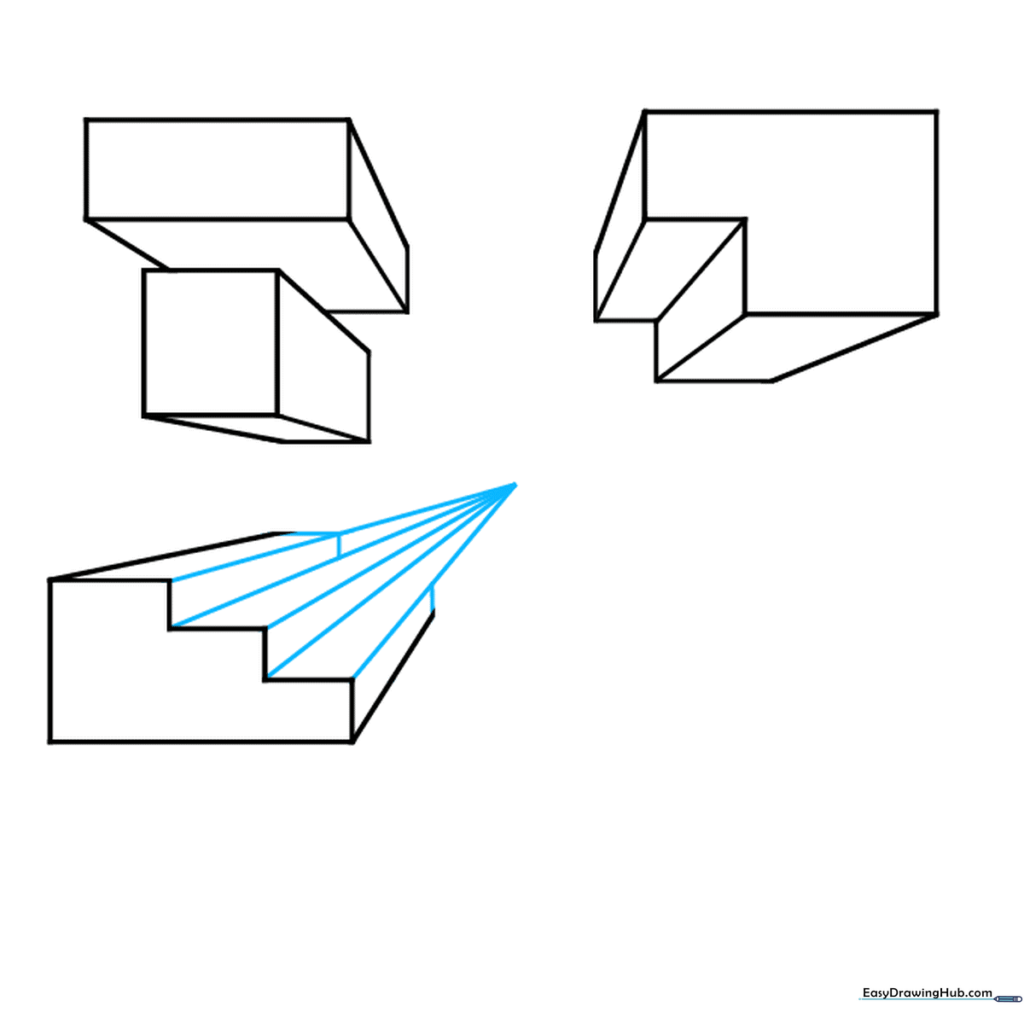
Connect each corner of your stairs to the vanishing point. Add 'L' shaped lines to define the edges of each step. Teacher's Tip: Think of these as blocks stacked on top of each other; focus on the top surface of each step.
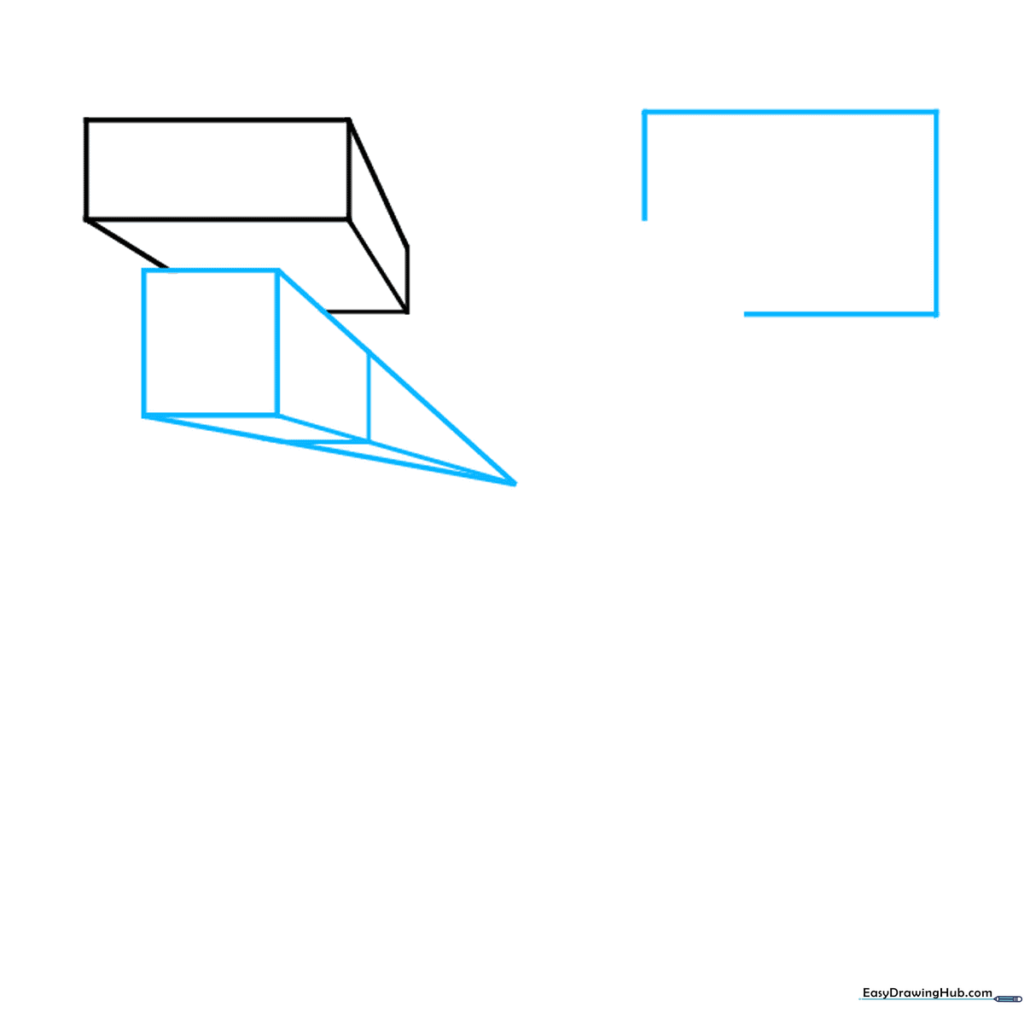
Step 6: Adding Cubes
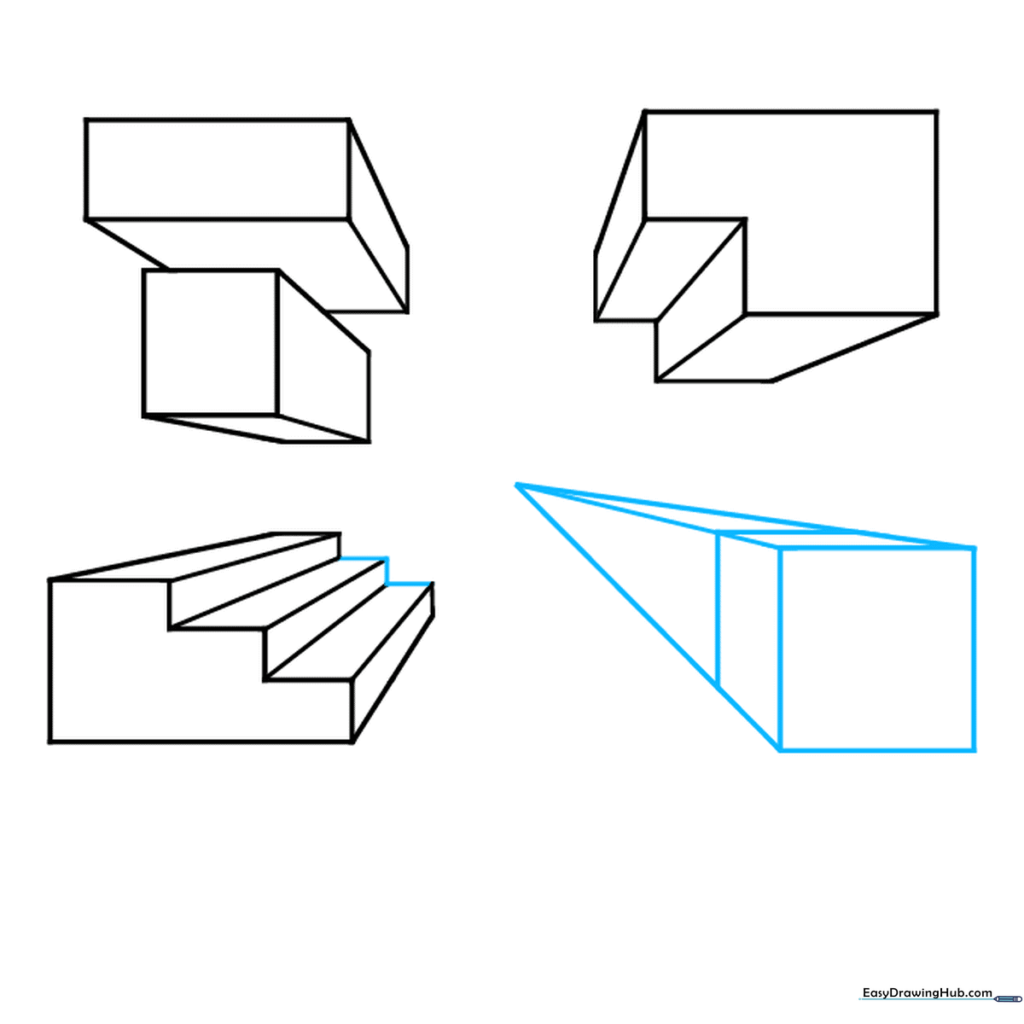
Clean up your drawing by erasing the guideline segments between the stairs and the vanishing point. Add a new square in the empty corner, connect it to the center, and use an 'L' shape to turn it into a cube. Teacher's Tip: If your hand gets tired, take a quick break—drawing straight lines requires focus!
Step 7: Expanding the Composition
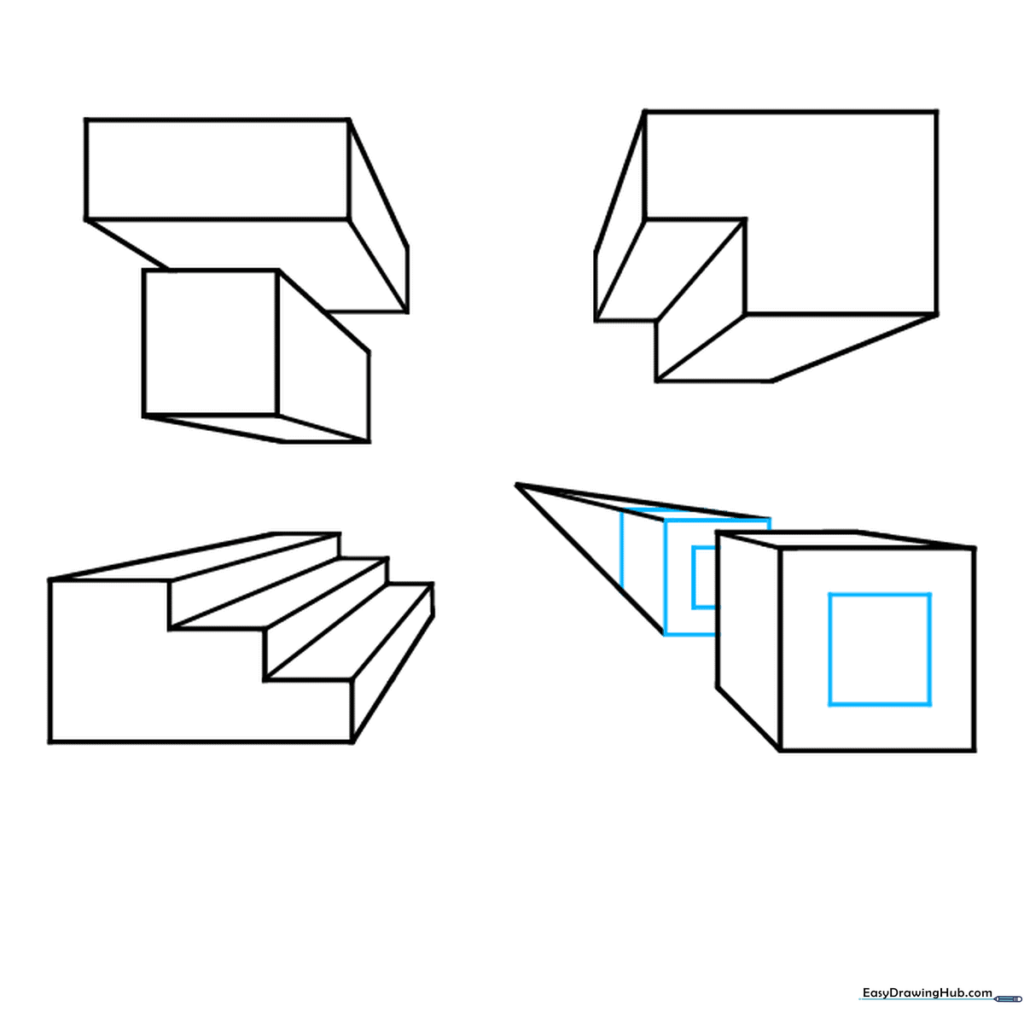
Draw another cube further down the guidelines. Enclose a square or partial square on the front of each cube to define their faces. Teacher's Tip: Varying the size of your cubes creates a sense of distance—smaller cubes look further away.
Step 8: Adding Hollow Details
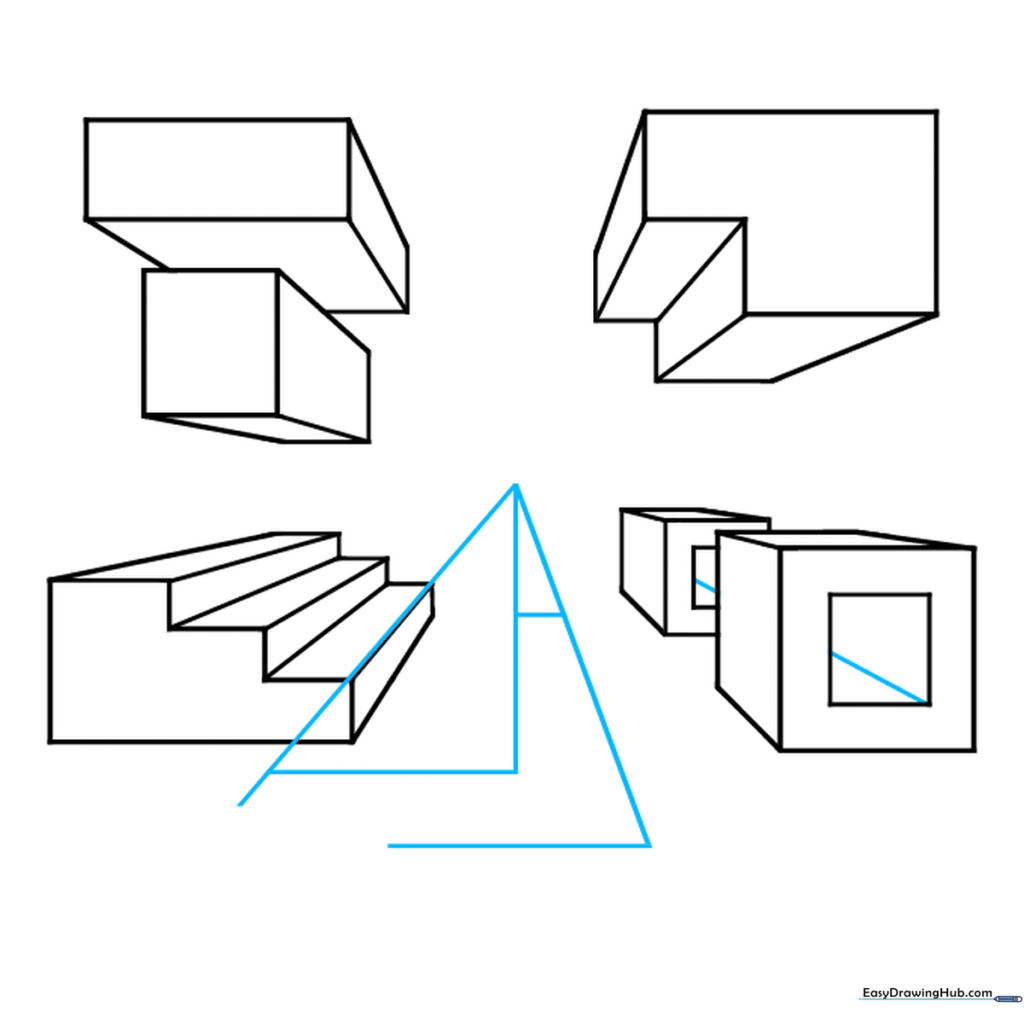
Draw a diagonal line inside each cube to give them a hollow, open appearance. Add a partial triangle with two right triangles overlapping the stairs. Teacher's Tip: This is where the drawing starts to look like a complex architectural sketch!
Step 9: Finalizing the Shapes
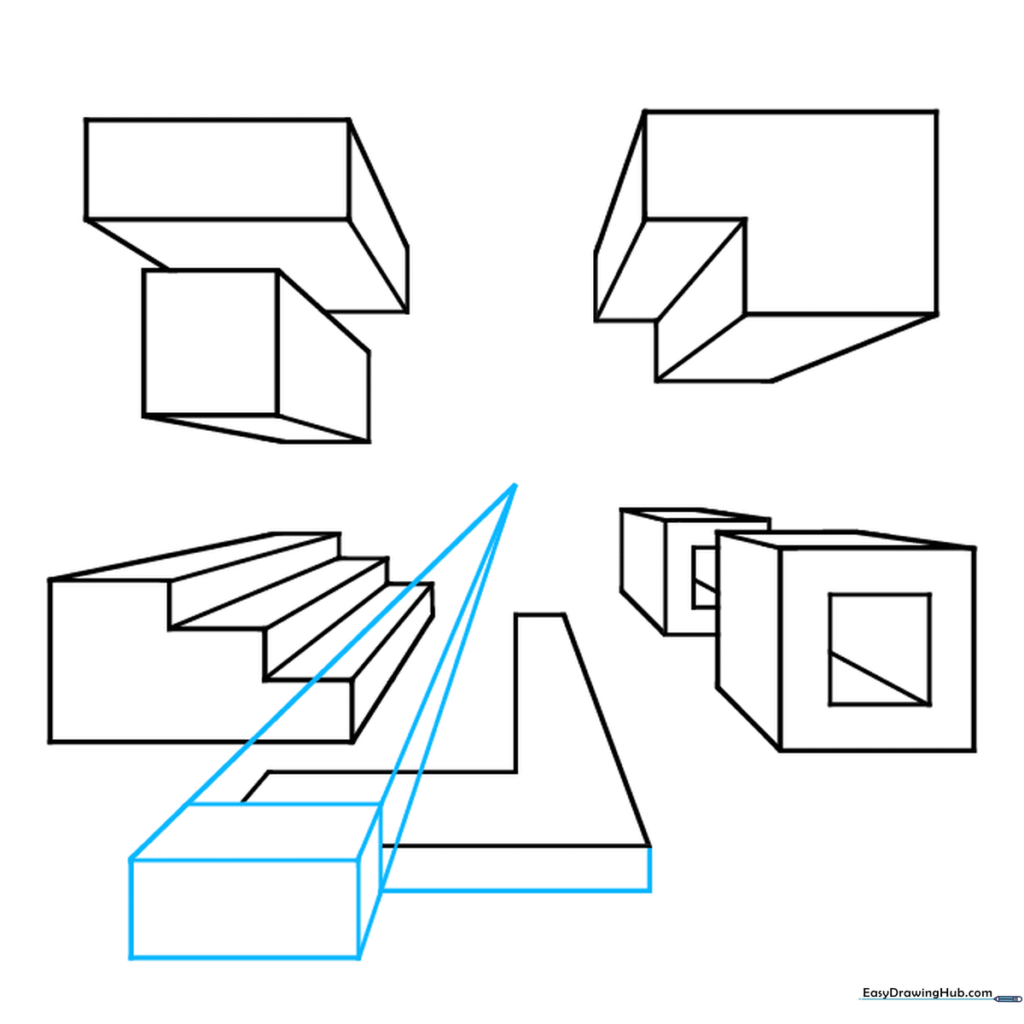
Erase parts of the triangle to create an 'L' shape. Add a final rectangular prism and a narrow rectangle below it. Erase all remaining construction guidelines. Teacher's Tip: Take your time with the eraser; a clean drawing makes the final result look much more professional.
Step 10: Adding Color and Contrast
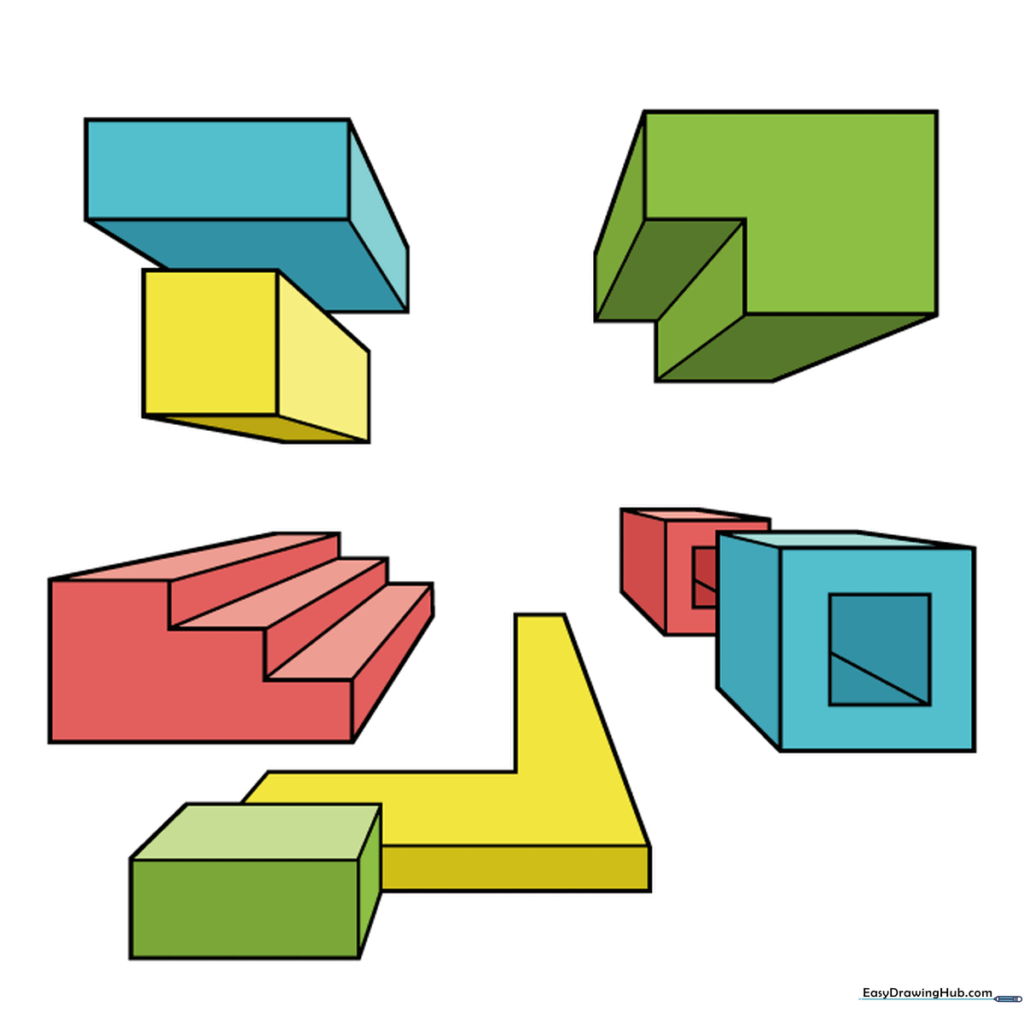
Your perspective exercise is complete! Use different colors for the top, side, and front faces of your shapes to emphasize their 3D form. Teacher's Tip: Use darker shades for the sides facing away from the light to make them 'pop' off the page.
More Tutorials


