How to Draw a Peacock: Easy 10-Step Guide for Kids
Bring the majesty of a peacock to life with this step-by-step drawing lesson, perfect for young artists ages 7 and up. You will need a pencil, eraser, and your favorite markers or colored pencils to capture those vibrant feathers. Follow along to master the art of drawing a bird with a grand, fanned-out tail.
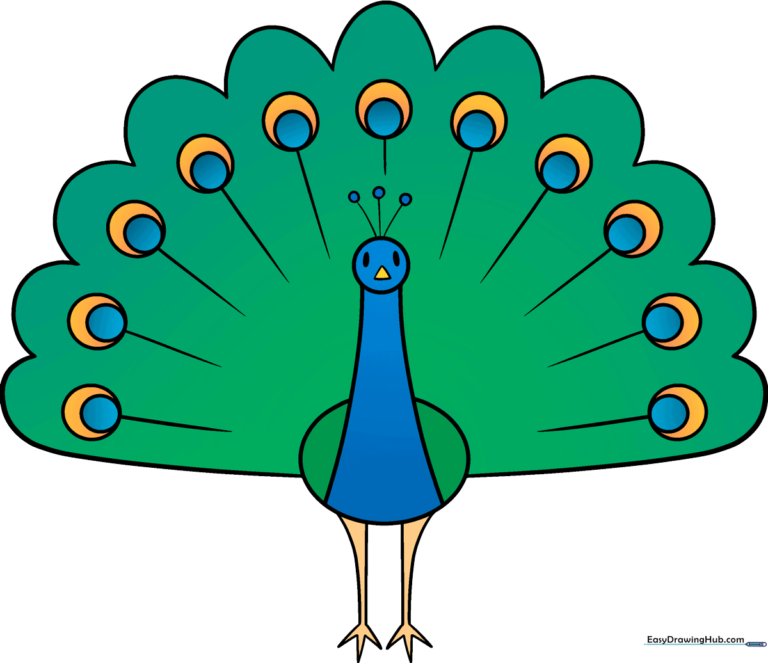
🎯 Final Result
Step-by-Step Instructions
Step 1: Sketching the Head and Crest

Draw a small circle for the head. Add two tiny ovals for eyes and a small triangle for the beak. Tip: Keep your pencil pressure light so you can easily erase the guidelines later. Add three curved lines on top of the head, each ending in a small circle to create the peacock's signature crest.
Step 2: Defining the Neck and Body
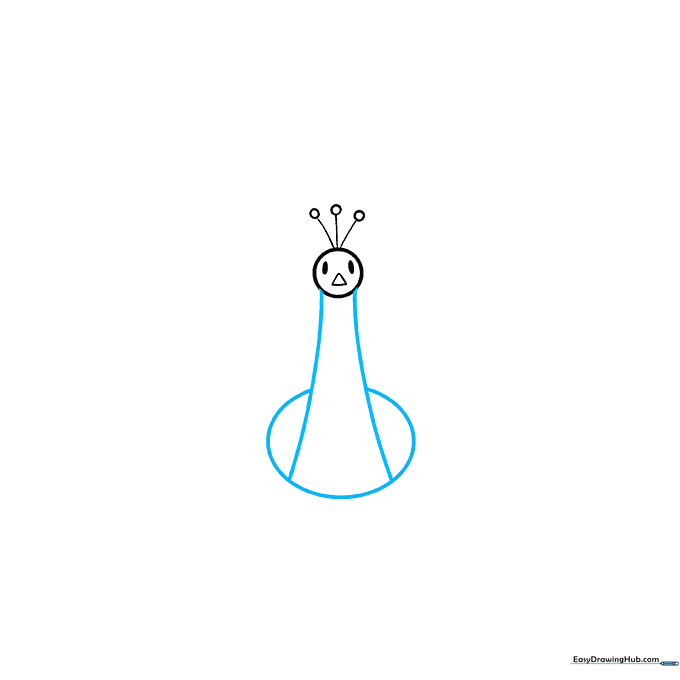
Extend two long, graceful curved lines downward from the head to form the neck. At the base, draw a large oval to serve as the main body. Tip: Think of the body shape like a plump teardrop; this helps give the bird a sturdy, realistic posture.
Step 3: Drawing the First Leg
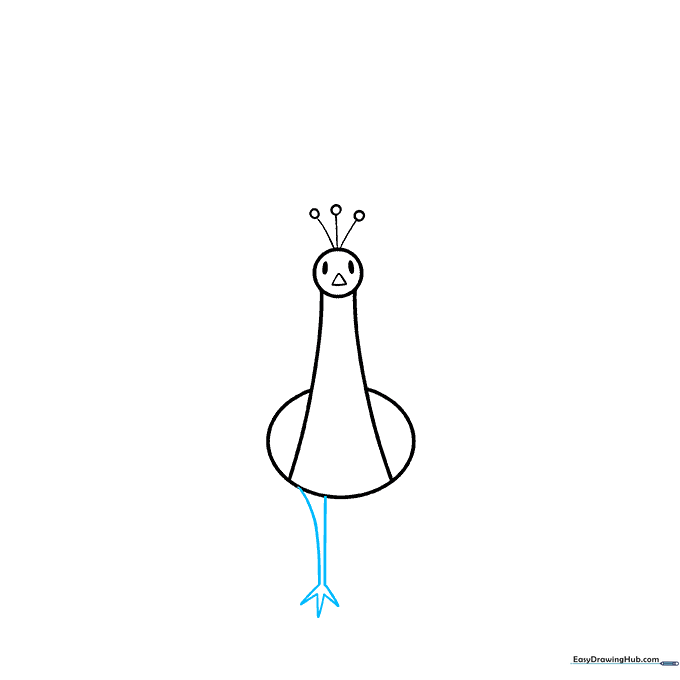
Extend two curved lines from the bottom of the body to create the first leg. Add three small, pointed shapes at the end for the toes. Tip: Peacocks have strong, sturdy legs; make sure your lines are firm and confident.
Step 4: Adding the Second Leg
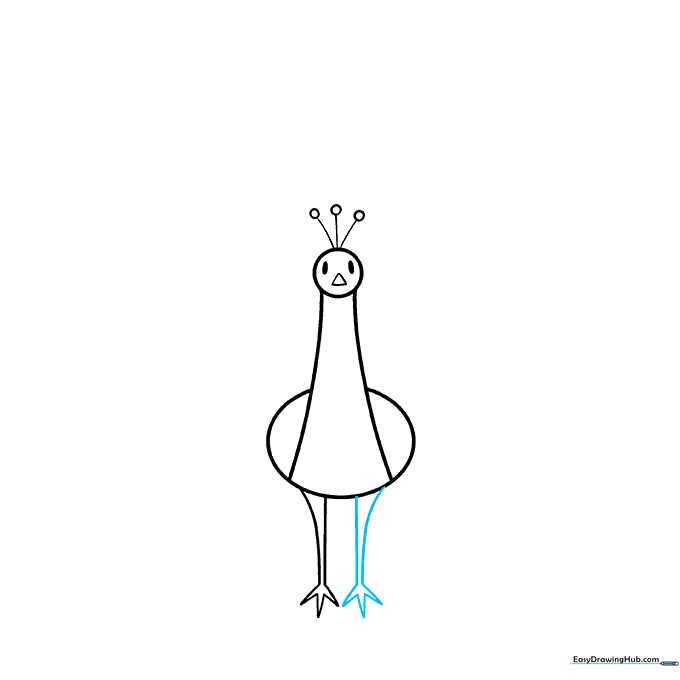
Repeat the process from Step 3 to draw the second leg slightly behind the first. This creates a sense of depth. Tip: If the legs look a bit stiff, try adding a slight curve to the 'knee' area to make the bird look like it's standing naturally.
Step 5: Starting the Tail Fan
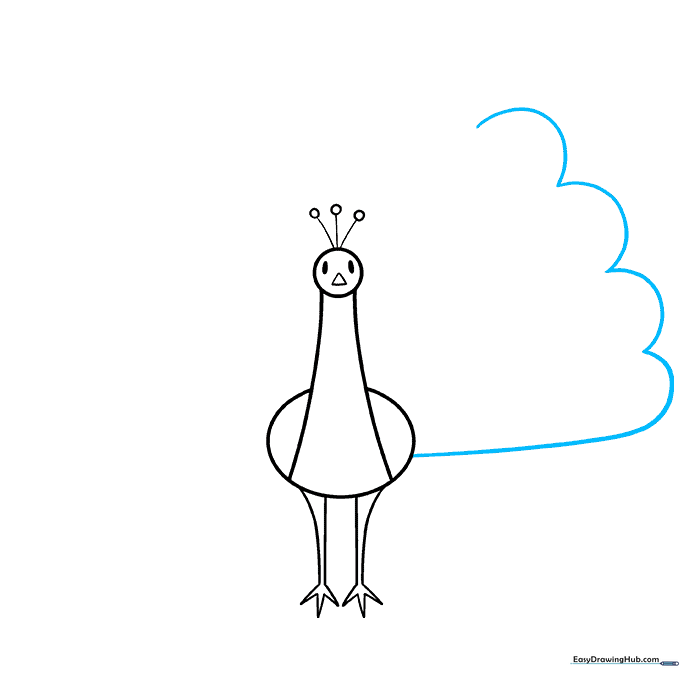
Draw a long, sweeping curved line from the bird's side. Add a series of 'U' shaped lines along this curve. Tip: These 'U' shapes are the foundation of the tail feathers, so keep them evenly spaced to make the fan look balanced.
Step 6: Expanding the Tail
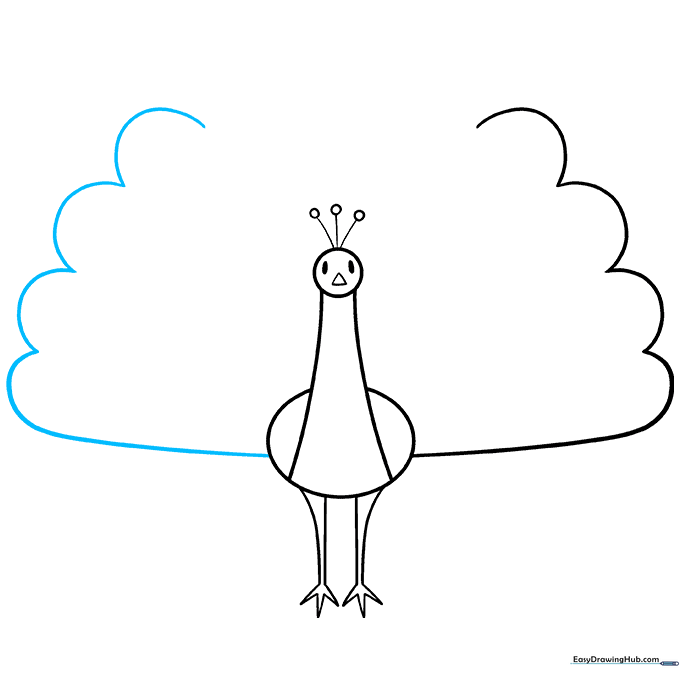
Extend a matching curved line from the opposite side of the body and add more 'U' shaped lines. Tip: Don't worry if the feathers aren't perfectly symmetrical; nature is rarely perfect, and this adds character to your drawing.
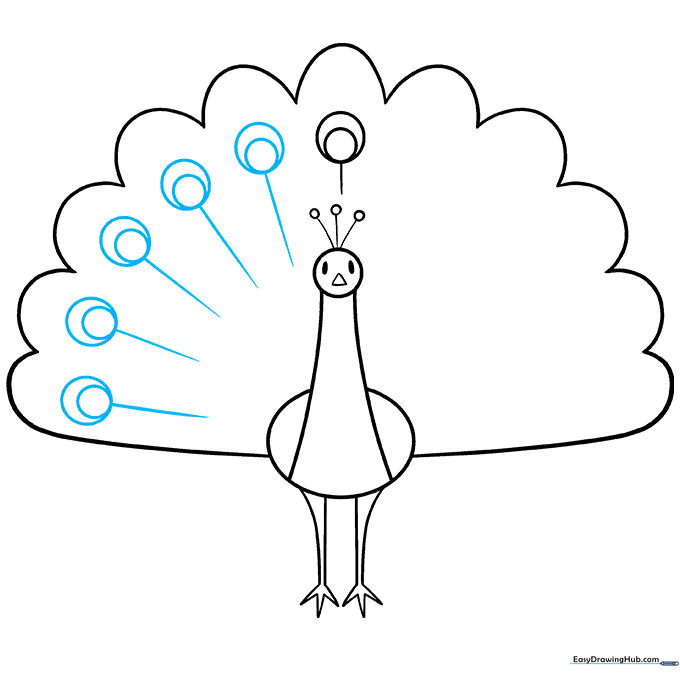
Step 7: Connecting the Feathers

Connect the two tail sections with more 'U' shaped lines to create a full, rounded fan. Add the first 'eyespot' detail above the head by drawing a circle within a circle and a short vertical line. Tip: The eyespot is the most iconic part of the peacock—take your time to make it look distinct.
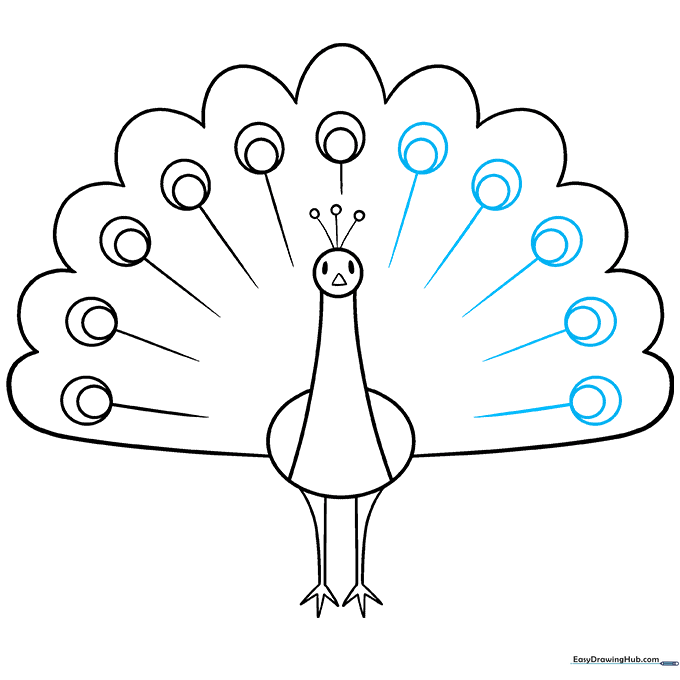
Step 8: Adding Eyespot Details
Draw more eyespots along the tail, placing one below each 'U' shaped feather tip. Each eyespot consists of a circle inside a circle with a line connecting it to the body. Tip: Vary the size of the circles slightly to make the tail look more realistic and layered.
Step 9: Finalizing the Tail
Fill in any remaining gaps with more eyespots. Ensure every feather tip has a corresponding detail. Tip: Use a fine-liner pen to go over your pencil lines once you're happy with the placement; this makes the drawing look professional and clean.
Step 10: Adding Color
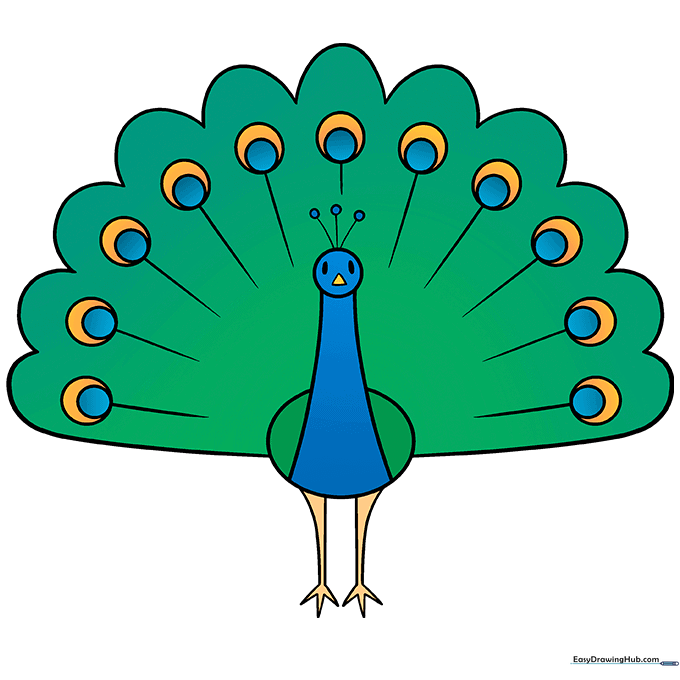
Bring your peacock to life with color! Use vibrant blues and greens for the body and feathers, and add touches of gold or yellow to the eyespots. Tip: Try blending two shades of blue on the neck to create a beautiful, iridescent effect.
More Tutorials


