How to Draw a Park: Easy Step-by-Step Landscape Guide
Create your own peaceful city park scene with this beginner-friendly tutorial. Designed for young artists, this lesson uses basic shapes to build a landscape featuring trees, a pond, and a city skyline. Grab your pencil and paper to start building your scene today.
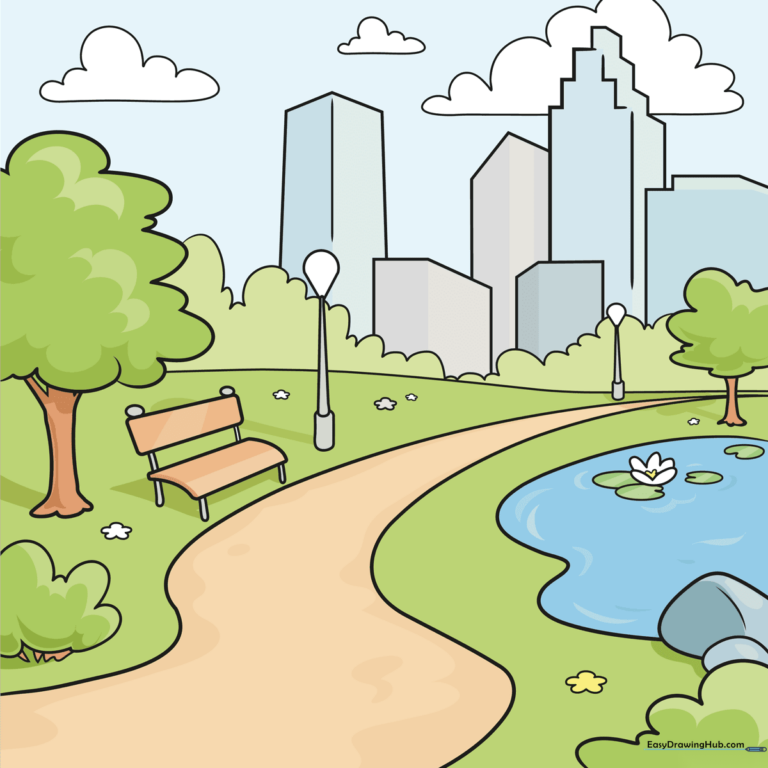
🎯 Final Result
Step-by-Step Instructions
Step 1: Sketching the Horizon and Pond

Draw a long, gentle curve for the horizon line. Below it, sketch two lines that get closer together to create a path. Finally, outline a soft, irregular shape for your pond. Teacher's Tip: Keep your pencil pressure light so you can easily adjust the pond's shape later.
Step 2: Adding Your First Trees

Draw a cloud-like shape for the tree crown and two vertical lines for the trunk. Add a smaller shrub in the corner. Teacher's Tip: Use 'bumpy' lines for the leaves to give the tree a natural, fluffy texture.
Step 3: Detailing Shrubs and Rocks

Add more bushes using the same cloud technique and draw small, irregular ovals near the pond for rocks. Teacher's Tip: Vary the size of your rocks to make the pond edge look more realistic.
Step 4: Drawing the Bench and Lamp Post

Draw a park bench using rounded rectangles for the seat and back. Next to it, draw a tall, thin triangle for a lamp post with a teardrop shape on top. Teacher's Tip: Use a ruler if you want your lamp post to be perfectly straight!
Step 5: Adding Distance and Water Lilies

Draw a smaller lamp post in the distance to create depth. Add small circles on the pond for water lilies. Teacher's Tip: Smaller objects placed higher up on the page help the drawing look like it has a background.
Step 6: Flowers and Distant Trees

Draw simple flower shapes using 'U' lines on the grass. Add another tree in the distance. Teacher's Tip: Keep distant trees smaller than the ones in the front to show perspective.
Step 7: The City Skyline
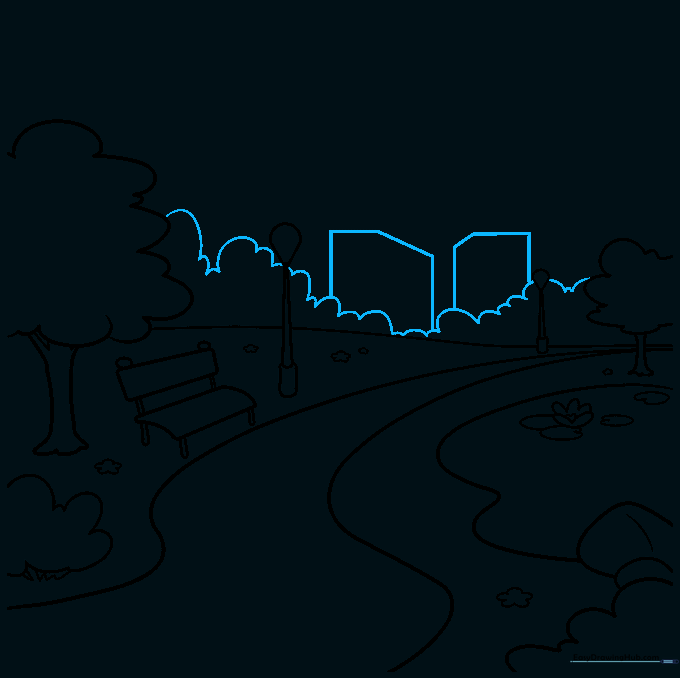
Draw a treeline on the horizon, then add rectangular skyscrapers behind it. Teacher's Tip: Give the buildings different heights to make the city look busy and interesting.
Step 8: Building Details

Add more buildings to fill out your skyline using straight, clean lines. Teacher's Tip: Don't worry about making them perfect; city buildings come in all shapes and sizes!
Step 9: Final Touches

Add windows or roof details to your buildings and draw fluffy clouds in the sky. Teacher's Tip: Use a darker pencil for your final outlines to make the drawing pop.
Step 10: Bring Your Park to Life with Color
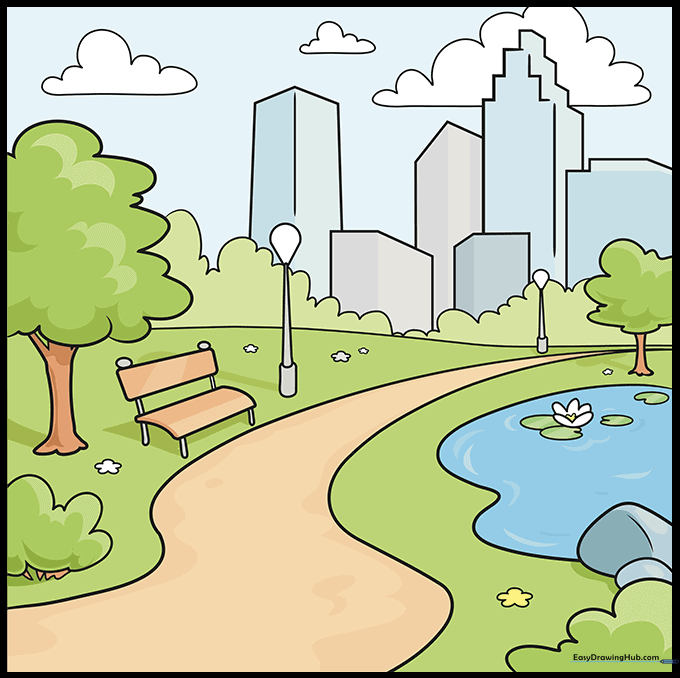
Color your park! Use bright greens for summer or warm oranges and reds for an autumn theme. Teacher's Tip: Use light blue for the pond and add white highlights to make the water look shiny.
More Tutorials


