How to Draw a Navy Ship: Easy 10-Step Guide for Kids
Ready to set sail? This tutorial is perfect for young artists ages 6+ who want to draw their own powerful navy ship. All you need is a pencil, an eraser, and a piece of paper to get started. Follow these simple steps to build your ship from the hull up and master basic geometric shapes.
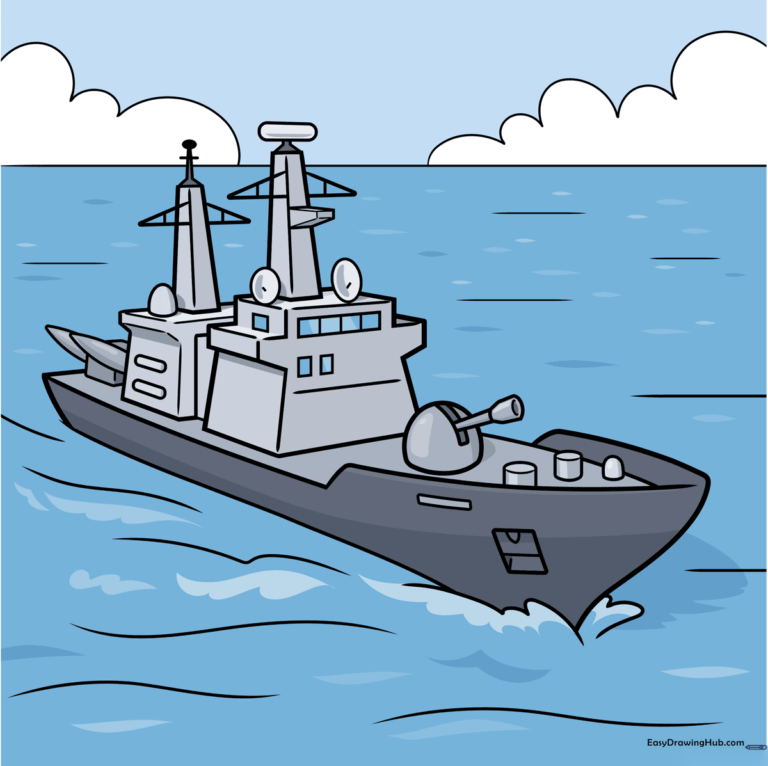
🎯 Final Result
Step-by-Step Instructions
Step 1: Sketching the Hull and Waterline
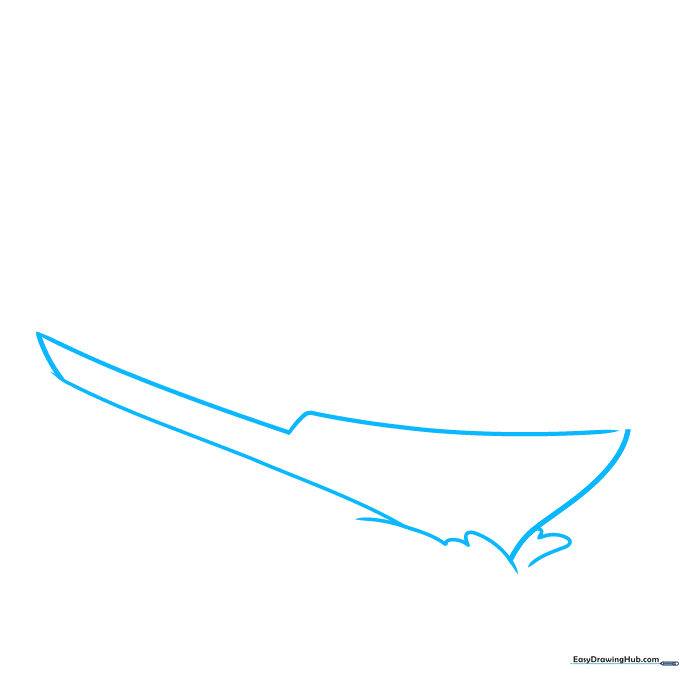
Start by drawing the curved bow of the ship. At the base, add soft, wavy lines to represent the ocean. Teacher's Tip: Keep your pencil lines light so you can easily erase the waterline if you want to adjust the ship's position later.
Step 2: Defining the Deck Structure
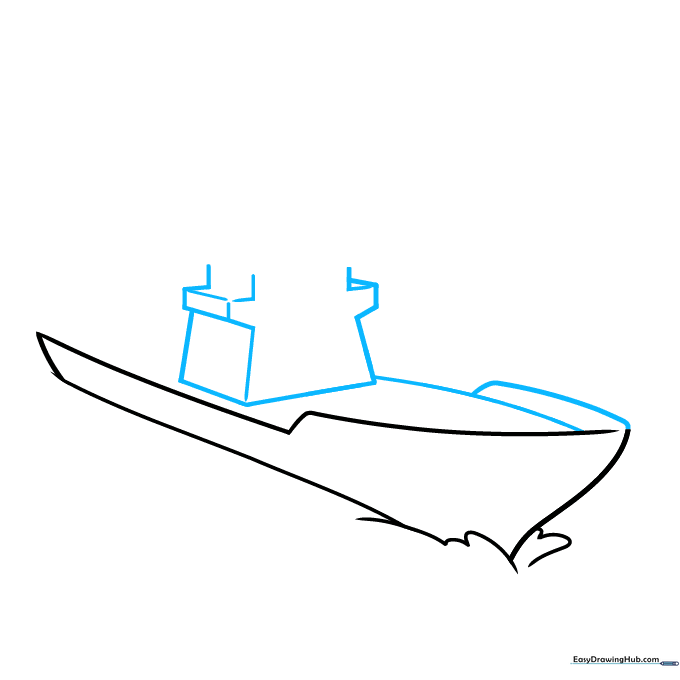
Draw a thick 'T' shape on the deck using straight lines. Add depth by connecting it to the hull with curved lines. Teacher's Tip: Use a ruler if you struggle with straight lines, but try freehand first to build your hand-eye coordination!
Step 3: Building the Command Tower
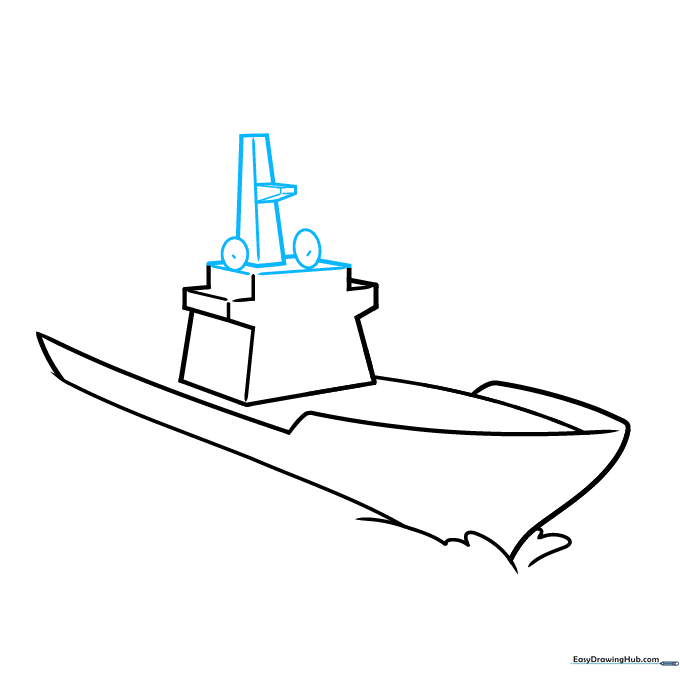
Add two ovals and a tall trapezoid on top of the tower. Create a 3D effect by adding a smaller trapezoid to the side. Teacher's Tip: If you make a mistake, don't worry! Just use your eraser to clean up the overlapping lines.
Step 4: Adding Detail to the Bridge
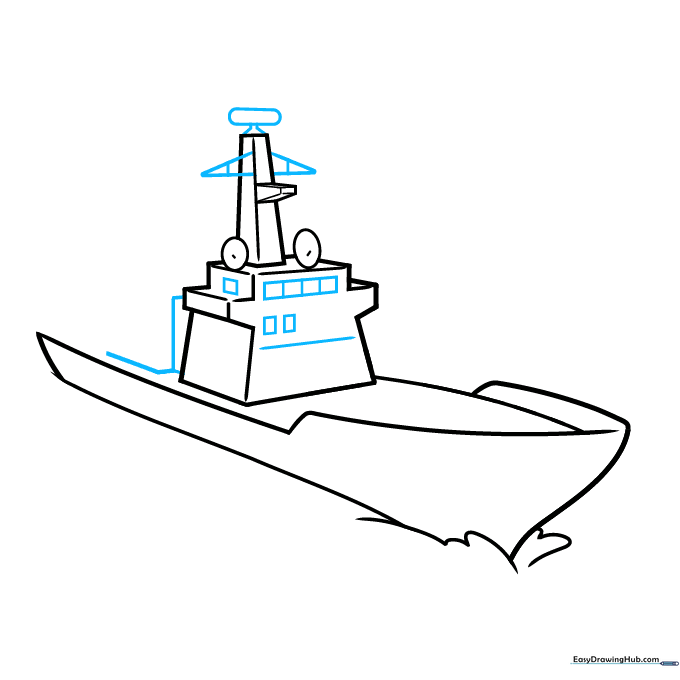
Draw triangles on the sides of the tower and a pill shape on top. Add small rectangles for windows. Teacher's Tip: Focus on keeping your window sizes consistent to make the ship look more realistic.
Step 5: Sketching the Second Tower
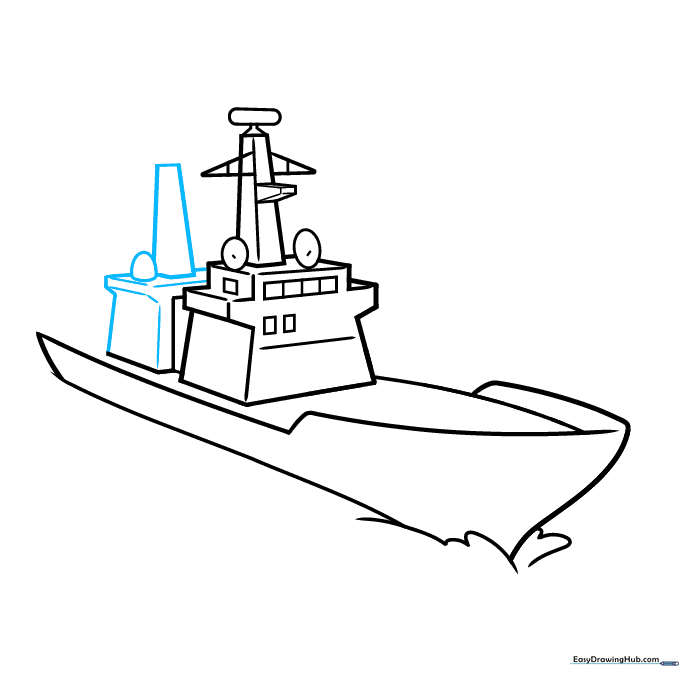
Draw a second tower behind the first using a gumdrop shape and a trapezoid. Teacher's Tip: Overlapping shapes like this creates the illusion of distance.
Step 6: Adding the Gun Turret
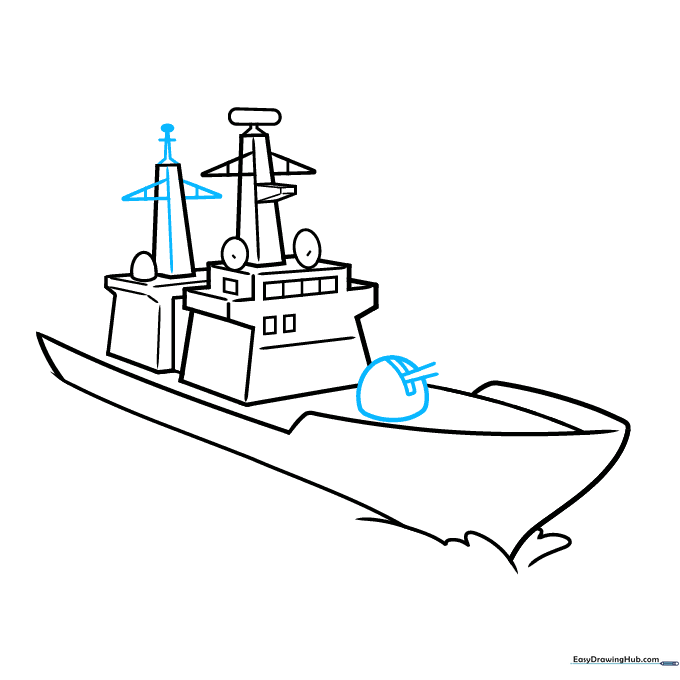
Add vertical lines to the towers for texture. On the deck, draw a round shape with a curved rectangle and two lines to form the gun turret. Teacher's Tip: Make the gun barrels thin and straight to emphasize their length.
Step 7: Finalizing the Deck and Stern
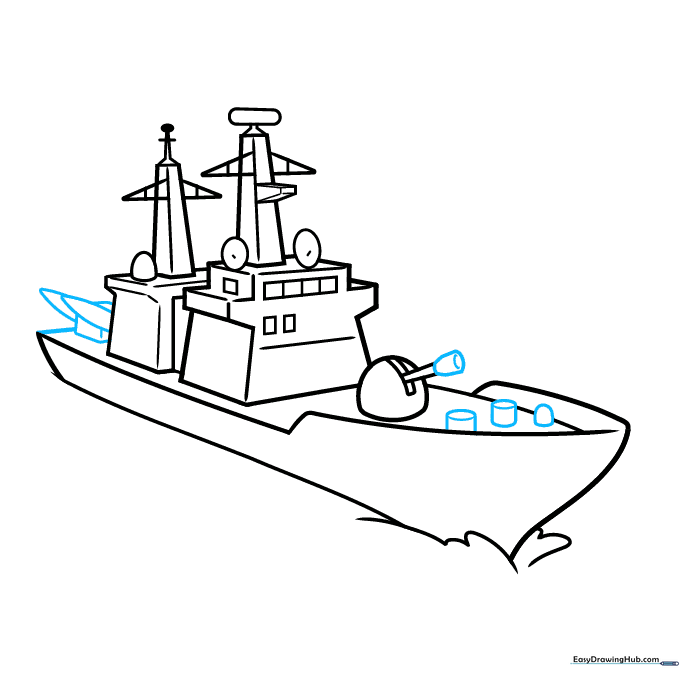
Add cylinders to the turret and deck. At the back of the ship, draw curved lines meeting at a point to form the stern. Teacher's Tip: Use a steady hand to ensure the cylinders look round and solid.
Step 8: Adding Atmospheric Details
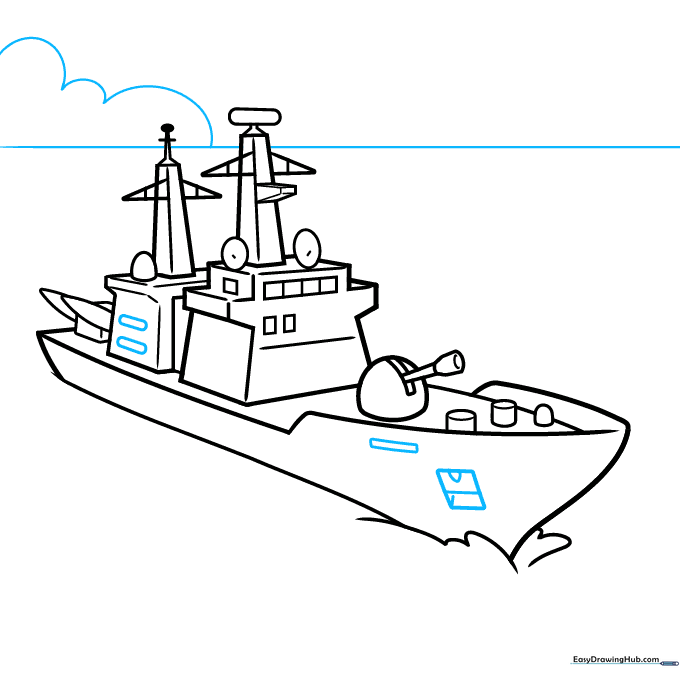
Add more windows to the hull. Draw a long horizontal horizon line and a fluffy cloud in the distance. Teacher's Tip: Vary the size of your windows to make the ship look more complex.
Step 9: Final Touches
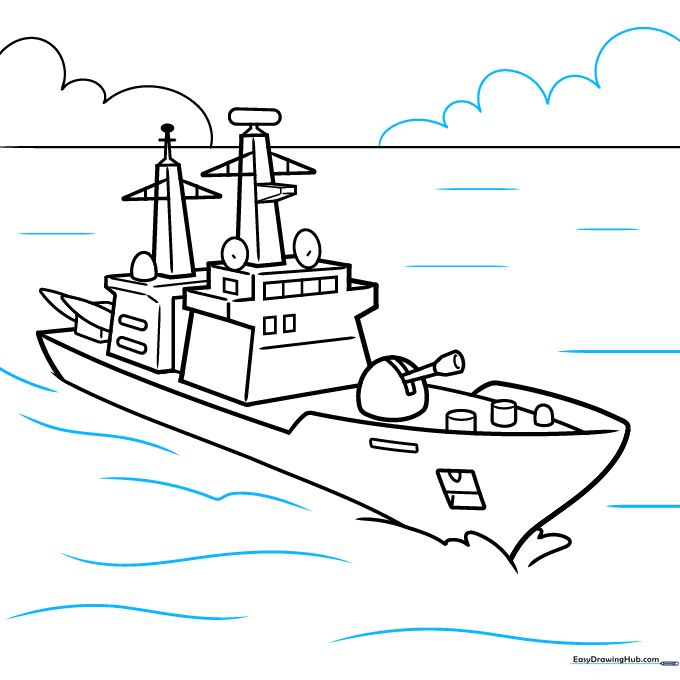
Add another cloud and use wavy lines to texture the water surface. Teacher's Tip: Use short, quick strokes for the water to make it look like it's moving.
Step 10: Coloring Your Ship
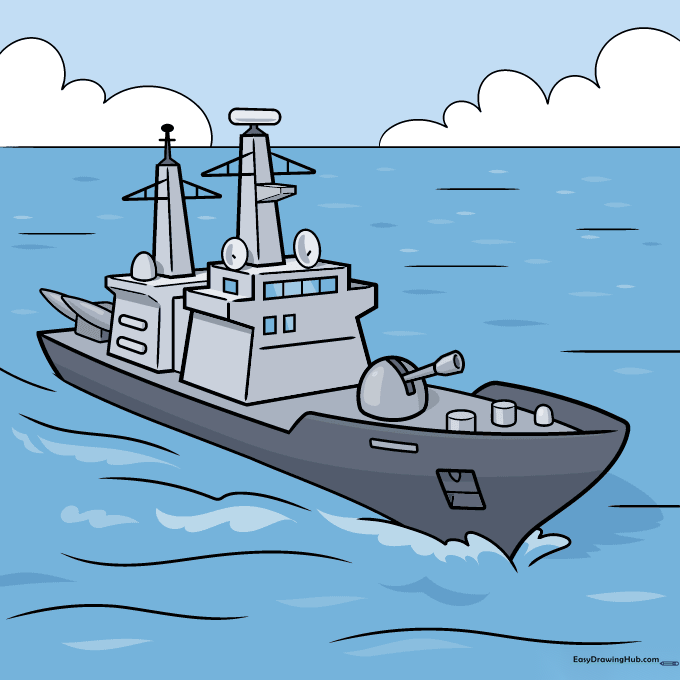
Your outline is complete! Use shades of gray to color your battleship, as this is the traditional color for naval vessels. Teacher's Tip: Use a darker gray for the shadows under the deck to give your drawing a 3D look.
More Tutorials


