How to Draw a Muscular Arm: Easy 9-Step Guide
Ready to add some strength to your character designs? This tutorial is perfect for young artists ages 8+ looking to understand basic anatomy shapes. You will need a pencil, an eraser, and a black fine-liner to complete this exercise in building form and volume.
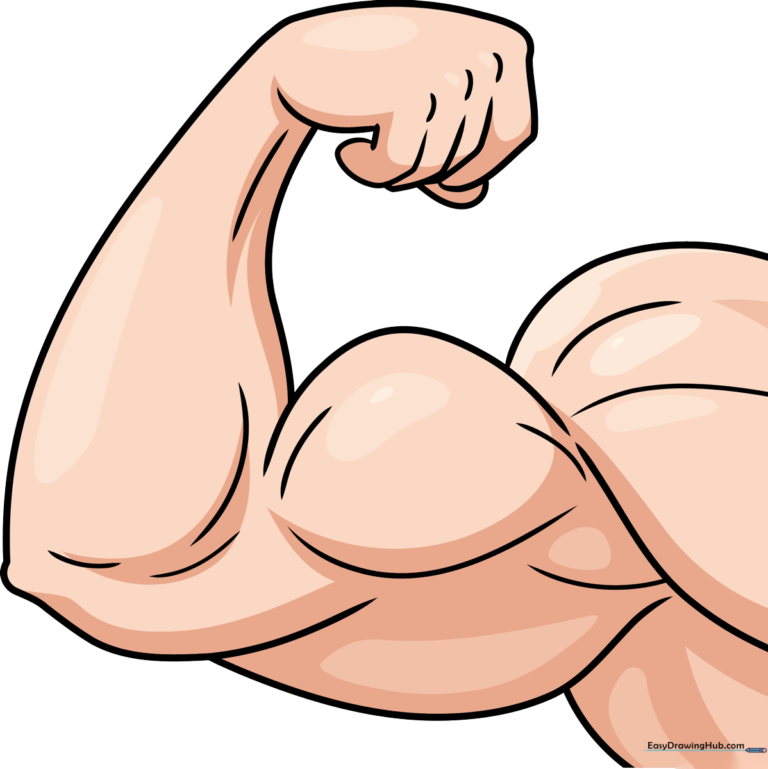
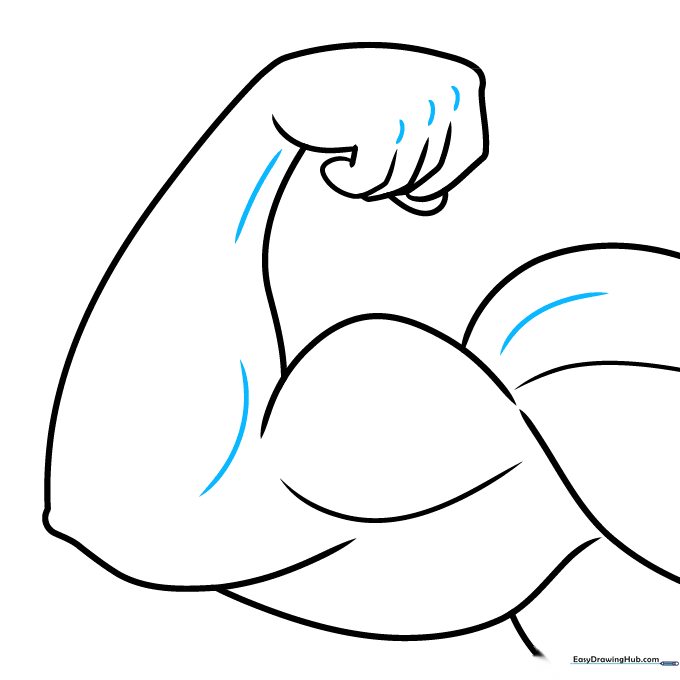
🎯 Final Result
Step-by-Step Instructions
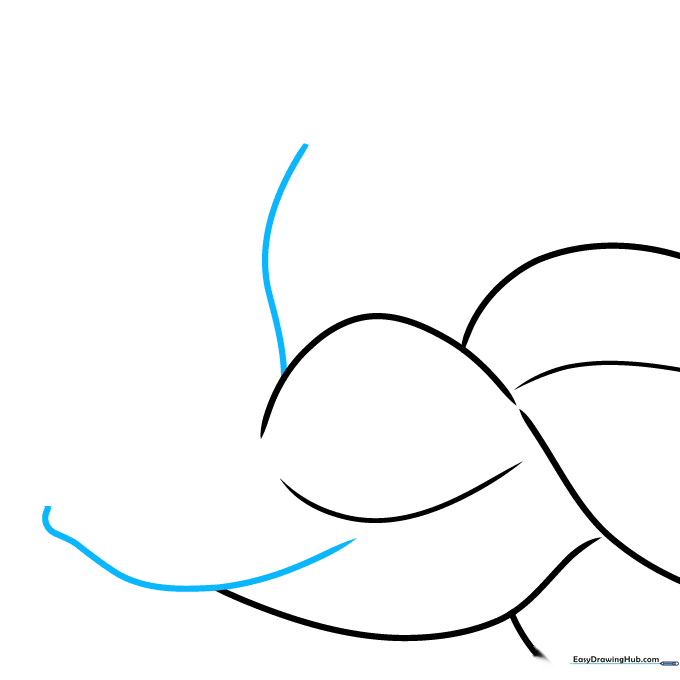
Step 1: Establishing the Shoulder Curve
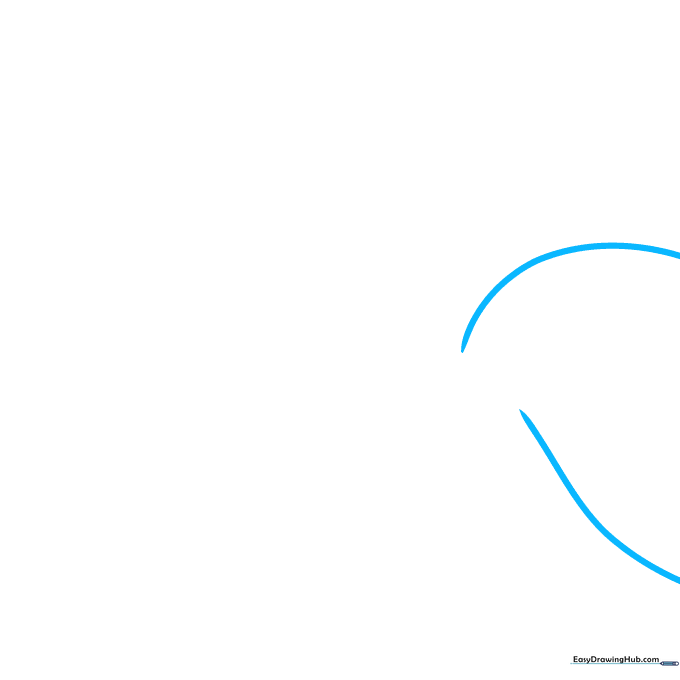
Draw a gentle horizontal curve on the right side of your paper to represent the shoulder. Below it, sketch a diagonal line that angles toward the edge of the page. Teacher's Tip: Keep your pencil grip loose to ensure these lines remain fluid and light.
Step 2: Defining the Bicep
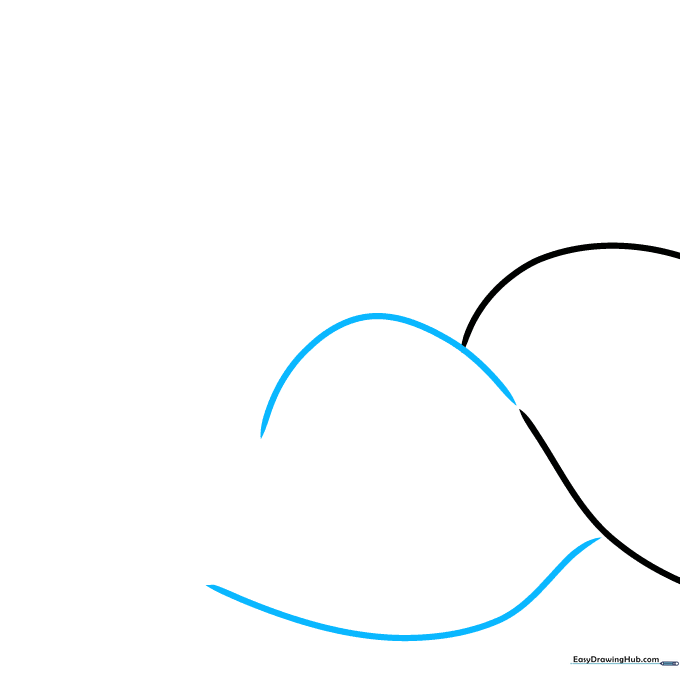
Attach a rounded 'hill' shape to the shoulder curve. Sketch a horizontal line underneath with a small gap to define the separation between the bicep and the forearm. Teacher's Tip: Think of the bicep as a soft, rounded mountain.
Step 3: Adding Muscle Definition
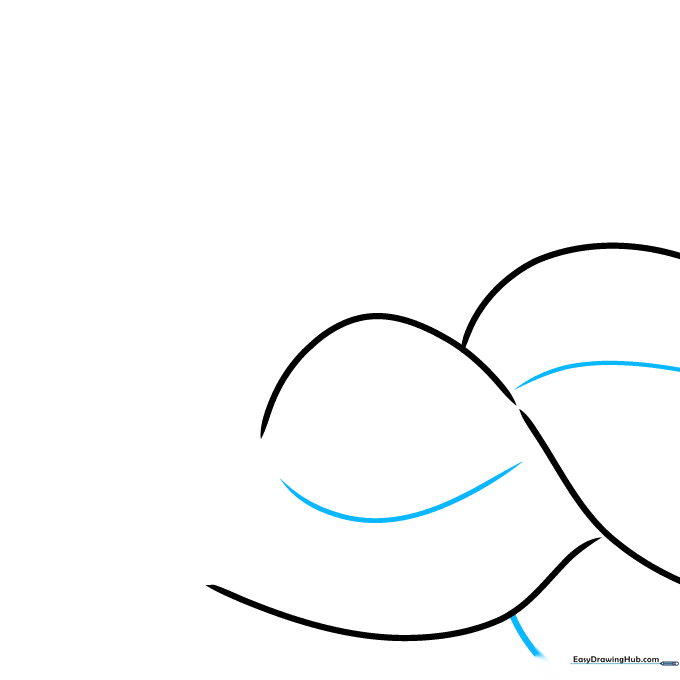
Sketch a short curve under the bicep. Add a small curve inside the left muscle and a horizontal line in the right muscle to suggest depth. Teacher's Tip: These inner lines act as 'contour lines' that help the viewer see the 3D shape of the arm.
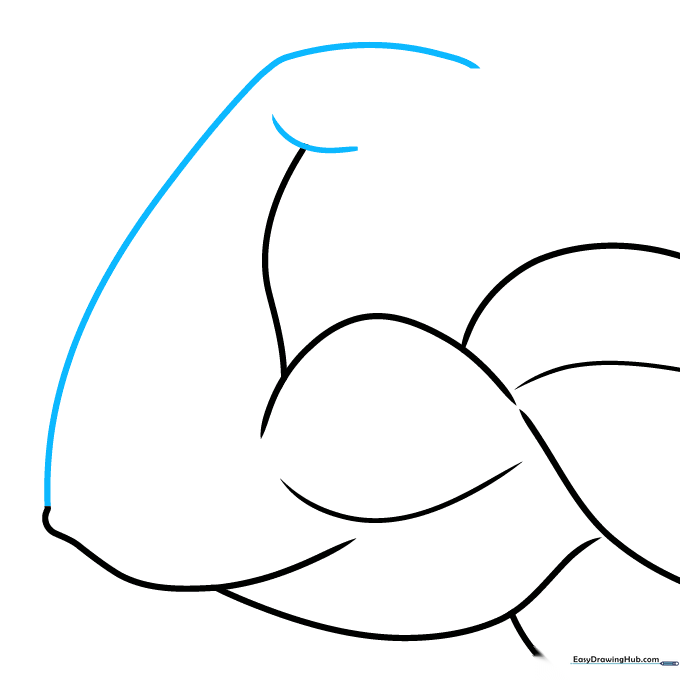
Step 4: Shaping the Forearm
Draw a curved vertical line extending from the left muscle, then sketch a wavy horizontal line reaching toward the left. Teacher's Tip: The 'wavy' line creates the natural taper of a forearm as it moves toward the wrist.
Step 5: Connecting the Elbow and Hand
Outline the arm with a long diagonal line starting from the elbow. Sketch a horizontal line and a curve to begin the hand structure. Teacher's Tip: Keep the hand shape simple—we will add the fingers in the next step.
Step 6: Sketching the Fingers
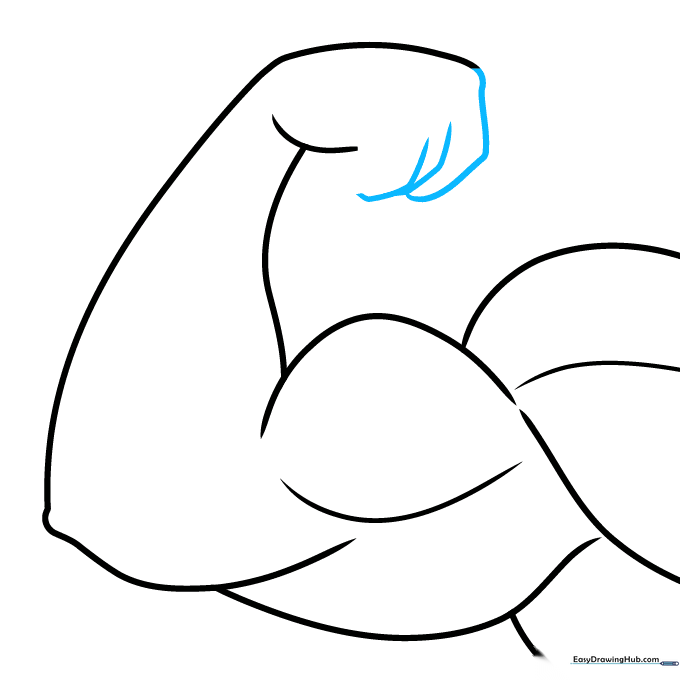
Draw a loose triangle shape with a rounded bottom for the fingers, adding two smaller overlapping triangles. Ensure the middle finger is the longest. Teacher's Tip: Use light, quick strokes to get the finger proportions right before committing to the final outline.
Step 7: Adding the Thumb
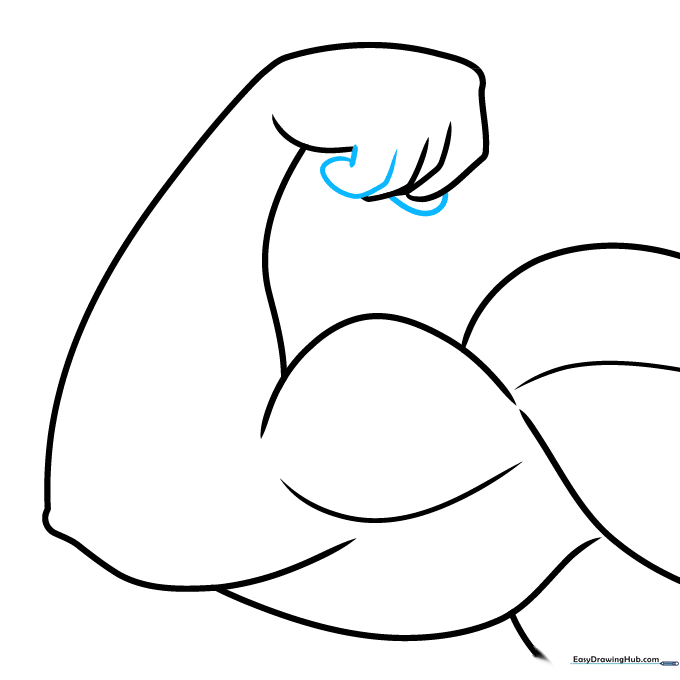
Sketch a fourth finger using an oval and two straight lines. Add another oval behind the fingers to represent the thumb. Teacher's Tip: The thumb usually sits lower than the other fingers, so place your oval slightly down from the main finger group.
Step 8: Refining Muscle Detail
Draw curves inside the arm to define the muscle groups. Outline the knuckles with three small dashes. Teacher's Tip: Don't over-complicate the knuckles; three simple dashes are enough to imply a clenched fist.
Step 9: Finalizing the Outline
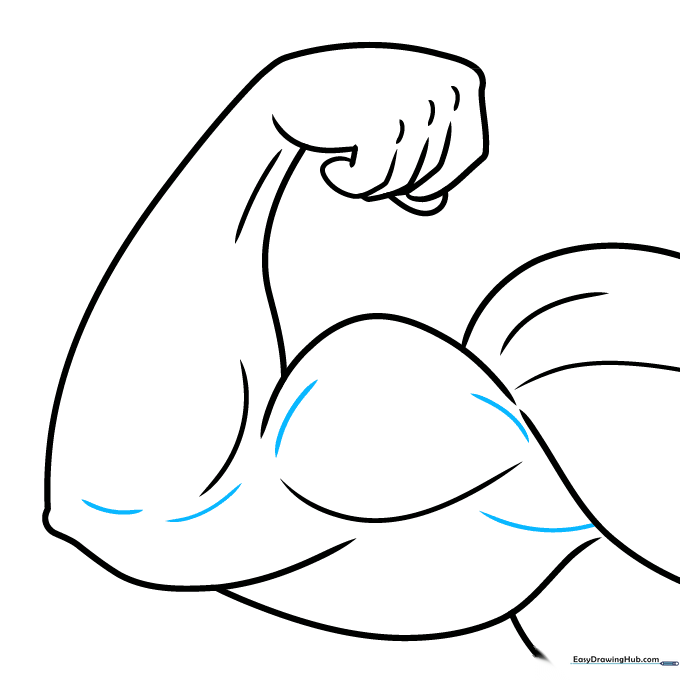
Sketch five more curves inside the arm to emphasize the center muscle. Use a black marker to trace your final lines, then erase your pencil marks once the ink is dry. Teacher's Tip: Let the ink dry for at least 30 seconds before erasing to prevent smudging!
Step 10: Adding Color and Depth
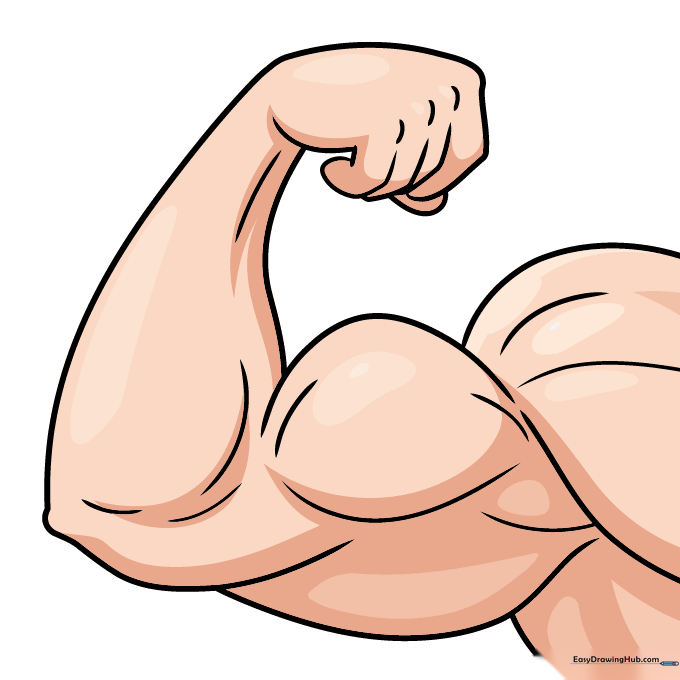
Color your arm using a base skin tone, then add darker shades for shadows and lighter tones for highlights. Teacher's Tip: Focus your highlights on the upper 'peak' of the bicep to make the muscle look like it's catching the light.
More Tutorials


