How to Draw a Cartoon Monkey: Easy 11-Step Guide
Ready to bring a playful primate to life? This tutorial is perfect for ages 5 and up, requiring only a pencil, paper, and an eraser. Follow these simple steps to build your monkey character from basic shapes, helping you master proportions and expressive cartooning.
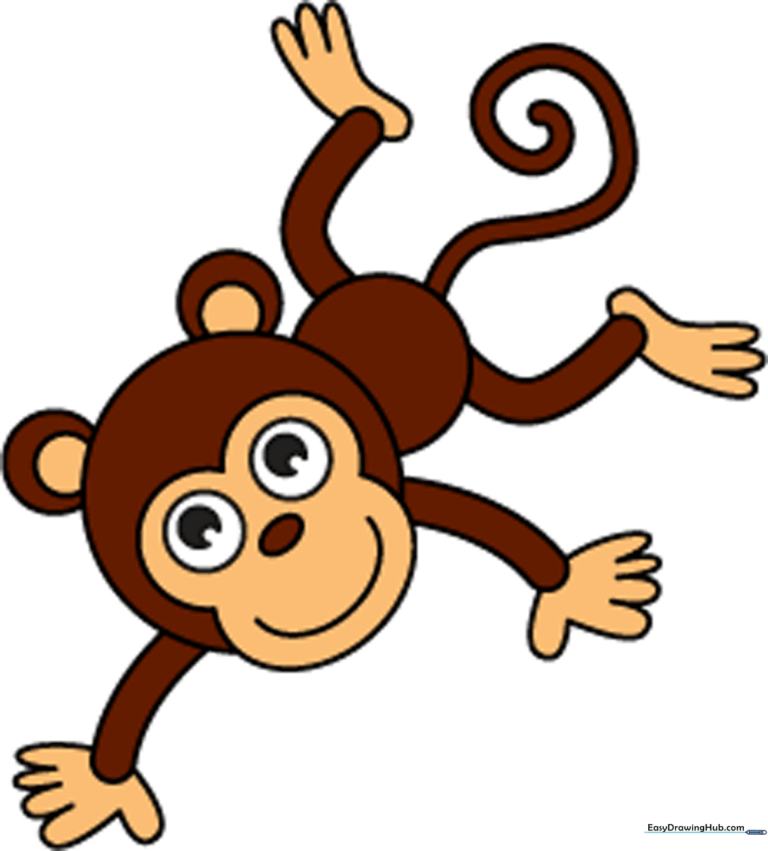
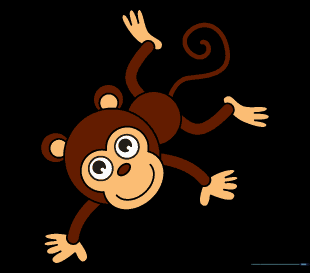
🎯 Final Result
Step-by-Step Instructions
Step 1: Sketching the Head

Start by drawing a light circle to serve as the monkey's head. Teacher's Tip: Keep your pencil strokes very faint so you can easily erase them later; think of this as the 'skeleton' of your drawing.
Step 2: Defining the Snout and Eyes

Draw a large oval overlapping the side of the head for the snout, then add two smaller circles for the eyes. Teacher's Tip: Don't worry about the overlapping lines yet; we will clean those up in the next step!
Step 3: Cleaning the Outline

Gently erase the overlapping lines inside the snout and eyes to create a smooth, clean face shape. Teacher's Tip: Use a soft eraser and light pressure to avoid crinkling your paper.
Step 4: Adding Facial Features

Draw two large circles for the eyes and a small oval in the center for the nose. Teacher's Tip: Placing the nose slightly lower between the eyes gives the monkey a friendly, youthful expression.
Step 5: Adding Pupils and a Smile

Add small shaded circles for pupils and a wide 'U' shape for the mouth. Teacher's Tip: Make the pupils look in different directions if you want your monkey to look extra silly!
Step 6: Drawing the Ears

Add two 'C' shaped lines on the sides of the head to form the ears. Teacher's Tip: Try to keep them symmetrical so the monkey looks balanced.
Step 7: Adding Ear Detail and Body
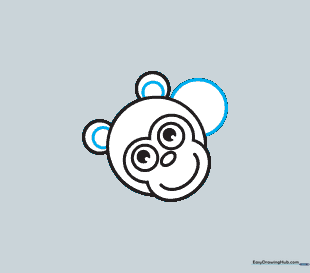
Draw smaller 'C' shapes inside the ears for detail, then add a large curved line for the body. Teacher's Tip: The body line should start just below the head to show the neck.
Step 8: Sketching the Limbs

Use pairs of parallel curved lines to create the arms and legs. Teacher's Tip: Keep the lines slightly curved to make the monkey look relaxed and natural.
Step 9: Drawing the Hands

Add the hands using small, connected 'U' shapes for fingers. Teacher's Tip: Don't worry about perfect anatomy; simple shapes work best for cartoon styles!
Step 10: Feet and Tail

Draw the feet with simple toes and add a long, spiral tail. Teacher's Tip: Make the tail look like a spring to give your monkey a sense of movement.
Step 11: Final Touches
Add a sturdy tree branch for your monkey to hang from! Teacher's Tip: Use thick, dark lines to outline your final drawing to make it pop.
More Tutorials


