How to Draw a Monkey Face: Easy 10-Step Guide for Kids
Ready to bring a cheeky primate to life? This tutorial is perfect for artists ages 5 and up. You will only need a pencil, an eraser, and a piece of paper to master these expressive features and build your character-drawing confidence.
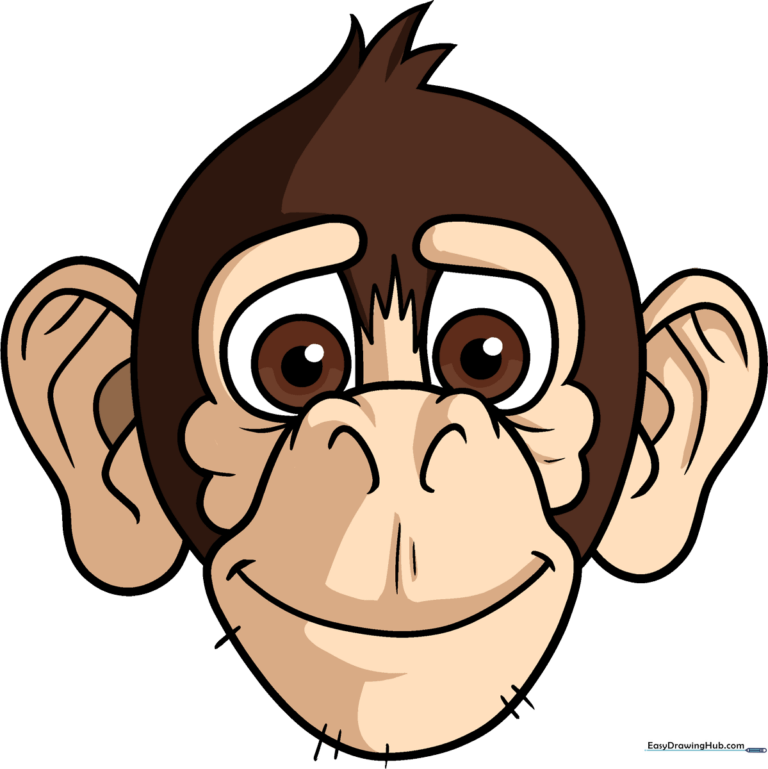
🎯 Final Result
Step-by-Step Instructions
Step 1: Establishing the Brow Line

Draw two gentle hills with a soft curve connecting them. Add a small cylinder shape on each side to act as the base for the ears. Tip: Keep these lines light—they are just your structural map!
Step 2: Sketching the Eyes

Connect your shapes with a smooth curve. Inside the brow area, draw two circles with smaller circles inside for pupils. Tip: Make the pupils look slightly off-center to give your monkey a curious, playful gaze.
Step 3: Defining the Face Shape

Draw a large, soft curve to outline the monkey's muzzle area. Use wavy lines to connect this to the ear cylinders. Tip: Use a 'bumpy' motion with your pencil to mimic the texture of fur.
Step 4: Adding the Nose and Mouth
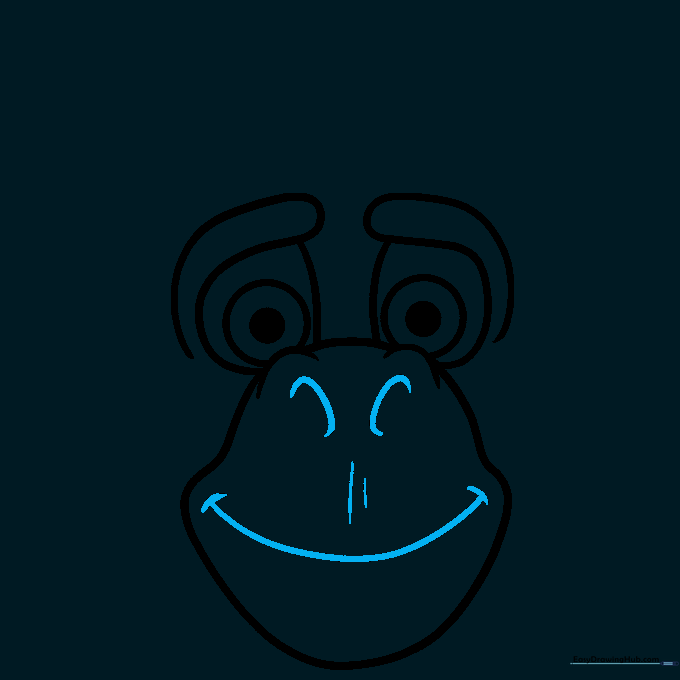
Add two small hook shapes for the nostrils. Below them, draw a wide, happy curve for the mouth with a dash at the end. Tip: A slight upward curve at the mouth corners makes the monkey look friendly.
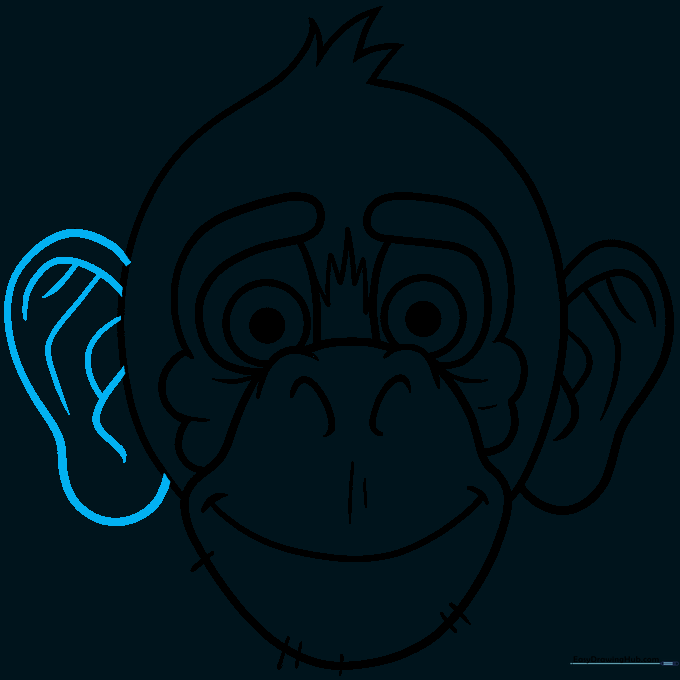
Step 5: Detailing the Ears and Brow

Draw two loops on the sides that look like the number '3' for the ears. Sketch small triangles between the eyes to define the bridge of the nose. Tip: Keep the ear loops rounded to maintain a cute, cartoon aesthetic.
Step 6: Adding Fur Texture
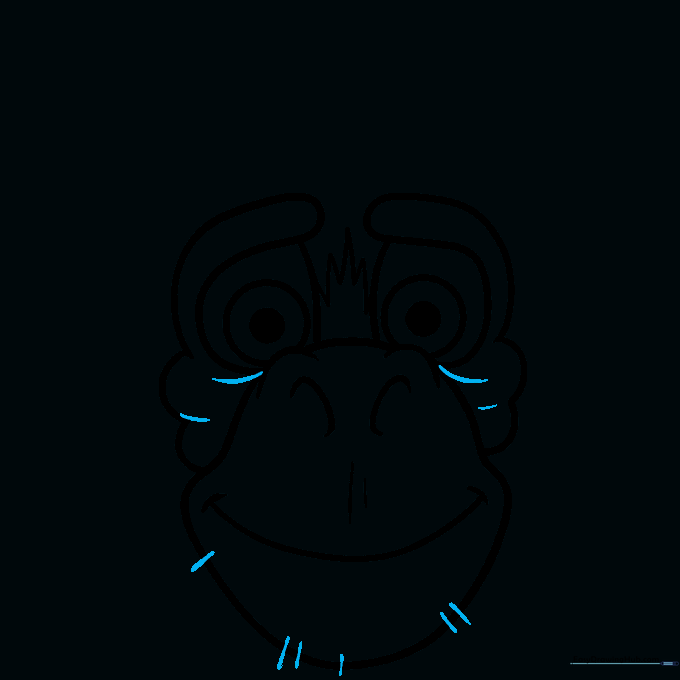
Sketch small, quick dashes around the edge of the face. Tip: Don't worry about making them perfect; irregular dashes actually look more like natural, messy monkey fur.
Step 7: Completing the Head Shape
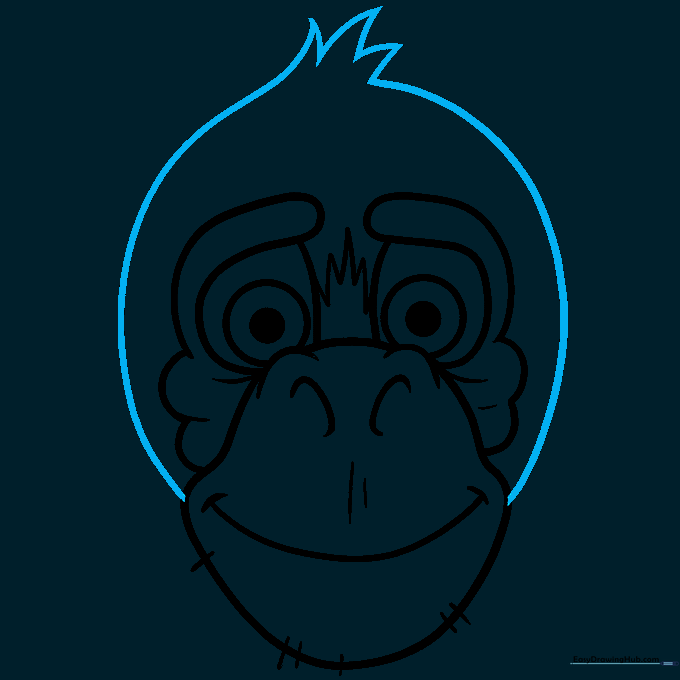
Draw a large oval to frame the head, adding three small triangles at the top to suggest a tuft of hair. Tip: Make the hair tuft slightly asymmetrical for a more natural look.
Step 8: Refining the Ears
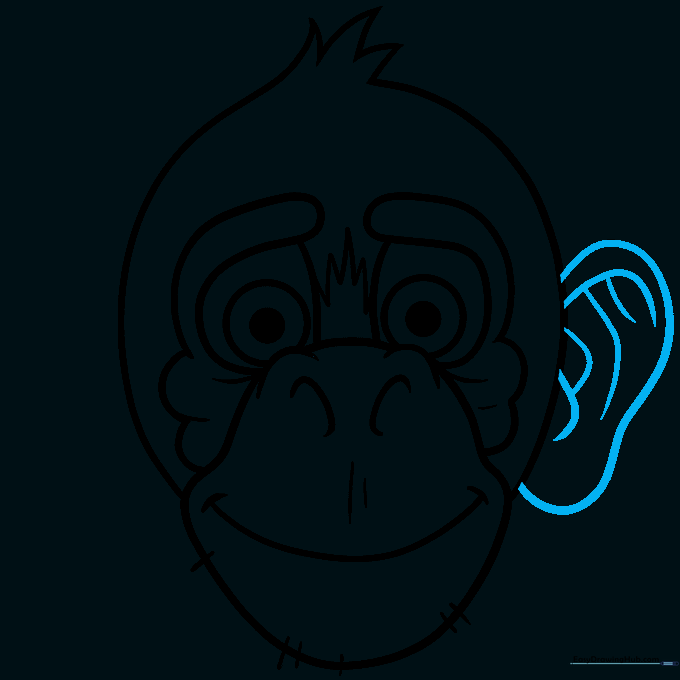
Add inner loops to the ears and use small, curved lines to create depth. Tip: Think of the ear as a bowl—the inner lines show where the 'bowl' curves inward.
Step 9: Final Outline
Mirror the details on the opposite side to balance the face. Once you are happy with your pencil sketch, use a black pen or marker to trace your final lines. Tip: Use a steady hand and don't rush the tracing process!
Step 10: Adding Color

Bring your monkey to life! Use light tan for the face and ears, and a darker brown for the shadows and the top of the head. Tip: Use circular coloring motions to keep the texture smooth and even.
More Tutorials


