How to Draw a Money Rose: Easy 10-Step Guide
This fun drawing project is perfect for artists ages 7 and up who want to combine nature with a creative twist. All you need is a pencil, an eraser, and some paper to get started. Follow these steps to master the art of folding paper money into a beautiful, stylized rose illustration.
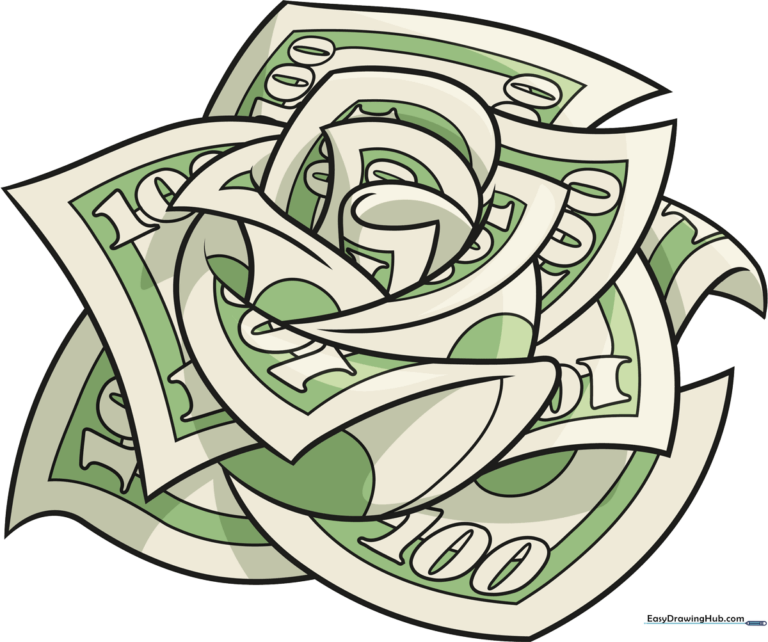
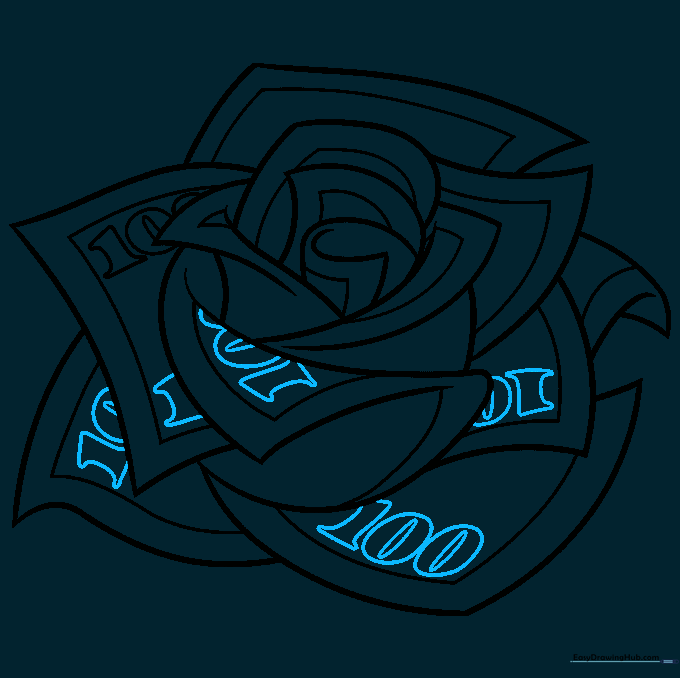
🎯 Final Result
Step-by-Step Instructions
Sketching the Inner Petals

Begin by sketching the two innermost petals. Use pairs of long, graceful curved lines that meet at sharp, elegant points. Teacher's Tip: Keep your pencil pressure light here so you can easily adjust the shape if needed.
Building the Petal Layers

Continue adding petals by drawing pairs of curved lines that meet at points. Add a small triangle shape to one of the petal tips to suggest a fold. Teacher's Tip: Vary the size of your petals to make the rose look more realistic and organic.
Adding Curled Petal Tips
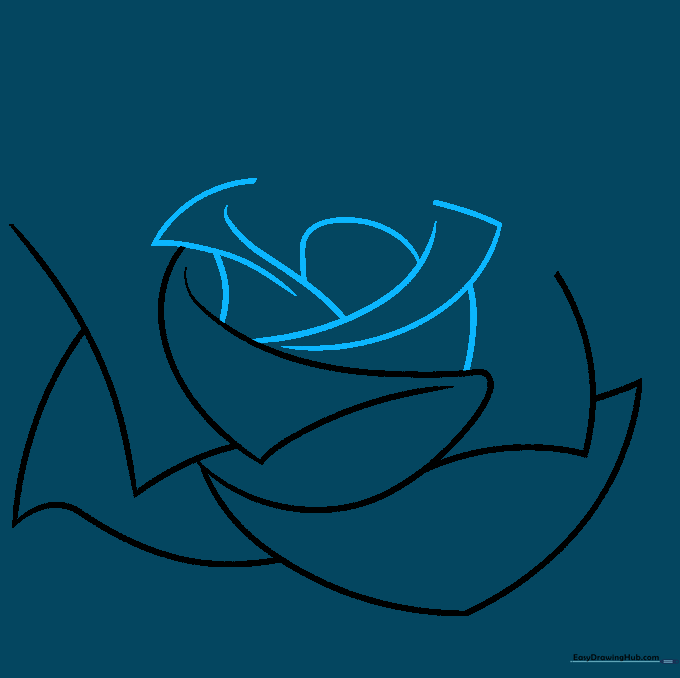
Use sets of three curved lines to create narrow, curled triangle shapes at the edges of your petals. Connect these to the main body of the flower with smooth, flowing lines. Teacher's Tip: Think of these as the 'edges' of a dollar bill folding over.
Developing the Rose Center

Draw additional petals using curved lines that meet at sharp points. Focus on the center of the flower, ensuring the lines overlap to create a sense of depth. Teacher's Tip: Don't worry about perfect symmetry; real roses are beautifully irregular!
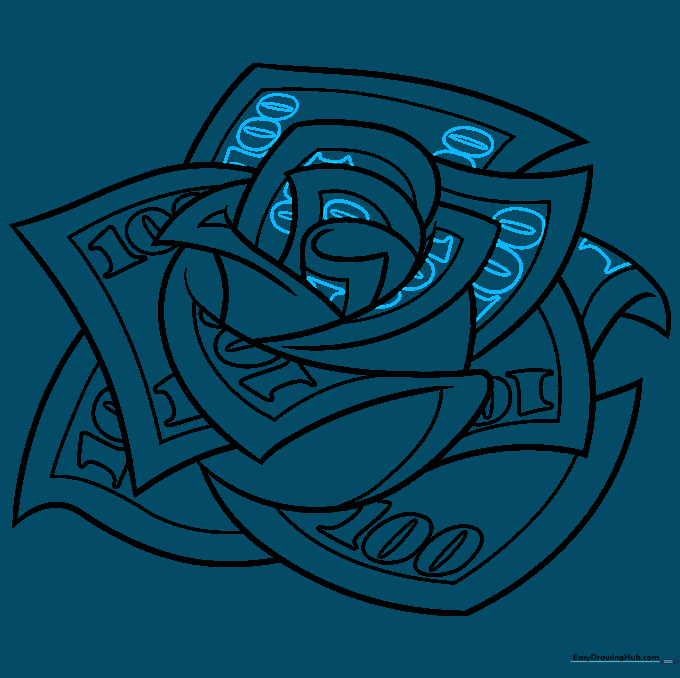
Defining the Bill Borders
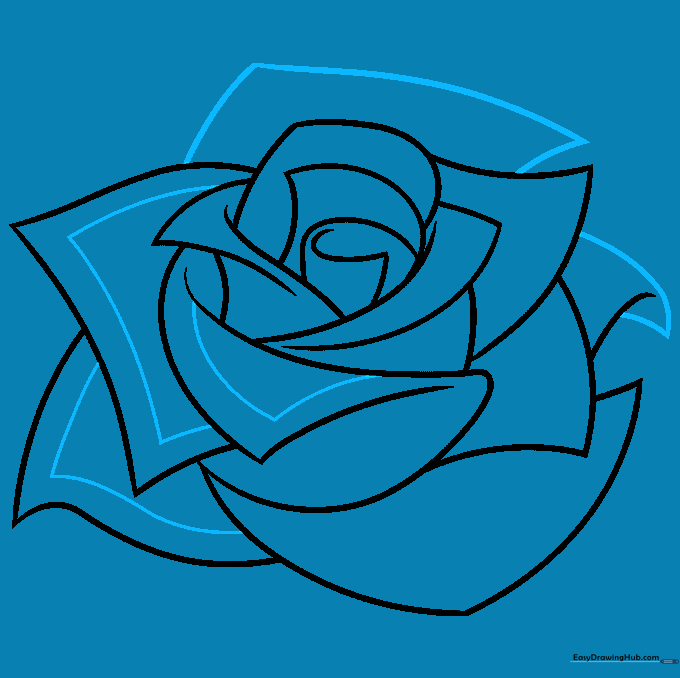
Draw the final outer petals. Now, let's add the 'money' detail! Draw curved lines parallel to the edges of your petals to represent the borders of a dollar bill. Teacher's Tip: Keep your lines steady; these borders define the 'currency' look.
Adding Currency Details
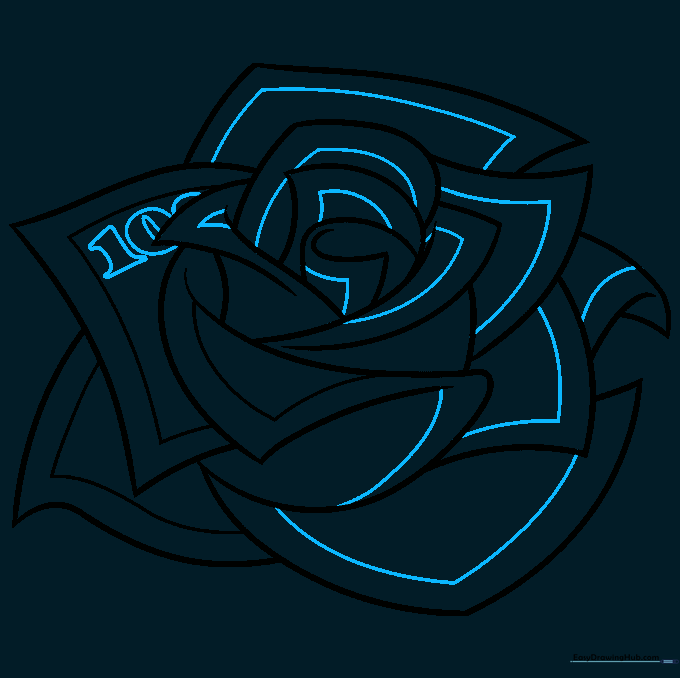
Continue drawing parallel lines on the remaining petals. In one corner, carefully print the bold numbers '100'. Teacher's Tip: Use a fine-liner or a sharp pencil to make the numbers look crisp and official.
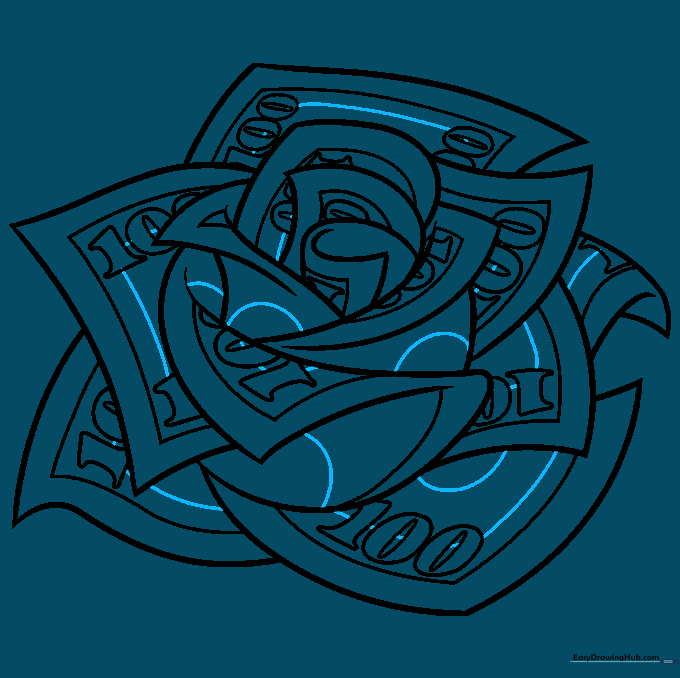
Expanding the Details
Repeat the process by adding the '100' detail to the corners of more petals. Teacher's Tip: Make sure the numbers follow the curve of the petal so they look like they are printed on the paper.
Finishing the Markings
Add the '100' detail to the remaining visible corners of your petals. Teacher's Tip: If the space is small, draw the numbers slightly smaller to keep the drawing looking clean.
Finalizing the Outline
Complete the outline by adding final parallel lines to the petal edges. Add small, partial circle shapes in the centers of the bills to suggest the intricate patterns found on real currency. Teacher's Tip: Use a light touch for these small details.
Coloring Your Money Rose
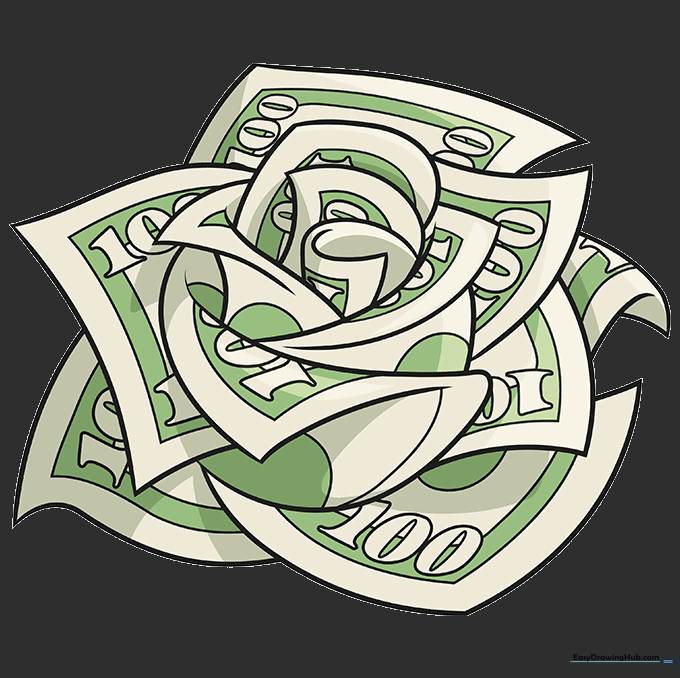
Bring your drawing to life! Use two different shades of green to color the petals, mimicking the look of a real dollar bill. Teacher's Tip: Use a darker green for the shadows where petals overlap to give your drawing a 3D effect.
More Tutorials


