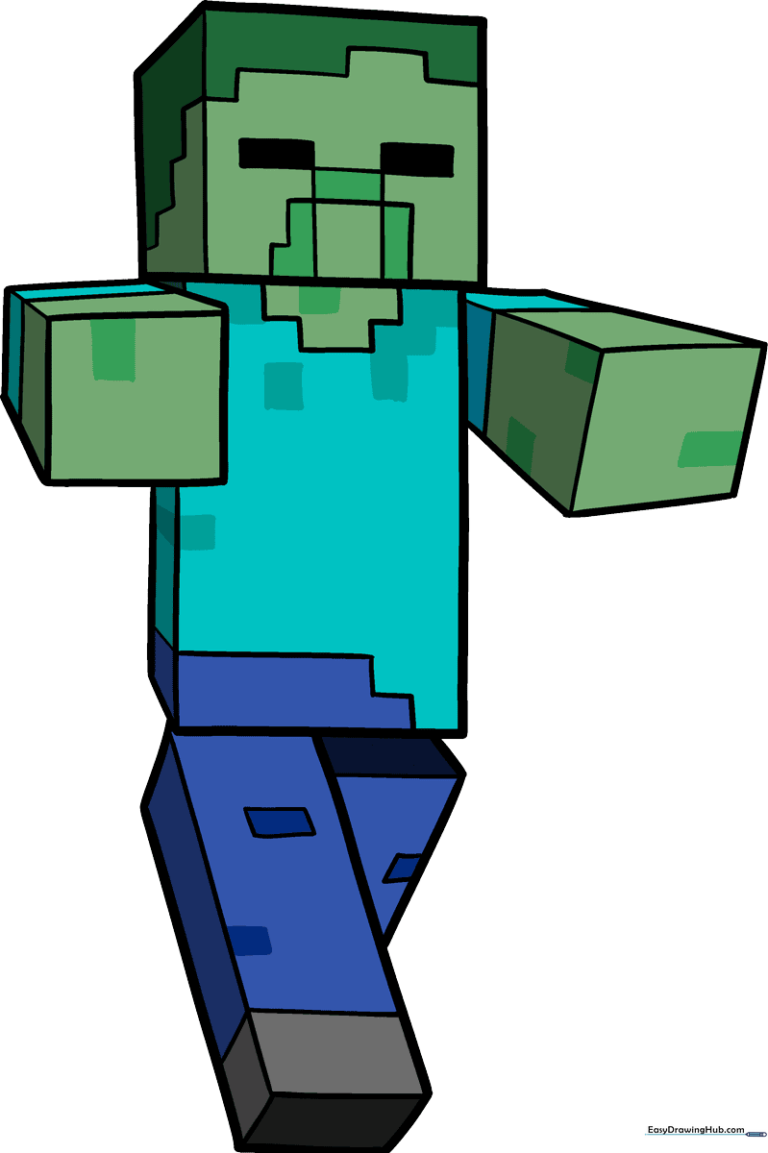
How to Draw a Minecraft Zombie: Easy 9-Step Guide
Bring your favorite Minecraft mob to life! This tutorial is designed for young artists and gamers to master 3D block-based drawing. You will only need a pencil, an eraser, and a ruler to create this iconic pixelated character while practicing your fine motor control.
🎯 Final Result
Step-by-Step Instructions
Step 1: Sketching the Head
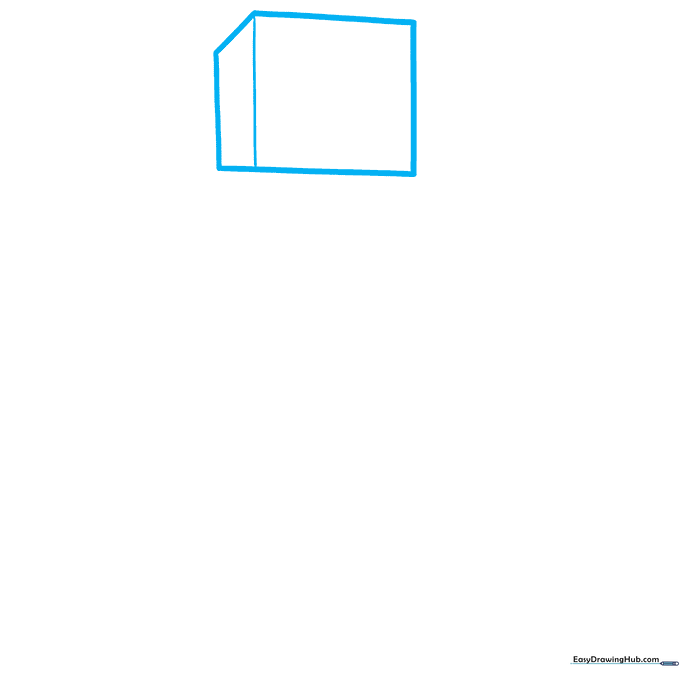
Draw a square near the top of your page for the head. Add a short diagonal line and two straight lines to the left to give it a 3D depth. Teacher's Tip: Keep your lines light; you'll be refining these shapes later.
Step 2: Defining the Torso
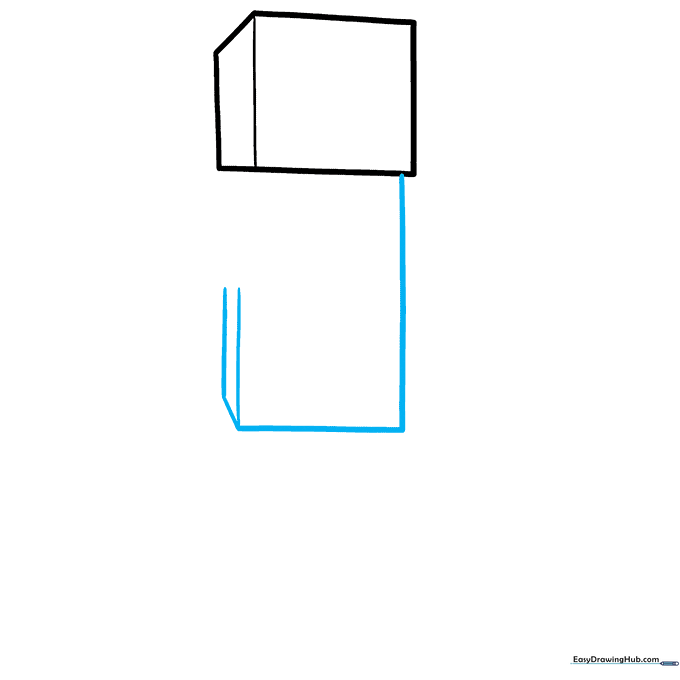
Draw a rectangle directly beneath the head. Add a short diagonal line and a tall vertical line on the left to maintain the 3D perspective. Tip: Ensure the torso is slightly wider than the head for that classic Minecraft look.
Step 3: Connecting the Body
Add another square block for the lower torso. Use diagonal lines on the top and left to create depth, then connect it to the head with a small dash. Tip: Use your ruler to ensure the vertical lines are perfectly parallel.
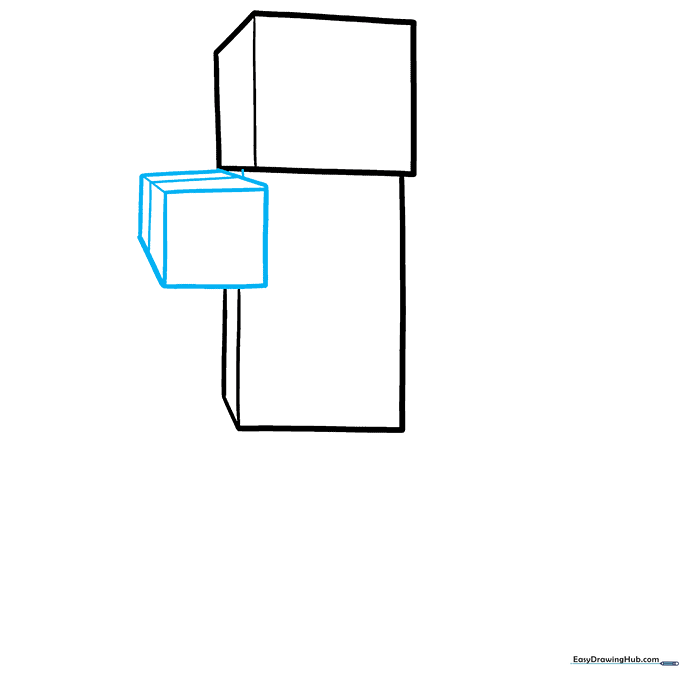
Step 4: Sketching the Arm
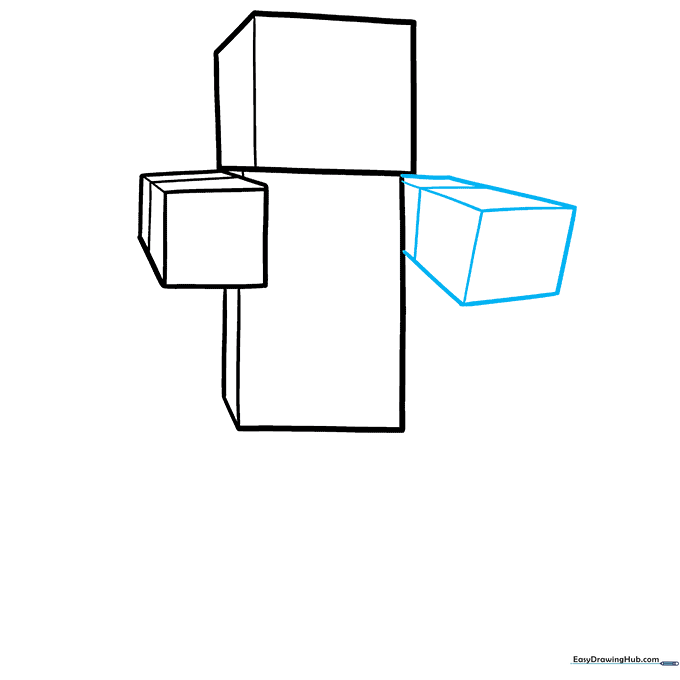
Draw a tilted box about half an inch from the body. Connect it to the main torso using three diagonal lines and one horizontal line. Tip: Think of this as drawing a small box floating next to the body before attaching it.
Step 5: Drawing the First Leg
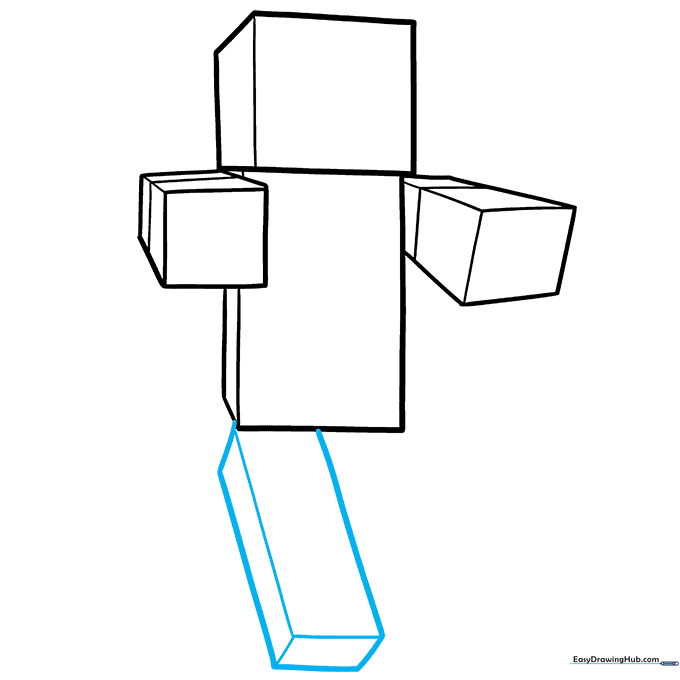
Sketch two long diagonal lines for the leg and connect them with a straight line. Outline the shape with additional straight lines to maintain the blocky aesthetic. Tip: Make sure the leg is long enough to balance the character's height.
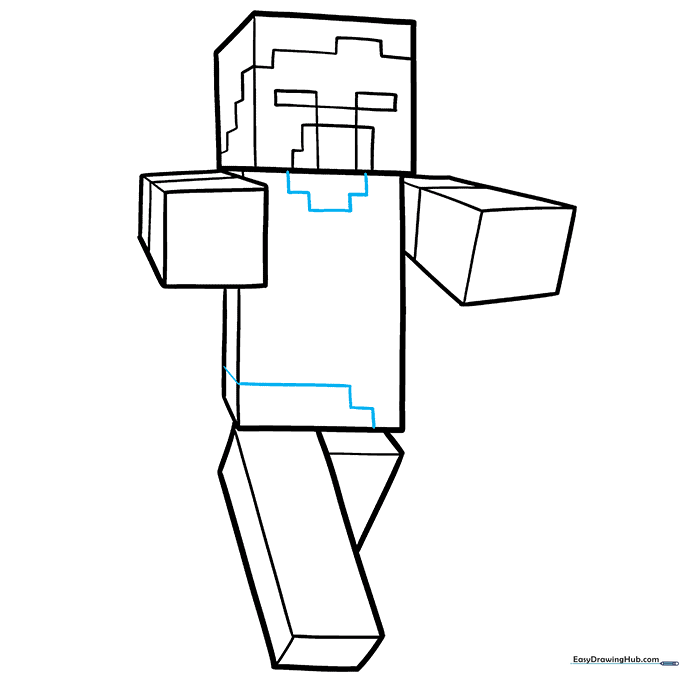
Step 6: Adding Leg Detail
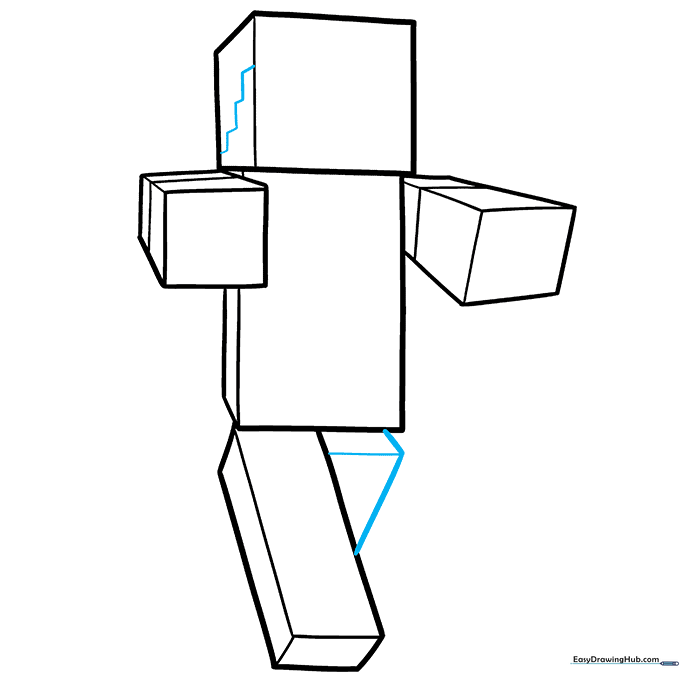
Add a staircase-like line inside the head area. Sketch the right leg using three straight lines, ensuring the left leg overlaps slightly to create a sense of distance. Tip: Overlapping lines are a great way to show depth in 2D drawings.
Step 7: Defining the Face
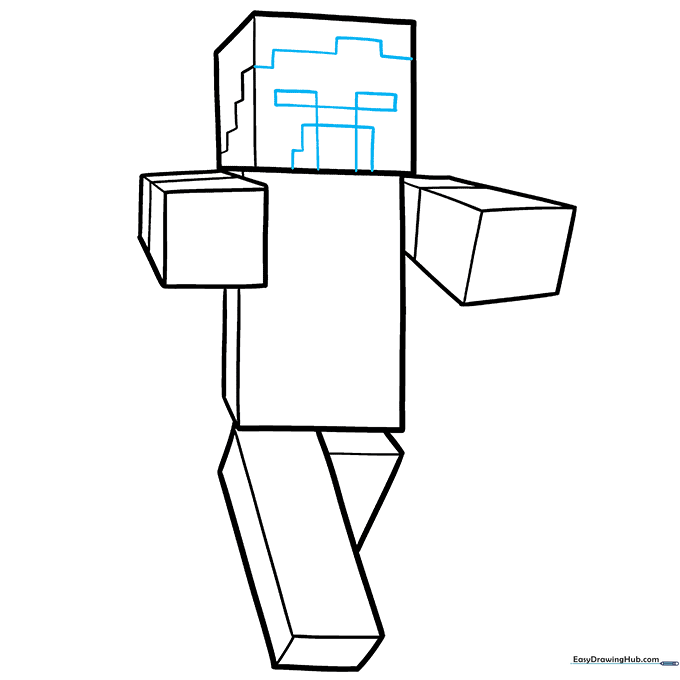
Outline the face using four rectangles and a backward L-shape. Add straight lines above to define the forehead. Tip: Keep these shapes simple; they don't need to be perfect, just consistent with the pixel style.
Step 8: Adding Texture
Add rectangular shapes inside the body that look like Tetris blocks. If you find this tricky, draw the full rectangle first and then erase the extra lines. Tip: This adds the 'pixelated' texture characteristic of Minecraft.
Step 9: Finalizing the Outline
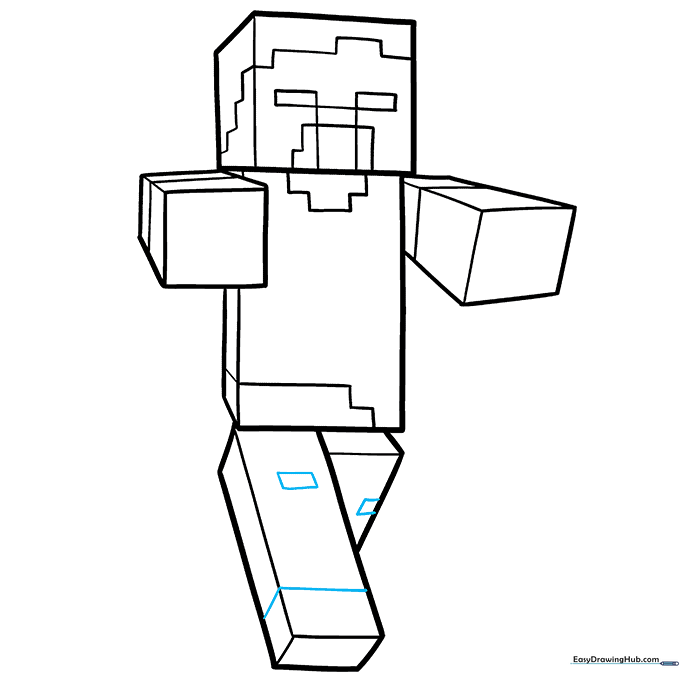
Draw two uneven squares and straight lines inside the legs for final details. Use a black pen to trace your pencil lines; use a thicker stroke for the outer edges and a thinner stroke for the inner details. Tip: Let the ink dry completely before erasing your pencil marks.
Step 10: Adding Color
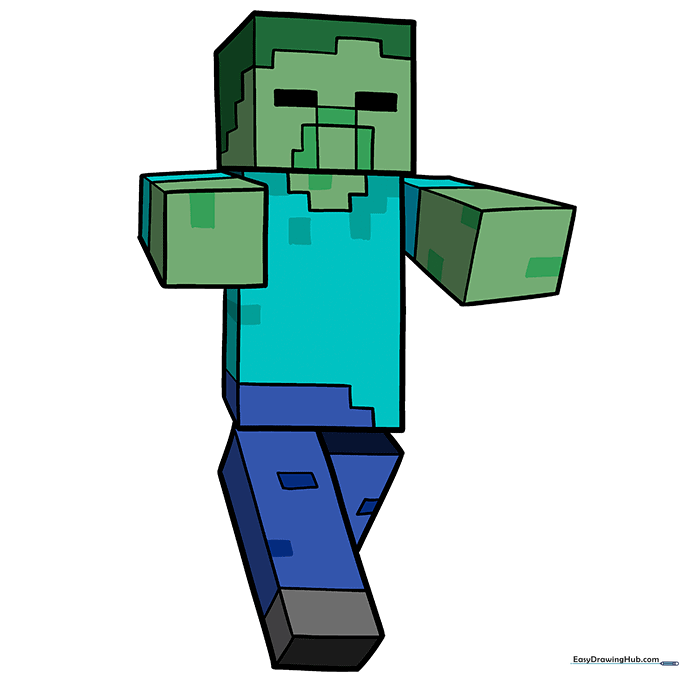
Bring your zombie to life with grayish-green skin, a light blue shirt, dark blue pants, and gray shoes. Use a block-coloring technique to maintain the game's signature pixelated look.
More Tutorials


