How to Draw a Milk Carton: Easy 10-Step Guide for Kids
This fun, screen-free activity is perfect for young artists ages 5 and up. All you need is a pencil, an eraser, and some paper to bring this friendly character to life. Follow along to master basic 3D shapes while creating a charming, expressive milk carton.
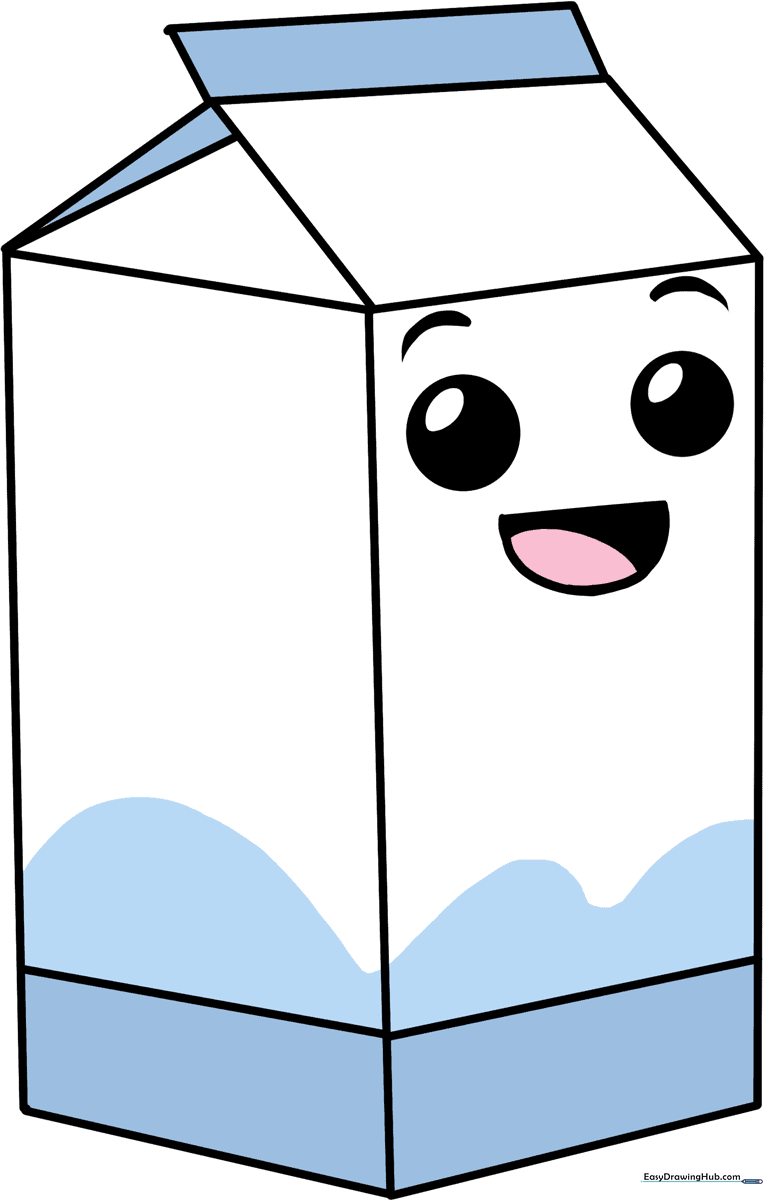
🎯 Final Result
Step-by-Step Instructions
Step 1: Sketching the Base
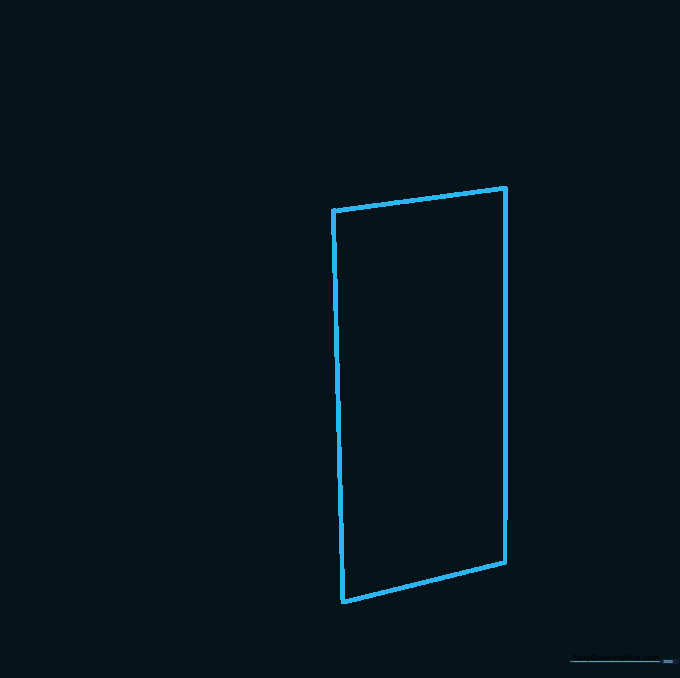
Draw a vertical rectangle to serve as the main body. Tip: Keep your lines light and loose—angled slightly to suggest depth—so they are easy to adjust as we build the 3D form.
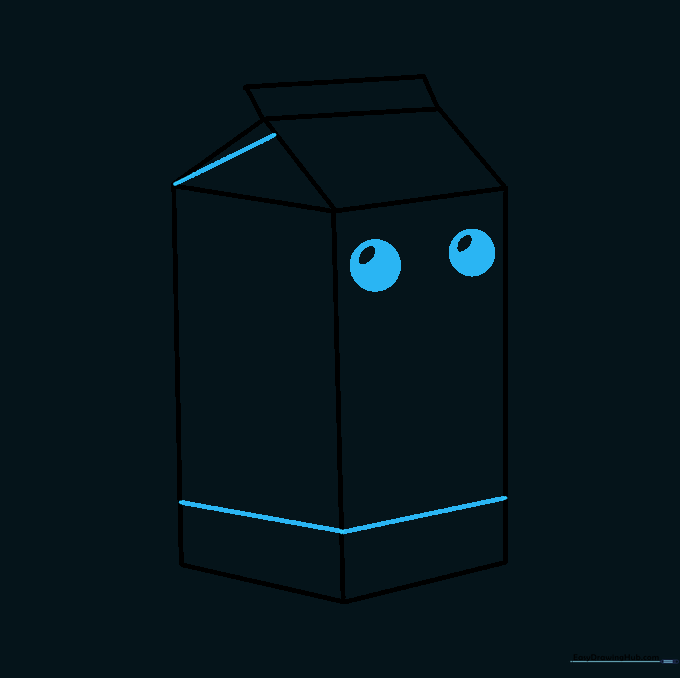
Step 2: Adding Perspective

Draw a short diagonal line extending from the bottom corner. Tip: This small line helps create the illusion that the carton has a side, giving it a realistic 3D look.
Step 3: Defining the Side Panel

Use two straight lines to enclose a second, narrower rectangle on the side. Tip: Ensure the angles match the first rectangle to keep the perspective consistent.
Step 4: Creating the Gable Top
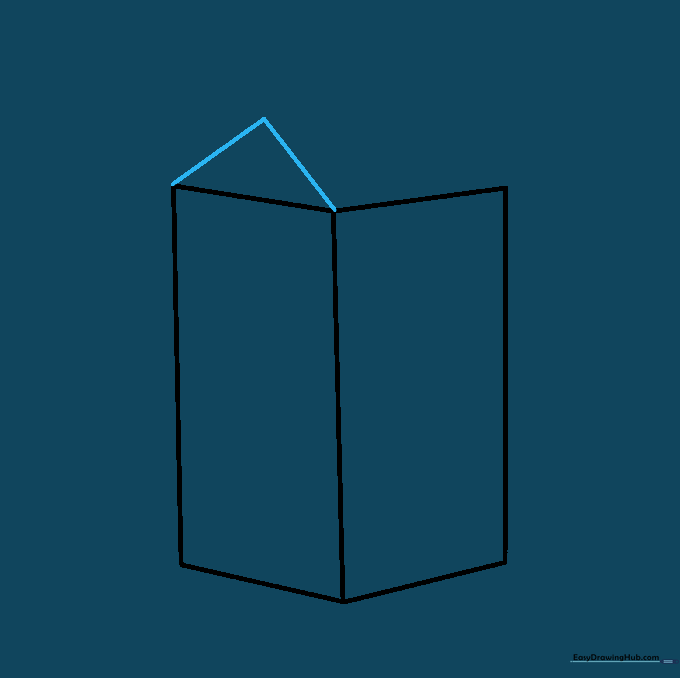
Draw a triangle on top of the side rectangle. Tip: Think of this as the 'roof' of your carton; keep the peak centered to make it look balanced.
Step 5: Connecting the Top
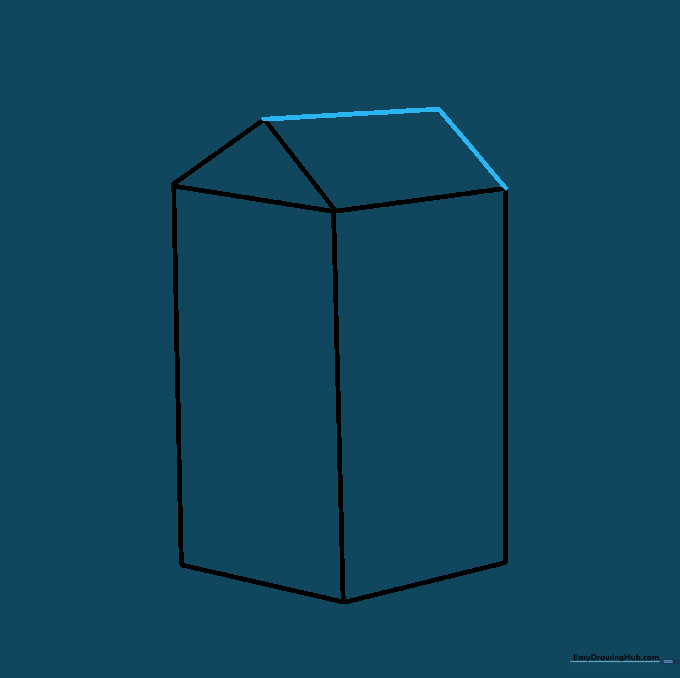
Draw a slanted rectangle (parallelogram) between the front and the roof. Tip: This connects the two sides, making the carton look like a solid object.
Step 6: The Gable Closure

Add a straight line above the carton, parallel to the top edge. Tip: This represents the folded paper seal at the very top of the carton.
Step 7: Finishing the Top

Connect the top line to the roof using two short, vertical lines. Tip: Keep these lines short to ensure the top looks like a folded flap.
Step 8: Adding Character
Draw eyes by sketching two circles with smaller ovals inside, then shade the area between them. Tip: Adding a small diagonal line on the roof adds extra depth to the carton's structure.
Step 9: Adding a Smile
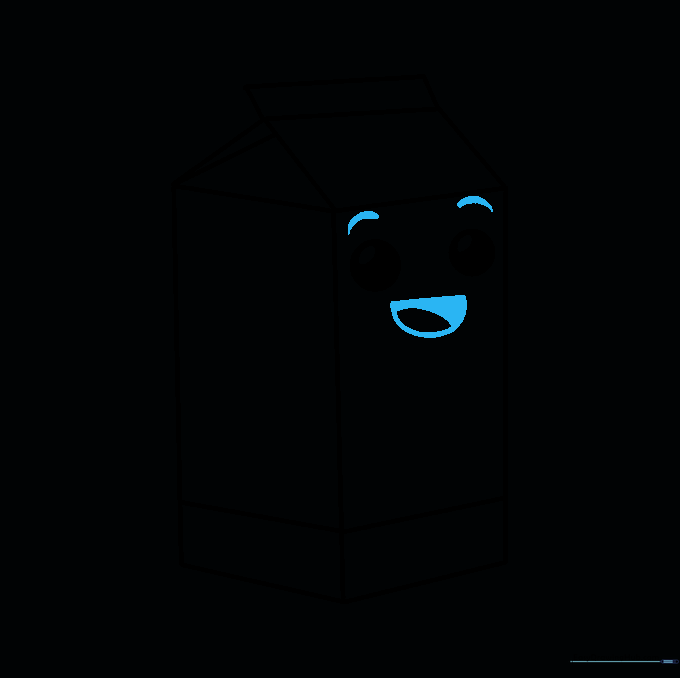
Draw a 'U' shaped mouth with a small tongue inside. Tip: Use a darker pencil stroke for the mouth to make the expression pop against the carton's outline.
Step 10: Final Touches
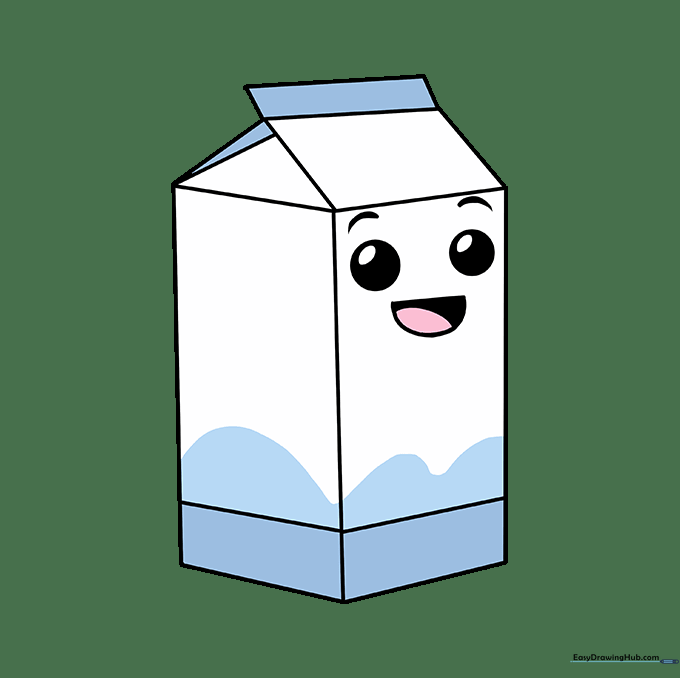
Add eyebrows and color your carton! Tip: Get creative—draw a fruit on the side to turn it into a juice box, or use your favorite colors to make it unique.
More Tutorials


