How to Draw a Microwave: Easy 10-Step Guide for Kids
Bring your kitchen drawings to life with this fun, step-by-step microwave tutorial! Designed for young artists ages 5 and up, this project uses basic geometric shapes to build confidence. All you need is a pencil, an eraser, and some paper to get started.
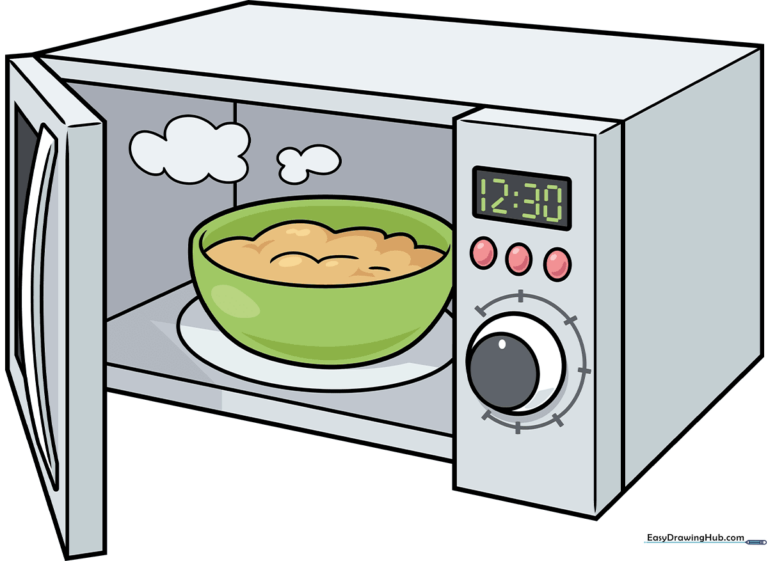
🎯 Final Result
Step-by-Step Instructions
Step 1: Sketching the Main Body
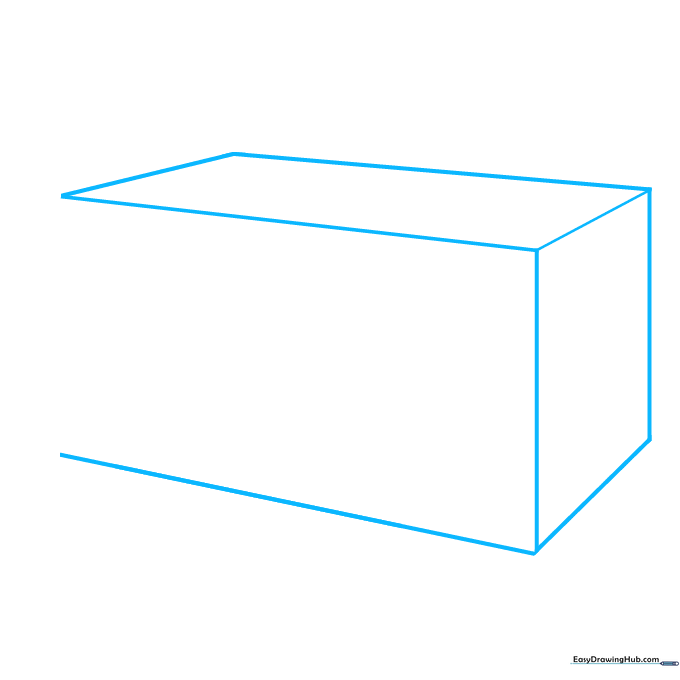
Draw a large rectangle to serve as the main body of the microwave. Teacher's Tip: Use a light touch with your pencil so you can easily erase any overlapping lines later.
Step 2: Defining the Control Panel
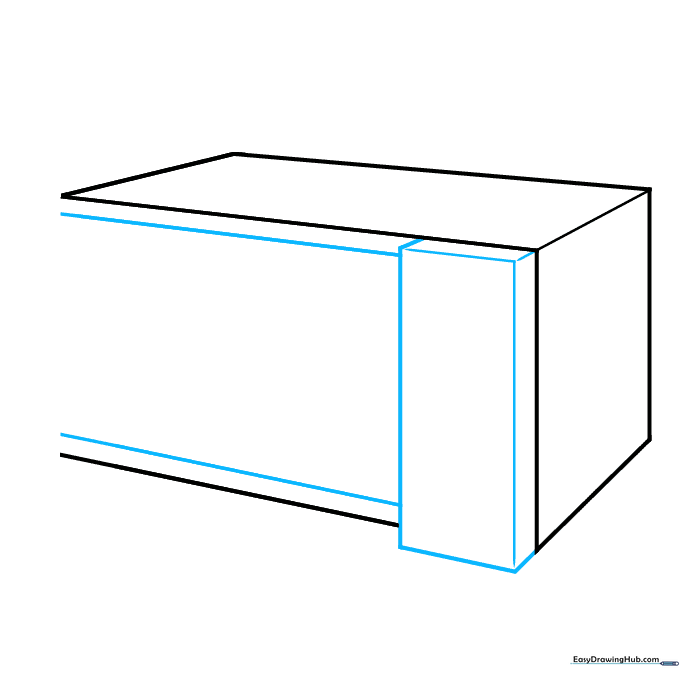
Sketch a smaller vertical rectangle on the right side for the control panel. Add short diagonal lines at the corners to give it a 3D look. Tip: Keep your ruler handy if you want perfectly straight edges!
Step 3: Creating the Door Frame
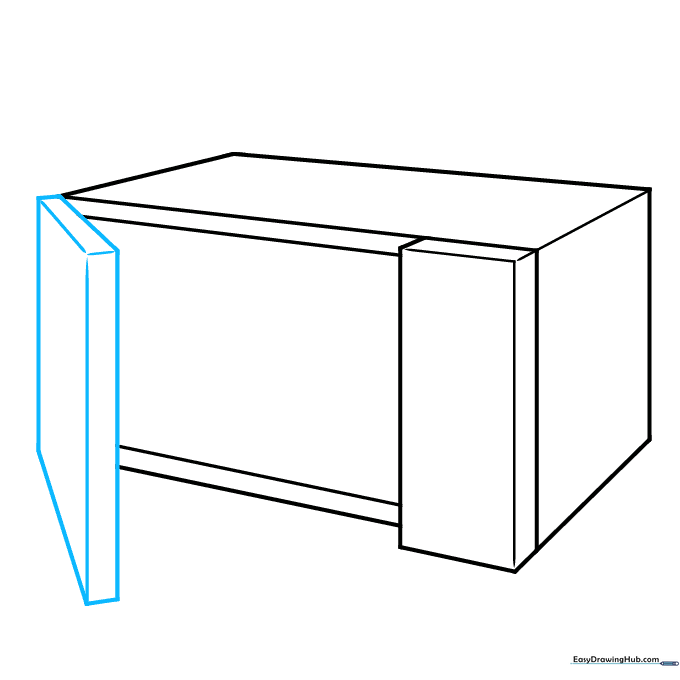
On the left, draw two narrow vertical rectangles to frame the door. Connect them with diagonal lines to create depth. Tip: Think of this as drawing a picture frame for the glass door.
Step 4: Adding the Handle
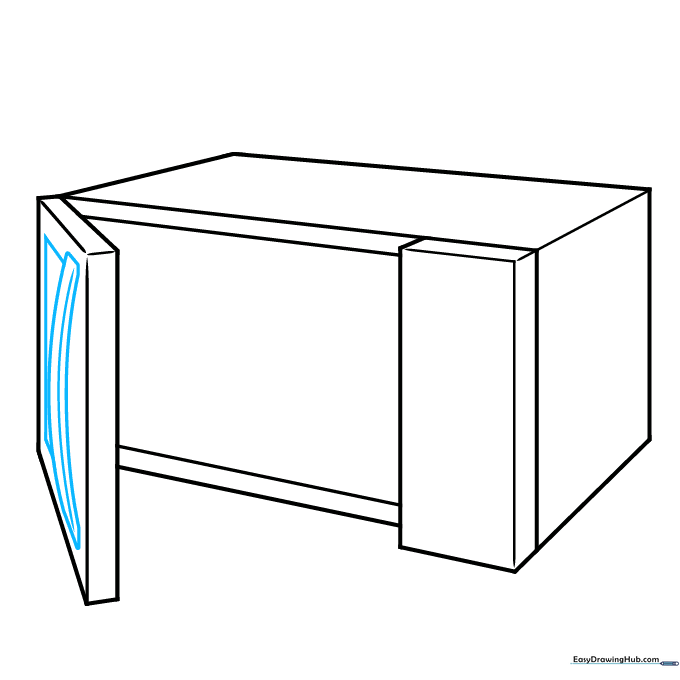
Draw a long, curved 'banana' shape for the handle, then add a small rectangle behind it to show where it attaches to the door. Tip: Make the handle slightly curved to look more realistic.
Step 5: Designing the Control Panel
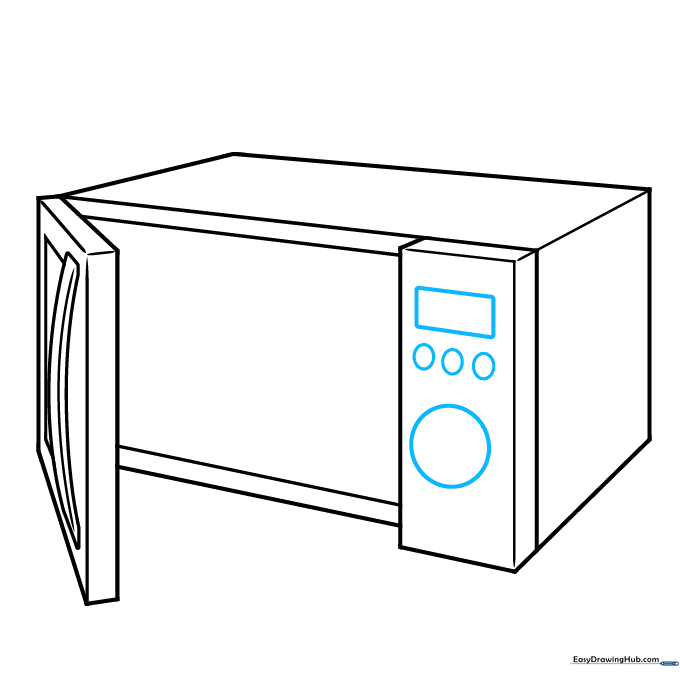
Fill the control panel with a rectangle for the screen, a circle for the dial, and three small ovals for buttons. Tip: Use a light touch—these are small details!
Step 6: Adding Digital Details
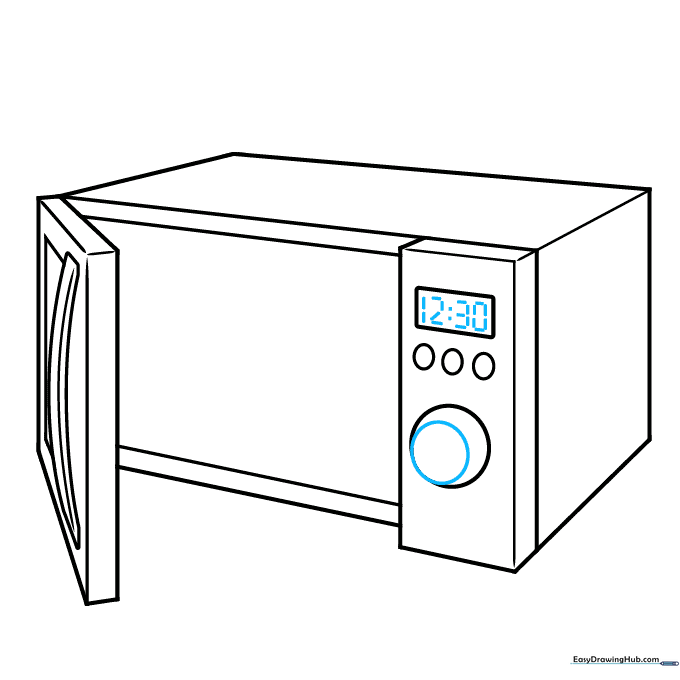
Draw a smaller circle inside the dial and write '12:30' on the screen using blocky, digital-style letters. Tip: Take your time with the numbers to keep them legible.
Step 7: The Interior Bowl

Draw a semi-circle around the knob and add small dashes for settings. Inside the microwave, sketch a large oblong oval for the bowl. Tip: Ensure the bowl looks centered inside the door frame.
Step 8: Adding Food Details
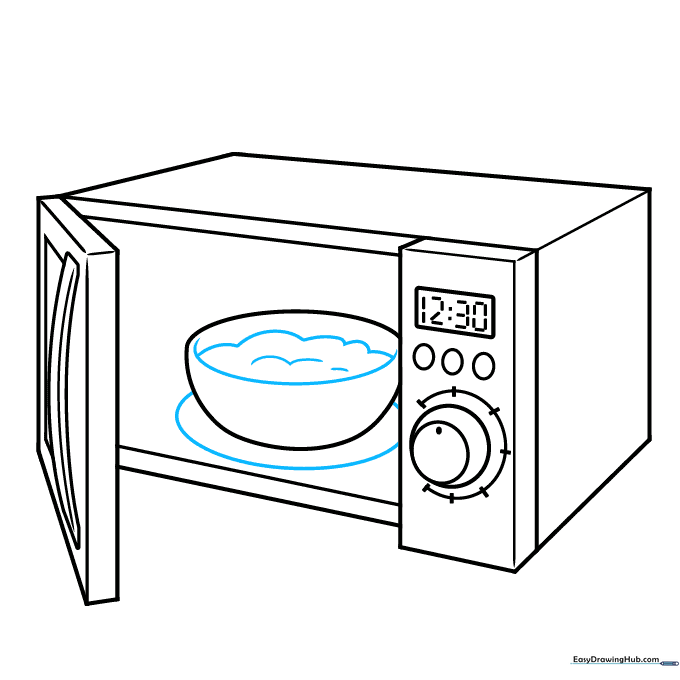
Draw 'hill' shapes inside the bowl to represent food. Add an oval underneath the bowl to create a base. Tip: Use wavy lines for the food to make it look like it's bubbling or steaming.
Step 9: Final Touches and Outlining
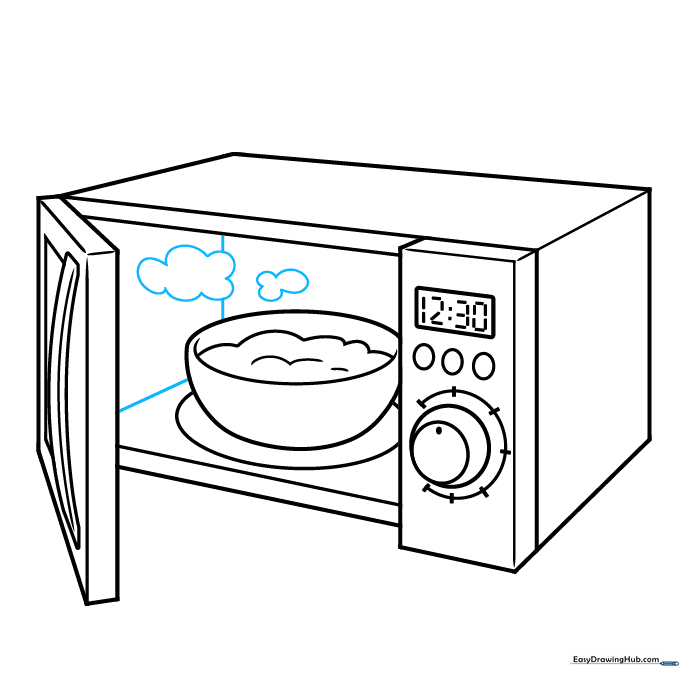
Draw two cloud shapes above the food to represent steam. Outline your drawing with a black pen, then erase your pencil marks once the ink is dry. Tip: Use a steady hand for the final outline!
Step 10: Coloring Your Masterpiece

Bring your microwave to life with color! Use shades of grey for the body, red for the buttons, and green for the bowl. Tip: Add a little white highlight to the bowl to make it look shiny.
More Tutorials


