How to Draw a Mason Jar: Easy 10-Step Guide for Kids
Looking for a fun, screen-free activity? This mason jar drawing tutorial is perfect for young artists ages 5 and up. You only need a pencil, an eraser, and a piece of paper to get started. Follow these simple steps to build confidence in drawing geometric shapes and smooth curves.
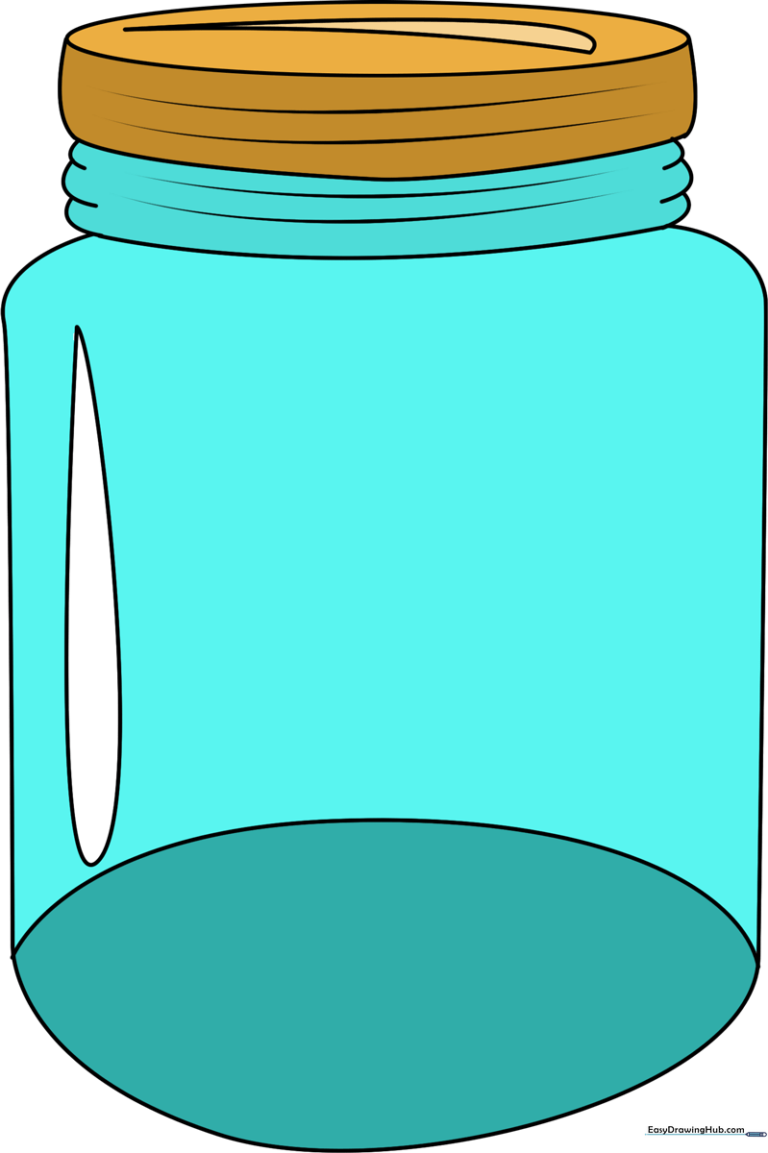
🎯 Final Result
Step-by-Step Instructions
Step 1: Sketching the Lid Top

Draw a narrow, horizontal oval near the top of your page. This represents the flat top of the mason jar lid. Tip: Keep it centered so you have plenty of room for the jar body below!
Step 2: Defining the Lid Sides

Extend two short, slightly curved lines downward from the ends of your oval. These define the height of the metal lid. Tip: Make sure these lines are parallel to keep the lid looking symmetrical.
Step 3: Closing the Lid

Connect the bottom of your two vertical lines with a gentle, downward-curving line. This creates the bottom edge of the lid. Tip: Think of this as a 'smile' shape connecting the sides.
Step 4: Drawing the Threaded Neck
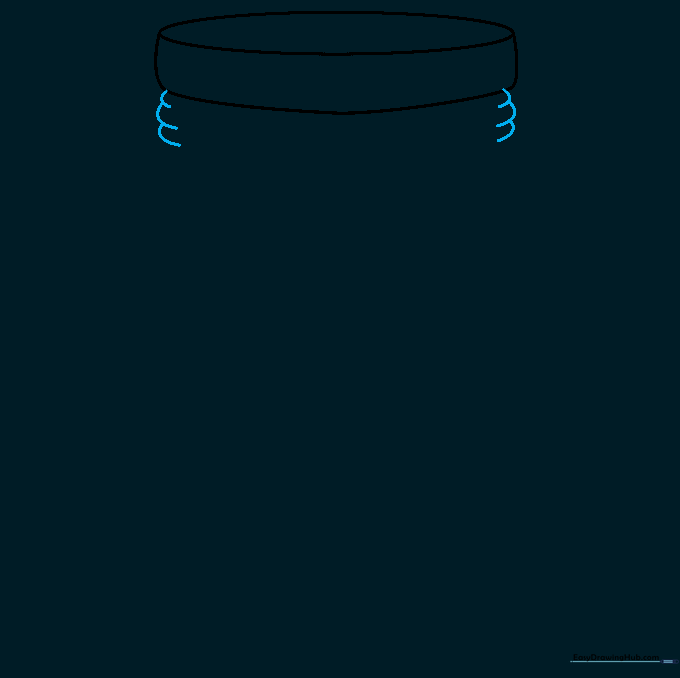
Draw a series of small, connected 'U' shapes just below the lid. This represents the threads where the lid screws on. Tip: Keep these 'U's consistent in size for a realistic look.
Step 5: Connecting the Neck

Add a curved line connecting the sides of the threaded neck area. This helps define the transition from the neck to the main body of the jar.
Step 6: Outlining the Jar Body
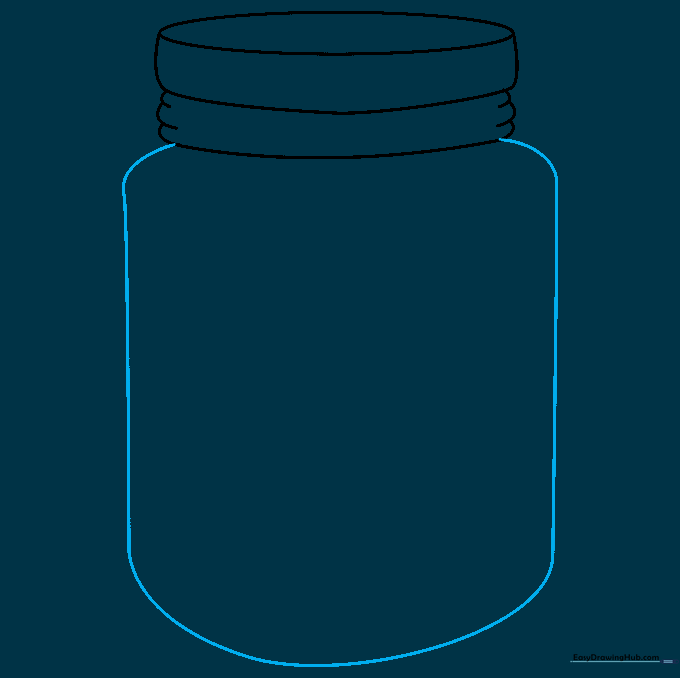
Extend long, curved lines downward from the neck, angling them slightly outward before curving them inward at the bottom. This creates the classic mason jar silhouette. Tip: Use a fluid motion for a smoother line.
Step 7: Adding Lid Details
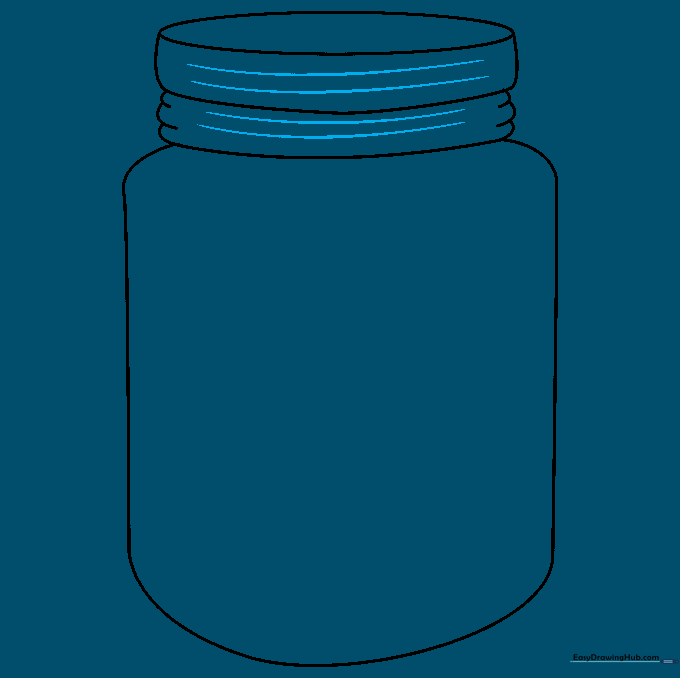
Draw a few horizontal curved lines across the lid and the neck area. These suggest the texture of the metal lid and the glass rim. Tip: Keep the curves consistent with the shape of the lid top.
Step 8: Defining the Base
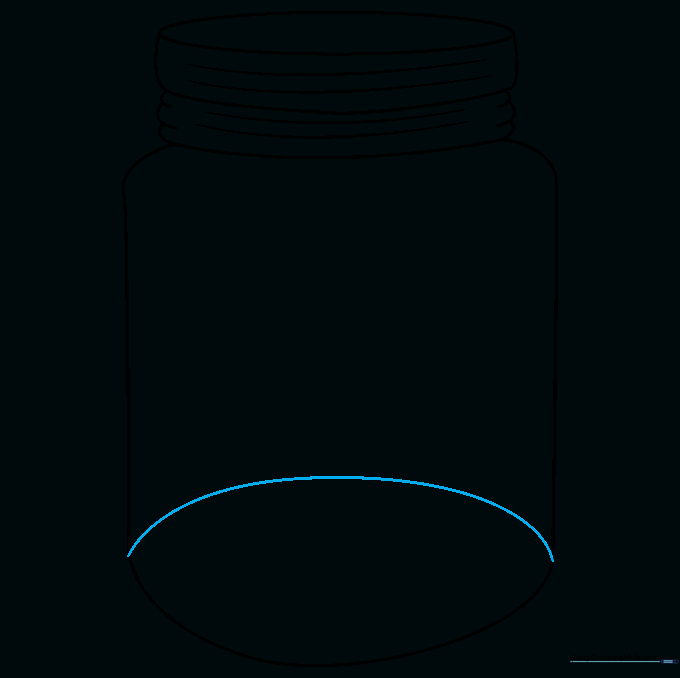
Draw a curved line across the bottom of the jar to create an oval base. This gives your drawing a 3D effect, showing the bottom of the glass.
Step 9: Finalizing the Outline

Go over your sketch with a darker pencil or pen to finalize the outline. Erase any stray guidelines to make your drawing look clean and professional.
Step 10: Adding Color
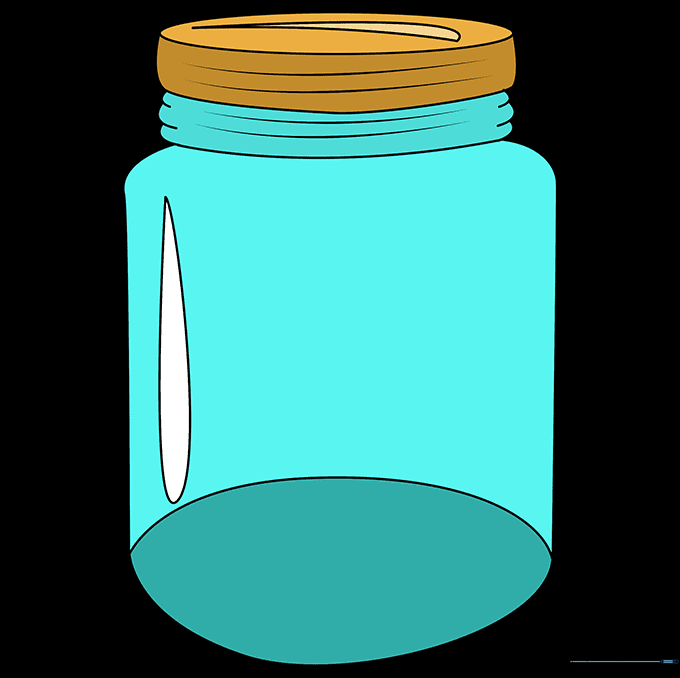
Bring your jar to life with color! Use light blues or grays for the glass and metallic tones for the lid. Tip: Leave a small white space on one side of the jar to represent a 'highlight' or reflection on the glass.
More Tutorials


