How to Draw a Magpie: Easy 10-Step Guide for Kids
Bring this clever bird to life with our simple, 10-step guide designed for young artists ages 5 and up. All you need is a pencil, an eraser, and a piece of paper to master this classic garden visitor. Follow along to build confidence in your sketching skills and create a beautiful, feathery friend.
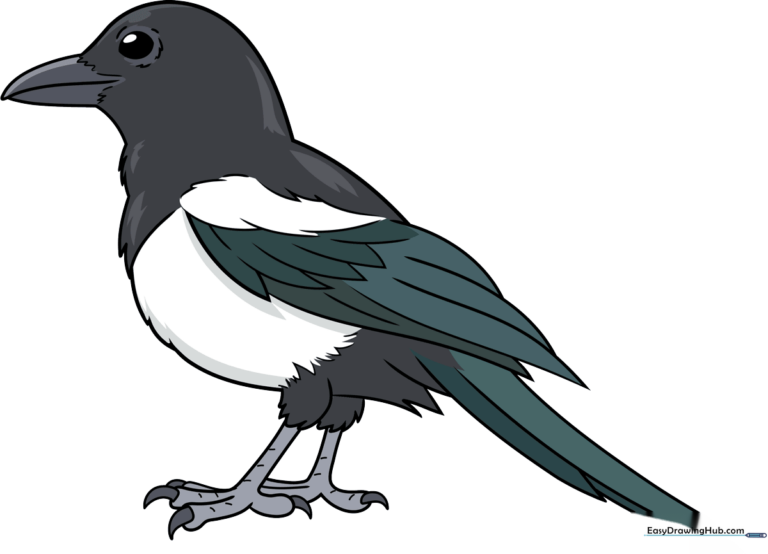
🎯 Final Result
Step-by-Step Instructions
Step 1: Sketching the Head and Beak
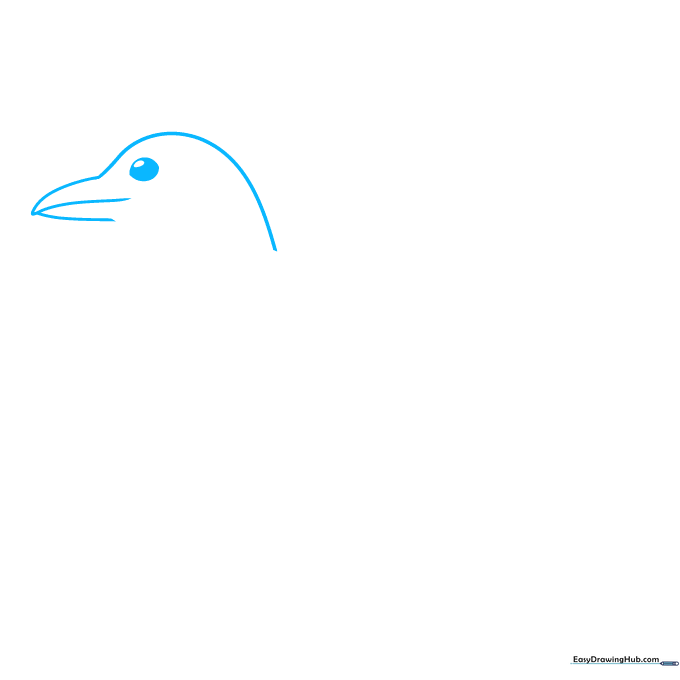
Start by drawing a smooth, curved line for the top of the head and the upper beak. Add a smaller curve to complete the beak shape. For the eye, draw a small oval inside a circle and shade the space between them. Teacher's Tip: Keep your pencil lines light so you can easily erase any overlapping marks later.
Step 2: Adding Neck Feathers

Draw the feathers along the front of the neck using a series of connected, jagged curved lines. Teacher's Tip: Think of these as little 'V' shapes to give your bird a realistic, fluffy texture.
Step 3: Outlining the Back and Wing

Use a long, graceful curve for the bird's back. Add overlapping lines to define the top of the wing, then extend pairs of lines downward to create the primary flight feathers. Teacher's Tip: Make the feathers slightly longer as you move toward the back of the wing.
Step 4: Defining Flight Feathers
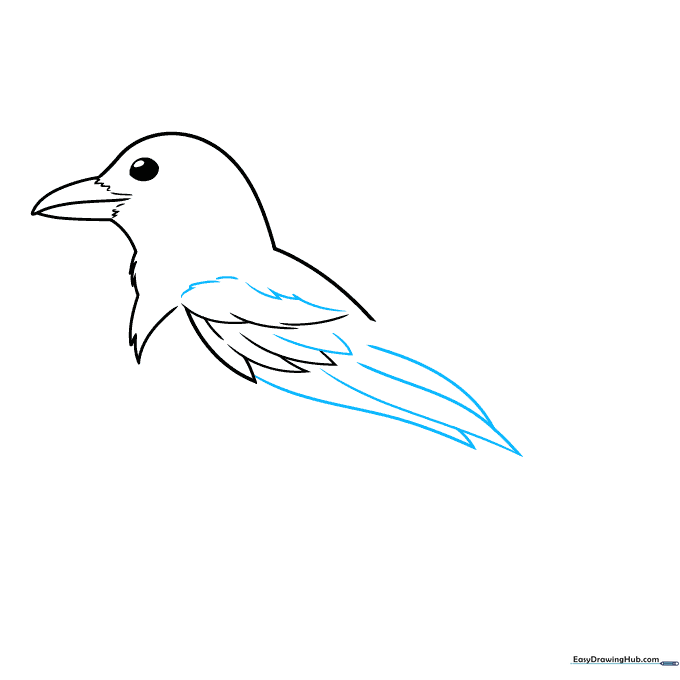
Add a second layer of longer flight feathers below the first set. Use connected curved lines at the top of the wing to add contour. Teacher's Tip: Ensure the lines meet at sharp points to mimic the look of real bird feathers.
Step 5: Belly and Leg Base
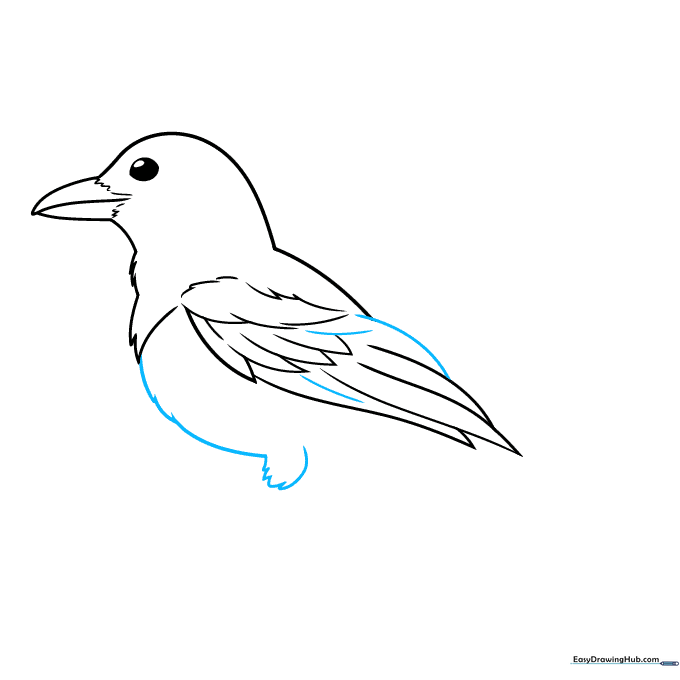
Finish the wing details with a few extra curves. Then, sketch the belly and the top of the leg using jagged lines to maintain that feathery look. Teacher's Tip: Keep the belly line rounded to give your magpie a friendly, plump appearance.
Step 6: Drawing the Leg and Claws
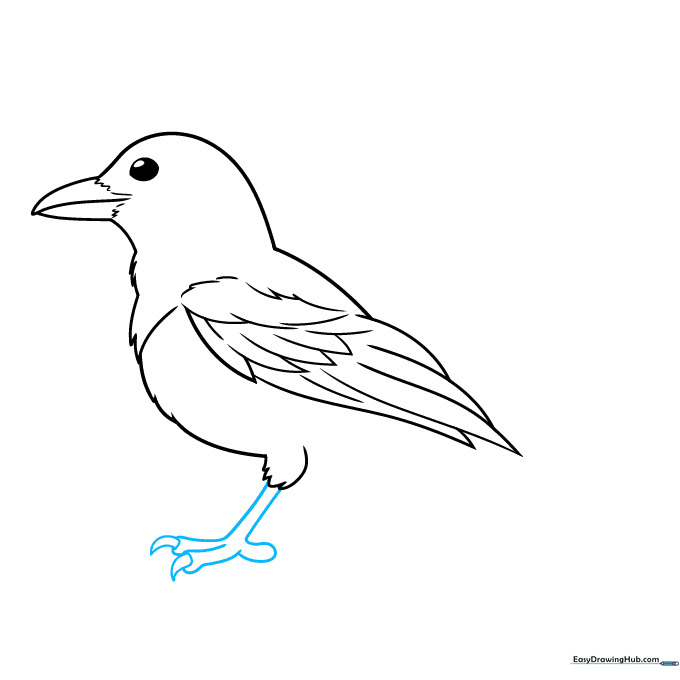
Draw the leg using parallel lines. Add three toes with small, triangular claws at the ends. Teacher's Tip: If the toes look tricky, draw them as simple 'Y' shapes first, then thicken them up.
Step 7: Finalizing the Lower Body
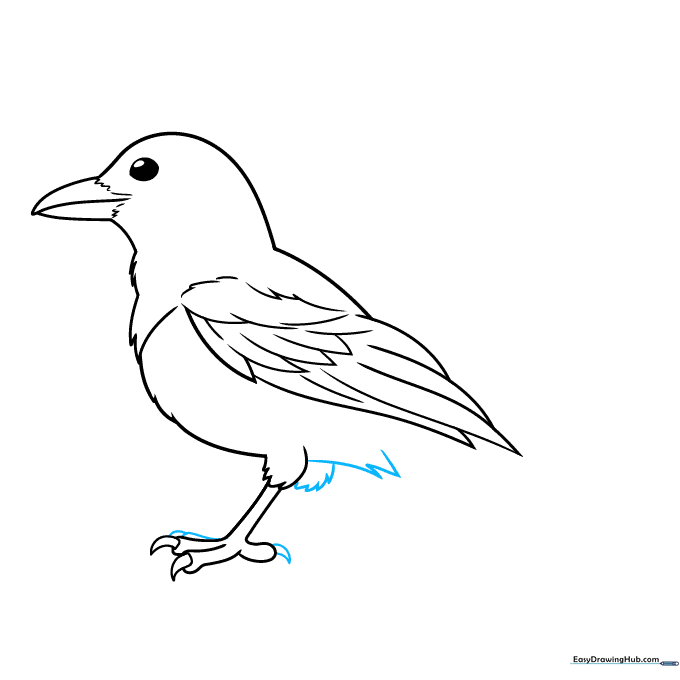
Draw the final toe and claw. Use jagged lines to sketch the top of the second leg and the base where the tail will connect. Teacher's Tip: Ensure the tail base is wide enough to support the long tail feathers coming next.
Step 8: Sketching the Tail
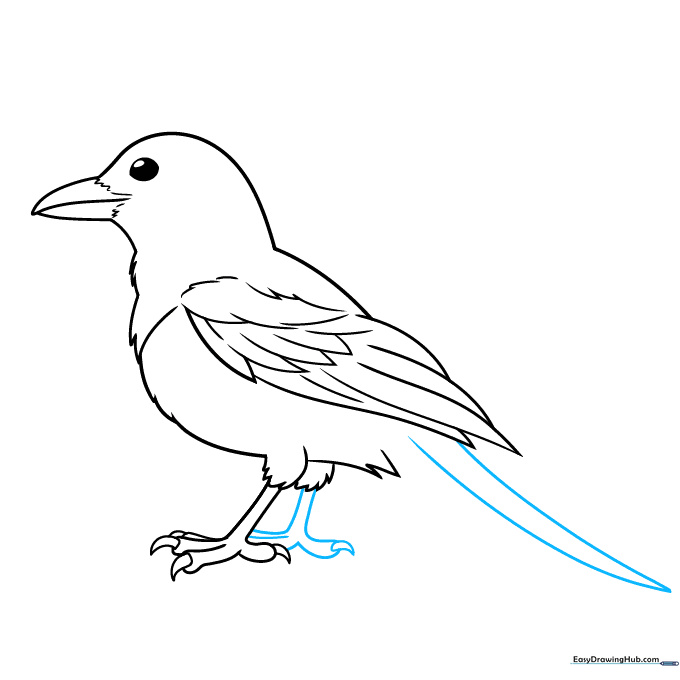
Draw the remaining leg using curved lines. Start the long tail by drawing two long, sweeping curves that meet at a point. Teacher's Tip: Magpie tails are very long, so don't be afraid to let it extend off the main body shape.
Step 9: Adding Final Textures
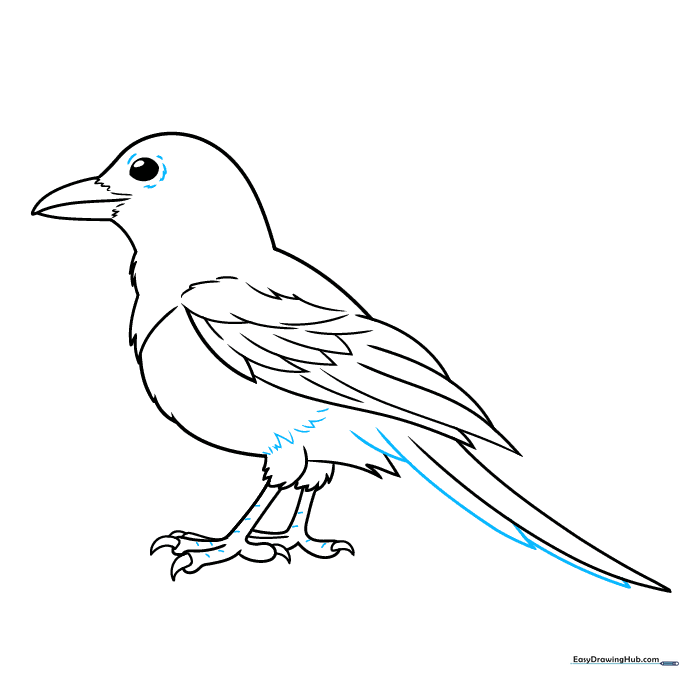
Complete the tail feathers with curved lines. Add small, short strokes around the eye, belly, and legs to create a realistic, feathery texture. Teacher's Tip: Use short, quick pencil flicks to make the feathers look soft and natural.
Step 10: Bringing Your Magpie to Life with Color
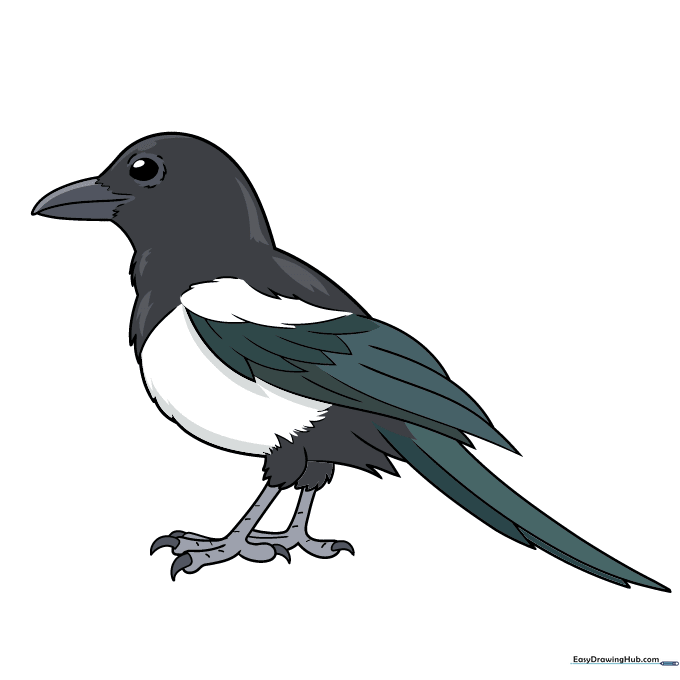
Your outline is complete! Now, add color. We used a classic black-billed magpie palette: deep bluish-black for the wings and back, and clean white for the belly. Teacher's Tip: Use a light blue pencil to add a 'sheen' over the black areas to make them look shiny and iridescent.
More Tutorials


