How to Draw a Lupine: Easy 10-Step Flower Guide
Bring the beauty of spring indoors with this simple lupine drawing tutorial, perfect for artists ages 5 and up. You will only need a pencil, an eraser, and your favorite coloring supplies to create this iconic wildflower. Follow along to master the unique, stacked petal structure of this garden favorite.
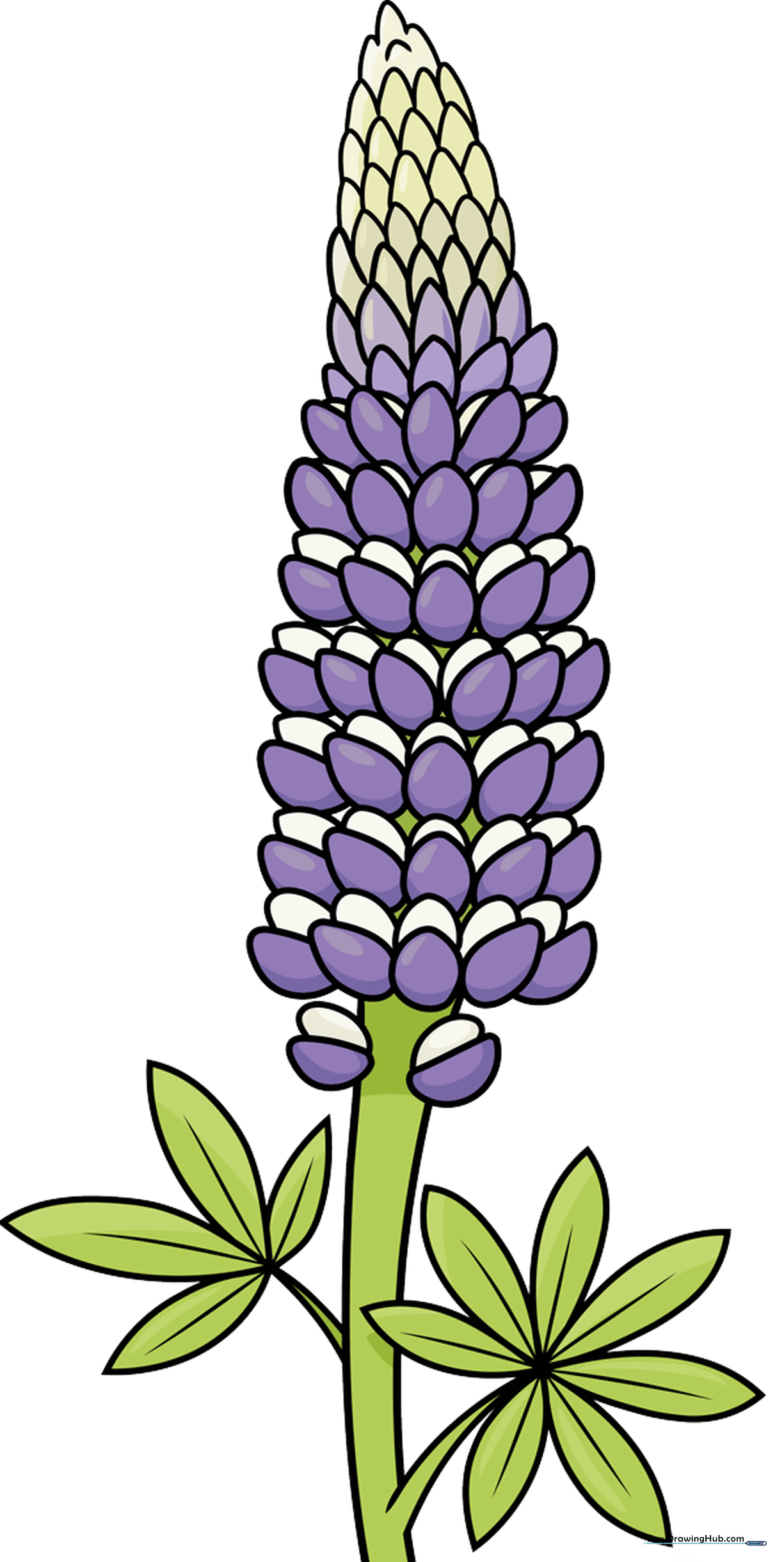
🎯 Final Result
Step-by-Step Instructions
Step 1: Sketching the Base Petals

Start by drawing the first row of flowers at the top. Enclose small, rounded teardrop shapes that overlap slightly. Teacher's Tip: Keep your pencil pressure light here so you can easily adjust the spacing as you work your way down the stem.
Step 2: Adding Depth to the Bloom
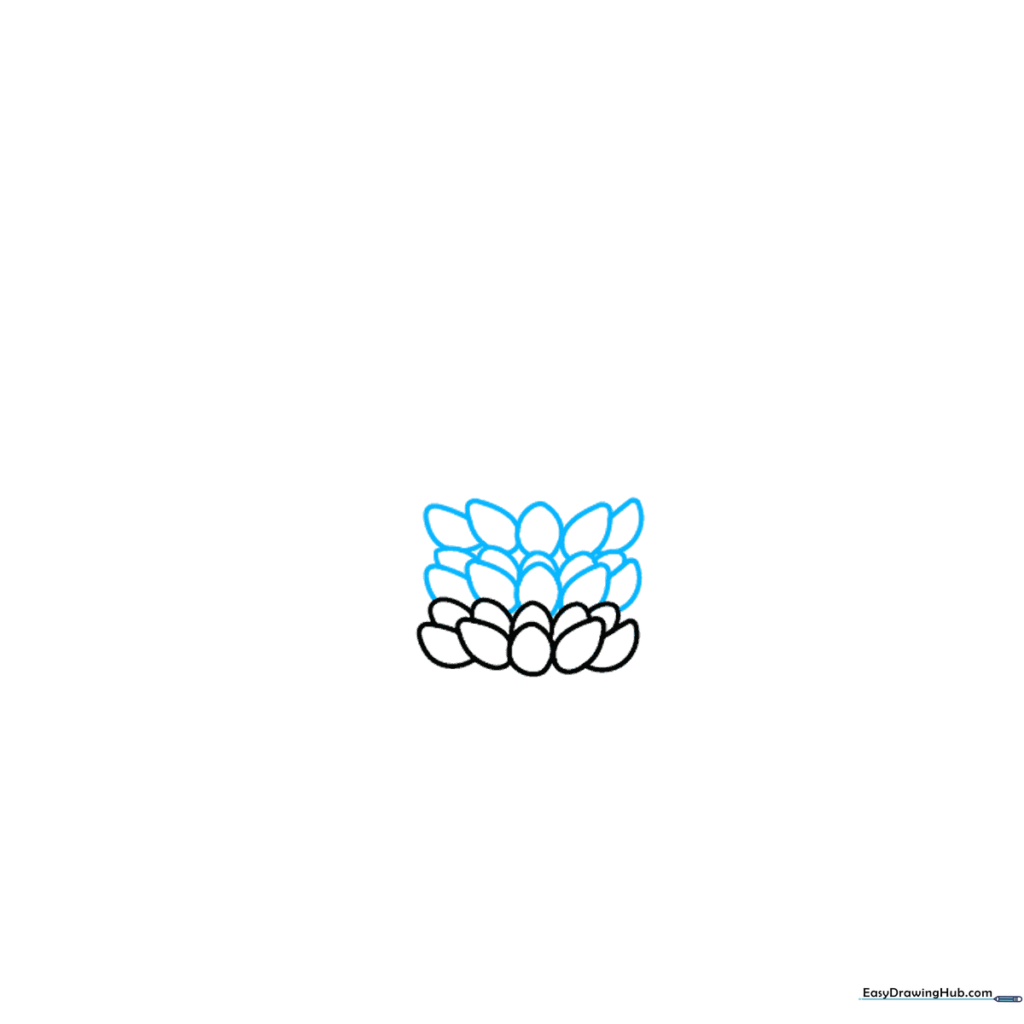
Add three more rows of egg-shaped petals beneath the first. Notice how the middle row appears tucked behind the others. Teacher's Tip: Varying the size of these shapes creates a natural, organic look.
Step 3: Expanding the Flower Spike

Continue adding four more rows of petals, alternating between smaller, partially hidden rows and fuller, visible ones. Teacher's Tip: Don't worry about perfect symmetry; wildflowers look best when they are a little bit irregular.
Step 4: Building the Flower Body
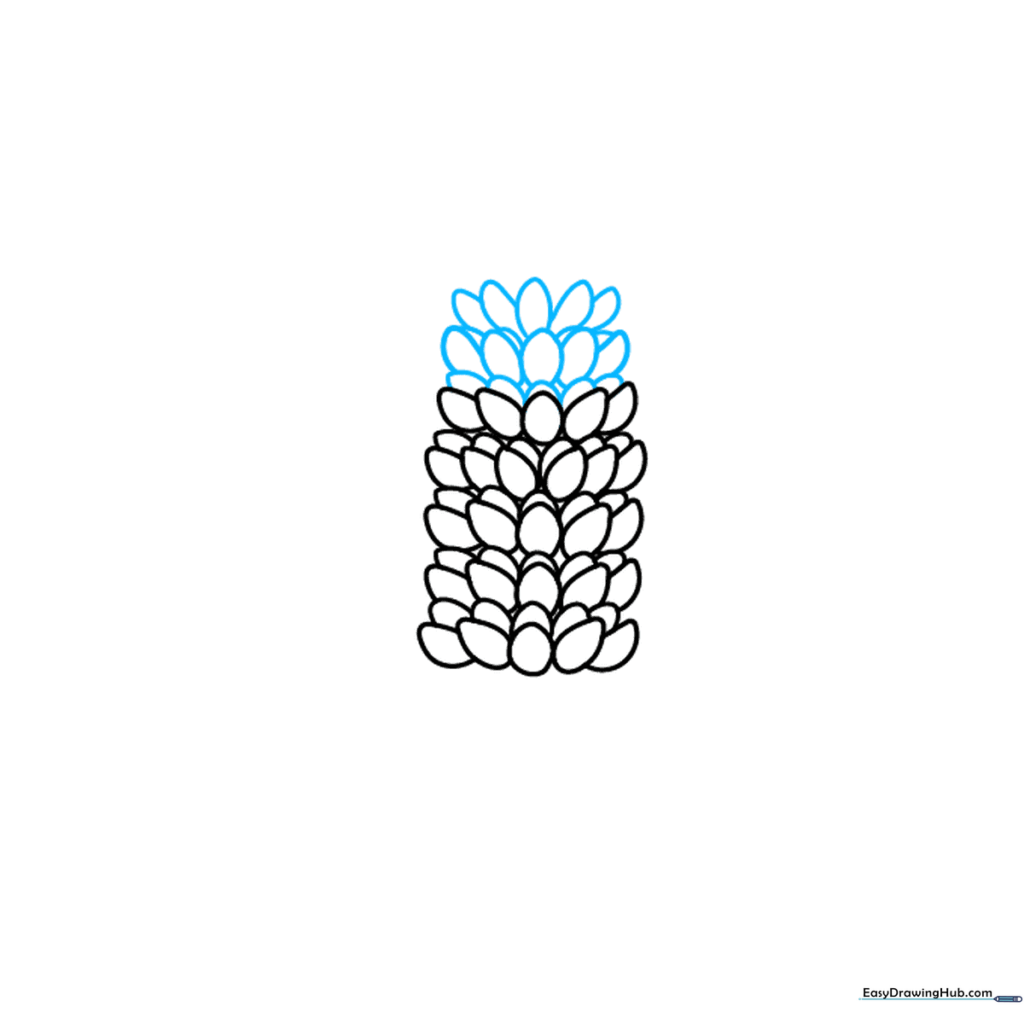
Add another set of four rows of petal racemes. Keep the pattern consistent by alternating between small and large shapes. Teacher's Tip: If your hand gets tired, take a quick break—drawing many small shapes requires focus!
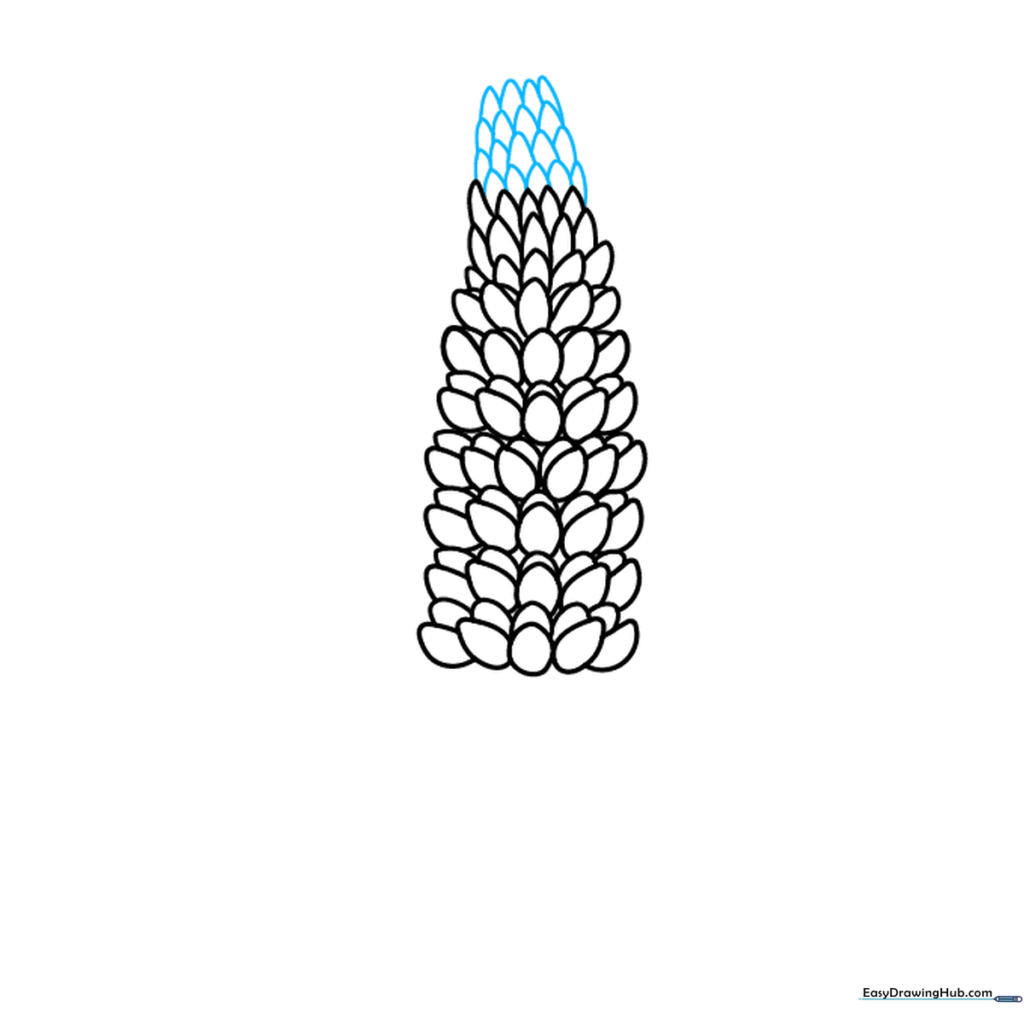
Step 5: Tapering the Bloom
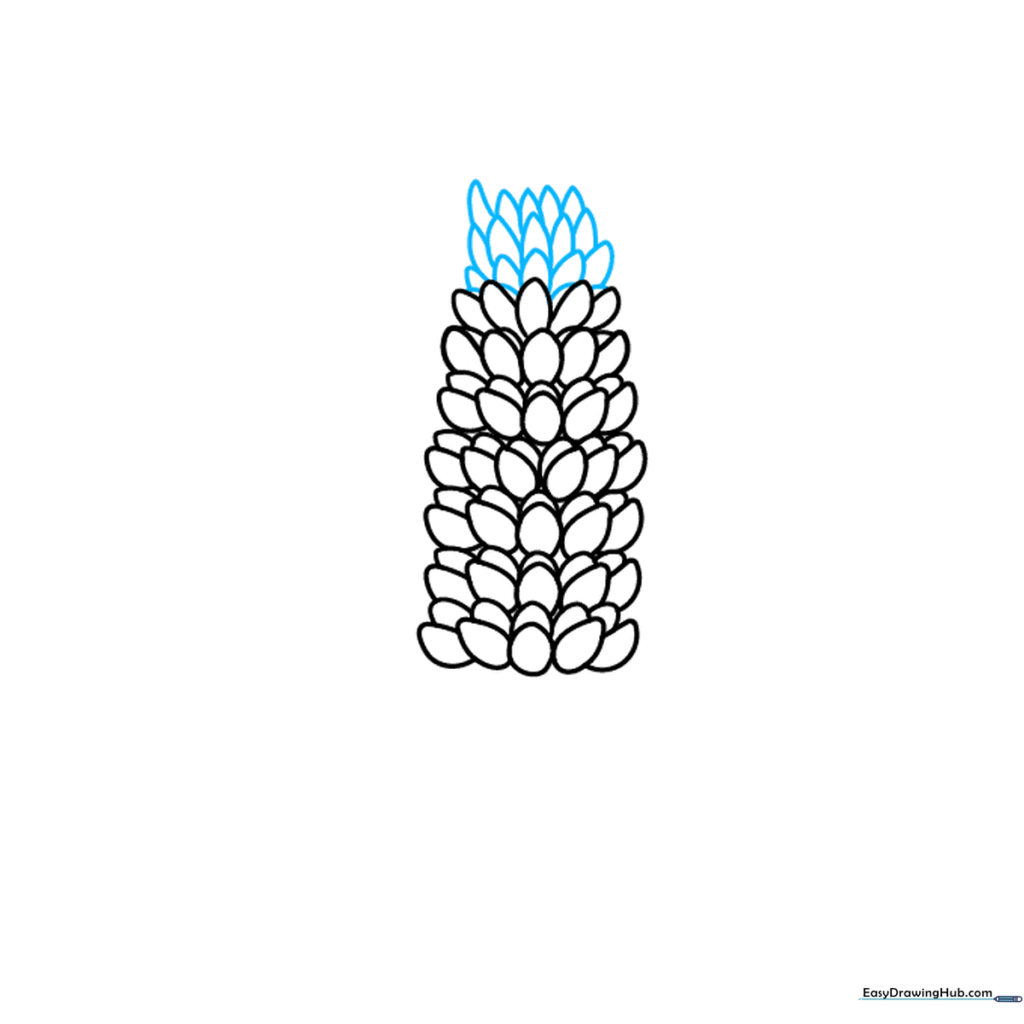
Draw three more rows of petals, making these slightly narrower than the ones above. This helps the flower spike look like it is tapering toward the bottom. Teacher's Tip: Use a sharper pencil point for these smaller details.
Step 6: Adding Unopened Buds
Draw four rows of tightly packed, pointed shapes at the very base. These represent the flower buds that haven't opened yet. Teacher's Tip: Make these shapes smaller and more compact than the open petals above.
Step 7: Drawing the Stem and Leaves
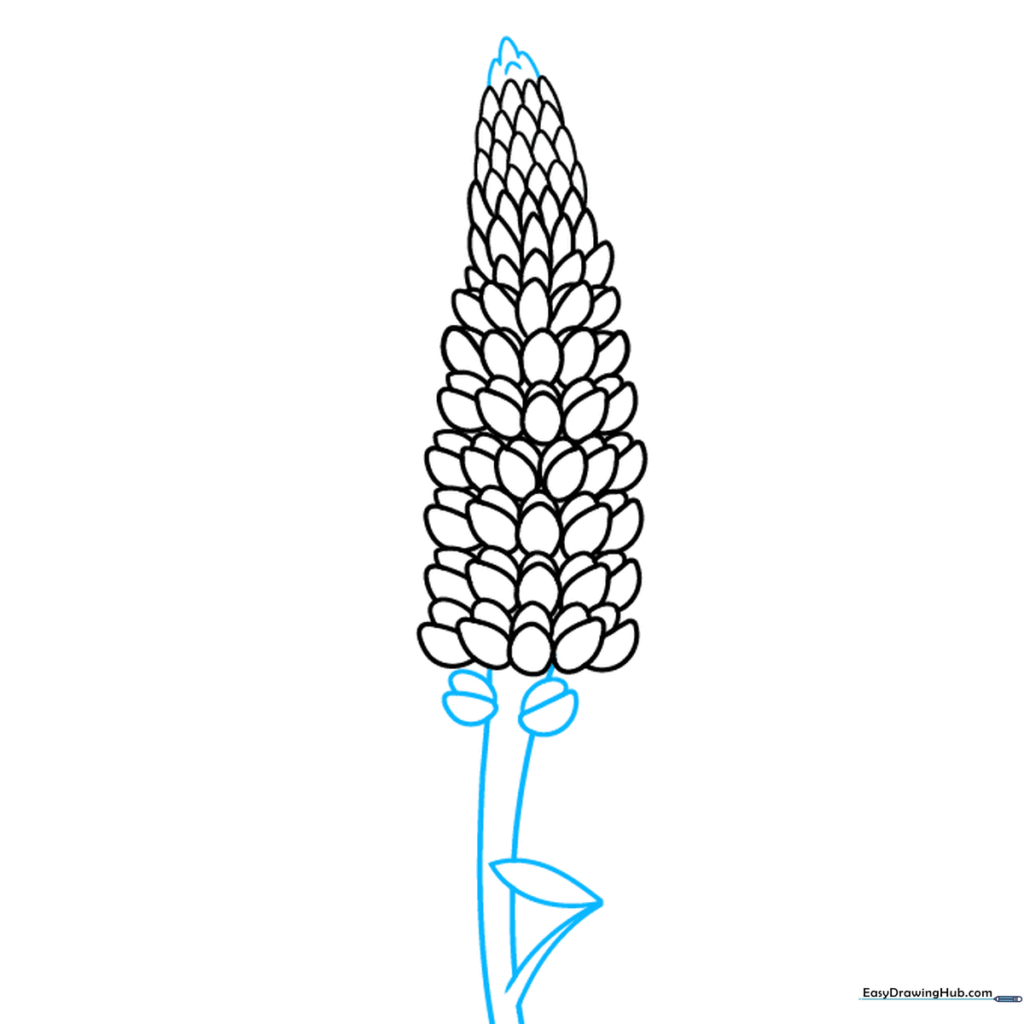
Draw the stem extending downward. Below the flower, add two 'coffee bean' shaped leaves and connect them to the main stalk. Teacher's Tip: Use smooth, fluid lines for the stem to give it a realistic, sturdy appearance.
Step 8: Creating the Starburst Leaves
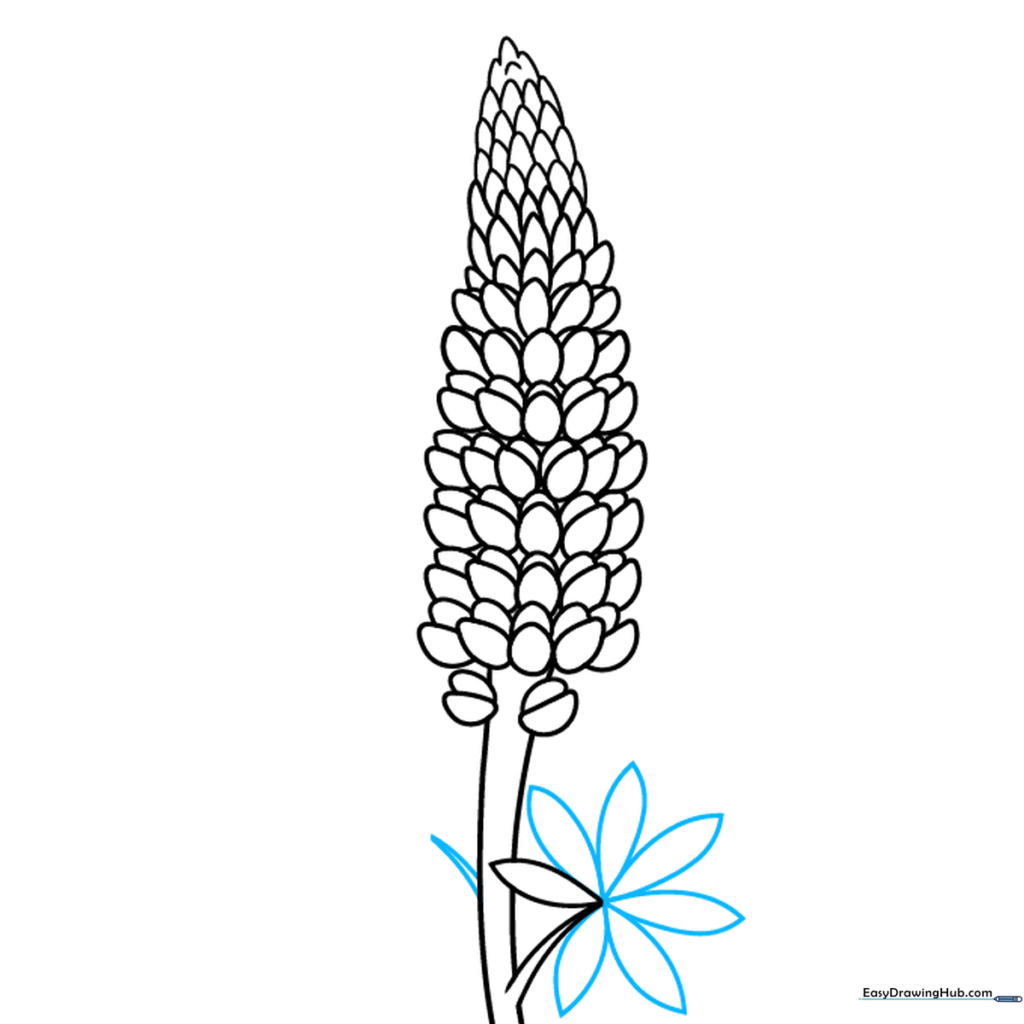
Draw six pointed leaves in a starburst pattern around the tip of the twig. Teacher's Tip: Lupine leaves are palmate, meaning they spread out like fingers on a hand. Try to keep them evenly spaced.
Step 9: Final Leaf Details

Add four more leaves to the second stem and draw a single line down the center of each leaf to represent the vein. Teacher's Tip: Adding these veins adds a professional, botanical touch to your drawing.
Step 10: Bringing Your Lupine to Life with Color

Time to color! Use vibrant purples and blues for the petals, fading to a soft cream or yellow at the very top. Keep the stems and leaves a fresh, bright green. Teacher's Tip: Use light pressure with your colored pencils to create a soft, blended gradient.
More Tutorials


